1.第一步:首先创建一个web工程

然后在web/WEB-INF的目录下创建lib包,并将ssm整合的jar包导入
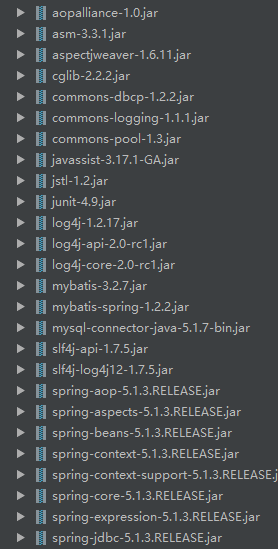

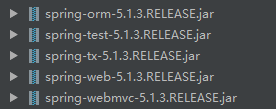
导入后不要忘了,右击lib目录将jar包添加到库中的操作

2.第二步:首先进行springmvc的配置
在ssm目录下新建config文件,在config文件下创建springmvc.xml文件

然后右击config文件,将此文件标记为ROOT

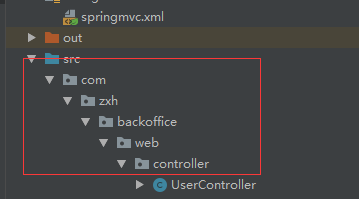
建好controller层的包目录,在springmvc.xml中配置注解扫描到controller层
然后进行springmvc.xml文件的配置
<?xml version="1.0" encoding="UTF-8"?>
<beans xmlns="http://www.springframework.org/schema/beans"
       xmlns:xsi="http://www.w3.org/2001/XMLSchema-instance" xmlns:mvc="http://www.springframework.org/schema/mvc"
       xmlns:context="http://www.springframework.org/schema/context"
       xmlns:aop="http://www.springframework.org/schema/aop" xmlns:tx="http://www.springframework.org/schema/tx"
       xsi:schemaLocation="http://www.springframework.org/schema/beans
      http://www.springframework.org/schema/beans/spring-beans-3.2.xsd
      http://www.springframework.org/schema/mvc
      http://www.springframework.org/schema/mvc/spring-mvc-3.2.xsd
      http://www.springframework.org/schema/context
      http://www.springframework.org/schema/context/spring-context-3.2.xsd
      http://www.springframework.org/schema/aop
      http://www.springframework.org/schema/aop/spring-aop-3.2.xsd
      http://www.springframework.org/schema/tx
      http://www.springframework.org/schema/tx/spring-tx-3.2.xsd">

    <!-- 1.配置注解扫描位置 -->
    <context:component-scan base-package="com.zxh.backoffice.web.controller" />

    <!-- 2.配置注解处理映射-->
    <bean class="org.springframework.web.servlet.mvc.method.annotation.RequestMappingHandlerMapping"/>

    <!--3.配置适配器-->
    <bean class="org.springframework.web.servlet.mvc.method.annotation.RequestMappingHandlerAdapter"></bean>

    <!-- 4.配置springmvc视图解析器 视图解析器解析的视频路径为:前缀 + 后缀 -->
    <bean class="org.springframework.web.servlet.view.InternalResourceViewResolver">
        <property name="prefix" value="/WEB-INF/views/" />
        <property name="suffix" value=".jsp" />
    </bean>
</beans>
然后在web.xml文件中进行配置,加载springmvc.xml文件配置
<?xml version="1.0" encoding="UTF-8"?>
<web-app xmlns="http://xmlns.jcp.org/xml/ns/javaee"
         xmlns:xsi="http://www.w3.org/2001/XMLSchema-instance"
         xsi:schemaLocation="http://xmlns.jcp.org/xml/ns/javaee http://xmlns.jcp.org/xml/ns/javaee/web-app_4_0.xsd"
         version="4.0">

    <servlet>
        <servlet-name>DispatcherServlet</servlet-name>
        <servlet-class>org.springframework.web.servlet.DispatcherServlet</servlet-class>
        <!-- 3.0的springmvc 默认加载WEB-INF下的dispatcher-servlet.xml文件 3.2的springmvc
            加载DispatcherServlet-servlet.xml文件 -->
        <init-param>
            <!-- 修改黑底springmvc加载的配置文件路径 -->
            <param-name>contextConfigLocation</param-name>
            <param-value>classpath*:springmvc.xml</param-value>
        </init-param>
        <load-on-startup>1</load-on-startup>
    </servlet>
    <servlet-mapping>
        <servlet-name>DispatcherServlet</servlet-name>
        <url-pattern>*.do</url-pattern>
    </servlet-mapping>

</web-app>
在controller层下创建UserController.java文件,进行到controller层的测试
package com.zxh.backoffice.web.controller;

import org.springframework.stereotype.Controller;
import org.springframework.web.bind.annotation.RequestMapping;

@Controller
@RequestMapping("/user")
public class UserController {

    @RequestMapping("/list")
    public String list(){
        return "user/list";
    }
}
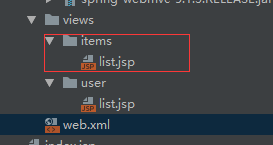
在web目录下,建好jsp文件

list.jsp
<%--
  Created by IntelliJ IDEA.
  User: 赵秀浩
  Date: 2020/1/6
  Time: 20:25
  To change this template use File | Settings | File Templates.
--%>
<%@ page contentType="text/html;charset=UTF-8" language="java" %>
<html>
<head>
    <title>用户页面</title>
</head>
<body>
用户列表:
</body>
</html>
启动Tomcat进行测试,如下效果即说明到controller层的配置成功。

3.第三步:Model、mapper、service层的配置
首先准备好相应的数据库表,然后在工程中新建好Model、mapper、service这三层目录,然后将model和mapper文件加入(model和mapper的代码可用通过逆向工程生成的)
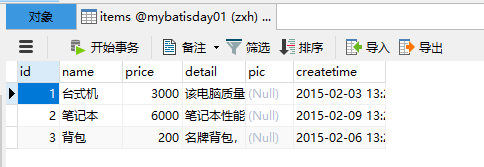

准备一个案列方便后续进行测试如:
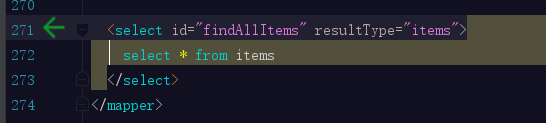
ItemsMapper.java接口

ItemsMapper.xml
ItemsService.java

service实现类,注意:在service层上加上注解

然后再先创建mybatis的配置文件mybatis.xml
<?xml version="1.0" encoding="UTF-8" ?>
<!DOCTYPE configuration
        PUBLIC "-//mybatis.org//DTD Config 3.0//EN"
        "http://mybatis.org/dtd/mybatis-3-config.dtd">
<configuration>
    <!-- 别名配置 -->
    <typeAliases>
        <!-- 批量配置别名:指定批量定义别名的类包,别名为类名(首字母大小写都可) -->
        <package name="com.zxh.backoffice.model"/>
    </typeAliases>
    <mappers>
        <!-- 批量加载映射文件 -->
        <package name="com.zxh.backoffice.mapper"/>
    </mappers>
</configuration>
然后进行spring的配置
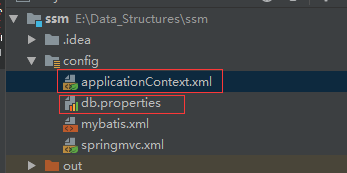
数据库的数据源文件
db.properties
jdbc.driver=com.mysql.jdbc.Driver
jdbc.url=jdbc:mysql://localhost:3306/mybatisday01
jdbc.username=root
jdbc.password=root
spring配置文件的配置,配置c3p0数据源和mybatis的会话工厂,及添加Bean的注解装配
applicationContext.xml
<?xml version="1.0" encoding="UTF-8"?>
<beans xmlns="http://www.springframework.org/schema/beans"
       xmlns:xsi="http://www.w3.org/2001/XMLSchema-instance"
       xmlns:context="http://www.springframework.org/schema/context"
       xmlns:aop="http://www.springframework.org/schema/aop"
       xmlns:tx="http://www.springframework.org/schema/tx"
       xsi:schemaLocation="http://www.springframework.org/schema/beans
		http://www.springframework.org/schema/beans/spring-beans-3.2.xsd
		http://www.springframework.org/schema/context
		http://www.springframework.org/schema/context/spring-context-3.2.xsd
		http://www.springframework.org/schema/aop
		http://www.springframework.org/schema/aop/spring-aop-3.2.xsd
		http://www.springframework.org/schema/tx
		http://www.springframework.org/schema/tx/spring-tx-3.2.xsd">

    <!--加载配置文件-->
    <context:property-placeholder location="classpath:db.properties"/>

    <!--1.配置数据源-->
    <bean id="dataSource" class="com.mchange.v2.c3p0.ComboPooledDataSource">
        <property name="driverClass" value="${jdbc.driver}"/>
        <property name="jdbcUrl" value="${jdbc.url}"/>
        <property name="user" value="${jdbc.username}"/>
        <property name="password" value="${jdbc.password}"/>
        <property name="maxPoolSize" value="30"/>
        <property name="minPoolSize" value="2"/>
    </bean>

    <!--2.配置sessionFactory-->
    <bean class="org.mybatis.spring.SqlSessionFactoryBean" id="sqlSessionFactoryBean">
        <property name="dataSource" ref="dataSource"/>
        <!-- 指定配置文件位置 -->
        <property name="configLocation" value="classpath:mybatis.xml"/>
    </bean>

    <!--3.自动生成dao,mapper-->
    <bean class="org.mybatis.spring.mapper.MapperScannerConfigurer">
        <property name="basePackage" value="com.zxh.backoffice.mapper"/>
        <property name="sqlSessionFactoryBeanName" value="sqlSessionFactoryBean"/>
    </bean>

    <!--自动扫描service-->
    <context:component-scan base-package="com.zxh.backoffice"/>

</beans>
然后在Web.xml中配置spring容器

<!--配置spring-->
    <context-param>
        <param-name>contextConfigLocation</param-name>
        <param-value>classpath:applicationContext.xml</param-value>
    </context-param>
    <listener>
        <listener-class>org.springframework.web.context.ContextLoaderListener</listener-class>
    </listener>
再为测试用例添加jsp页面,编写controller层代码
UserController.java
package com.zxh.backoffice.web.controller;

import com.zxh.backoffice.model.Items;
import com.zxh.backoffice.service.IItemsService;
import org.springframework.beans.factory.annotation.Autowired;
import org.springframework.stereotype.Controller;
import org.springframework.web.bind.annotation.RequestMapping;

import java.util.List;

@Controller
@RequestMapping("/items")
public class ItemsController {

    @Autowired
    private IItemsService iItemsService;

    @RequestMapping("/list")
    public String list(){

        List<Items> allItems = iItemsService.findAllItems();
        System.out.println(allItems);
        return "items/list";
    }
}
启动Tomcat进行整合测试


配置事务:

<!--配置事务-->
    <!-- 4.配置事务管理器 -->
    <bean id="transactionManager" class="org.springframework.jdbc.datasource.DataSourceTransactionManager">
        <property name="dataSource" ref="dataSource"/>
    </bean>
    <!-- 5.开启事务注解-->
    <tx:annotation-driven></tx:annotation-driven>
然后在service层添加事务注解

测试事务:

UserController.java
  @RequestMapping("/save")
    public String save(){

        //创建一个商品
        Items item = new Items();
        item.setName("iphone12");
        item.setPrice(5499.00F);
        item.setCreatetime(new Date());
        item.setDetail("666");
        //保存数据
        iItemsService.saveOrUpdate(item);
        return "items/list";
    }
int i = 1/0 没有注释掉时,数据将不会添加进数据库,注释掉则可以添加到数据库,说明事务配置成功。
