什么是缓冲区?
java 传统I/O将输入输出抽象为字节流或字符流,是基于单个字节的,优点是使用简单,缺点就是效率低下。而且IO的各种流是阻塞的。当一个线程调用read() 或 write()时,该线程被阻塞,直到有一些数据被读取,或数据完全写入,在此期间不能再干任何事情了。而Java NIO则提供了缓冲区Buffer来实现字节块的读写,放在java.nio包下面。常用的Buffer如下:

通过继承图我们可以知道所有的缓冲区实现类都继承自Buffer,Buffer具有一下几个主要属性:
  	private int mark = -1;
    private int position = 0;
    private int limit;
    private int capacity;
    Buffer(int mark, int pos, int lim, int cap) {       // package-private
        if (cap < 0)
            throw new IllegalArgumentException("Negative capacity: " + cap);
        this.capacity = cap;
        limit(lim);
        position(pos);
        if (mark >= 0) {
            if (mark > pos)
                throw new IllegalArgumentException("mark > position: ("
                                                   + mark + " > " + pos + ")");
            this.mark = mark;
        }
    }
     public final Buffer limit(int newLimit) {
        if ((newLimit > capacity) || (newLimit < 0))
            throw new IllegalArgumentException();
        limit = newLimit;
        if (position > limit) position = limit;
        if (mark > limit) mark = -1;
        return this;
    }
    public final Buffer position(int newPosition) {
        if ((newPosition > limit) || (newPosition < 0))
            throw new IllegalArgumentException();
        position = newPosition;
        if (mark > position) mark = -1;
        return this;
    }
| 主要属性 | 含义 |
|---|---|
| mark | 位置标记,可以临时保存position,用于position改变后可以回复原来位置 |
| position | 表示缓冲区中当前可读写位置,也就是索引 |
| limit | 表示缓冲区中可用元素的大小,也就是实际存放的字节数量 |
| capacity | 表示缓冲的大小,其实就是缓冲区内部数组的大小 |
查看源码,我们可以知道每个具体的Buffer子类内部管理着一个字节数组,数据存放在数组中。
ByteBuffer(int mark, int pos, int lim, int cap,   // package-private
                 byte[] hb, int offset)
    {
        super(mark, pos, lim, cap);
        this.hb = hb;
        this.offset = offset;
    }
IntBuffer(int mark, int pos, int lim, int cap,   // package-private
                 int[] hb, int offset)
    {
        super(mark, pos, lim, cap);
        this.hb = hb;
        this.offset = offset;
    }
FloatBuffer(int mark, int pos, int lim, int cap,   // package-private
                 float[] hb, int offset)
    {
        super(mark, pos, lim, cap);
        this.hb = hb;
        this.offset = offset;
    }
Buffer作为数据的载体,Java程序在使用NIO时都会通过Buffer与外界进行通信。
缓冲区的使用
Buffer提供了一下主要方法,如图:

1.allocate、put、flip、get、rewind、clear
为了自己学习方便,自己参考视频与文章,亲手画了一下图解,便于大家理解


以下是具体的使用测试示例:
@Test
    public void test01(){
        String str = "javaNIO";
        //1.分配一个指定大小的缓冲区
        ByteBuffer buffer = ByteBuffer.allocate(9);
        showIConsole(buffer,"allocate()");
        //2.put()存入数据到缓冲区
        buffer.put(str.getBytes());
        showIConsole(buffer,"put()");
        //3.切换到读取模式
        buffer.flip();
        showIConsole(buffer,"flip()");
        //4.get()读取缓冲区中的数据
        byte[] bytes = new byte[buffer.limit()];
        buffer.get(bytes);
        System.out.println("读到的数据:"+new String(bytes,0,bytes.length));
        showIConsole(buffer,"get()");
        //5.rewind():倒回,可重复读
        buffer.rewind();
        showIConsole(buffer,"rewind");
        //6.clear(),清空缓冲区,但数据依然存在,只是处于"被遗忘状态”
        buffer.clear();
        showIConsole(buffer,"clear()");
        System.out.println("after clear,the part data:"+ (char)buffer.get(5));
    }
     public void showIConsole(Buffer buf, String title){
        System.out.println("-------"+title+"-------");
        System.out.println("position:"+buf.position());
        System.out.println("limt:"+buf.limit());
        System.out.println("capacity:"+buf.capacity());

    }
运行结果:
/home/xiaoxin/jdk/jdk1.8/bin/java...
-------allocate()-------
position:0
limt:9
capacity:9
-------put()-------
position:7
limt:9
capacity:9
-------flip()-------
position:0
limt:7
capacity:9
读到的数据:javaNIO
-------get()-------
position:7
limt:7
capacity:9
-------rewind-------
position:0
limt:7
capacity:9
-------clear()-------
position:0
limt:9
capacity:9
after clear,the part data:I

Process finished with exit code 0
2.mark测试


 @Test
    public  void test02(){
        ByteBuffer buffer = ByteBuffer.allocate(9);
        buffer.put("javaNIO".getBytes());
        buffer.flip();
        byte[] dst = new byte[buffer.limit()];
        buffer.get(dst,0,2);
        System.out.println(new String(dst,0,4));
        System.out.println("before mark,the position:"+buffer.position());
        System.out.println("before mark,the position:"+buffer.limit());
        System.out.println("before mark,the position:"+buffer.capacity());
        //标记
        buffer.mark();
        System.out.println("------after mark,read again---");
        buffer.get(dst,2,2);
        System.out.println(new String(dst,2,2));
        System.out.println("after mark,the position:"+buffer.position());
        System.out.println("after mark,the position:"+buffer.limit());
        System.out.println("after mark,the position:"+buffer.capacity());
        //reset,恢复到mark位置
        buffer.reset();
        System.out.println("after reset,the position:"+buffer.position());
        System.out.println("after reset,the position:"+buffer.limit());
        System.out.println("after reset,the position:"+buffer.capacity());
        //判断缓冲区是否还有数据
        if(buffer.hasRemaining()){
            //获取缓冲区中可以操作的数量
            System.out.println(buffer.remaining());
        }
    }
运行结果:
/home/xiaoxin/jdk/jdk1.8/bin/java
ja
before mark,the position:2
before mark,the position:7
before mark,the position:9
------after mark,read again---
va
after mark,the position:4
after mark,the position:7
after mark,the position:9
after reset,the position:2
after reset,the position:7
after reset,the position:9
5
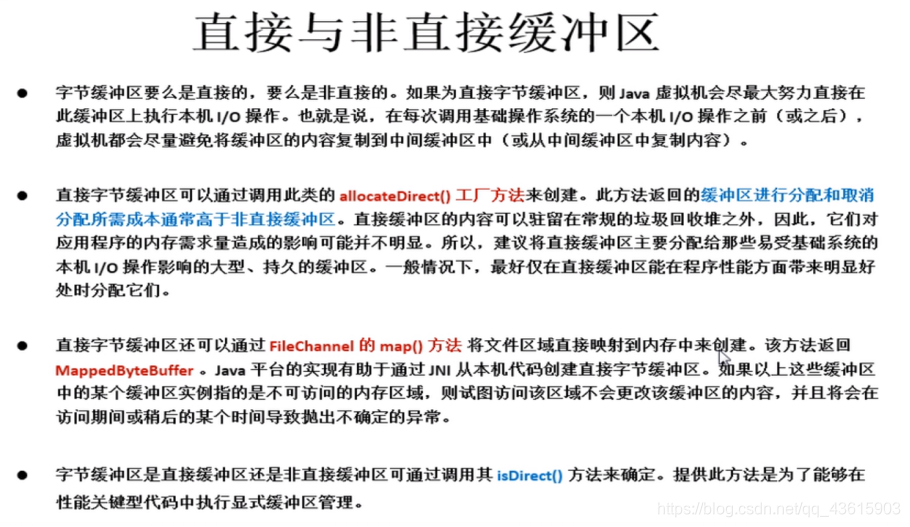
3.直接缓冲区


@Test
    public void test03(){
        //分配直接缓冲区
        ByteBuffer buffer= ByteBuffer.allocateDirect(512);
        showIConsole(buffer,"allocate direct Bytebuffer");
        System.out.println(buffer.isDirect());
        System.out.println(buffer.isReadOnly());
    }
运行结果:
/home/xiaoxin/jdk/jdk1.8/bin/java
-------allocate direct Bytebuffer-------
position:0
limt:512
capacity:512
true
false

Process finished with exit code 0
4.compact测试
如果Buffer中仍有未读的数据,且后续还需要这些数据,但是此时想要先写些数据,那么使用compact()方法。compact()方法将所有未读的数据拷贝到Buffer起始处。compacth调用后buffer 会回到读剩余后的状态,将position设到最后一个未读元素正后面,不会覆盖未读的数据。另外与clear不同的是compact后的数据不会被遗忘,可以继续读。比如intbuffer连续放入两个int数字,get读出一个后,再调用compact后,position、limit,compacity分别为1、9、9,切后续继续get数据,获得99。但若此时不是使用compact而是使用clear,则是0,9,9且后续get,则是position为0的数据199了。
 @Test
    public void test04(){
        IntBuffer intBuffer = IntBuffer.allocate(9);
        showIConsole(intBuffer,"intbuffer-allocate");
        intBuffer.put(199);
        intBuffer.put(99);
        showIConsole(intBuffer,"intbuffer-put");
        intBuffer.flip();
        showIConsole(intBuffer,"intbuffer-flip");
        int n= intBuffer.get();
        System.out.println("get1:"+n);
        showIConsole(intBuffer,"intbuffer-get");
        intBuffer.compact();
        showIConsole(intBuffer,"intbuffer-compct");
        showIConsole(intBuffer,"intbuffer-get2");
        System.out.println("get2:"+intBuffer.get());

    }
结果:
/home/xiaoxin/jdk/jdk1.8/bin/java
-------intbuffer-allocate-------
position:0
limt:9
capacity:9
-------intbuffer-put-------
position:2
limt:9
capacity:9
-------intbuffer-flip-------
position:0
limt:2
capacity:9
get1:199
-------intbuffer-get-------
position:1
limt:2
capacity:9
-------intbuffer-compct-------
position:1
limt:9
capacity:9
-------intbuffer-get2-------
position:1
limt:9
capacity:9
get2:99

Process finished with exit code 0
对比clear,进一步体会不同之处:
@Test
    public void test05(){
        IntBuffer intBuffer = IntBuffer.allocate(9);
        showIConsole(intBuffer,"intbuffer-allocate");
        intBuffer.put(199);
        intBuffer.put(99);
        showIConsole(intBuffer,"intbuffer-put");
        intBuffer.flip();
        showIConsole(intBuffer,"intbuffer-flip");
        int n= intBuffer.get();
        System.out.println("get1:"+n);
        showIConsole(intBuffer,"intbuffer-get");
        intBuffer.clear();//此时使用clear而不是compact
        showIConsole(intBuffer,"intbuffer-clear instead of compct");
        showIConsole(intBuffer,"intbuffer-get2");
        //position回到了0.ge得到199,而compact则是读取第一个剩余后的99,position为1
        System.out.println("get2:"+intBuffer.get());

    }
clear结果:
/home/xiaoxin/jdk/jdk1.8/bin/java
-------intbuffer-allocate-------
position:0
limt:9
capacity:9
-------intbuffer-put-------
position:2
limt:9
capacity:9
-------intbuffer-flip-------
position:0
limt:2
capacity:9
get1:199
-------intbuffer-get-------
position:1
limt:2
capacity:9
-------intbuffer-clear instead of compct-------
position:0
limt:9
capacity:9
-------intbuffer-get2-------
position:0
limt:9
capacity:9
get2:199

Process finished with exit code 0
总结
传统 I/O 以流的方式处理数据,而 NIO 以块的方式处理数据。面向流 的 I/O 系统一次一个字节地处理数据。一个输入流产生一个字节的数据,一个输出流消费一个字节的数据, I/O 通常相当慢。一个 面向块 的 I/O 系统以块的形式处理数据。每一个操作都在一步中产生或者消费一个数据块。按块处理数据比按(流式的)字节处理数据要快得多。NIO性能的优势就来源于缓冲的机制,不管是读或者写都需要以块的形式写入到缓冲区中。NIO实际上让我们对IO的操作更接近于操作系统的实际过程。
