技术栈:vue+element+express+mongodb
教程:b站“全栈之巅”
github地址:https://github.com/frotage/vue-management
前言:本人平常写的是前端,这次主要是想学习一下express,而前端界面的实现主要都是用了element直接调用,就没有写的特别详细
具体:
-
mongodb安装
官网下载安装完毕后,设置data的地址,没有再去设置后台自动启动,选择开两个cmd
两个cmd模式的开启方式:
先开一个cmd
mongod --dbpath D:\mongodb\data\db
再开一个cmd
mongo
over
-
前端vue-cli创建项目
vue create 项目名称
选择的时候把router加上创建
vue add element
选择的时候选择全局安装,就不用后期用一个再注册一个
主界面App.vue用element-ui里的container搭建
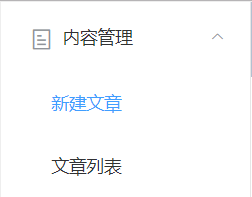
侧边栏留两个
把文件夹views原来的删掉,新建文件
CreateArticle.vue =>新建文章
EditArticle.vue =>编辑文章
ListArticle.vue =>文章列表
把App.vue的两个键index调整为:
<el-menu-item index="/articles/create">新建文章</el-menu-item>
<el-menu-item index="/articles/index">文章列表</el-menu-item>
打开router里面的index.js
将刚刚在views里面创建的三个vue引入
为三个vue设置对应的路由
  //刚打开网页的时候引向文章列表
  {
    path: '/',
    name: 'Home',
    redirect:'/articles/index'
 },
 //文章列表
 {
   path:'/articles/index',
   name:'list-article',
   component:ListArticle
 },
 //创建文章
 {
   path: '/articles/create',
   name: 'create-article',
   component:CreateArticle
 },
 //根据文章自动生成的id来编辑文章
 {
   path:'/articles/:id/edit',
   name:'edit-article',
   component:EditArticle
 }
CreateArticle.vue
用element的form
在<el-form>上设置方法用于post输入的信息给后端
@submit.native.prevent="saveArticle"
在<el-form>上绑定:model="article"
再在文章标题和文章内容对应的<el-input>上分别加上
v-model="article.title"
v-model="article.body"
在data中创建article:{}
ListArticle.vue

用element的table
在<el-table>里面加上:data="articles"
EditArticle.vue

界面为element的form
-
后端
创建server文件夹
在其中创建index.js文件
引入express
const express = require('express')
const app = express()
npm下载并引入cors,解决跨域问题(后端和前端不在一个域)
app.use(require('cors')())
解决express要识别客户端提交的json
app.use(express.json())
npm下载nodemon,在启动后端node时如果不用这个则每次修改完数据之后需要重新启动服务器,用nodemon则会自动检测修改并帮你更新
两种启动方式都可以(如下)
在只写nodemon server时如果server是文件则启动运行,倘若是文件夹则会去自动找里面的index.js文件
nodemon server/index.js
nodemon server
npm下载并引入mongoose
const mongoose = require('mongoose')
mongoose.connect('mongodb://localhost:27017/element-admin', {
    useNewUrlParser: true,
    useFindAndModify: true,
    useCreateIndex: true,
   useUnifiedTopology: true
})
写数据库模型,此处只设置简单的标题和文章主体和博客对应
// 模型,习惯性用大写来表示
// 需要精确地定义每一个模型的每一个字段是什么类型的
const Article=mongoose.model('Article',new mongoose.Schema({
    title:{type:String},
    body:{type:String},
}))
npm下载并在main.js中引入axios
创建axios实例,通过定义到原型上让在所有文件中都可以访问,为了让名字不重复故加上$
Vue.prototype.$http=axios.create({
  // 设置接口根地址
  // 作用:就不用再所有请求中都写一遍接口根地址,比较方便
  baseURL:'http://localhost:3001/api'
})
创建文章
回到server/index.js
// 新增文章的接口
app.post('/api/articles',async(req,res)=>{
    const article=await Article.create(req.body)
    res.send(article)
})
在CreateArticle.vue中,该方法绑定到<el-form>上
在客户端输入信息点击对应的提交按钮后,this.$message为element的弹窗,成功则会弹出提示
同时回到index主页即文章列表
    saveArticle() {
      // 此处由于eslint判断创建的变量未使用会报错,故加上下面那行注释来解决
      this.$http.post("articles", this.article).then(res => {
        this.$message({
          message: "文章创建成功",
         type: "success"
       });
       this.$router.push('/articles/index')
     });
   }
文章列表
server/index.js
app.get('/api/articles',async(req,res)=>{
    const articles=await Article.find()
    res.send(articles)
})
ListArticle.vue
this.$http就是http://localhost:3001/api
即到后端取数据后将数据通过this.articles = res.data;传送给data里定义好的articles
created() {
    this.$http.get("articles").then(res => {
      this.articles = res.data;
    });
}
删除文章
server/index.js
删除文章成功后返回一个成功的状态
app.delete('/api/articles/:id',async(req,res)=>{
    await Article.findByIdAndDelete(req.params.id)
    res.send({
        status:true
    })
})
ListArticle.vue
先写了个fetch()方法,在删除数据之后会需要立即更新列表,故将更新的代码提出来为fetch()方法减少冗余
删除成功后同样也有个弹窗
fetch() {
  this.$http.get("articles").then(res => {
    this.articles = res.data;
  });
},
remove(id) {
  this.$http.delete(`articles/${id}`).then(() => {
      this.$message({
        message: "文章删除成功",
        type: "success"
     });
     this.fetch()
   }
 );
}
在删除按钮上绑定@click="remove(scope.row._id)",将需要删除的文章的id获取到并传输
文章详情
server/index.js
在编辑已经上传的文章的时候需要先获取到这个文章的数据将其放入输入框再进行修改
故先get到对应id文章的数据,并将数据传递过去
app.get(`/api/articles/:id`,async(req,res)=>{
    const article=await Article.findById(req.params.id)
    res.send(article)
})
EditArticle.vue
fetch(){
  this.$http.get(`articles/${this.$route.params.id}`).then(res=>{
    this.article=res.data
  })
}
created(){
    this.fetch()
}
修改文章
server/index.js
将修改过的数据直接用put覆盖掉原来的数据
app.put(`/api/articles/:id`,async(req,res)=>{
    const article=await Article.findByIdAndUpdate(req.params.id,req.body)
    res.send(article)
})
EditArticle.vue
同样通过id来获得对应的文章,更新成功后会有弹窗
this.$http.put(`articles/${this.$route.params.id}`,this.article).then(res => {
        this.$message({
          message: "文章更新成功",
          type: "success"
        });
       this.$router.push('/articles/index')
     });
   },
完整代码github地址:https://github.com/frotage/vue-management