一:介绍
在前两篇的介绍中,客户端都是直接调用配置中心的server端来获取配置文件信息。这样就存在了一个问题,客户端和服务端的耦合性太高,如果server端要做集群,客户端只能通过原始的方式来路由,server端改变IP地址的时候,客户端也需要修改配置,不符合springcloud服务治理的理念。
springcloud提供了这样的解决方案,我们只需要将server端当做一个服务注册到eureka中,client端去eureka中去获取配置中心server端的服务既可。
二.server端
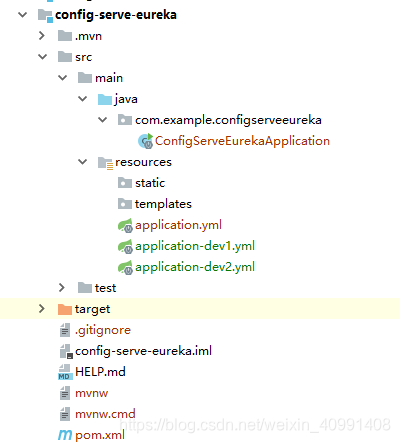
2.1 在主Maven工程中创建一个新的 Module 工程,命名为config-serve-eureka。采用Spring Initializr 的方式的方式创建。
2.2 config-serve-eureka 的 pom.xml 的内容如下:
<?xml version="1.0" encoding="UTF-8"?>
<project xmlns="http://maven.apache.org/POM/4.0.0" xmlns:xsi="http://www.w3.org/2001/XMLSchema-instance"
         xsi:schemaLocation="http://maven.apache.org/POM/4.0.0 https://maven.apache.org/xsd/maven-4.0.0.xsd">
    <modelVersion>4.0.0</modelVersion>
    <parent>
        <groupId>com.springcloud</groupId>
        <artifactId>springcloud-hx</artifactId>
        <version>1.0-SNAPSHOT</version>
        <relativePath/> <!-- lookup parent from repository -->
    </parent>
    <groupId>com.example</groupId>
    <artifactId>config-serve-eureka</artifactId>
    <version>0.0.1-SNAPSHOT</version>
    <name>config-serve-eureka</name>
    <description>Demo project for Spring Boot</description>

    <properties>
        <java.version>1.8</java.version>
    </properties>

    <dependencies>
        <dependency>
            <groupId>org.springframework.cloud</groupId>
            <artifactId>spring-cloud-starter-netflix-eureka-client</artifactId>
        </dependency>

        <dependency>
            <groupId>org.springframework.cloud</groupId>
            <artifactId>spring-cloud-config-server</artifactId>
        </dependency>

        <dependency>
            <groupId>org.springframework.boot</groupId>
            <artifactId>spring-boot-starter-web</artifactId>
        </dependency>

        <dependency>
            <groupId>org.springframework.boot</groupId>
            <artifactId>spring-boot-starter-test</artifactId>
            <scope>test</scope>
        </dependency>
    </dependencies>

    <build>
        <plugins>
            <plugin>
                <groupId>org.springframework.boot</groupId>
                <artifactId>spring-boot-maven-plugin</artifactId>
            </plugin>
        </plugins>
    </build>

</project>
添加了依赖:
        <dependency>
            <groupId>org.springframework.cloud</groupId>
            <artifactId>spring-cloud-starter-netflix-eureka-client</artifactId>
        </dependency>

        <dependency>
            <groupId>org.springframework.cloud</groupId>
            <artifactId>spring-cloud-config-server</artifactId>
        </dependency>
2.3 主Module 的 的 pom.xml 加上:

2.4 在启动类上加上 @EnableConfigServer 注解开启配置中心服务器的功能,加上@EnableDiscoveryClient 注解开启服务注册于发现代码如下:
package com.example.configserveeureka;

import org.springframework.boot.SpringApplication;
import org.springframework.boot.autoconfigure.SpringBootApplication;
import org.springframework.cloud.client.discovery.EnableDiscoveryClient;
import org.springframework.cloud.config.server.EnableConfigServer;

//开启服务注册于发现
@EnableDiscoveryClient
//注解开启配置中心服务器的功能
@EnableConfigServer
@SpringBootApplication
public class ConfigServeEurekaApplication {

    public static void main(String[] args) {
        SpringApplication.run(ConfigServeEurekaApplication.class, args);
    }

}
2.5 在 config-serve-eureka 的 resource 文件夹下新建两个配置文件application-dev1.yml 和 application-dev2.yml 方便做集群。 配置文件 application.yml 和 application-dev1.yml 和 application-dev2.yml 的内容如下:
application.yml :
spring:
  profiles:
    active: dev1  # dev1 和 dev2 都可以
application-dev1.yml :
server:
  port: 8772

spring:
  #配置程序名为config-serve-eureka
  application:
    name: config-serve-eureka
  cloud:
    config:
      label: master #配置仓库的分支
      server:
        git:
          uri: https://github.com/huangxuhenshuai/springcloud-config-demo     # 配置git仓库的地址
          search-paths: config-repo    # git仓库地址下的相对地址(放配置文件的文件夹),可以配置多个,用,分割。
          username: xxxxxxxxx   # git仓库的账号
          password:  xxxxxxxxx     # git仓库的密码


eureka:
  client:
    #服务注册地址
    serviceUrl:
      #注意: Eureka Server 的注册地址
      #将服务提供者注册到三个Eureka Server中去
      #defaultZone: http://peer1:8001/eureka/,http://peer2:8002/eureka/,http://peer3:8003/eureka/
      #defaultZone: http://peer1:8001/eureka/
      defaultZone: http://localhost:8761/eureka/
application-dev2.yml :
server:
  port: 8773

spring:
  #配置程序名为config-serve-eureka
  application:
    name: config-serve-eureka
  cloud:
    config:
      label: master #配置仓库的分支
      server:
        git:
          uri: https://github.com/huangxuhenshuai/springcloud-config-demo     # 配置git仓库的地址
          search-paths: config-repo    # git仓库地址下的相对地址(放配置文件的文件夹),可以配置多个,用,分割。
          username: [email protected]   # git仓库的账号
          password: hx77082493hyx37     # git仓库的密码


eureka:
  client:
    #服务注册地址
    serviceUrl:
      #注意: Eureka Server 的注册地址
      #将服务提供者注册到三个Eureka Server中去
      #defaultZone: http://peer1:8001/eureka/,http://peer2:8002/eureka/,http://peer3:8003/eureka/
      #defaultZone: http://peer1:8001/eureka/
      defaultZone: http://localhost:8761/eureka/
相比于config-serve 的配置文件内容,多了 eureka 的 配置信息
- uri: 配置git仓库的地址
- search-paths: git仓库地址下的相对地址(放配置文件的文件夹),可以配置多个,用,分割。
- username: git仓库的账号
- password: git仓库的密码
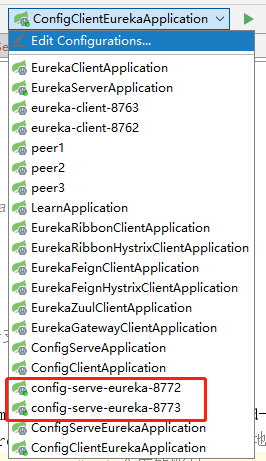
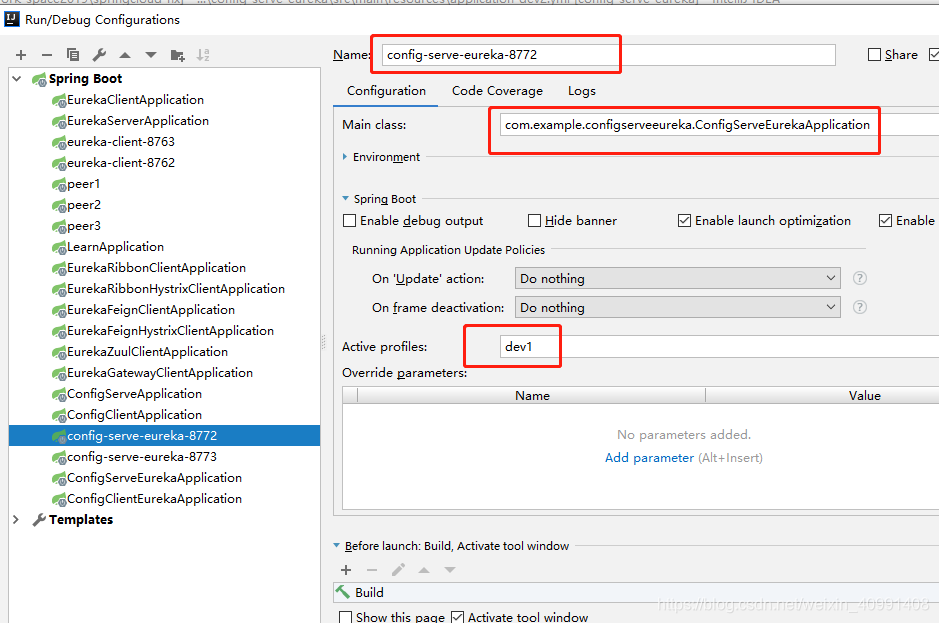
2.6 设置两个 config-serve-eureka 8772、8773 两个端口的启动,如图:
三.client端
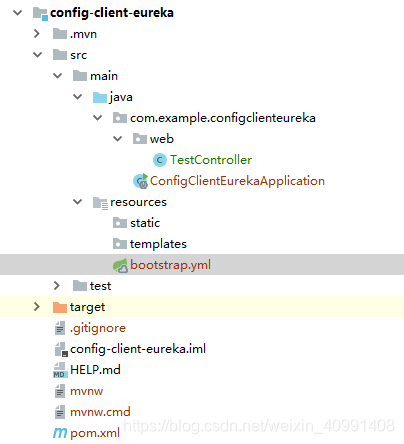
3.1 在主Maven工程中创建一个新的 Module 工程,命名为config-client-eureka。采用Spring Initializr 的方式的方式创建。
3.2 config-client-eureka 的 pom.xml 的内容如下:
<?xml version="1.0" encoding="UTF-8"?>
<project xmlns="http://maven.apache.org/POM/4.0.0" xmlns:xsi="http://www.w3.org/2001/XMLSchema-instance"
         xsi:schemaLocation="http://maven.apache.org/POM/4.0.0 https://maven.apache.org/xsd/maven-4.0.0.xsd">
    <modelVersion>4.0.0</modelVersion>
    <parent>
        <groupId>com.springcloud</groupId>
        <artifactId>springcloud-hx</artifactId>
        <version>1.0-SNAPSHOT</version>
        <relativePath/> <!-- lookup parent from repository -->
    </parent>
    <groupId>com.example</groupId>
    <artifactId>config-client-eureka</artifactId>
    <version>0.0.1-SNAPSHOT</version>
    <name>config-client-eureka</name>
    <description>Demo project for Spring Boot</description>

    <properties>
        <java.version>1.8</java.version>
    </properties>

    <dependencies>
        <dependency>
            <groupId>org.springframework.cloud</groupId>
            <artifactId>spring-cloud-starter-netflix-eureka-client</artifactId>
        </dependency>

        <dependency>
            <groupId>org.springframework.cloud</groupId>
            <artifactId>spring-cloud-starter-config</artifactId>
        </dependency>

 <!--增加了spring-boot-starter-actuator包,spring-boot-starter-actuator是一套监控的功能,
        可以监控程序在运行时状态,其中就包括/refresh的功能。-->
        <dependency>
            <groupId>org.springframework.boot</groupId>
            <artifactId>spring-boot-starter-actuator</artifactId>
        </dependency>
        <dependency>
            <groupId>org.springframework.boot</groupId>
            <artifactId>spring-boot-starter-web</artifactId>
        </dependency>

        <dependency>
            <groupId>org.springframework.boot</groupId>
            <artifactId>spring-boot-starter-test</artifactId>
            <scope>test</scope>
        </dependency>
    </dependencies>

    <build>
        <plugins>
            <plugin>
                <groupId>org.springframework.boot</groupId>
                <artifactId>spring-boot-maven-plugin</artifactId>
            </plugin>
        </plugins>
    </build>

</project>
添加了依赖:
        <dependency>
            <groupId>org.springframework.cloud</groupId>
            <artifactId>spring-cloud-starter-netflix-eureka-client</artifactId>
        </dependency>

        <dependency>
            <groupId>org.springframework.cloud</groupId>
            <artifactId>spring-cloud-starter-config</artifactId>
        </dependency>
3.3 主Module 的 的 pom.xml 加上:

3.4 config-client-eureka 的 配置文件 bootstrap.yml 的内容如下:
server:
  port: 8774


eureka:
  client:
    #服务注册地址
    serviceUrl:
      #注意: Eureka Server 的注册地址
      #将服务提供者注册到三个Eureka Server中去
      #defaultZone: http://peer1:8001/eureka/,http://peer2:8002/eureka/,http://peer3:8003/eureka/
      #defaultZone: http://peer1:8001/eureka/
      defaultZone: http://localhost:8761/eureka/


spring:
  application:
    name: config-client-eureka
  cloud:
    config:
      name: config-eureka-client
      profile: dev
      label: master
      discovery:
        enabled: true #是否通过eureka发现config-serve-eureka
        service-id: config-serve-eureka #指定配置中心的service-id,便于扩展为高可用配置集群。(config-serve-euraka在eureka中的名称)


#spring.application.name:对应{application}部分
#spring.cloud.config.profile:对应{profile}部分
#spring.cloud.config.label:对应git的分支。如果配置中心使用的是本地存储,则该参数无用
#spring.cloud.config.uri:配置中心的具体地址
#spring.cloud.config.discovery.service-id:指定配置中心的service-id,便于扩展为高可用配置集群。(config-serve-euraka在eureka中的名称)
#spring.cloud.config.discovery.enabled: true   是否通过eureka发现config-service


#特别注意:上面这些与spring-cloud相关的属性必须配置在bootstrap.yml,config部分内容才能被正确加载。
#因为config的相关配置会先于application.yml,而bootstrap.yml的加载也是先于application.yml。
特别注意:
上面这些与spring-cloud相关的属性必须配置在bootstrap.yml,config部分内容才能被正确加载。因为config的相关配置会先于application.yml,而bootstrap.yml的加载也是先于application.yml。
- spring.application.name:对应{application}部分
- spring.cloud.config.profile:对应{profile}部分
- spring.cloud.config.label:对应git的分支。如果配置中心使用的是本地存储,则该参数无用
- spring.cloud.config.uri:配置中心的具体地址
- spring.cloud.config.discovery.service-id:指定配置中心的service-id,便于扩展为高可用配置集群。(config-serve-eureka 在eureka中的名称)
- spring.cloud.config.discovery.enabled: true 是否通过eureka发现config-serve-eureka
3.5 在启动类上加上 加上@EnableDiscoveryClient 注解开启服务注册于发现代码如下:
package com.example.configclienteureka;

import org.springframework.boot.SpringApplication;
import org.springframework.boot.autoconfigure.SpringBootApplication;
import org.springframework.cloud.client.discovery.EnableDiscoveryClient;

//开启服务注册于发现
@EnableDiscoveryClient
@SpringBootApplication
public class ConfigClientEurekaApplication {

    public static void main(String[] args) {
        SpringApplication.run(ConfigClientEurekaApplication.class, args);
    }

}
四.测试
在config-client-eureka 项目里 新建一个 TestController 类,使用@Value注解来获取server端参数的值。代码如下:
package com.example.configclienteureka.web;

import org.springframework.beans.factory.annotation.Value;
import org.springframework.cloud.context.config.annotation.RefreshScope;
import org.springframework.web.bind.annotation.RequestMapping;
import org.springframework.web.bind.annotation.RestController;


// 使用该注解的类,会在接到SpringCloud配置中心配置刷新的时候,自动将新的配置更新到该类对应的字段中。
@RefreshScope
@RestController
public class TestController {

    @Value("${neo.hello}")
    private String hello;

    @RequestMapping("/test")
    public String from() {
        return this.hello;
    }

}
启动 eureka-serve、config-serve-eureka(8772、8773两个端口)、config-client-eureka 服务。
在浏览器上访问:http://localhost:8761/
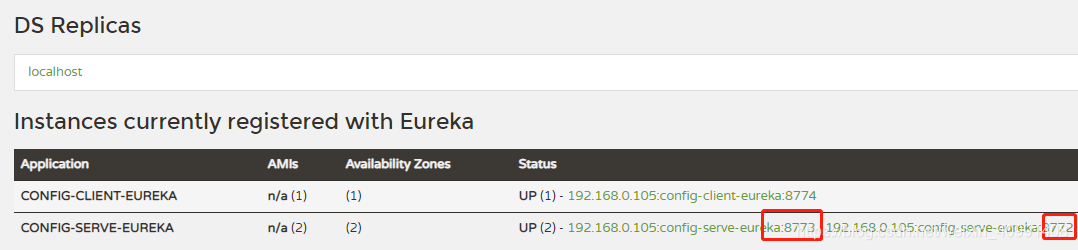
在浏览器上分别 访问http://localhost:8772/config-eureka-client/dev ,http://localhost:8773/config-eureka-client/dev 返回的信息如下:
{
    "name":"config-eureka-client",
    "profiles":[
        "dev"
    ],
    "label":null,
    "version":"3ca3e72dd7763d0091624c7b93549c7d45d6c414",
    "state":null,
    "propertySources":[
        {
            "name":"https://github.com/huangxuhenshuai/springcloud-config-demo/config-repo/config-eureka-client-dev.yml",
            "source":{
                "neo.hello":"config-eureka-client-dev"
            }
        }
    ]
}
说明两个 server 端都正常读取到了配置信息。
再次在浏览器上访问:http://localhost:8774/test,返回:
config-eureka-client-dev
说明客户端已经读取到了server端的内容,我们随机停掉一台server端的服务,再次访问 http://localhost:8774/test,
返回:
config-eureka-client-dev
说明达到了高可用的目的。
