前言
SpringCloud 是微服务中的翘楚,最佳的落地方案。
Spring Cloud Config 是一个解决分布式系统的配置管理方案,它包含了 server 和 client 两个部分。
server 用来获取远程的配置信息(默认为 Git 仓库),并且以接口的形式提供出去;
client 根据 server 提供的接口读取配置文件,以便于初始化自己的应用。
源码
GitHub地址:https://github.com/intomylife/SpringCloud
环境
- JDK 1.8.0 +
- Maven 3.0 +
- SpringBoot 2.0.3
- SpringCloud Finchley.RELEASE
开发工具
- IntelliJ IDEA
正文
commons 工程
commons 工程 - POM 文件
<?xml version="1.0" encoding="UTF-8"?>
<project xmlns="http://maven.apache.org/POM/4.0.0" xmlns:xsi="http://www.w3.org/2001/XMLSchema-instance"
         xsi:schemaLocation="http://maven.apache.org/POM/4.0.0 http://maven.apache.org/xsd/maven-4.0.0.xsd">
    <modelVersion>4.0.0</modelVersion>

    <!-- 三坐标 -->
    <groupId>com.zwc</groupId>
    <artifactId>springcloud-config-git-commons</artifactId>
    <version>1.0</version>

    <!-- 工程名称和描述 -->
    <name>springcloud-config-git-commons</name>
    <description>公用工程</description>

    <!-- 打包方式 -->
    <packaging>jar</packaging>

    <!-- 在 properties下声明相应的版本信息,然后在dependency下引用的时候用 ${} 就可以引入该版本jar包了 -->
    <properties>
        <!-- 编码 -->
        <project.build.sourceEncoding>UTF-8</project.build.sourceEncoding>
        <!-- jdk -->
        <java.version>1.8</java.version>

        <!-- SpringBoot -->
        <platform-bom.version>Cairo-SR3</platform-bom.version>

        <!-- SpringCloud -->
        <spring-cloud-dependencies.version>Finchley.RELEASE</spring-cloud-dependencies.version>
    </properties>

    <!-- 加入依赖 -->
    <dependencies>

    </dependencies>

    <!-- 依赖 jar 包版本管理的管理器 -->
    <!-- 如果 dependencies 里的 dependency 自己没有声明 version 元素,那么 maven 就此处来找版本声明。 -->
    <!-- 如果有,就会继承它;如果没有就会报错,告诉你没有版本信息 -->
    <!-- 优先级:如果 dependencies 里的 dependency 已经声明了版本信息,就不会生效此处的版本信息了 -->
    <dependencyManagement>
        <dependencies>
            <!-- SpringBoot -->
            <dependency>
                <groupId>io.spring.platform</groupId>
                <artifactId>platform-bom</artifactId>
                <version>${platform-bom.version}</version>
                <type>pom</type>
                <scope>import</scope>
            </dependency>
            <!-- SpringCloud -->
            <dependency>
                <groupId>org.springframework.cloud</groupId>
                <artifactId>spring-cloud-dependencies</artifactId>
                <version>${spring-cloud-dependencies.version}</version>
                <type>pom</type>
                <scope>import</scope>
            </dependency>
        </dependencies>
    </dependencyManagement>

    <!-- 插件依赖 -->
    <build>
        <plugins>
            <plugin>
                <groupId>org.springframework.boot</groupId>
                <artifactId>spring-boot-maven-plugin</artifactId>
            </plugin>
        </plugins>
    </build>

</project>
- 配置一些共用依赖
commons 工程 - 项目结构

配置文件
创建一个 Git 库,里面存放配置文件,文件夹名称为:config-repo;这里模拟不同的环境,所以分别构建了
dev(开发)、uat(测试)以及 online(线上)三种不同的配置文件;此文件夹存在此项目的根目录中
- springcloud-config-git
- config-repo
- system-dev.properties
- system-online.properties
- system-uat.properties
+ springcloud-config-git-commons
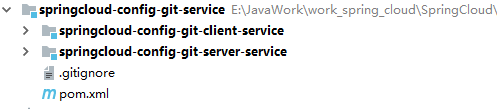
+ springcloud-config-git-serviceservice 工程
① 此工程下有两个模块:一个 server,一个 client

server(获取远程的配置信息)
server - POM 文件
<?xml version="1.0" encoding="UTF-8"?>
<project xmlns="http://maven.apache.org/POM/4.0.0" xmlns:xsi="http://www.w3.org/2001/XMLSchema-instance"
         xsi:schemaLocation="http://maven.apache.org/POM/4.0.0 http://maven.apache.org/xsd/maven-4.0.0.xsd">
    <modelVersion>4.0.0</modelVersion>

    <!-- 继承父 -->
    <parent>
        <groupId>com.zwc</groupId>
        <artifactId>springcloud-config-git-service</artifactId>
        <version>1.0</version>
    </parent>

    <!-- 三坐标 -->
    <groupId>com.zwc</groupId>
    <artifactId>springcloud-config-git-server-service</artifactId>
    <version>1.0</version>

    <!-- 工程名称描述 -->
    <name>springcloud-config-git-server-service</name>
    <description>config server</description>

    <!-- 打包方式 -->
    <packaging>jar</packaging>

    <!-- 在 properties下声明相应的版本信息,然后在dependency下引用的时候用 ${} 就可以引入该版本jar包了 -->
    <properties>

    </properties>

    <!-- 加入依赖 -->
    <dependencies>
        <!-- commons工程 依赖 -->
        <dependency>
            <groupId>com.zwc</groupId>
            <artifactId>springcloud-config-git-commons</artifactId>
            <version>1.0</version>
        </dependency>

        <!-- config server 依赖 -->
        <dependency>
            <groupId>org.springframework.cloud</groupId>
            <artifactId>spring-cloud-config-server</artifactId>
        </dependency>
    </dependencies>

    <!-- 插件依赖 -->
    <build>
        <plugins>
            <plugin>
                <groupId>org.springframework.boot</groupId>
                <artifactId>spring-boot-maven-plugin</artifactId>
            </plugin>
        </plugins>
    </build>

</project>
- 主要加入 spring-cloud-config-server 依赖
server - application.yml 配置文件
# 端口
server:
  port: 8000

spring:
  application:
    # 应用名称
    name: config-git-server
  cloud:
    config:
      server:
        git:
          # 仓库地址
          uri: https://github.com/intomylife/SpringCloud
          # 对应 {label} 部分,即 Git 的分支
          label: master
          # 仓库文件夹名称,多个以逗号分隔
          search-paths: springcloud-config-git/config-repo
          # git 仓库用户名(公开库可以不用填写)
          username:
          # git 仓库密码(公开库可以不用填写)
password:- 注意这里 uri 只能写到仓库名
- 如果配置文件在仓库中多层目录下,那么 search-paths 就从根目录开始写起
server - 启动类
package com.zwc;

import org.springframework.boot.SpringApplication;
import org.springframework.boot.autoconfigure.SpringBootApplication;
import org.springframework.cloud.config.server.EnableConfigServer;

@SpringBootApplication
@EnableConfigServer
public class SpringcloudConfigGitServerServiceApplication {

    public static void main(String[] args) {
        SpringApplication.run(SpringcloudConfigGitServerServiceApplication.class, args);
    }

}
- 添加 @EnableConfigServer 注解表示开启配置中心
server - 启动项目
1. 项目启动成功后访问:http://localhost:8000/config-repo/dev(获取完整配置信息)
2. 输出内容:
{
    "name":"config-repo",
    "profiles":[
        "dev"
    ],
    "label":null,
    "version":"92bd1adf4d22d2a27ce34cd0abc7d1702ad8fff6",
    "state":null,
    "propertySources":[

    ]
}
3. 访问地址:http://localhost:8000/system/dev(获取完整配置信息)
4. 输出内容:
{
    "name":"system",
    "profiles":[
        "dev"
    ],
    "label":null,
    "version":"92bd1adf4d22d2a27ce34cd0abc7d1702ad8fff6",
    "state":null,
    "propertySources":[
        {
            "name":"https://github.com/intomylife/SpringCloud/springcloud-config-git/config-repo/system-dev.properties",
            "source":{
                "hello":"I'm dev."
            }
        }
    ]
}
5. 访问地址:http://localhost:8000/system-dev.properties(获取指定配置文件内容)
6. 输出内容:'hello: I'm dev.'
7. 证明 server 已经成功从远程仓库中获取到了配置信息
注:接口访问有如下规则:
/{application}/{profile}[/{label}]

/{application}-{profile}.yml

/{label}/{application}-{profile}.yml

/{application}-{profile}.properties

/{label}/{application}-{profile}.properties
client(读取 server 中的配置信息)
client - POM 文件
<?xml version="1.0" encoding="UTF-8"?>
<project xmlns="http://maven.apache.org/POM/4.0.0" xmlns:xsi="http://www.w3.org/2001/XMLSchema-instance"
         xsi:schemaLocation="http://maven.apache.org/POM/4.0.0 http://maven.apache.org/xsd/maven-4.0.0.xsd">
    <modelVersion>4.0.0</modelVersion>

    <!-- 继承父 -->
    <parent>
        <groupId>com.zwc</groupId>
        <artifactId>springcloud-config-git-service</artifactId>
        <version>1.0</version>
    </parent>

    <!-- 三坐标 -->
    <groupId>com.zwc</groupId>
    <artifactId>springcloud-config-git-client-service</artifactId>
    <version>1.0</version>

    <!-- 工程名称描述 -->
    <name>springcloud-config-git-client-service</name>
    <description>config client</description>

    <!-- 打包方式 -->
    <packaging>jar</packaging>

    <!-- 在 properties下声明相应的版本信息,然后在dependency下引用的时候用 ${} 就可以引入该版本jar包了 -->
    <properties>

    </properties>

    <!-- 加入依赖 -->
    <dependencies>
        <!-- commons工程 依赖 -->
        <dependency>
            <groupId>com.zwc</groupId>
            <artifactId>springcloud-config-git-commons</artifactId>
            <version>1.0</version>
        </dependency>

        <!-- config 依赖 -->
        <dependency>
            <groupId>org.springframework.cloud</groupId>
            <artifactId>spring-cloud-starter-config</artifactId>
        </dependency>
    </dependencies>

    <!-- 插件依赖 -->
    <build>
        <plugins>
            <plugin>
                <groupId>org.springframework.boot</groupId>
                <artifactId>spring-boot-maven-plugin</artifactId>
            </plugin>
        </plugins>
    </build>

</project>
- 主要加入 spring-cloud-starter-config 依赖
client - application.yml 配置文件
# 端口
server:
  port: 8001

spring:
  application:
    # 应用名称
    name: config-git-client
client - bootstrap.yml 配置文件(注意)
spring:
  cloud:
    config:
      # 仓库地址
      uri: http://127.0.0.1:8000
      # 对应 {label} 部分,即 Git 的分支
      label: master
      # 对应 {application} 部分
      name: system
      # 对应 {profile} 部分
profile: dev- bootstrap.yml 配置文件加载先于 application.yml 配置文件
- 与 Spring Cloud Config 相关的属性必须配置在 bootstrap.yml 中
- 仓库地址就是上面的 server
- 从 server 中读取 dev(开发)环境的配置文件信息
client - controller 前端控制器
package com.zwc.client.controller;

import org.springframework.beans.factory.annotation.Value;
import org.springframework.web.bind.annotation.RequestMapping;
import org.springframework.web.bind.annotation.RestController;

/**
 * @ClassName HelloController
 * @Desc TODO   读取 git 配置文件
 * @Date 2019/6/2 16:54
 * @Version 1.0
 */
@RestController
public class HelloController {

    @Value("${hello}")
    private String hello;

    /*
     * @ClassName HelloController
     * @Desc TODO   读取 git 配置文件
     * @Date 2019/6/2 16:56
     * @Version 1.0
     */
    @RequestMapping("/hello")
    public String hello() {
        return this.hello;
    }

}
- 直接使用 @Value 注解就可以从 server 中读取到对应的配置信息
client - 启动类
package com.zwc;

import org.springframework.boot.SpringApplication;
import org.springframework.boot.autoconfigure.SpringBootApplication;

@SpringBootApplication
public class SpringcloudConfigGitClientServiceApplication {

    public static void main(String[] args) {
        SpringApplication.run(SpringcloudConfigGitClientServiceApplication.class, args);
    }

}
- 只需要 @SpringBootApplication 注解
client - 启动项目
1. 项目启动成功后访问:http://localhost:8001/hello
2. 输出内容:'I'm dev.'
3. 证明 client 已经成功从 server 中读取到了配置信息
service 工程 - 项目结构
把多工程项目使用 IntelliJ IDEA 打开
- 把项目从 GitHub 中下载到你的本地
- 打开 IntelliJ IDEA
- 点击 File -> Open
- 打开你下载到本地的项目目录
- springcloud-config-git -> springcloud-config-git-service(选择打开此工程)
- 打开 service 工程后
- 再次点击 File -> Project Structrue
- 选择 Modules,点击 '+' 符号
- 点击 Import Module
- 还是打开你下载到本地的项目目录
- springcloud-config-git -> springcloud-config-git-commons -> pom.xml
- 点击 OK
- 点击 Next,Finish
- 点击 Apply,OK
希望能够帮助到你
over