1. IDEA 新建 SpringBoot 项目(略),以作为服务监控端。
2. pom.xml 文件引入依赖:
<dependency> <groupId>de.codecentric</groupId> <artifactId>spring-boot-admin-server</artifactId> <version>1.5.7</version> </dependency> <dependency> <groupId>de.codecentric</groupId> <artifactId>spring-boot-admin-server-ui</artifactId> <version>1.5.7</version> </dependency> <dependency> <groupId>de.codecentric</groupId> <artifactId>spring-boot-admin-server-ui-login</artifactId> <version>1.5.7</version> </dependency> |
3. 配置文件 application.properties:
# 端口号 server.port=9000 spring.application.name=Spring Boot Admin Server spring.jackson.serialization.indent-output=true # 登陆帐户 spring.boot.admin.username="${security.user.name}" # 登陆密码 spring.boot.admin.password="${security.user.password}" spring.boot.admin.client.metadata.user.name="${security.user.name}" spring.boot.admin.client.metadata.user.password="${security.user.password}" security.user.name=user security.user.password=pass endpoints.health.sensitive=false |
4. SpringBoot 启动类上使用 @EnableAdminServer 注解激活 SpringBoot Admin:
@SpringBootApplication @EnableAdminServer public class IotAdminServerApplication { public static void main(String[] args) { SpringApplication.run(IotAdminServerApplication.class, args); } } |
5. 新建一个 config 包,添加一个类 SecurityConfig.java 继承 WebSecurityConfigurerAdapter.java:
import org.springframework.security.config.annotation.web.builders.HttpSecurity; import org.springframework.security.config.annotation.web.configuration.WebSecurityConfigurerAdapter; public class SecurityConfig extends WebSecurityConfigurerAdapter { @Override protected void configure(HttpSecurity http) throws Exception { // Page with login form is served as /login.html and does a POST on /login http.formLogin().loginPage("/login.html").loginProcessingUrl("/login").permitAll(); // The UI does a POST on /logout on logout http.logout().logoutUrl("/logout"); // The ui currently doesn't support csrf http.csrf().disable(); // Requests for the login page and the static assets are allowed http.authorizeRequests() .antMatchers("/login.html", "/**/*.css", "/img/**", "/third-party/**") .permitAll(); // ... and any other request needs to be authorized http.authorizeRequests().antMatchers("/**").authenticated(); // Enable so that the clients can authenticate via HTTP basic for registering http.httpBasic(); } } |
6. 服务监控端搭建完成,右键 SpringBoot 启动类 Application.java 运行 run 启动
7. 浏览器地址栏输入 http://localhost:9000 登陆用户名:user 密码:pass 出现以下界面:
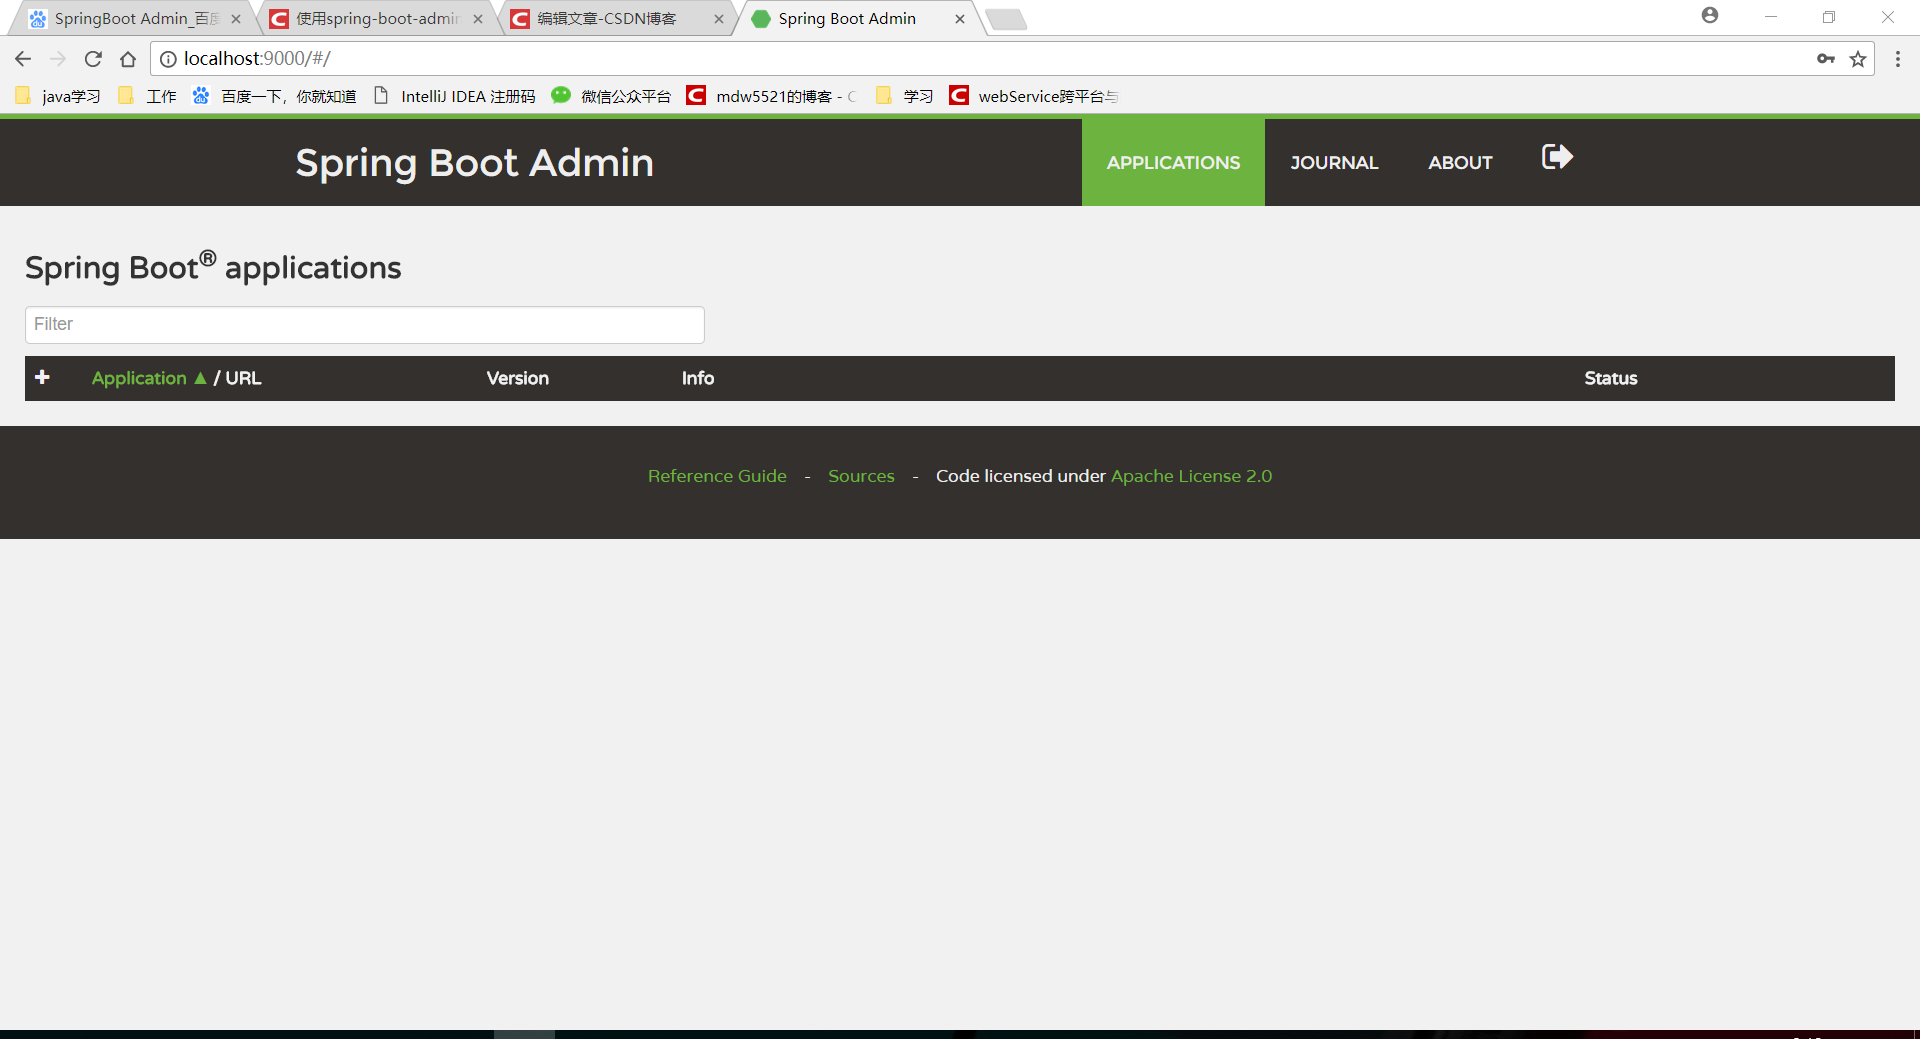 |
8. 发现界面光秃秃的什么都没有,不要着急,那是因为我们还没有配置被监控端。
9. 打开需要被监控端项目的 pom.xml 文件引入依赖:
<dependency> <groupId>de.codecentric</groupId> <artifactId>spring-boot-admin-starter-client</artifactId> <version>1.5.7</version> </dependency> |
10. 配置文件application.properties 或者 application.yml 任意位置添加如下配置:
### Spring Boot Admin Client 端配置 ## 指定client的名字 spring.application.name=ecej ## Admin Server 中配置的 username 和 password spring.boot.admin.username=user spring.boot.admin.password=pass ## 关闭身份验证 security.basic.enabled=false ## 配置端口 server.port=8080 ## 配置Admin Server的地址 spring.boot.admin.url=http://localhost:9000 ## 关闭安全验证 management.security.enabled=false info.version=@project.version@ |
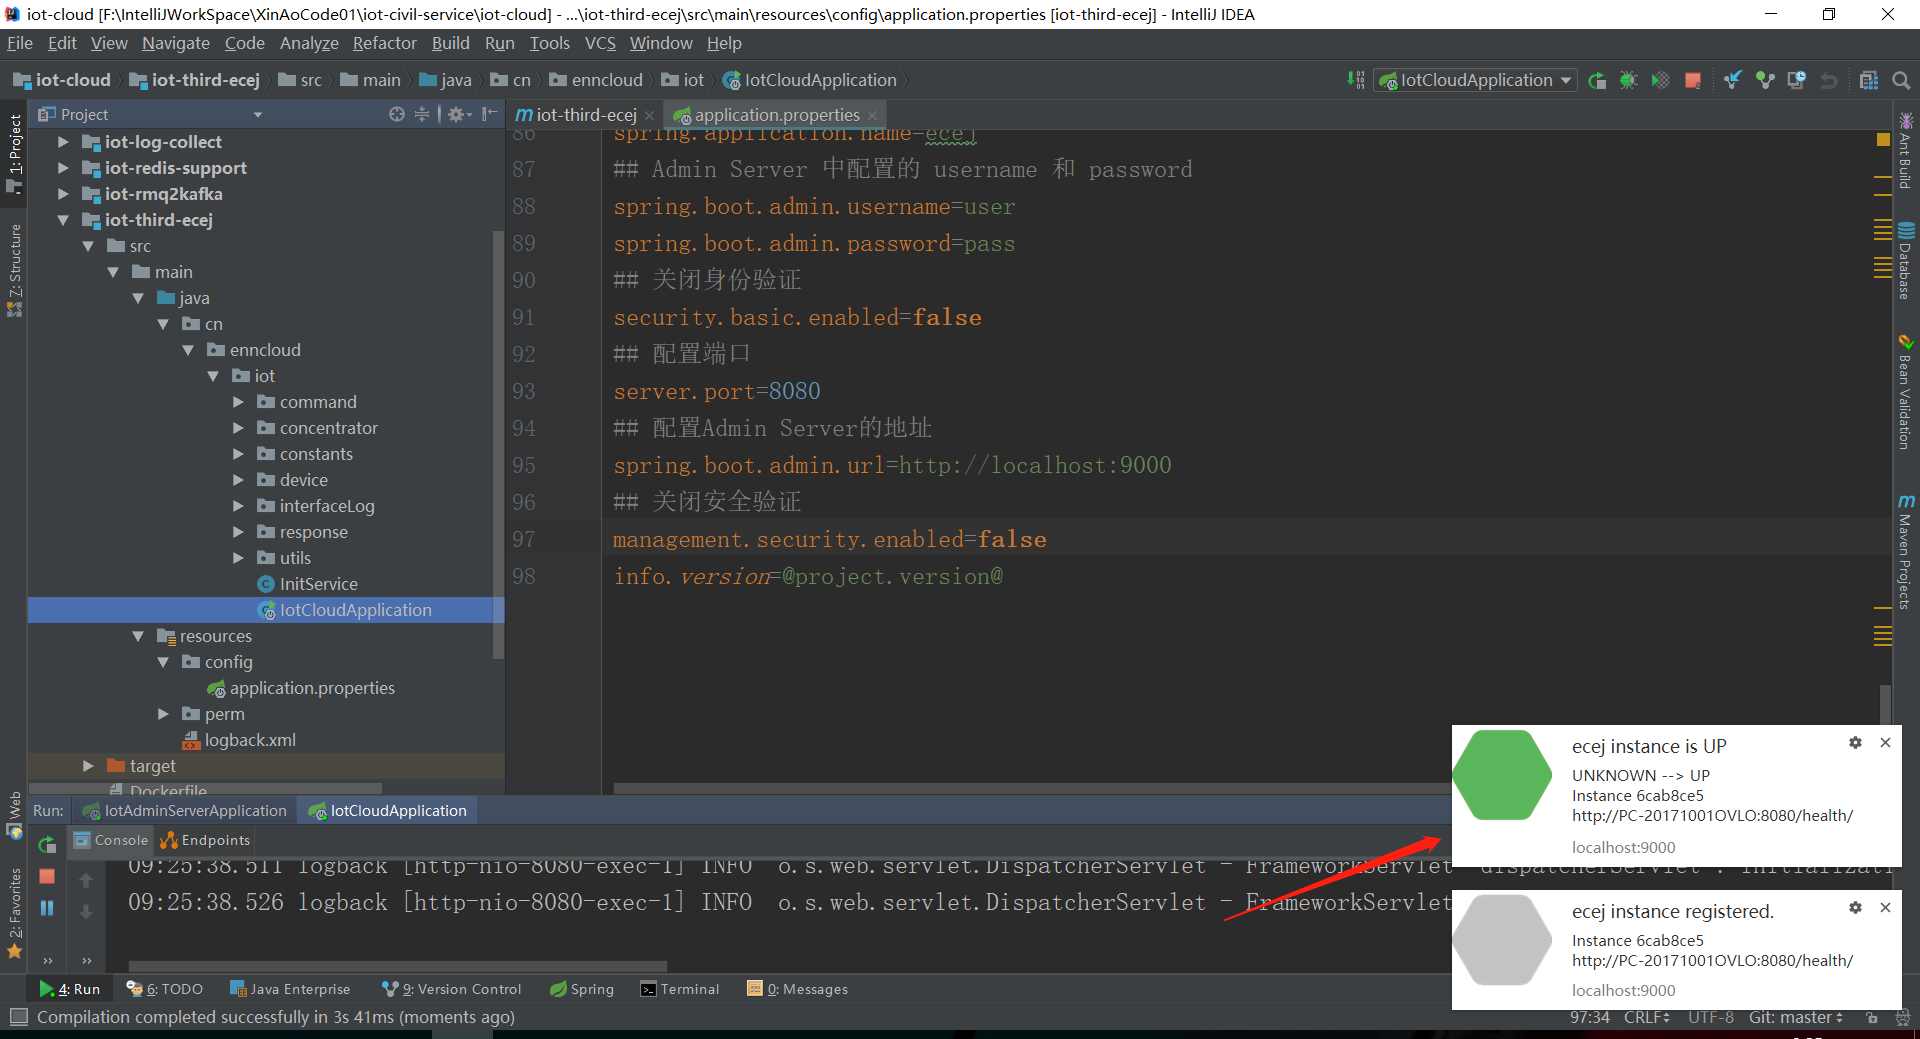
11. 被监控端搭建完成,右键 SpringBoot 启动类 Application.java 运行 run 启动,启动完成后,右下角会有如图提示:
 |
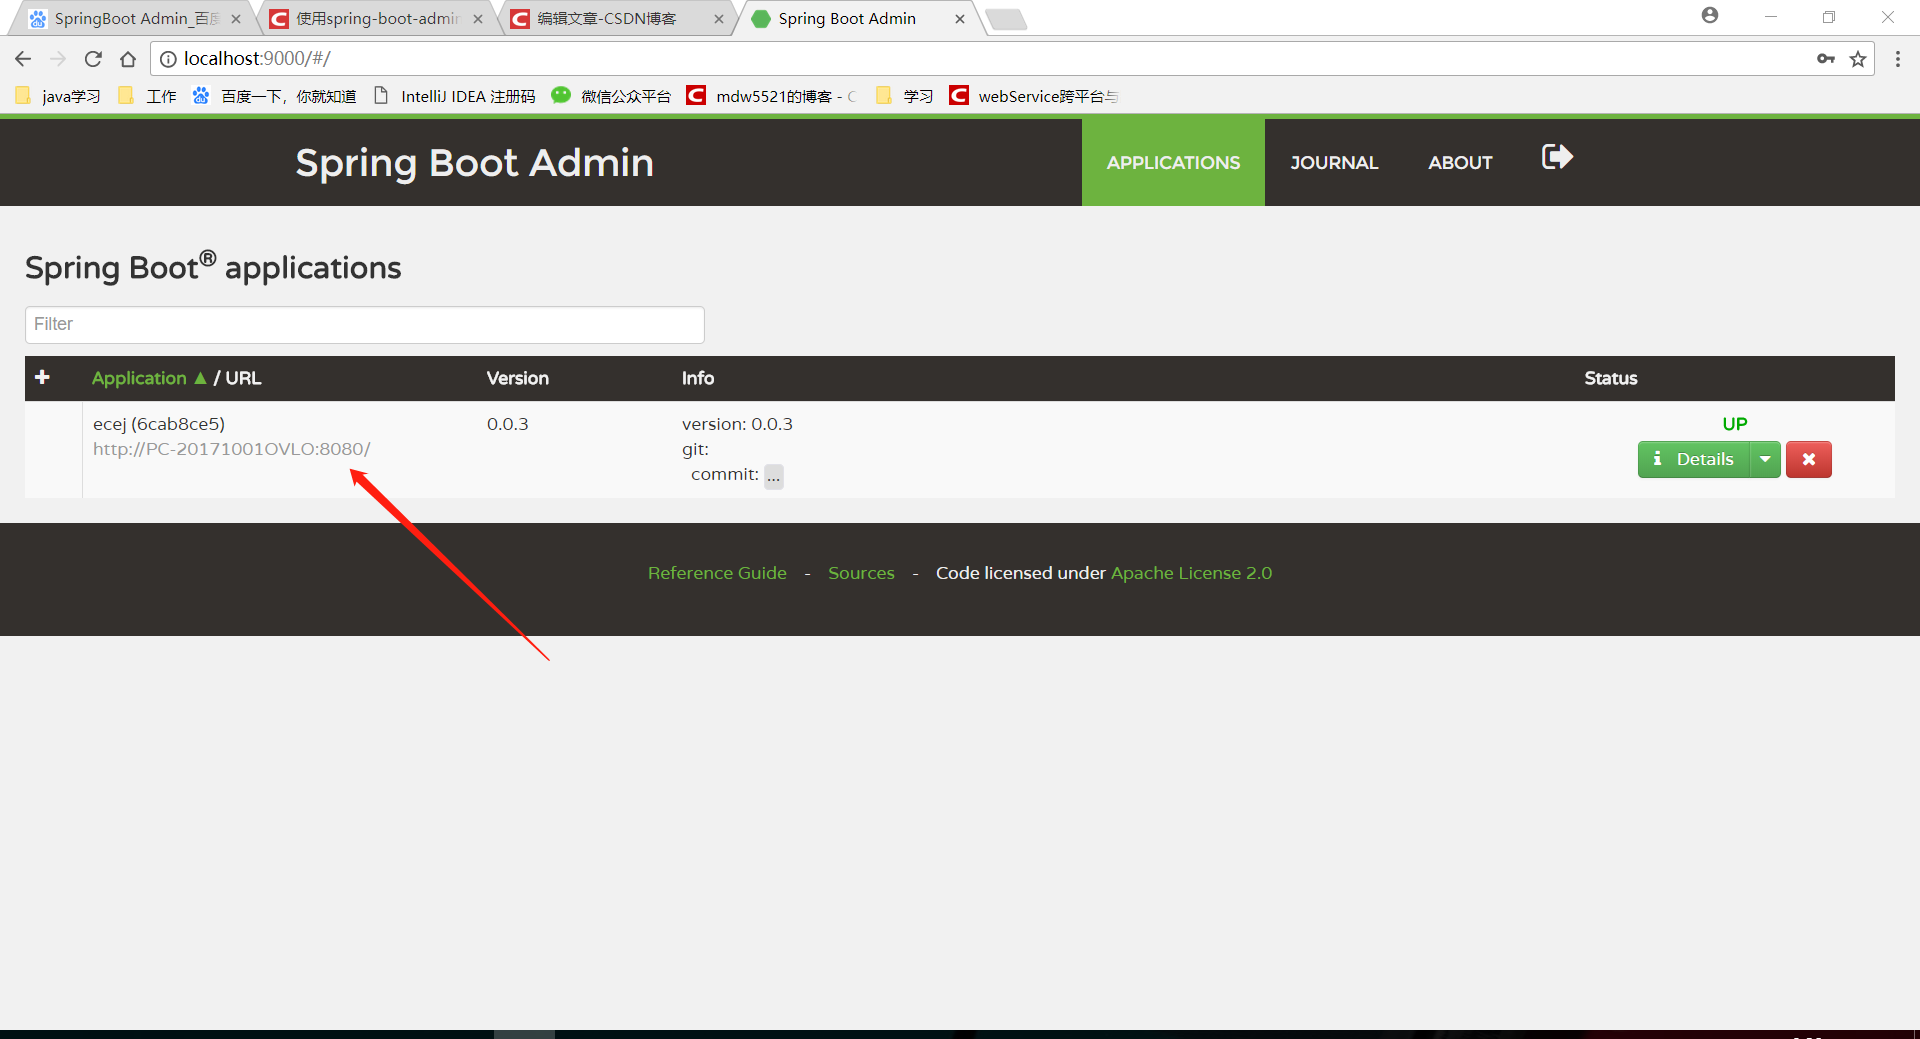
12. 打开浏览器 http://localhost:9000 页面,就可以监控启动的服务了。
 |