转载请标明出处:http://blog.csdn.net/zhaoyanjun6/article/details/80762922
本文出自【赵彦军的博客】
简介
Spring Boot Admin 是一个管理和监控你的 Spring Boot 应用程序的应用程序。 这些应用程序通过 Spring Boot Admin Client(通过 HTTP)注册或者使用 Spring Cloud(例如 Eureka)发现。UI只是 Spring Boot Actuator端点上的一个 AngularJs 应用程序。
Spring Boot Admin 是一个管理和监控 Spring Boot 应用程序的开源项目。分为admin-server 与 admin-client 两个组件,admin-server通过采集 actuator 端点数据,显示在spring-boot-admin-ui 上,已知的端点几乎都有进行采集,通过 spring-boot-admin 可以动态切换日志级别、导出日志、导出heapdump、监控各项指标 等等….
Spring Boot Admin 在对单一应用服务监控的同时也提供了集群监控方案,支持通过eureka、consul、zookeeper等注册中心的方式实现多服务监控与管理…
相关文档:http://codecentric.github.io/spring-boot-admin/current/
服务端集成
gradle 添加依赖
buildscript {
    ext {
        springBootVersion = '2.0.3.RELEASE'
    }
    repositories {
        mavenCentral()
    }
    dependencies {
        classpath("org.springframework.boot:spring-boot-gradle-plugin:${springBootVersion}")
    }
}

apply plugin: 'java'
apply plugin: 'eclipse'
apply plugin: 'org.springframework.boot'
apply plugin: 'io.spring.dependency-management'

group = 'com.admin'
version = '0.0.1-SNAPSHOT'
sourceCompatibility = 1.8

repositories {
    mavenCentral()
}


dependencies {
    compile('org.springframework.boot:spring-boot-starter-web')

    //服务端:带UI界面
    compile 'de.codecentric:spring-boot-admin-starter-server:2.0.0'
}
在 application.yml 中添加配置文件,定义 admin_server 运行在 8088 端口。
server:
  port: 8088
在 ServerApplication 里面添加配置
package com.admin.server;

import de.codecentric.boot.admin.server.config.EnableAdminServer;
import org.springframework.boot.SpringApplication;
import org.springframework.boot.autoconfigure.EnableAutoConfiguration;
import org.springframework.context.annotation.Configuration;

@Configuration
@EnableAutoConfiguration
@EnableAdminServer
public class ServerApplication {

    public static void main(String[] args) {
        SpringApplication.run(ServerApplication.class, args);
    }
}
现在我们把 ServerApplication 运行起来,在浏览器中输入 http://localhost:8088/ 可以看到如下界面。
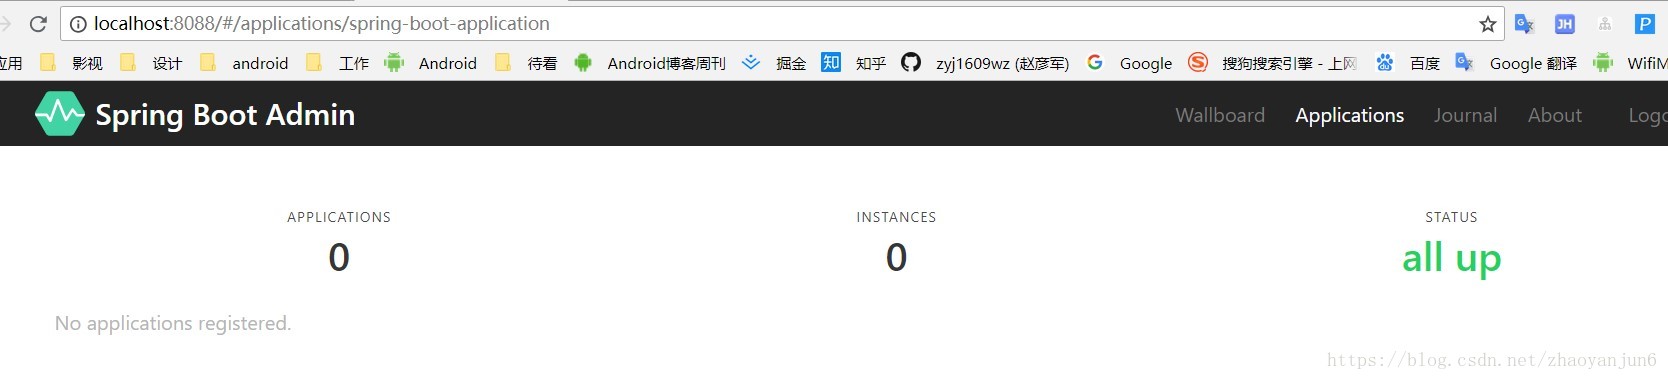
到这里,我们的 server 端已经运行起来了。
客户端集成
gradle 添加依赖
buildscript {
    ext {
        springBootVersion = '2.0.3.RELEASE'
    }
    repositories {
        mavenCentral()
    }
    dependencies {
        classpath("org.springframework.boot:spring-boot-gradle-plugin:${springBootVersion}")
    }
}

apply plugin: 'java'
apply plugin: 'eclipse'
apply plugin: 'org.springframework.boot'
apply plugin: 'io.spring.dependency-management'

group = 'com.admin'
version = '0.0.1-SNAPSHOT'
sourceCompatibility = 1.8

repositories {
    mavenCentral()
}


dependencies {
    compile('org.springframework.boot:spring-boot-starter-web')

    //客户端包
    compile 'de.codecentric:spring-boot-admin-starter-client:2.0.0'

    compile ('org.springframework.boot:spring-boot-starter-security')
}
在 application.yml 中添加配置文件,定义 admin_client 运行在 8081 端口。
server:
  port: 8081
spring:
  boot:
    admin:
      client:
        url: "http://localhost:8088"
management:
  endpoints:
    web:
      exposure:
        include: "*"
配置说明
//定义client注册服务到8088端口
url: "http://localhost:8088"

//开放所有的接口监听
include: "*"
最后把 ClientApplication 运行起来,可以看到
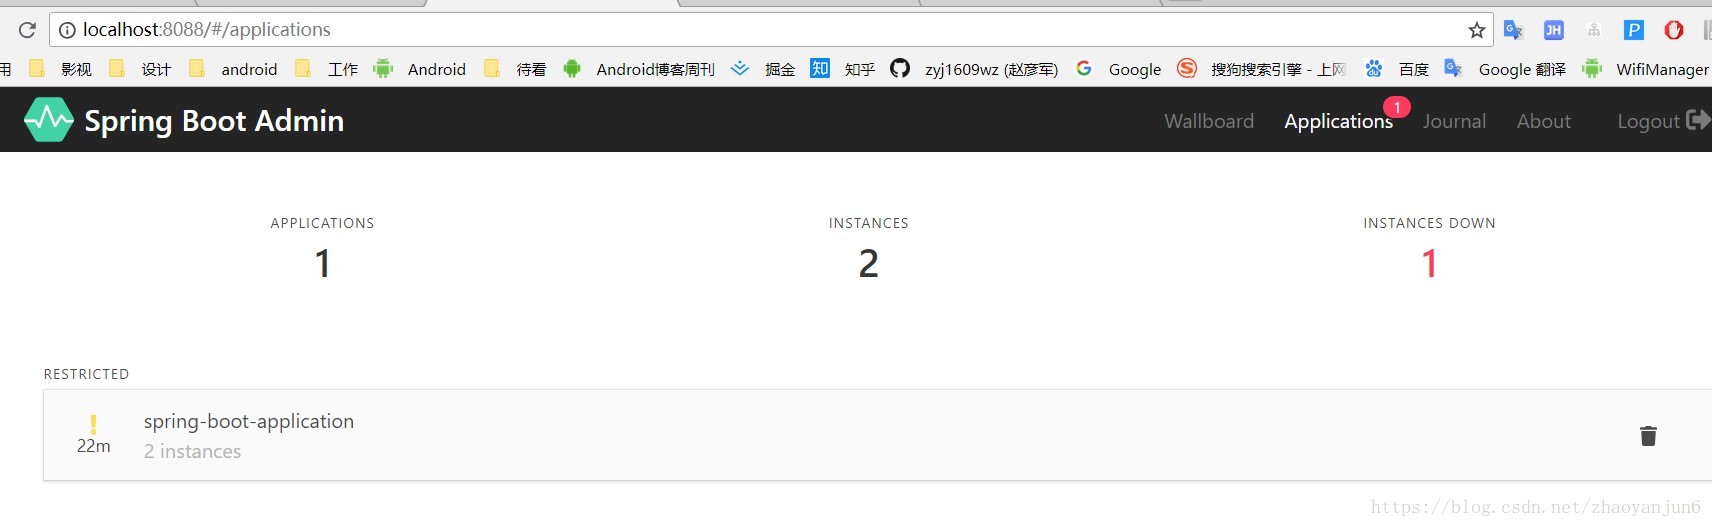
已经有 client 连接上 server 服务了。
总结
本文所有代码已经上传至 GitHub
地址: https://github.com/zyj1609wz/SpringBootAdmin
个人微信号:zhaoyanjun125 , 欢迎关注
