文件上传
- 前端代码
<script src="https://cdn.jsdelivr.net/npm/vue/dist/vue.js"></script>
<script src="https://unpkg.com/element-ui/lib/index.js"></script>
<link
rel="stylesheet"
href="https://unpkg.com/element-ui/lib/theme-chalk/index.css"
/>
<div id="app">
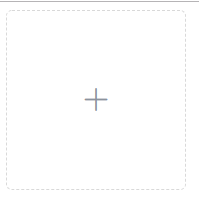
<el-upload
class="avatar-uploader"
action="http://localhost:3000/users/upload"
:show-file-list="false"
:on-success="handleUploadSuccess"
:before-upload="beforeUploadUpload"
>
<img v-if="imageUrl" :src="imageUrl" class="avatar" />
<i v-else class="el-icon-plus avatar-uploader-icon"></i>
</el-upload>
</div>
<script>
var app = new Vue({
el: "#app",
data(){
return :{
imageUrl: ""
};
},
methods: {
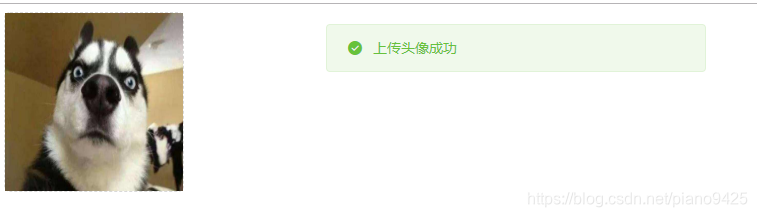
handleUploadSuccess(res, file){
this.$message.success("上传头像成功");
this.imageUrl = URL.createObjectURL(file.raw);
},
beforeUploadUpload(file){
const isJPG = file.type === 'image/jpeg';
const isLt2M = file.size / 1024 /1024 < 2;
if(!isJPG) {
this.$message.error("上传头像图片只能是 JPG 格式!");
}
if(!isLt2M){
this.$message.error("上传头像图片大小不能超过 2MB!");
}
return isJPG && isLt2M;
}
}
})
</script>
- 说明:
- vscode使用
alt+b打开html文件,使用的协议是file. el-upload中的action属性,是点击后请求的路由连接,是http协议(后端需要设置跨域)on-success: 成功后前端的回调before-upload: 发出ajax请求前,进行校验this.$message: 是element-ui的消息函数.
const Koa = require("koa");
const app = new Koa();
const Router = require("koa-router");
const router = new Router({prefix,"/users"});
const cors = require("koa2-cors");
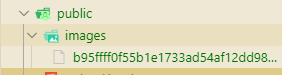
const __ROOTDIR__ = "./public/images";
const upload = require("koa-multer")({dest: __ROOTDIR__});
app.use(cors());
router.post("/upload", upload.single("file"), ctx=>{
ctx.body ="上传成功"
})
- 说明:
__ROOTDIR__: 代表上传的资源存储的文件目录upload.single: 是koa-multer库提供的一个函数,上传一个文件
美化一下前端代码:
- upload.html
<!DOCTYPE html>
<html lang="en">
<head>
  <meta charset="UTF-8">
  <meta name="viewport" content="width=device-width, initial-scale=1.0">
  <meta http-equiv="X-UA-Compatible" content="ie=edge">
  <script src="https://cdn.jsdelivr.net/npm/vue/dist/vue.js"></script>
  <script src="https://unpkg.com/element-ui/lib/index.js"></script>
  <link rel="stylesheet" href="https://unpkg.com/element-ui/lib/theme-chalk/index.css">
  <style>
    .avatar-uploader .el-upload{
      border: 1px dashed #d9d9d9;
      border-radius: 6px;
      cursor: pointer;
      position: relative;
    }
    .avatar-uploader-icon{
      font-size: 28px;
      color: #8c939d;
      width: 178px;
      height: 178px;
      line-height: 178px;
      text-align: center;
    }
    .avatar{
      width: 178px;
      height: 178px;
      display: block;
    }
  </style>
  <title>文件上传</title>
</head>
<body>
  <div id="app">
    <!-- ajax方式上传-->
    <el-upload
    class="avatar-uploader"
    action="http://localhost:3000/users/upload"
    :show-file-list="false"
    :on-success="handleAvatarSuccess"
    :before-upload="beforeAvatarUpload">
    <img v-if="imageUrl" :src="imageUrl" class="avatar" />
    <i v-else class="el-icon-plus avatar-uploader-icon"></i>
  </el-upload>
  </div>
  <script>
    var app = new Vue({
      el:"#app",
      data(){
        return {
          imageUrl:""
        };
      },
      methods: {
        handleAvatarSuccess(res, file){
          this.$message.success("上传头像成功");
          this.imageUrl = URL.createObjectURL(file.raw);
        },
        beforeAvatarUpload(file) {
          const isJPG = file.type === 'image/jpeg';
          const isLt2M = file.size / 1024 / 1024 < 2;

          if(!isJPG){
            this.$message.error("上传头像图片只能是 JPG 格式!");
          }
          if(!isLt2M){
            this.$message.error("上传头像图片大小不能超过 2MB!");
          }
          return isJPG && isLt2M;
        }
      },
    })
  </script>
</body>
</html>
启动后端
nodemon user.js
在Public/images下可以看见上传的图片