核心代码
const upload = require('koa-multer') ({dest: './public/images'});
router.post('/upload', upload.single('file'), ctx=>{
	console.log('file', ctx.req.file);
	console.log('body', ctx.req.body);
	ctx.body = '上传成功';
})
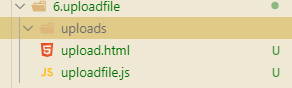
目录结构如下
基本思路
- 1.通过浏览器访问url: http://localhost:3000/upload
- 2.服务器(koa)监听到对应的路由,调用路由处理函数
- 3.使用nunjucks模板引擎进行渲染,并返回给浏览器
- 4.浏览器渲染完毕后显示出来.
- 5.点击上传文件->上传
- 6.服务端监听到上传的POST请求,进行相应的处理并将处理结果返回给前端
总体代码
const koa = require('koa');
const app = new koa();
const router = new require('koa-router')();
const multer = require('koa-multer');
const nunjucks = require('koa-nunjucks-2');
const path = require('path');
const fs = require('fs');
app.use(nunjucks({
ext: 'html',
path: __dirname,
nunjucksConfig: {
trimBlocks: true
}
}));
const upload = multer({
dest: 'uploads/'
});
const types = upload.single('avatar');
router.get('/upload', async (ctx, next) => {
await ctx.render('upload')
})
router.post('/profile', types, async (ctx, next) => {
const { originalname, path: out_path, mimetype} = ctx.req.file;
let newName = out_path + path.parse(originalname).ext;
let err = fs.renameSync(out_path, newName);
let result;
if(err){
result = JSON.stringify(err);
} else {
result = `<h1>upload success</h1>`;
}
ctx.body = result;
});
app.use(router.routes());
app.listen(3000, async () => {
console.log('Server is running at http://localhost:3000');
})
<!DOCTYPE html>
<html lang="en">

<head>
    <meta charset="UTF-8">
    <title>Document</title>
</head>

<body>
    <form method="post" action="/profile" enctype="multipart/form-data">
        选择图片: <input name="avatar" id="upfile" type="file" />
        <input type="submit" value="提交" />
    </form>
</body>

</html>
Element-ui组件(前端)文件上传
<!DOCTYPE html>
<html lang="en">
<head>
<meta charset="UTF-8">
<meta name="viewport" content="width=device-width, initial-scale=1.0">
<meta http-equiv="X-UA-Compatible" content="ie=edge">
<script src="https://cdn.jsdelivr.net/npm/vue/dist/vue.js"></script>
<script src="https://unpkg.com/element-ui/lib/index.js"></script>
<link rel="stylesheet" href="https://unpkg.com/element-ui/lib/theme-chalk/index.css">
<style>
.avatar-uploader .el-upload{
border: 1px dashed #d9d9d9;
border-radius: 6px;
cursor: pointer;
position: relative;
}
.avatar-uploader-icon{
font-size: 28px;
color: #8c939d;
width: 178px;
height: 178px;
line-height: 178px;
text-align: center;
}
.avatar{
width: 178px;
height: 178px;
display: block;
}
</style>
<title>文件上传</title>
</head>
<body>
<div id="app">
<el-upload
class="avatar-uploader"
action="http://localhost:3000/users/upload"
:show-file-list="false"
:on-success="handleAvatarSuccess"
:before-upload="beforeAvatarUpload">
<img v-if="imageUrl" :src="imageUrl" class="avatar" />
<i v-else class="el-icon-plus avatar-uploader-icon"></i>
</el-upload>
</div>
<script>
var app = new Vue({
el:"#app",
data(){
return {
imageUrl:""
};
},
methods: {
handleAvatarSuccess(res, file){
this.$message.success("上传头像成功");
this.imageUrl = URL.createObjectURL(file.raw);
},
beforeAvatarUpload(file) {
const isJPG = file.type === 'image/jpeg';
const isLt2M = file.size / 1024 / 1024 < 2;
if(!isJPG){
this.$message.error("上传头像图片只能是 JPG 格式!");
}
if(!isLt2M){
this.$message.error("上传头像图片大小不能超过 2MB!");
}
return isJPG && isLt2M;
}
},
})
</script>
</body>
</html>
