最近做项目需要连接ubuntu的图像界面,开始用XQuartZ,界面太low太丑,而且有些应用启动不了;后来转到使用x11vnc,在网络上查看了很多交安装x11vnc的方法:
下面这种方法在Ubuntu18.04不能用
1.安装
sudo apt-get install x11vnc
2.配置vnc密码
x11vnc -storepasswd
3.启动vnc服务
x11vnc -forever -shared -rfbauth ~/.vnc/passwd
会提示错误:
04/12/2019 14:14:51 passing arg to libvncserver: -rfbauth
04/12/2019 14:14:51 passing arg to libvncserver: /home/ml/.vnc/passwd
04/12/2019 14:14:51 x11vnc version: 0.9.13 lastmod: 2011-08-10  pid: 21722
04/12/2019 14:14:51 XOpenDisplay("") failed.
04/12/2019 14:14:51 Trying again with XAUTHLOCALHOSTNAME=localhost ...
04/12/2019 14:14:51
04/12/2019 14:14:51 *** XOpenDisplay failed. No -display or DISPLAY.
04/12/2019 14:14:51 *** Trying ":0" in 4 seconds.  Press Ctrl-C to abort.
04/12/2019 14:14:51 *** 1 2 3 4
Invalid MIT-MAGIC-COOKIE-1 key04/12/2019 14:14:55 XOpenDisplay(":0") failed.
04/12/2019 14:14:55 Trying again with XAUTHLOCALHOSTNAME=localhost ...
Invalid MIT-MAGIC-COOKIE-1 key04/12/2019 14:14:55 XOpenDisplay(":0") failed.
04/12/2019 14:14:55 Trying again with unset XAUTHLOCALHOSTNAME ...
Invalid MIT-MAGIC-COOKIE-1 key04/12/2019 14:14:55

04/12/2019 14:14:55 ***************************************
04/12/2019 14:14:55 *** XOpenDisplay failed (:0)

*** x11vnc was unable to open the X DISPLAY: ":0", it cannot continue.
*** There may be "Xlib:" error messages above with details about the failure.

Some tips and guidelines:

** An X server (the one you wish to view) must be running before x11vnc is
   started: x11vnc does not start the X server.  (however, see the -create
   option if that is what you really want).

** You must use -display <disp>, -OR- set and export your $DISPLAY
   environment variable to refer to the display of the desired X server.
 - Usually the display is simply ":0" (in fact x11vnc uses this if you forget
   to specify it), but in some multi-user situations it could be ":1", ":2",
   or even ":137".  Ask your administrator or a guru if you are having
   difficulty determining what your X DISPLAY is.

** Next, you need to have sufficient permissions (Xauthority)
   to connect to the X DISPLAY.   Here are some Tips:

 - Often, you just need to run x11vnc as the user logged into the X session.
   So make sure to be that user when you type x11vnc.
 - Being root is usually not enough because the incorrect MIT-MAGIC-COOKIE
   file may be accessed.  The cookie file contains the secret key that
   allows x11vnc to connect to the desired X DISPLAY.
 - You can explicitly indicate which MIT-MAGIC-COOKIE file should be used
   by the -auth option, e.g.:
       x11vnc -auth /home/someuser/.Xauthority -display :0
       x11vnc -auth /tmp/.gdmzndVlR -display :0
   you must have read permission for the auth file.
   See also '-auth guess' and '-findauth' discussed below.

** If NO ONE is logged into an X session yet, but there is a greeter login
   program like "gdm", "kdm", "xdm", or "dtlogin" running, you will need
   to find and use the raw display manager MIT-MAGIC-COOKIE file.
   Some examples for various display managers:

     gdm:     -auth /var/gdm/:0.Xauth
              -auth /var/lib/gdm/:0.Xauth
     kdm:     -auth /var/lib/kdm/A:0-crWk72
              -auth /var/run/xauth/A:0-crWk72
     xdm:     -auth /var/lib/xdm/authdir/authfiles/A:0-XQvaJk
     dtlogin: -auth /var/dt/A:0-UgaaXa

   Sometimes the command "ps wwwwaux | grep auth" can reveal the file location.

   Starting with x11vnc 0.9.9 you can have it try to guess by using:

              -auth guess

   (see also the x11vnc -findauth option.)

   Only root will have read permission for the file, and so x11vnc must be run
   as root (or copy it).  The random characters in the filenames will of course
   change and the directory the cookie file resides in is system dependent.

See also: http://www.karlrunge.com/x11vnc/faq.html
下面方法在Ubuntu18.04能够成功启动x11vnc:
1、安装
sudo apt-get install x11vnc2、生成密码
sudo x11vnc -storepasswd3、编辑启动文
sudo vi /lib/systemd/system/x11vnc.service启动文件内容(USERNAME要替换成自己的用户名)
[Unit]
Description=Start x11vnc at startup.
After=multi-user.target

[Service]
Type=simple
ExecStart=/usr/bin/x11vnc -auth guess -forever -loop -noxdamage -repeat -rfbauth /home/USERNAME/.vnc/passwd -rfbport 5900 -shared

[Install]
WantedBy=multi-user.target
4、另一个窗口启动lightdm
sudo lightdm5、 添加到服务中
sudo systemctl daemon-reload
sudo systemctl enable x11vnc.service
sudo systemctl start x11vnc.service
6、重启验证服务(非必须步骤)
sudo reboot7、验证x11vnc服务
sudo netstat -an | grep 5900
tcp        0      0 0.0.0.0:5900            0.0.0.0:*               LISTEN
tcp6       0      0 :::5900                 :::*                    LISTEN
连接登陆服务
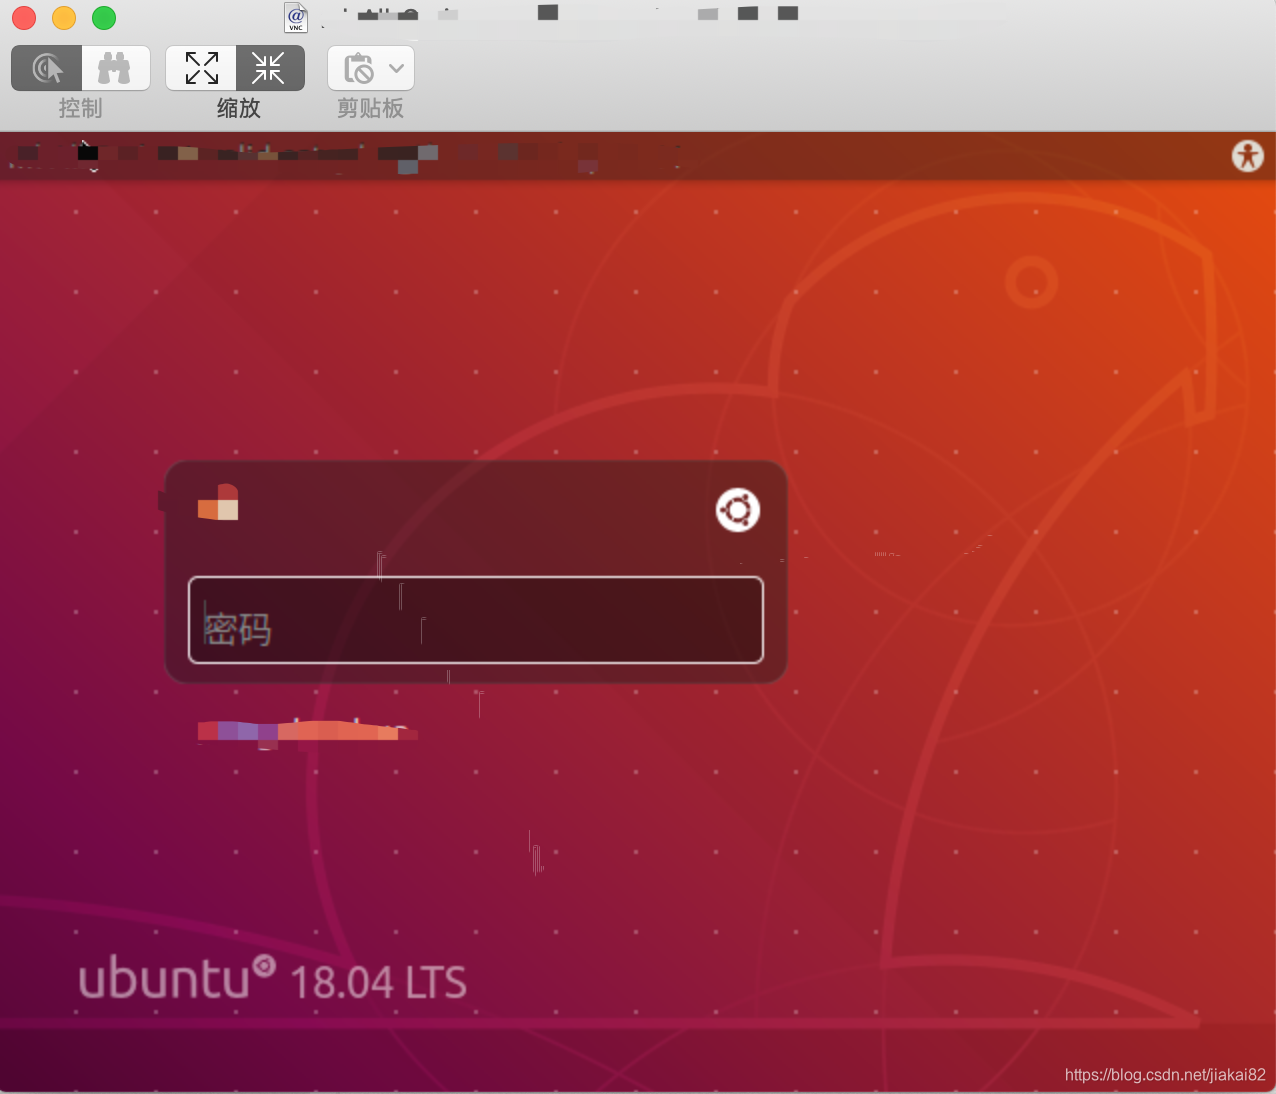
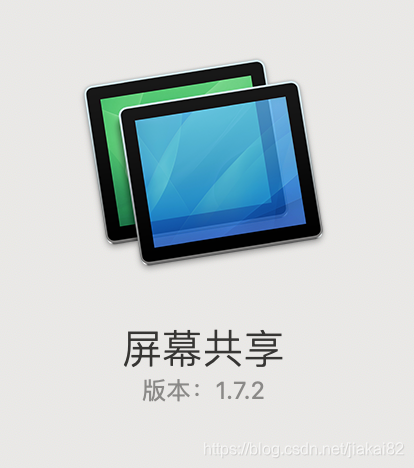
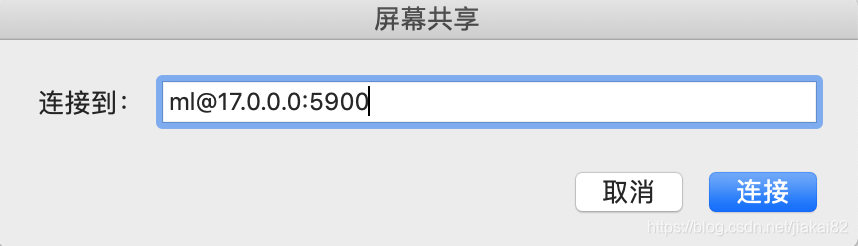
1、打开mac下自带软件“屏幕共享”即可连接(惊叹mac的强大之处,不需要安装第三方客户端)
2、注意连接字符串,其中ml和IP需要替换成你自己的
3、连接成功,可以在mac看到ubuntu登陆界面了(比XQuartZ效果好太多太多)