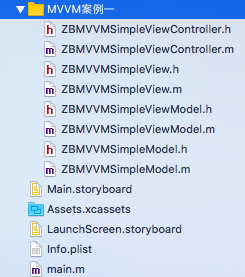
MVVM的核心在于:(个人意见) 1.MVVM的双向绑定; 2.Model与View解耦;
选用RAC实现MVVM架构,不是必要的,重要的实现架构,也可以自己用KVO实现,这里推荐使用Facebook开源的KVOController 框架。
一.MVVM架构

ZBMVVMSimpleViewController
协调viewModel绑定model,view绑定viewModel;
- (void)viewDidLoad
{
    [super viewDidLoad];

    //初始化
    self.simpleModel.name = @"帅斌";

    //创建视图
    [self.view addSubview:self.simpleView];

    /*绑定关系*/
    //viewModel绑定model
    [self.simpleViewModel bindModel:self.simpleModel];
    //view绑定viewModel
    [self.simpleView bindViewModel:self.simpleViewModel];

}
ZBMVVMSimpleView
创建视图,实现绑定viewModel的内部逻辑;
- (instancetype)init
{
    self = [super init];
    if(self){
        self.frame = [UIScreen mainScreen].bounds;
        self.backgroundColor = [UIColor whiteColor];

        self.nameButton = [UIButton buttonWithType:UIButtonTypeSystem];
        _nameButton.frame = CGRectMake(0, 0, 100, 50);
        _nameButton.center = CGPointMake(self.frame.size.width / 2.0, (self.frame.size.height / 3.0 * 1));
        _nameButton.backgroundColor = [UIColor blackColor];
        [_nameButton setTitleColor:[UIColor whiteColor] forState:UIControlStateNormal];
        [_nameButton addTarget:self action:@selector(nameButtonAction) forControlEvents:UIControlEventTouchUpInside];
        [self addSubview:_nameButton];
    }
    return self;
}
//按钮点击方法
- (void)nameButtonAction
{
    if(self.viewModel){
        [self.viewModel changeButtonTextAction];
    }
}
//绑定viewModel
- (void)bindViewModel:(id)viewModel
{
    self.viewModel = viewModel;
    @weakify(self);
    [[RACObserve(self.viewModel, nameStr) ignore:nil] subscribeNext:^(id  _Nullable x) {
        @strongify(self);
        [self.nameButton setTitle:x forState:UIControlStateNormal];
    }];
}
ZBMVVMSimpleViewModel
ZBMVVMSimpleViewModel.h部分: 对外暴露的一些可供调用的接口:
@interface ZBMVVMSimpleViewModel : NSObject

@property (nonatomic, strong) NSString *nameStr;

//绑定model
- (void)bindModel:(id)model;

//按钮点击方法的实现
- (void)changeButtonTextAction;

@end
ZBMVVMSimpleViewModel.m部分: 实现绑定model,按钮更换name;
@interface ZBMVVMSimpleViewModel()

@property (nonatomic, strong) ZBMVVMSimpleModel *model;
@property (nonatomic, assign) BOOL              isClick;

@end
@implementation ZBMVVMSimpleViewModel

//绑定model
- (void)bindModel:(id)model
{
    self.model = model;
    self.nameStr = self.model.name;
}

//按钮点击方法的实现
- (void)changeButtonTextAction
{
    _isClick = !_isClick;
    if(_isClick){
       self.model.name = @"火之玉";
    }else{
       self.model.name = @"帅斌";
    }
    self.nameStr = self.model.name;
}

@end
通过这个简单的案例,可以看出MVVM各个部分之间的关系以及如何实现这一架构;
MVVM的Model和View没有交互,交互移步到ViewModel;View持有ViewModel,ViewModel持有Model。
二.工程实践
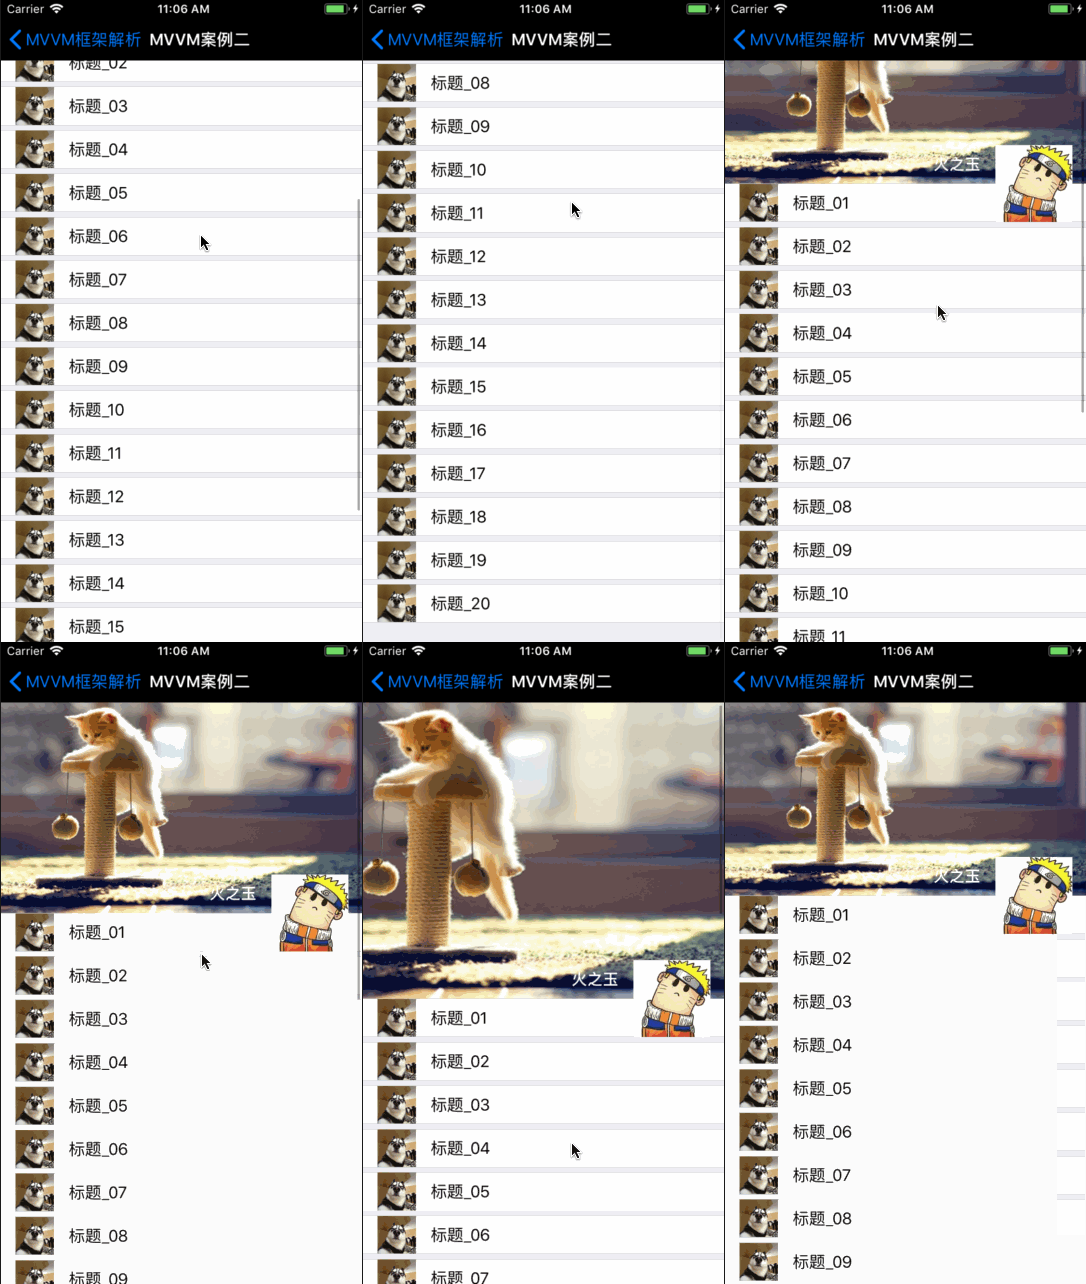
参照iOS MVVM+RAC 从框架到实战自己实现了个小demo:

这里原本想抽出tableView的dataSource父类,但看到网上一个比较好的案例,基于MVVM,用于快速搭建设置页,个人信息页的框架,也挺有意思的,学习了。
如何用 ReactiveCocoa 将 view-model 与视图控制器连接起来
//
// View Controller
//

- (void) viewDidLoad {
    [super viewDidLoad];

    RAC(self.viewModel,  username) = [myTextfield rac_textSignal];

    RACSignal *usernameIsValidSignal = RACObserve(self.viewModel,  usernameValid);

    RAC(self.goButton,  alpha) = [usernameIsValidSignal
        map:  ^(NSNumber *valid) {
            return valid.boolValue ? @1 :  @0.5;
        }];

    RAC(self.goButton,  enabled) = usernameIsValidSignal;

    RAC(self.avatarImageView,  image) = RACObserve(self.viewModel,  userAvatarImage);

    RAC(self.userNameLabel,  text) = RACObserve(self.viewModel,  userFullName);

    @weakify(self);
    [[[RACSignal merge: @[RACObserve(self.viewModel,  tweets),
                        RACObserve(self.viewModel,  allTweetsLoaded)]]
        bufferWithTime: 0 onScheduler: [RACScheduler mainThreadScheduler]]
        subscribeNext: ^(id value) {
            @strongify(self);
            [self.tableView reloadData];
        }];

    [[self.goButton rac_signalForControlEvents: UIControlEventTouchUpInside]
        subscribeNext:  ^(id value) {
            @strongify(self);
            [self.viewModel getTweetsForCurrentUsername];
        }];
}

-(UITableViewCell*)tableView: (UITableView *)tableView cellForRowAtIndexPath: (NSIndexPath *)indexPath {
    // if table section is the tweets section
    if (indexPath.section == 0) {
        MYTwitterUserCell *cell = [self.tableView dequeueReusableCellWithIdentifier: @"MYTwitterUserCell" forIndexPath: indexPath];

        // grab the cell view model from the vc view model and assign it
        cell.viewModel = self.viewModel.tweets[indexPath.row];
        return cell;
    } else {
        // else if the section is our loading cell
        MYLoadingCell *cell = [self.tableView dequeueReusableCellWithIdentifier: @"MYLoadingCell" forIndexPath: indexPath];
        [self.viewModel loadMoreTweets];
        return cell;
    }
}


//
// MYTwitterUserCell
//

// this could also be in cell init
- (void) awakeFromNib {
    [super awakeFromNib];

    RAC(self.avatarImageView, image) = RACObserve(self,  viewModel.tweetAuthorAvatarImage);
    RAC(self.userNameLabel, text) = RACObserve(self,  viewModel.tweetAuthorFullName);
    RAC(self.tweetTextLabel, text) = RACObserve(self,  viewModel.tweetContent);
}
