之前的文章中我们通过两种方式分别实现了描边效果,他们各有优缺点,也比较简单,今天我们来通过后期处理这种方式来实现描边效果,相对于之前两种实现方式要稍微复杂一点。
后期处理的描边最终效果图如下:

实现大致思路:
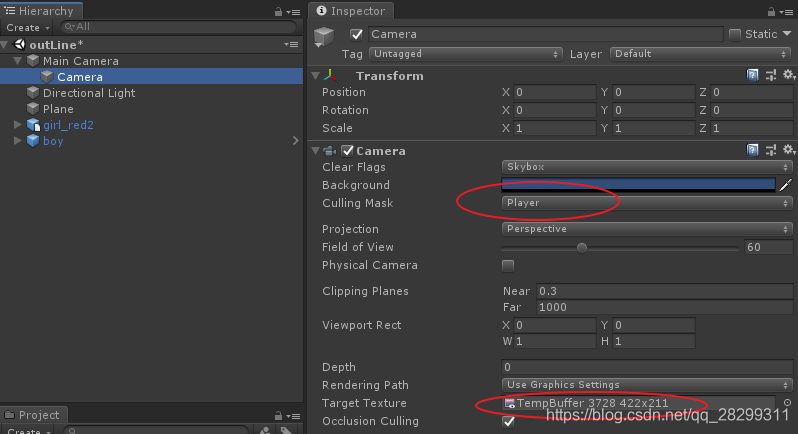
首先我们添加一个额外的摄像机用来专门渲染需要描边的对象,通过设置摄像机的LayerMask即可,然后将摄像机的Render Target设置为我们设定好的一张Render Texture上,设置如下:
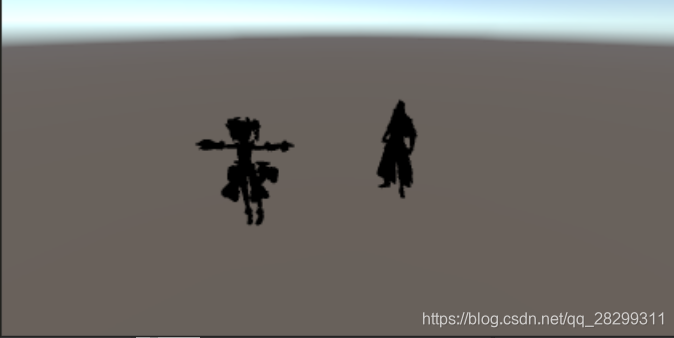
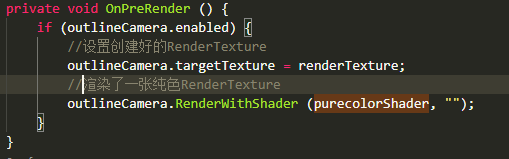
然后在渲染之前(可以通过Unity内置的方法OnPreRender处理),通过一个纯色shader来处理该Render Texture,使其变为纯色,如下图
关键代码如下:
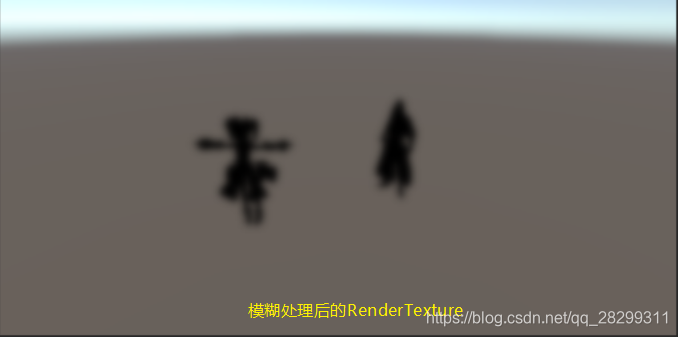
然后我们通过均值模糊或者高斯模糊来处理该RenderTexture,使其模糊 膨胀,然后和模糊之前的RenderTexture相减即可得到轮廓图。如图所示:
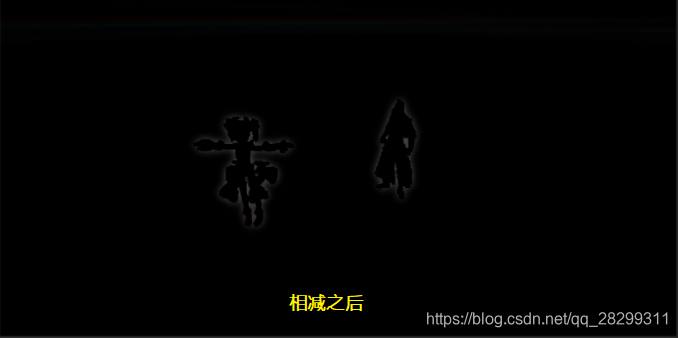
此时得到了轮廓图之后就好办了,直接和原图叠加即可得到最终的效果图

本篇文章采用了高斯模糊(参考了《Unity Shader入门精要》书中的高斯模糊)来处理RenderTexture,
高斯模糊也可以参考这里
最终代码如下:
Shader:
// Upgrade NOTE: replaced 'mul(UNITY_MATRIX_MVP,*)' with 'UnityObjectToClipPos(*)'
// ---------------------------【后处理-描边】---------------------------
Shader "lcl/screenEffect/outLine"
{
    // ---------------------------【属性】---------------------------
    Properties
    {
        _MainTex ("Texture", 2D) = "white" {}
    }
    // ---------------------------【子着色器】---------------------------
    SubShader
    {
        CGINCLUDE
        #include "UnityCG.cginc"
        sampler2D _MainTex;
        half4 _MainTex_TexelSize;
        float _BlurSize;
        sampler2D _BlurTex;
        sampler2D _SrcTex;
        fixed4 _OutlineColor;
        // ---------------------------【高斯模糊】---------------------------
        struct v2f
        {
            float4 pos : SV_POSITION;
            half2 uv[5]: TEXCOORD0;
        };

        //垂直方向的高斯模糊
        v2f vertBlurVertical(appdata_img v) {
            v2f o;
            o.pos = UnityObjectToClipPos(v.vertex);
            half2 uv = v.texcoord;
            o.uv[0] = uv;
            o.uv[1] = uv + float2(0.0, _MainTex_TexelSize.y * 1.0) * _BlurSize;
            o.uv[2] = uv - float2(0.0, _MainTex_TexelSize.y * 1.0) * _BlurSize;
            o.uv[3] = uv + float2(0.0, _MainTex_TexelSize.y * 2.0) * _BlurSize;
            o.uv[4] = uv - float2(0.0, _MainTex_TexelSize.y * 2.0) * _BlurSize;
            return o;
        }
        //水平方向的高斯模糊
        v2f vertBlurHorizontal(appdata_img v) {
            v2f o;
            o.pos = UnityObjectToClipPos(v.vertex);
            half2 uv = v.texcoord;
            o.uv[0] = uv;
            o.uv[1] = uv + float2(_MainTex_TexelSize.x * 1.0, 0.0) * _BlurSize;
            o.uv[2] = uv - float2(_MainTex_TexelSize.x * 1.0, 0.0) * _BlurSize;
            o.uv[3] = uv + float2(_MainTex_TexelSize.x * 2.0, 0.0) * _BlurSize;
            o.uv[4] = uv - float2(_MainTex_TexelSize.x * 2.0, 0.0) * _BlurSize;
            return o;
        }
        //高斯模糊片段着色器
        fixed4 fragBlur(v2f i) : SV_Target {
            float weight[3] = {0.4026, 0.2442, 0.0545};
            fixed3 sum = tex2D(_MainTex, i.uv[0]).rgb * weight[0];

            for (int it = 1; it < 3; it++) {
                sum += tex2D(_MainTex, i.uv[it*2-1]).rgb * weight[it];
                sum += tex2D(_MainTex, i.uv[it*2]).rgb * weight[it];
            }
            return fixed4(sum, 1.0);
        }
        // ---------------------------【轮廓图】---------------------------
        //Blur图和原图进行相减获得轮廓
        struct v2f_cull
        {
            float4 pos : SV_POSITION;
            half2 uv: TEXCOORD0;
        };
        v2f_cull vert_cull(appdata_img v)
        {
            v2f_cull o;
            o.pos = UnityObjectToClipPos(v.vertex);
            o.uv = v.texcoord.xy;
            //dx中纹理从左上角为初始坐标,需要反向
            //通过判断_MainTex_TexelSize.y是否小于0来检验是否开启了抗体锯齿
            #if UNITY_UV_STARTS_AT_TOP
                if (_MainTex_TexelSize.y < 0)
                o.uv.y = 1 - o.uv.y;
            #endif
            return o;
        }

        fixed4 frag_cull(v2f_cull i) : SV_Target
        {
            //取原始场景纹理进行采样
            fixed4 mainColor = tex2D(_MainTex, i.uv);
            //对blur之前的rt进行采样
            fixed4 srcColor = tex2D(_SrcTex, i.uv);
            //对blur后的纹理进行采样
            fixed4 blurColor = tex2D(_BlurTex, i.uv);
            //相减后得到轮廓图
            fixed4 outline = ( srcColor - blurColor) * _OutlineColor;
            //输出:blur部分为0的地方返回原始图像,否则为0,然后叠加描边
            fixed4 final = saturate(outline) + mainColor;
            return final;
        }
        ENDCG

        // No culling or depth
        Cull Off ZWrite Off ZTest Always

        //垂直高斯模糊
        Pass {
            CGPROGRAM
            #pragma vertex vertBlurVertical
            #pragma fragment fragBlur
            ENDCG
        }
        //水平高斯模糊
        Pass {
            CGPROGRAM
            #pragma vertex vertBlurHorizontal
            #pragma fragment fragBlur
            ENDCG
        }
        //轮廓图
        Pass {
            CGPROGRAM
            #pragma vertex vert_cull
            #pragma fragment frag_cull
            ENDCG
        }
    }
    FallBack "Diffuse"

}
using System.Collections;
using UnityEngine;

//编辑状态下也运行
[ExecuteInEditMode]
//继承自PostEffectsbase
public class OutLine : PostEffectsBase {
    //主相机
    private Camera mainCamera = null;
    //渲染纹理
    private RenderTexture renderTexture = null;
    private Material _material = null;

    /// 辅助摄像机
    public Camera outlineCamera;
    // 纯色shader
    public Shader purecolorShader;
    //描边处理的shader
    public Shader shader;
    //迭代次数
    [Range (0, 4)]
    public int iterations = 3;
    //模糊扩散范围
    [Range (0.2f, 3.0f)]
    public float blurSpread = 0.6f;
    private int downSample = 1;
    public Color outlineColor = new Color (1, 1, 1, 1);

    public Material outlineMaterial {
        get {
            _material = CheckShaderAndCreateMaterial (shader, _material);
            return _material;
        }
    }

    void Awake () {
        mainCamera = GetComponent<Camera> ();
        if (mainCamera == null)
            return;
        createPurecolorRenderTexture ();
    }

    // ---------------------------【创建一个RenderTexture】---------------------------
    private void createPurecolorRenderTexture () {
        outlineCamera.cullingMask = 1 << LayerMask.NameToLayer ("Player");
        int width = outlineCamera.pixelWidth >> downSample;
        int height = outlineCamera.pixelHeight >> downSample;
        renderTexture = RenderTexture.GetTemporary (width, height, 0);
    }

    // ---------------------------【渲染之前调用】---------------------------
    private void OnPreRender () {
        if (outlineCamera.enabled) {
            //设置创建好的RenderTexture
            outlineCamera.targetTexture = renderTexture;
            //渲染了一张纯色RenderTexture
            outlineCamera.RenderWithShader (purecolorShader, "");
        }
    }
    //-------------------------------------【OnRenderImage函数】------------------------------------
    // 说明:此函数在当完成所有渲染图片后被调用,用来渲染图片后期效果
    //--------------------------------------------------------------------------------------------------------
    private void OnRenderImage (RenderTexture source, RenderTexture destination) {
        int rtW = source.width >> downSample;
        int rtH = source.height >> downSample;
        var temp1 = RenderTexture.GetTemporary (rtW, rtH, 0);
        var temp2 = RenderTexture.GetTemporary (rtW, rtH, 0);
        // 高斯模糊处理
        Graphics.Blit (renderTexture, temp1);
        for (int i = 0; i < iterations; i++) {
            outlineMaterial.SetFloat ("_BlurSize", 1.0f + i * blurSpread);
            //垂直高斯模糊
            Graphics.Blit (temp1, temp2, outlineMaterial, 0);
            //水平高斯模糊
            Graphics.Blit (temp2, temp1, outlineMaterial, 1);
        }
        //用模糊图和原始图计算出轮廓图
        outlineMaterial.SetColor ("_OutlineColor", outlineColor);
        outlineMaterial.SetTexture ("_BlurTex", temp1);
        outlineMaterial.SetTexture ("_SrcTex", renderTexture);
        Graphics.Blit (source, destination, outlineMaterial, 2);
    }
}
参考
《Unity Shader 入门精要》
https://blog.csdn.net/puppet_master/article/details/54000951
