OkHttp也用了几年了,但其实也一直停留在会用的层面上,今天就来简单看看OkHttp里面又是怎样工作的吧。
基本使用
我一般阅读源码的入口都是从一些基本方法开始的,这样不会迷失在源码里,就算迷失了,也可以跟着用法在回来。
1、创建 OkHttpClient 对象。
  OkHttpClient mOkHttpClient;
  mOkHttpClient = new OkHttpClient.Builder()
            .addInterceptor(new HttpLoggingInterceptor())
            .build();
2、创建 Request 对象
    Request request = new Request.Builder()
            .url(url)
            .build();
3、创建 Call 对象
mCall = mOkHttpClient.newCall(request);
4、请求网络
        mCall.enqueue(new Callback() {
            @Override
            public void onFailure(Call call, IOException e) {
            }

            @Override
            public void onResponse(Call call, Response response) throws IOException {

            }
        });
通过上面四个步骤就可以完成一个基本OkHttp的网络请求了。下面我们跟着上面的请求步骤来看看OkHttp是怎样工作的吧
源码阅读
1、OkHttpClient 创建
很明显OkHttpClient 是通过Builder 模式进行创建和初始化的。
Builder 构造方法如下:
    public Builder() {
      dispatcher = new Dispatcher();
      protocols = DEFAULT_PROTOCOLS;
      connectionSpecs = DEFAULT_CONNECTION_SPECS;
      eventListenerFactory = EventListener.factory(EventListener.NONE);
      proxySelector = ProxySelector.getDefault();
      cookieJar = CookieJar.NO_COOKIES;
      socketFactory = SocketFactory.getDefault();
      hostnameVerifier = OkHostnameVerifier.INSTANCE;
      certificatePinner = CertificatePinner.DEFAULT;
      proxyAuthenticator = Authenticator.NONE;
      authenticator = Authenticator.NONE;
      connectionPool = new ConnectionPool();
      dns = Dns.SYSTEM;
      followSslRedirects = true;
      followRedirects = true;
      retryOnConnectionFailure = true;
      connectTimeout = 10_000;
      readTimeout = 10_000;
      writeTimeout = 10_000;
      pingInterval = 0;
    }
Builder 中是一系列参数的初始化,至于参数的意义,看名字也可以知道大概。
2、Request 对象
Request 也是Builder 模式创建的,我们看一下Builder 方法
    public Builder() {
      this.method = "GET";
      this.headers = new Headers.Builder();
    }
默认是get方法。

Request 中参数如上图所示。
3、Call 对象创建
Call 源码
public interface Call extends Cloneable {
  Request request();
  Response execute() throws IOException;
  void enqueue(Callback responseCallback);
  void cancel();
  boolean isExecuted();
  boolean isCanceled();
  Call clone();
  interface Factory {
    Call newCall(Request request);
  }
}
可以看到Call对象是一个接口,所以它肯定会有个子类的。
创建call对象
mCall = mOkHttpClient.newCall(request);
newCall()方法
  @Override
  public Call newCall(Request request) {
    return new RealCall(this, request, false /* for web socket */);
  }
可以看到newCall返回的是个 RealCall对象,因为Call是一个接口,所以真正请求逻辑在它的实例RealCall中的。
4、请求网络
        mCall.enqueue(new Callback() {
            @Override
            public void onFailure(Call call, IOException e) {
            }

            @Override
            public void onResponse(Call call, Response response) throws IOException {

            }
        });
因为真正的请求是在RealCall中的,所以我们去RealCall中看一下enqueue()方法吧
  @Override
  public void enqueue(Callback responseCallback) {
  	//synchronized 确保该方法只能被执行一次,防止并发
    synchronized (this) {
    //如果再次执行则抛出异常
      if (executed) throw new IllegalStateException("Already Executed");
      //标记执行
      executed = true;
    }
    //重定向操作,请求失败后重试机制
    captureCallStackTrace();
    //调用Dispatcher 对象的enqueue()方法分发请求
    client.dispatcher().enqueue(new AsyncCall(responseCallback));
  }
dispatcher()方法如下:
  public Dispatcher dispatcher() {
    return dispatcher;
  }
那么Dispatcher 又是啥呢?
Dispatcher 调度器
先来看一下 Dispatcher 中干了那些事:

初始化了maxRequests最大请求数,maxRequestsPerHost最大请求端口数,存储正在运行请求的队列,等待执行的队列,和一个线程池。
因为我们OkHttp可以同时发起多个请求,所以需要Dispatcher 来负责调度。
  synchronized void enqueue(AsyncCall call) {
  	//如果正在执行的请求小于最大请求数 并且 正在请求端口小于最大请求端口 则加入请求队列,执行请求
    if (runningAsyncCalls.size() < maxRequests && runningCallsForHost(call) < maxRequestsPerHost) {
      //加入执行队列
      runningAsyncCalls.add(call);
      //开始执行
      executorService().execute(call);
    } else {
      //如果请求已经满了,则加入等待队列
      readyAsyncCalls.add(call);
    }
  }
Dispatcher 负责线程调度,然后执行 AsyncCall ,所以真正的请求应该在AsyncCall 中。
AsyncCall

AsyncCall 又继承自 NamedRunnable,所以先看一下 NamedRunnable。
public abstract class NamedRunnable implements Runnable {
  protected final String name;

  public NamedRunnable(String format, Object... args) {
    this.name = Util.format(format, args);
  }

  @Override public final void run() {
    String oldName = Thread.currentThread().getName();
    Thread.currentThread().setName(name);
    try {
      execute();
    } finally {
      Thread.currentThread().setName(oldName);
    }
  }
  protected abstract void execute();
}
NamedRunnable 就是一个Runnable 对象,然后 执行 execute方法。
看一下AsyncCall 的 execute方法:
    @Override
    protected void execute() {
      boolean signalledCallback = false;
      try {
        //接收拦截器的执行结果
        Response response = getResponseWithInterceptorChain();
        //回调结果
        if (retryAndFollowUpInterceptor.isCanceled()) {
          signalledCallback = true;
          responseCallback.onFailure(RealCall.this, new IOException("Canceled"));
        } else {
          signalledCallback = true;
          responseCallback.onResponse(RealCall.this, response);
        }
      } catch (IOException e) {
        if (signalledCallback) {
          // Do not signal the callback twice!
          Platform.get().log(INFO, "Callback failure for " + toLoggableString(), e);
        } else {
          responseCallback.onFailure(RealCall.this, e);
        }
      } finally {
      	//将该请求移除队列
        client.dispatcher().finished(this);
      }
    }
从上面可以看到真正的请求是在 getResponseWithInterceptorChain() 方法中的。
并且在finally 中把该请求从 runningSyncCalls 队列中移除。
getResponseWithInterceptorChain()方法
  Response getResponseWithInterceptorChain() throws IOException {
    // Build a full stack of interceptors.
    List<Interceptor> interceptors = new ArrayList<>();
    //OkHttp初始化时候的interceptors
    interceptors.addAll(client.interceptors());
    //重定向interceptors
    interceptors.add(retryAndFollowUpInterceptor);
    //桥接interceptor
    interceptors.add(new BridgeInterceptor(client.cookieJar()));
    //缓存interceptor
    interceptors.add(new CacheInterceptor(client.internalCache()));
    //和服务器建立链接,返回httpCodec
    interceptors.add(new ConnectInterceptor(client));
    if (!forWebSocket) {
      interceptors.addAll(client.networkInterceptors());
    }
    //向服务器发送请求,并最终返回Response对象供客户端使用
    interceptors.add(new CallServerInterceptor(forWebSocket));
    //责任链中的第一个链,空参赋值下面会说
    Interceptor.Chain chain = new RealInterceptorChain(
        interceptors, null, null, null, 0, originalRequest);
    return chain.proceed(originalRequest);
  }
这里就把所有的拦截器都集中起来,执行 chain.proceed() 方法,再到 RealInterceptorChain 的proceed中去
RealInterceptorChain
  public Response proceed(Request request, StreamAllocation streamAllocation, HttpCodec httpCodec,
      RealConnection connection) throws IOException {
    if (index >= interceptors.size()) throw new AssertionError();

    calls++;
	...
    // 创建下一个拦截链
    RealInterceptorChain next = new RealInterceptorChain(
        interceptors, streamAllocation, httpCodec, connection, index + 1, request);
	//获得拦截器
    Interceptor interceptor = interceptors.get(index);
    //执行拦截器
    Response response = interceptor.intercept(next);
	...
    return response;
  }
这里面其实就是OkHttp的一个封装的精髓所在了,每个功能都继承自Interceptor,然后在通过Interceptor.Chain 将所有的 Interceptor 链接起来逐个执行。(不懂责任链模式的话可以去稍微看一下就好了,很简单)
上面提到了在getResponseWithInterceptorChain 方法中,责任链中的第一个RealInterceptorChain 创建如下:
  Interceptor.Chain chain = new RealInterceptorChain(
        interceptors, null, null, null, 0, originalRequest);
构造方法如下:
  public RealInterceptorChain(List<Interceptor> interceptors, StreamAllocation streamAllocation,
      HttpCodec httpCodec, RealConnection connection, int index, Request request) {
	...
  }
可以看到 streamAllocation,httpCodec,connection都为null,那么这三个对象是在什么地方创建赋值的呢?有一点可以肯定的是,肯定在下面的几个Interceptor中创建的

创建StreamAllocation 对象
StreamAllocation 对象是用来分配stream的,在RetryAndFollowUpInterceptor 中创建的。
RetryAndFollowUpInterceptor 对象中 intercept 方法源码如下:
  @Override public Response intercept(Chain chain) throws IOException {
    Request request = chain.request();
	//创建 streamAllocation 对象
    streamAllocation = new StreamAllocation(
        client.connectionPool(), createAddress(request.url()), callStackTrace);
    ...
    while (true) {
      Response response = null;
      try {
      //向下传递 streamAllocation对象
        response = ((RealInterceptorChain) chain).proceed(request, streamAllocation, null, null);
      } catch (RouteException e) {
		...
      } finally {
        // We're throwing an unchecked exception. Release any resources.
        if (releaseConnection) {
          streamAllocation.streamFailed(null);
          streamAllocation.release();
        }
      }
		...//省略重连逻辑
    }
  }
创建 HttpCodec对象和RealConnection对象
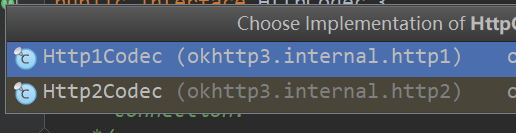
HttpCodec 是用来编码HTTP请求并解码HTTP响应,有两个子类:Http1Codec,Http2Codec。对应http1和http2。
HttpCodec 和RealConnection 对象都是在 ConnectInterceptor中创建的。
ConnectInterceptor 对象 intercept源码如下:
    RealInterceptorChain realChain = (RealInterceptorChain) chain;
    Request request = realChain.request();
    //接收上一个Interceptor传递的 StreamAllocation 对象
    StreamAllocation streamAllocation = realChain.streamAllocation();

    // We need the network to satisfy this request. Possibly for validating a conditional GET.
    boolean doExtensiveHealthChecks = !request.method().equals("GET");
    //创建httpCodec,建立链接
    HttpCodec httpCodec = streamAllocation.newStream(client, doExtensiveHealthChecks);
    //获得connection 对象
    RealConnection connection = streamAllocation.connection();
	//传递给下一个Interceptor
    return realChain.proceed(request, streamAllocation, httpCodec, connection);
可以看到,在ConnectInterceptor 分别创建了 httpCodec 对象 和 RealConnection 对象,并传递给链上的下一个Interceptor对象。
CallServerInterceptor
经过前面几个Interceptor我们已经建立和服务器之间的连接了,终于到了CallServerInterceptor,负责向服务器发送请求和获得相应数据。
intercept方法源码如下:
  @Override public Response intercept(Chain chain) throws IOException {
  	//获得对应Interceptor请求链
    RealInterceptorChain realChain = (RealInterceptorChain) chain;
    //下面的参数通过之前Interceptor传递过来
    HttpCodec httpCodec = realChain.httpStream();
    StreamAllocation streamAllocation = realChain.streamAllocation();
    RealConnection connection = (RealConnection) realChain.connection();
    Request request = realChain.request();

    long sentRequestMillis = System.currentTimeMillis();
    //向服务器发送数据
    httpCodec.writeRequestHeaders(request);

    Response.Builder responseBuilder = null;
    //校验请求方法是否正确,请求体是否为空
    if (HttpMethod.permitsRequestBody(request.method()) && request.body() != null) {
      if ("100-continue".equalsIgnoreCase(request.header("Expect"))) {
        httpCodec.flushRequest();
        responseBuilder = httpCodec.readResponseHeaders(true);
      }

      if (responseBuilder == null) {
        // 创建Sink 对象
        Sink requestBodyOut = httpCodec.createRequestBody(request, request.body().contentLength());
        //接收数据
        BufferedSink bufferedRequestBody = Okio.buffer(requestBodyOut);
        request.body().writeTo(bufferedRequestBody);
        bufferedRequestBody.close();
      } else if (!connection.isMultiplexed()) {
        // If the "Expect: 100-continue" expectation wasn't met, prevent the HTTP/1 connection from
        // being reused. Otherwise we're still obligated to transmit the request body to leave the
        // connection in a consistent state.
        streamAllocation.noNewStreams();
      }
    }

    httpCodec.finishRequest();

    if (responseBuilder == null) {
      responseBuilder = httpCodec.readResponseHeaders(false);
    }
	//构建Response 对象
    Response response = responseBuilder
        .request(request)
        .handshake(streamAllocation.connection().handshake())
        .sentRequestAtMillis(sentRequestMillis)
        .receivedResponseAtMillis(System.currentTimeMillis())
        .build();

    int code = response.code();
    if (forWebSocket && code == 101) {
      // Connection is upgrading, but we need to ensure interceptors see a non-null response body.
      response = response.newBuilder()
          .body(Util.EMPTY_RESPONSE)
          .build();
    } else {
      response = response.newBuilder()
          .body(httpCodec.openResponseBody(response))
          .build();
    }

    if ("close".equalsIgnoreCase(response.request().header("Connection"))
        || "close".equalsIgnoreCase(response.header("Connection"))) {
      streamAllocation.noNewStreams();
    }

    if ((code == 204 || code == 205) && response.body().contentLength() > 0) {
      throw new ProtocolException(
          "HTTP " + code + " had non-zero Content-Length: " + response.body().contentLength());
    }

    return response;
  }
这里已经是最后一个Interceptor,返回我们构建好的Response对象。
OkHttp把每个小的功能都独立到了Interceptor中,只有我们把每个Interceptor的实例了解清楚,其实也就了解了Okhttp的工作原理了。篇幅原因就不一一列举了(当然也有技术菜的原因)
OkHttp流程图

参考:https://www.jianshu.com/p/cb444f49a777
