文章目录
我们都知道SpringBoot自问世以来,一直有一个响亮的口号"约定优于配置",其实一种按约定编程的软件设计范式,目的在于减少软件开发人员在工作中的各种繁琐的配置,我们都知道传统的SSM框架的组合,会伴随着大量的繁琐的配置;稍有不慎,就可能各种bug,被人发现还以为我们技术很菜。而SpringBoot的出现不仅大大提高的开发人员的效率,还能避免由于"手抖"带来的配置错误。
SpringBoot启动流程分析之SpringApplication的初始化过程
很多程序员都感慨SpringBoot的到来大大解放了生产力,但是也有聪明的程序猿会多思考一下下,SpringBoot是怎么做到的约定的配置?它配置在了哪里?又是怎么启动的作用等等一系列的问号在跟女朋友花前月下的时候,依然会时不时冒出来。这严重影响了程序猿们的"幸"福生活,为了能广大"程序猿"同胞过上幸福美满的生活,今天咱么就来一起跟随源码探究下SpringBoot到底是如何做到"约定优于配置"的。
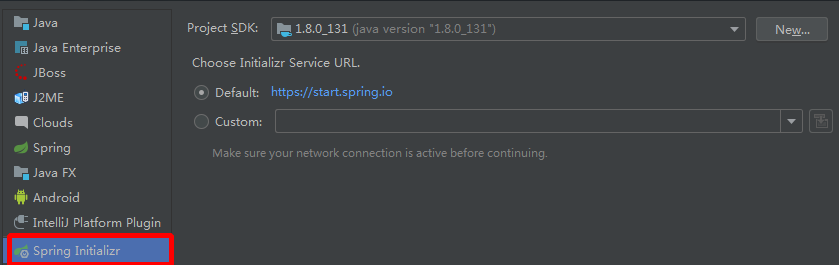
首先,我们先介绍下我们的演示的项目环境,我们先试用Spring Initializr来创建一个SpirngBoot工程。我们使用的版本是SpringBoot 2.2.2.RELEASE。
 接下来就只在pom.xml文件中添加一个web工程的依赖,是为了观察后面容器类型的源码。
		<dependency>
            <groupId>org.springframework.boot</groupId>
            <artifactId>spring-boot-starter-web</artifactId>
        </dependency>
这样我们的环境就准备好了。
我们跟着SpringBoot的源码来探究它的启动流程,首先,先找到这个应用程序的入口主方法,在上面打一个断点。
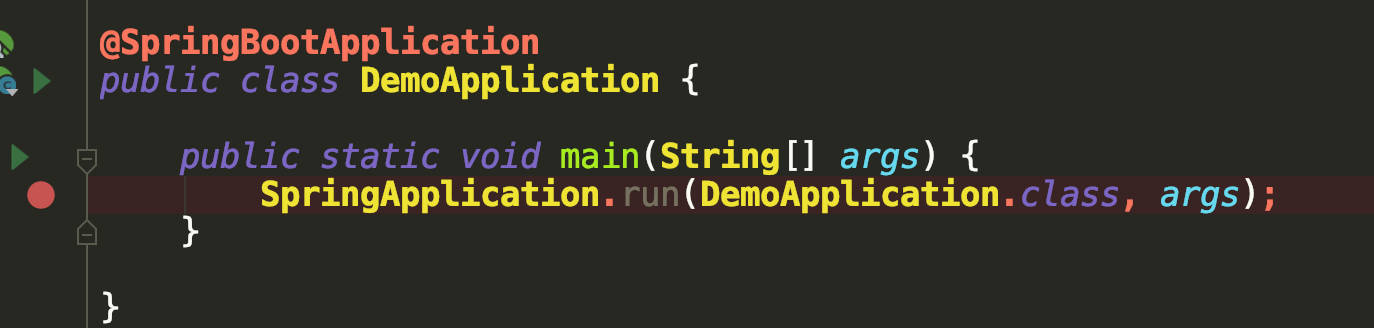
启动之后,Debug进入到run()方法
public static ConfigurableApplicationContext run(Class<?>[] primarySources,String[] args) {
	return new SpringApplication(primarySources).run(args);
}
到这里会执行new SpringApplication(primarySources)创建spring应用对象,继续往下跟会执行SpringApplication构造器。
// SpringApplication构造器
public SpringApplication(ResourceLoader resourceLoader, Class<?>... primarySources) {
	...其他代码
    // 资源加载器
	this.resourceLoader = resourceLoader;
	Assert.notNull(primarySources, "PrimarySources must not be null");
	this.primarySources = new LinkedHashSet<>(Arrays.asList(primarySources));
    // 1. 可能的web应用程序类型的类型。
	this.webApplicationType = WebApplicationType.deduceFromClasspath();
    // 2. 设置初始化应用context
	setInitializers((Collection) getSpringFactoriesInstances(
				ApplicationContextInitializer.class));
	// 3.设置初始化监听
    setListeners((Collection) getSpringFactoriesInstances(ApplicationListener.class));
	// 4. 推演主程序类
    this.mainApplicationClass = deduceMainApplicationClass();
	}
很多不为人知的事情都是发生在这个对象初始化的时候,这里我们都来一一解密。
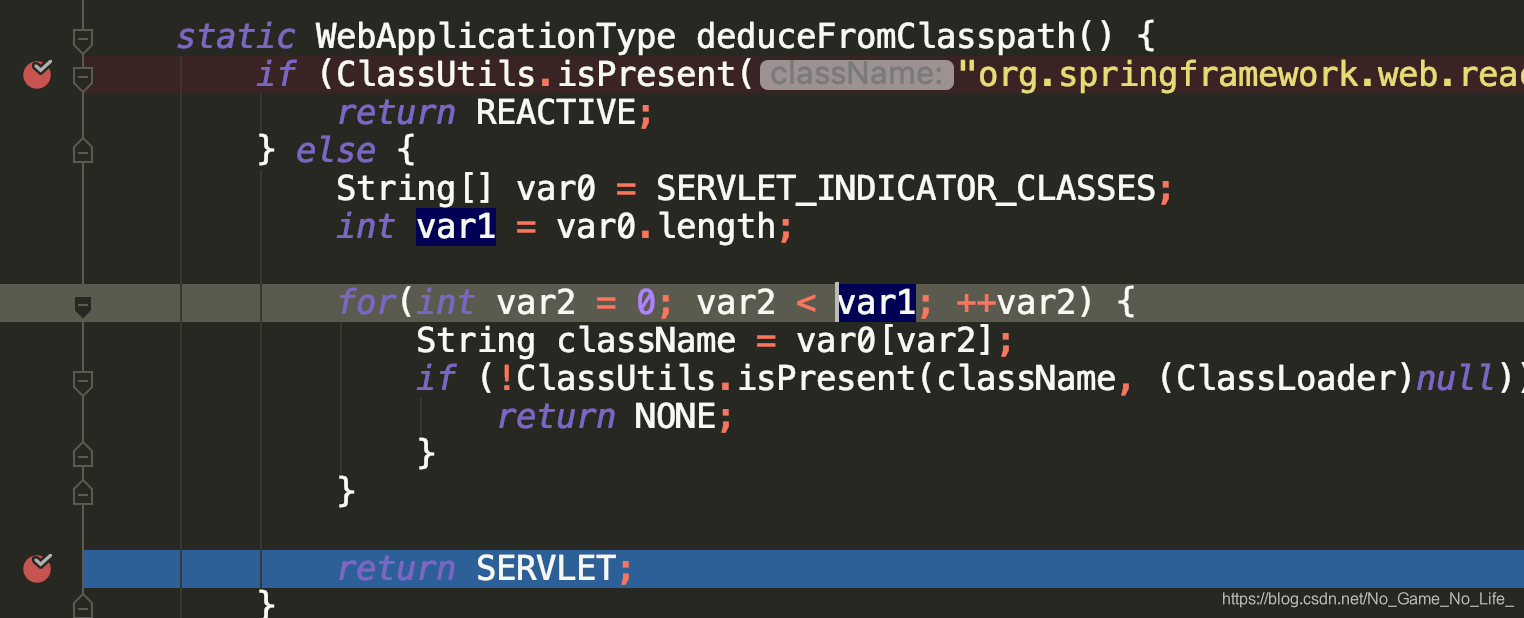
    static WebApplicationType deduceFromClasspath() {
        if (ClassUtils.isPresent("org.springframework.web.reactive.DispatcherHandler", (ClassLoader)null) && !ClassUtils.isPresent("org.springframework.web.servlet.DispatcherServlet", (ClassLoader)null) && !ClassUtils.isPresent("org.glassfish.jersey.servlet.ServletContainer", (ClassLoader)null)) {
            return REACTIVE;
        } else {
            String[] var0 = SERVLET_INDICATOR_CLASSES;
            int var1 = var0.length;

            for(int var2 = 0; var2 < var1; ++var2) {
                String className = var0[var2];
                if (!ClassUtils.isPresent(className, (ClassLoader)null)) {
                    return NONE;
                }
            }
            return SERVLET;
        }
    }
推断web应用类型
这段代码是来推断我们的应用是哪种web应用程序
public enum WebApplicationType {

	/**
	 * The application should not run as a web application and should not start an
	 * embedded web server.
	 */
	NONE, // 不是web应用

	/**
	 * The application should run as a servlet-based web application and should start an
	 * embedded servlet web server.
	 */
	SERVLET, // servlet容器

	/**
	 * The application should run as a reactive web application and should start an
	 * embedded reactive web server.
	 */
	REACTIVE;  // 反应型web应用(webflux)
当然一开始我们加入了web的依赖,所以我们是servlet容器。
springboot在启动时需要推断当前的应用环境,springboot2.0当中一共定义了三种环境:none, servlet, reactive。
none表示当前的应用即不是一个web应用也不是一个reactive应用,是一个纯后台的应用。
servlet表示当前应用是一个标准的web应用。
reactive表示是一个响应式的web应用。
现在的webflux框架就是响应式的,响应式代表其是非阻塞的,而以前使用的spring mvc是阻塞的。
初始化应用上下文
在设置初始化应用context的时候 ,是先执行了getSpringFactoriesInstances(ApplicationContextInitializer.class)方法,参数是ApplicationContextInitializer.class字节码对象。
private <T> Collection<T> getSpringFactoriesInstances(Class<T> type,
		Class<?>[] parameterTypes, Object... args) {
		ClassLoader classLoader = getClassLoader();
		// Use names and ensure unique to protect against duplicates
		Set<String> names = new LinkedHashSet<>(
       // 加载ApplicationContextInitializer.class类型的类
       // 这里传入就是参数 ApplicationContextInitializer.clas
	 	SpringFactoriesLoader.loadFactoryNames(type, classLoader));
       // 实例化加载到的类
		List<T> instances = createSpringFactoriesInstances(type, parameterTypes,
				classLoader, args, names);
		AnnotationAwareOrderComparator.sort(instances);
	 // 返回
    return instances;
}
public static List<String> loadFactoryNames(Class<?> factoryClass, @Nullable ClassLoader classLoader) {
		String factoryClassName = factoryClass.getName();
		return loadSpringFactories(classLoader).getOrDefault(factoryClassName, Collections.emptyList());
}
我们先来看看他是如何加载到这些类
private static Map<String, List<String>> loadSpringFactories(@Nullable ClassLoader classLoader) {
    // 先从缓存中拿
		MultiValueMap<String, String> result = cache.get(classLoader);
		if (result != null) {
			return result;
		}
		try {
// 去资源路径下加载
public static final String ACTORIES_RESOURCE_LOCATION = "META-INF/spring.factories";
public static final String FACTORIES_RESOURCE_LOCATION = "META-INF/spring.factories";
	Enumeration<URL> urls = (classLoader != null ?
 classLoader.getResources(FACTORIES_RESOURCE_LOCATION) :     ClassLoader.getSystemResources(FACTORIES_RESOURCE_LOCATION);			result = new LinkedMultiValueMap<>();
			while (urls.hasMoreElements()) {
				URL url = urls.nextElement();
				UrlResource resource = new UrlResource(url);
				Properties properties = PropertiesLoaderUtils.loadProperties(resource);
				for (Map.Entry<?, ?> entry : properties.entrySet()) {
					String factoryClassName = ((String) entry.getKey()).trim();
					for (String factoryName : StringUtils.commaDelimitedListToStringArray((String) entry.getValue())) {
			result.add(factoryClassName, factoryName.trim());
					}
				}
			}
			cache.put(classLoader, result);
             // 返回所有的加载的类
			return result;
		}
		catch (IOException ex) {
			throw new IllegalArgumentException("Unable to load factories from location [" +
					FACTORIES_RESOURCE_LOCATION + "]", ex);
		}
	}
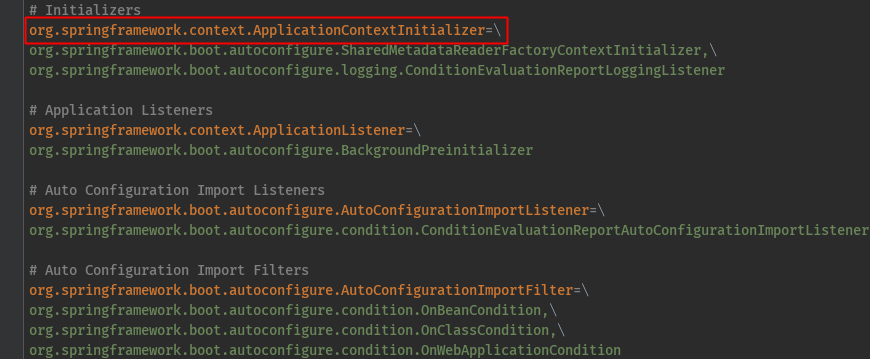
这里有两个加载配置类的地方其实都指向了META-INF/spring.factories,通过断点我们可以看到应用程序是加载了以下几个jar下的spring.factores文件。
双击Shift搜索
spring.factories可以看到它存在于以下工程中
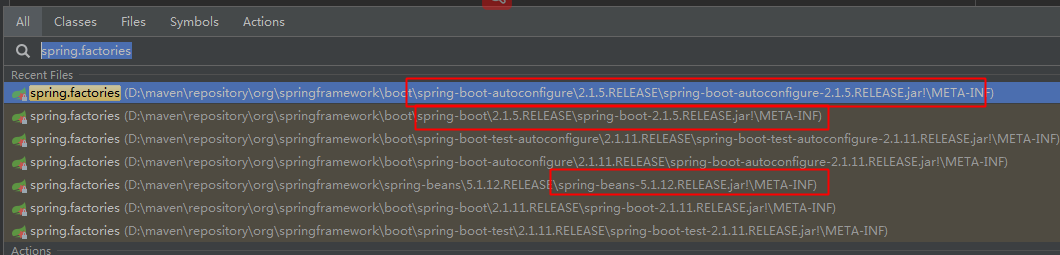
- spring-boot-2.1.5.RELEASE.jar下的spring.factores(截图未完整截取)
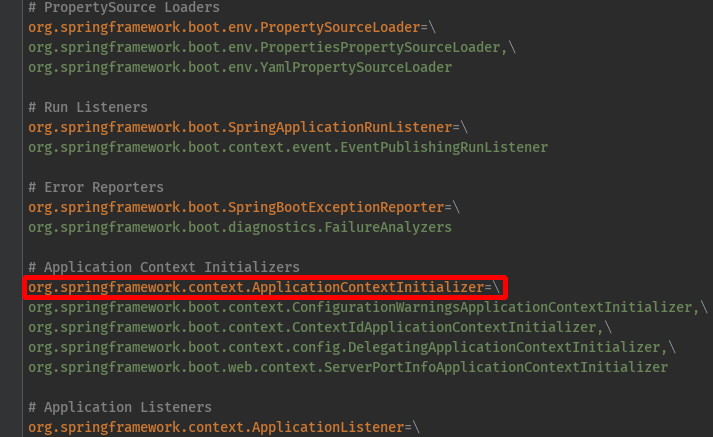
- spring-boot-autoconfigure-2.1.5.RELEASE.jar下的spring.factores
- spring-beans-5.1.7.RELEASE.jar下的spring.factores

从Map中根据org.springframework.context.ApplicationContextInitializer的类型拿到需要的类初始化类,断点进入getOrDefault(factoryClassName, Collections.emptyList());方法

之后就是把加载到的需要初始化的类进行实例化添加到一个集合中等待备用
public void setInitializers(
			Collection<? extends ApplicationContextInitializer<?>> initializers) {
		this.initializers = new ArrayList<>();
		this.initializers.addAll(initializers);
	}
初始化监听器类
最关键的的还是这句:
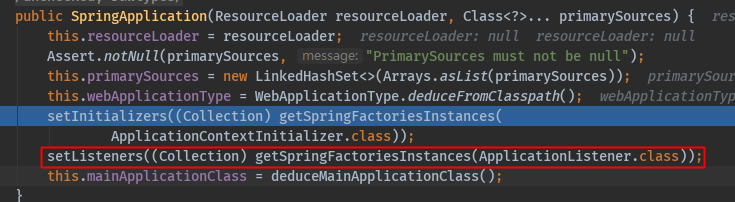
当我们跟进去之后,会发现在初始化监听类的时候和上面初始化应用上下文是一样的代码。唯一不同的是getSpringFactoriesInstances(ApplicationListener.class))传进去的是ApplicationListener.class所以这里就不再赘述。
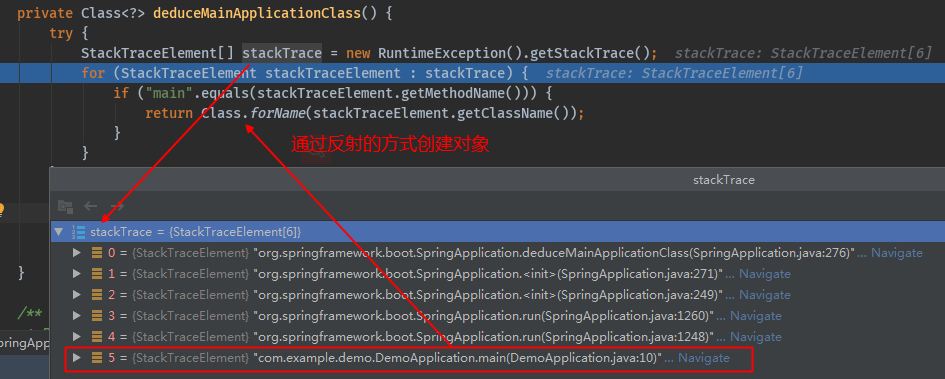
推演主程序类
也就是这个最关键的代码了。
this.mainApplicationClass = deduceMainApplicationClass();
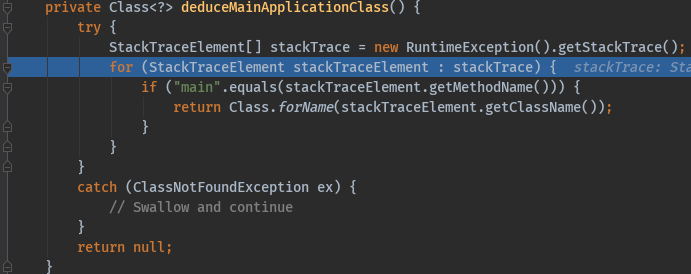
到这里就完成了SpringBoot启动过程中初始化SpringApplication的过程。
SpringApplication的初始化过程小结
这篇文章主要是给大家说了下SpringBoot启动过程中初始化SpringApplication的流程,大致可以分为四个步骤:
- 推演web应用的类型(如果没有加web依赖类型NONE)
- 初始化ApplicationContextInitializer
- 初始化ApplicationListener
- 推演出主程序类
通过这样四个步骤就完成了第一步SpringApplication的初始化过程。
