环境
一台笔记本电脑,Windows操作系统,安装了VirtualBox,Vagrant,Github。
笔记本内存至少16G。使用外置硬盘,最终实际消耗112GB。
目标
两节点RAC。操作系统Oracle Linux 7,数据库版本支持12.2,18从和19c。本例测试的是19c。
实例名为ORCLCDB,带一个可插拔数据库orclpdb1。
克隆项目
git clone https://github.com/oracle/vagrant-boxes.git
进入vagrant-boxes\OracleRAC目录。其中的README.md有详细的操作过程。
拷贝安装介质
需要下载对应版本的数据库和GI介质并拷贝到ORCL_software目录下。19.3版本介质约6GB。
cd vagrant-boxes/OracleRAC/ORCL_software
cp LINUX.X64_193000_db_home.zip .
cp LINUX.X64_193000_grid_home.zip .
修改配置
默认的RAC节点配置为8GB,由于笔记本只有16G内存,因此把单节点内存配置改为6G,在config/vagrant.yml文件中修改:
node1:
  vm_name: node1
  mem_size: 6144
  cpus: 2
  public_ip:  192.168.56.101
  vip_ip:     192.168.56.103
  private_ip: 192.168.200.101
  u01_disk: ./node1_u01.vdi

node2:
  vm_name: node2
  mem_size: 6144
  cpus: 2
  public_ip:  192.168.56.102
  vip_ip:     192.168.56.104
  private_ip: 192.168.200.102
  u01_disk: ./node2_u01.vdi
如果内存小于6G,vagrant up会报如下错误:
ERROR: vm1_mem_size option can not be less then 6 Gb
config/vagrant.yml, mem_size: 6144
启动安装
启动命令如下:
vagrant up
安装非常顺利,总共耗时2小时29分:
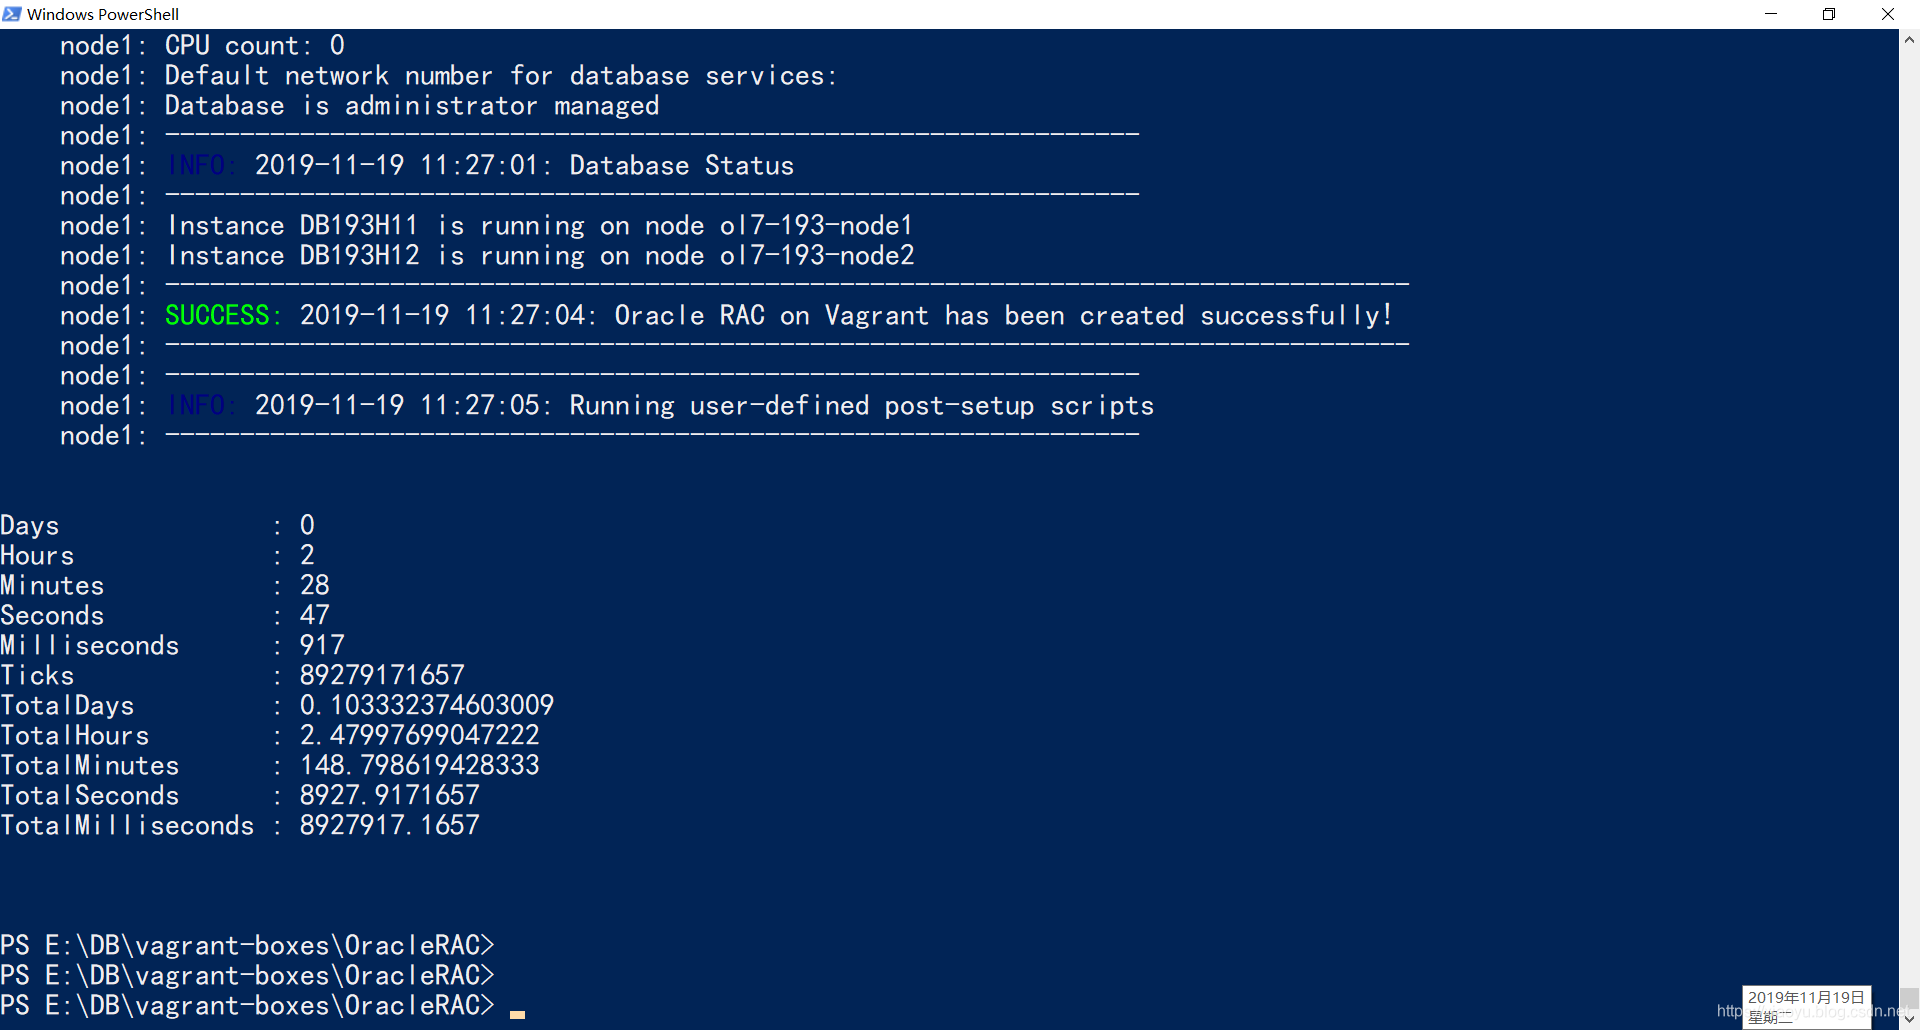
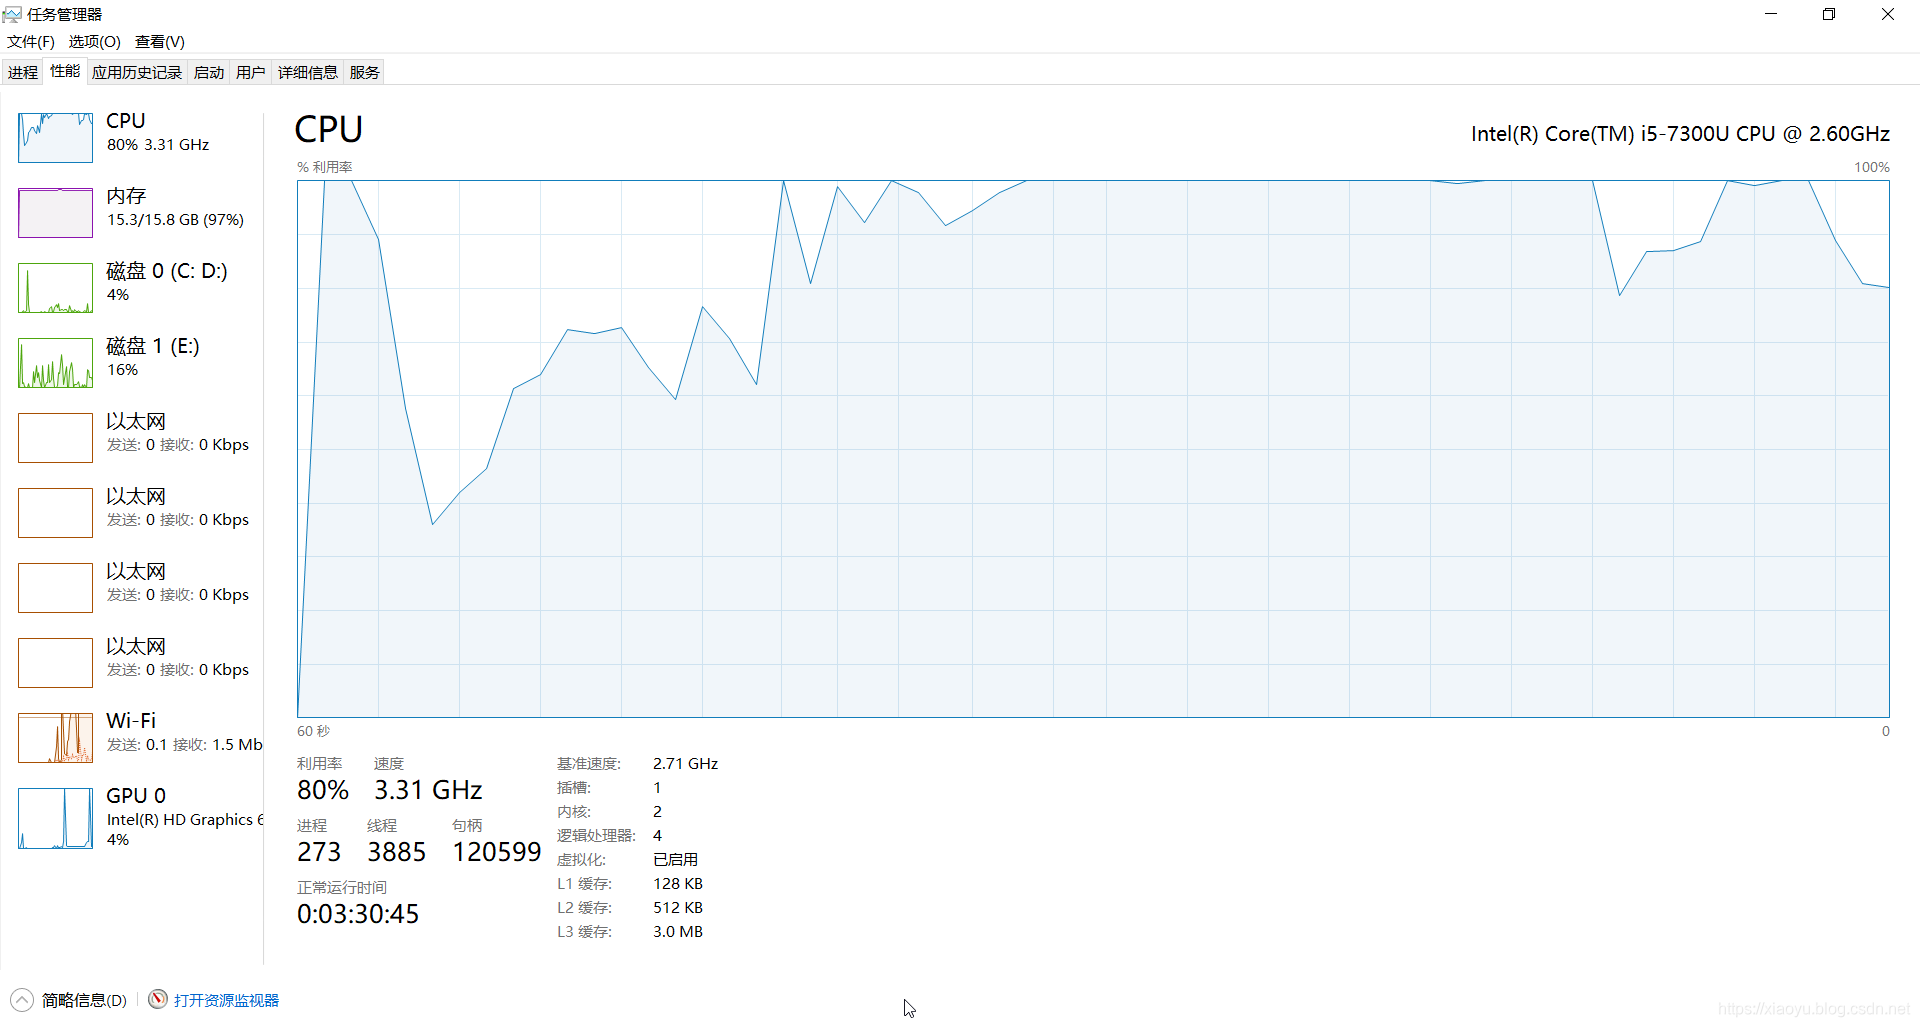
可以看到无论是安装,还是运行,资源都是和紧张的,这是由于笔记本内存不足导致的,如有可能,可以在公有云上进行此实验:
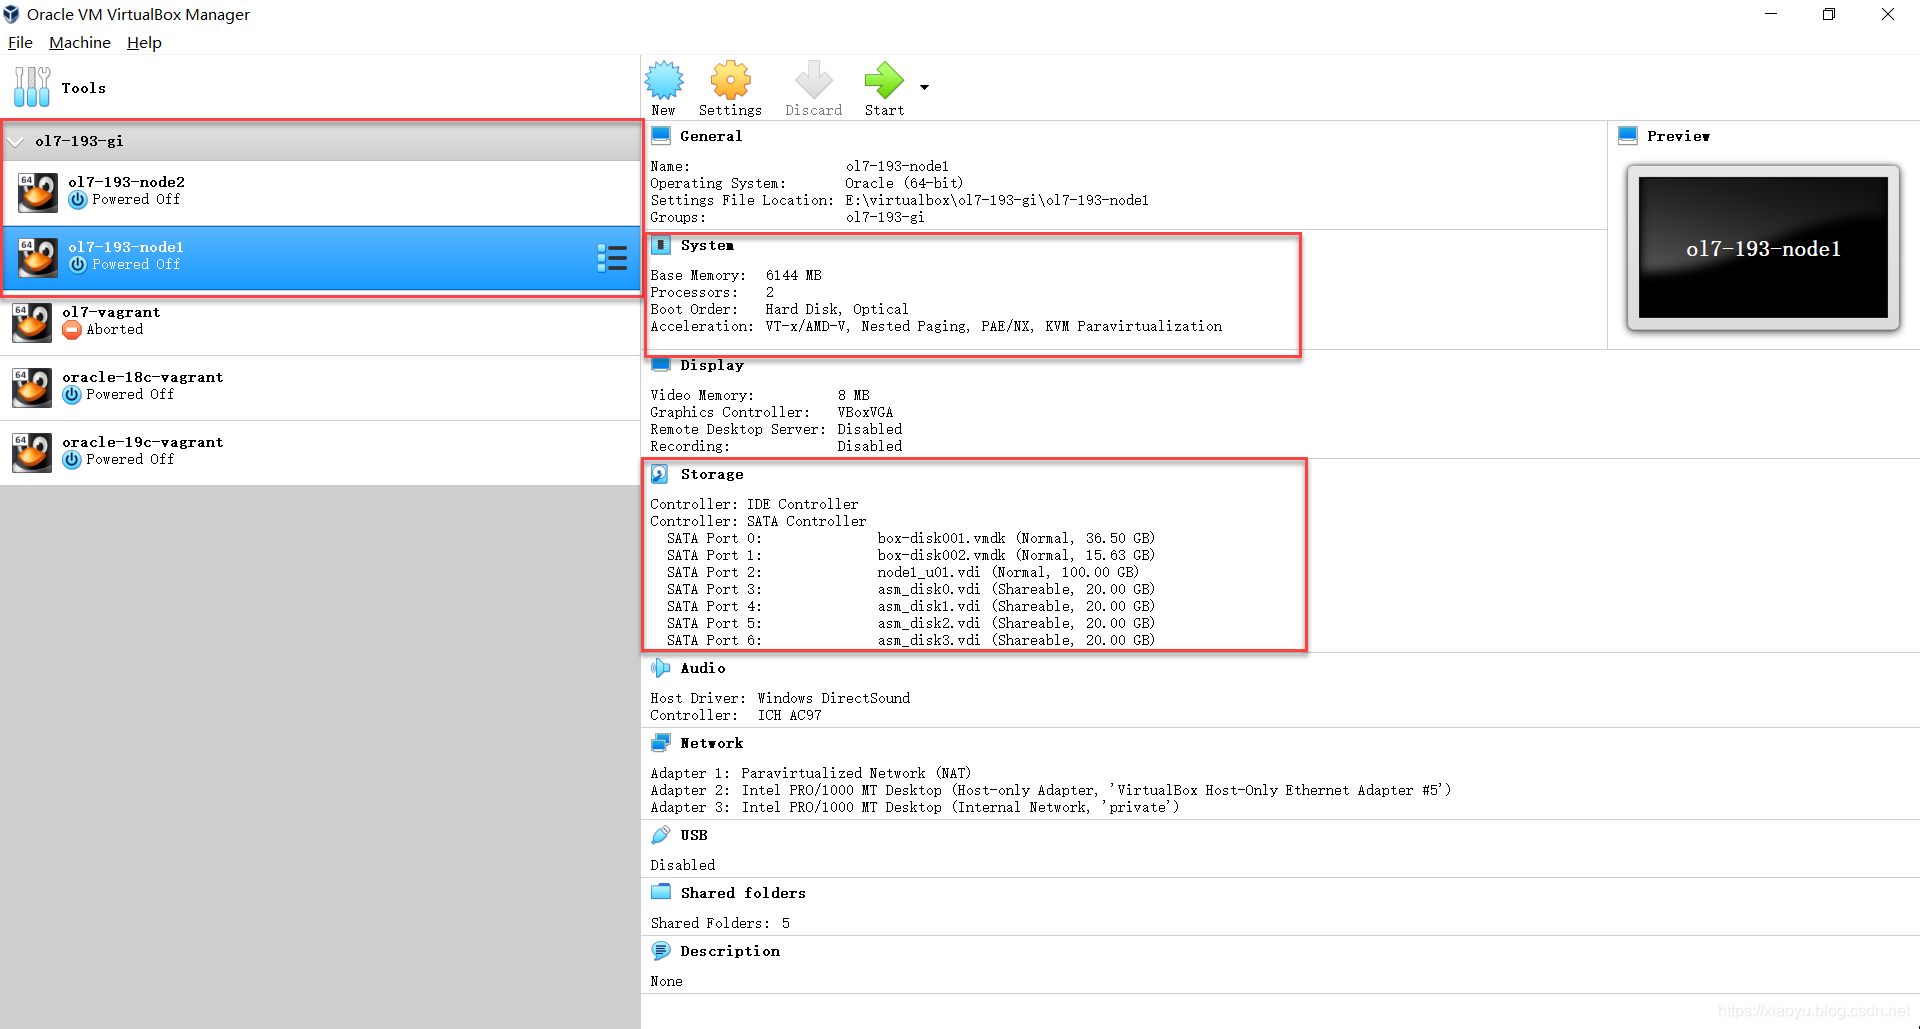
整个安装过程实际创建了两个虚机,本例为ol7-193-node1和ol7-193-node2。VirtualBox很贴心,还为这两个虚机建立一个分组:ol7-193-gi:
安装日志较长,以下截取了一部分:
PS E:\DB\vagrant-boxes\OracleRAC> Measure-Command { vagrant up | Out-Default}
getting Proxy Configuration from Host...
==> vagrant: A new version of Vagrant is available: 2.2.6 (installed version: 2.2.4)!
==> vagrant: To upgrade visit: https://www.vagrantup.com/downloads.html

Bringing machine 'node2' up with 'virtualbox' provider...
Bringing machine 'node1' up with 'virtualbox' provider...
==> node2: Importing base box 'ol7-latest'...

Progress: 10%
Progress: 30%
Progress: 40%
==> node2: Matching MAC address for NAT networking...
==> node2: Setting the name of the VM: ol7-193-node2
==> node2: Clearing any previously set network interfaces...
==> node2: Preparing network interfaces based on configuration...
    node2: Adapter 1: nat
    node2: Adapter 2: hostonly
    node2: Adapter 3: intnet
==> node2: Forwarding ports...
    node2: 22 (guest) => 2222 (host) (adapter 1)
==> node2: Running 'pre-boot' VM customizations...
这里停了很久,因为需要准备RAC节点磁盘和共享存储。
然后到第1个节点:
    node2: -----------------------------------------------------------------
    node2: INFO: 2019-11-19 09:21:43: Running user-defined post-setup scripts
    node2: -----------------------------------------------------------------
==> node1: Importing base box 'ol7-latest'...

Progress: 10%
Progress: 30%
Progress: 40%
==> node1: Matching MAC address for NAT networking...
==> node1: Setting the name of the VM: ol7-193-node1
==> node1: Fixed port collision for 22 => 2222. Now on port 2200.
==> node1: Clearing any previously set network interfaces...
==> node1: Preparing network interfaces based on configuration...
    node1: Adapter 1: nat
    node1: Adapter 2: hostonly
    node1: Adapter 3: intnet
==> node1: Forwarding ports...
    node1: 22 (guest) => 2200 (host) (adapter 1)
==> node1: Running 'pre-boot' VM customizations...
==> node1: Booting VM...
==> node1: Waiting for machine to boot. This may take a few minutes...
    node1: SSH address: 127.0.0.1:2200
    node1: SSH username: vagrant
    node1: SSH auth method: private key
    node1:
    node1: Vagrant insecure key detected. Vagrant will automatically replace
    node1: this with a newly generated keypair for better security.
    node1:
    node1: Inserting generated public key within guest...
    node1: Removing insecure key from the guest if it's present...
    node1: Key inserted! Disconnecting and reconnecting using new SSH key...
==> node1: Machine booted and ready!
==> node1: Checking for guest additions in VM...
==> node1: Setting hostname...
==> node1: Configuring and enabling network interfaces...
空间占用
基本的操作系统位于VirtualBox默认目录下,两个节点(虚机)合计占用空间4.2G。
此外,Vagrant为每个节点又各挂接一块100G磁盘,实际各占用空间15G。另外还有4块20GASM共享磁盘,实际占用80G。这几块磁盘位于Vagantfile所在目录,如下图所示:
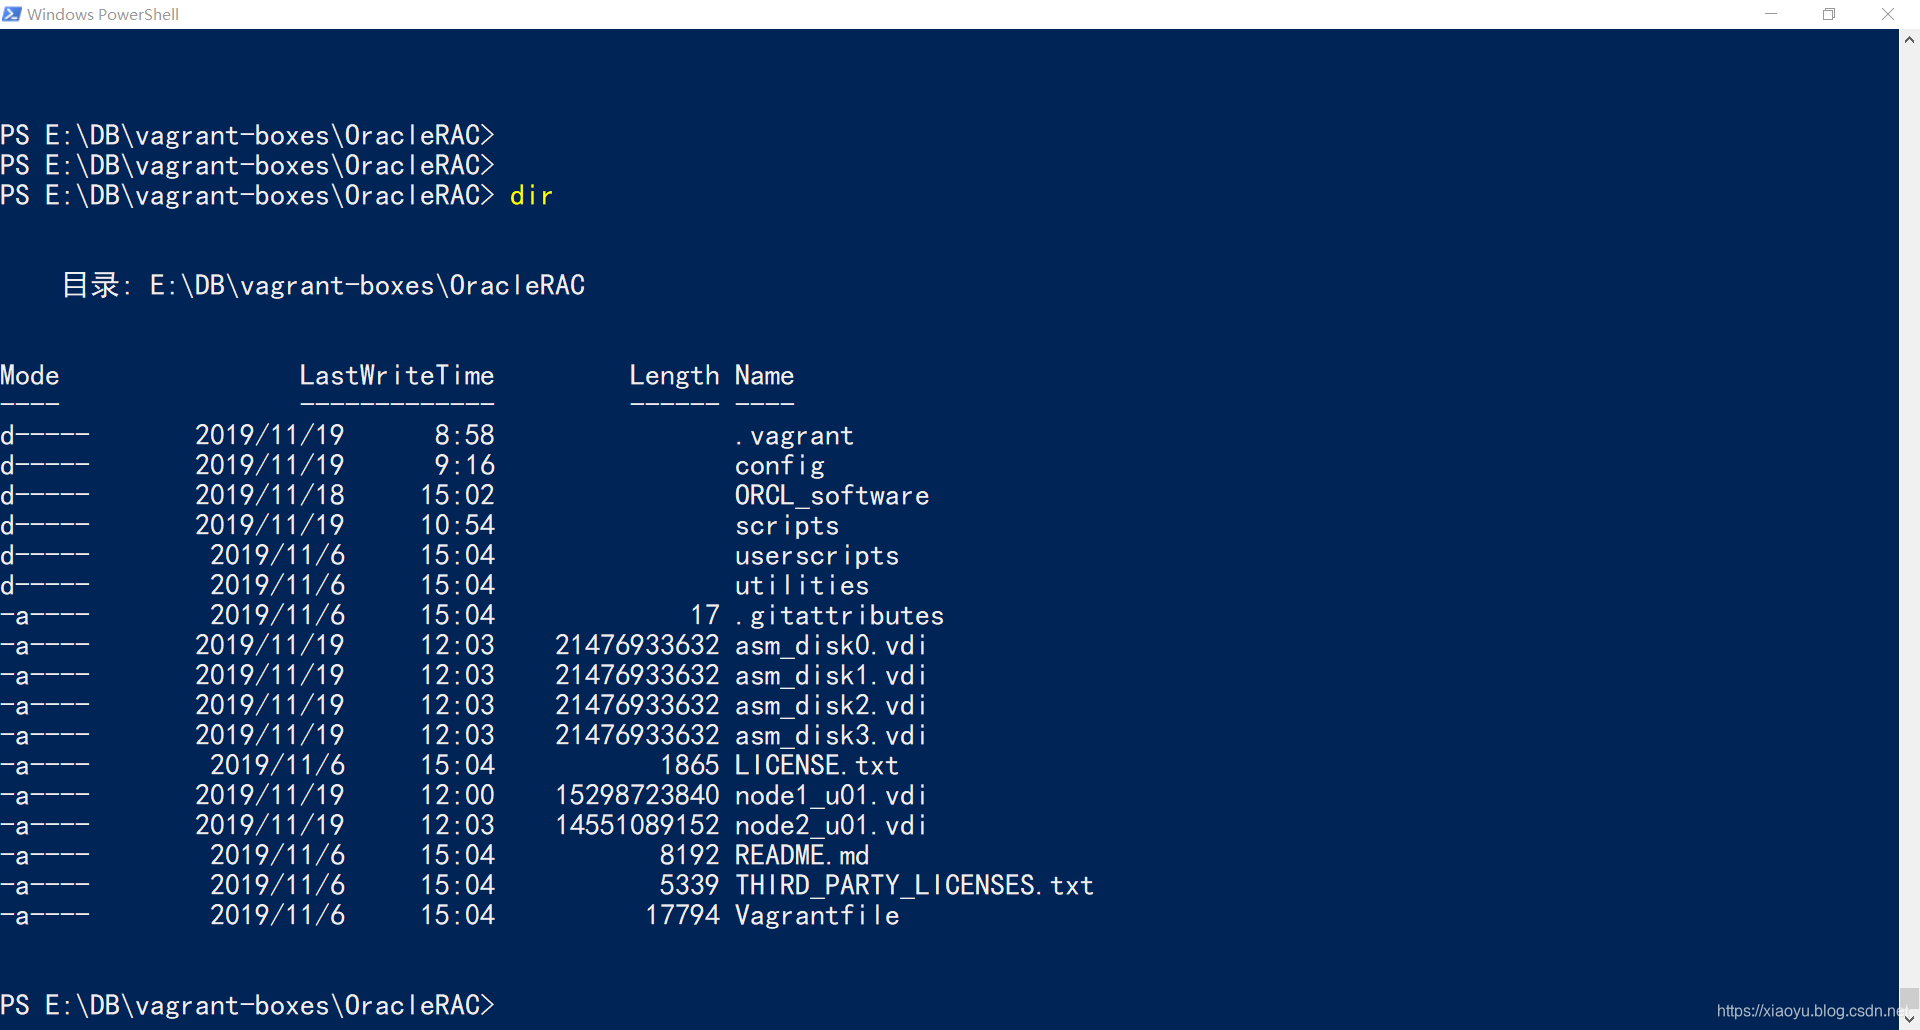
所以本实验实际占用空间=4.2+15*2+80=114.2GB。
验证
使用vagrant ssh或vagrant putty(需安装插件,vagrant plugin install vagrant-multi-putty)可以登录数据库主机。我用后者,界面更一致和美观。
以下为进入主机后的操作

[vagrant@oracle-19c-vagrant ~]$ sudo -s
[root@oracle-19c-vagrant vagrant]# su - oracle
Last login: Thu Nov 14 16:23:04 +08 2019
[oracle@oracle-19c-vagrant ~]$ sqlplus / as sysdba

SQL*Plus: Release 19.0.0.0.0 - Production on Thu Nov 14 16:46:28 2019
Version 19.3.0.0.0

Copyright (c) 1982, 2019, Oracle.  All rights reserved.


Connected to:
Oracle Database 19c Enterprise Edition Release 19.0.0.0.0 - Production
Version 19.3.0.0.0

SQL> show pdbs;

    CON_ID CON_NAME                       OPEN MODE  RESTRICTED
---------- ------------------------------ ---------- ----------
         2 PDB$SEED                       READ ONLY  NO
         3 ORCLPDB1                       READ WRITE NO
SQL> exit
Disconnected from Oracle Database 19c Enterprise Edition Release 19.0.0.0.0 - Production
Version 19.3.0.0.0
参考
- https://github.com/oracle/vagrant-boxes/tree/master/OracleDatabase
- https://yum.oracle.com/boxes
