看完本篇博客,你将能做到
- qq消息秒速99+
- 搭建云环境(或者虚拟机),部署qq机器人
- 使用springboot为你的人工智障写一个简单的hello world
灵感来源
- 伟哥的博客
- 基于酷Q的一个插件coolq-http-api
本地部署
步骤一:下载酷Q和插件coolq-http-api

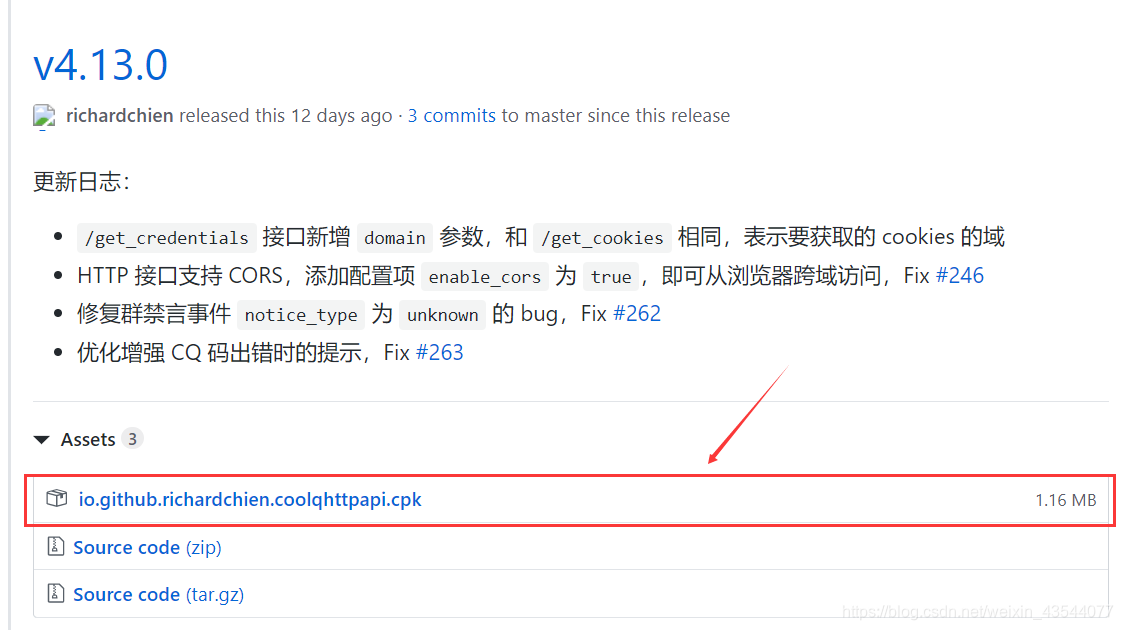
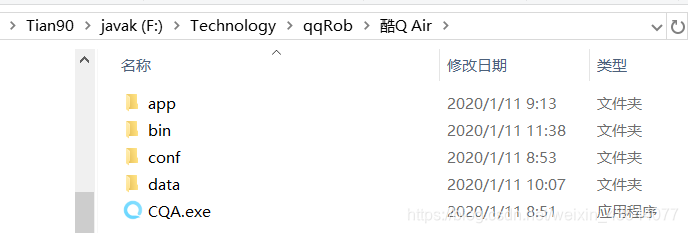
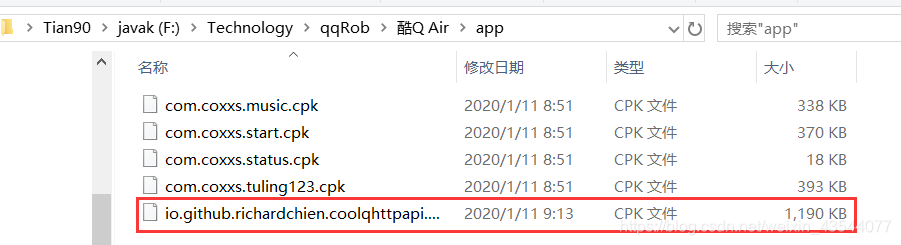
步骤二:解压酷Q添加coolq-http-api
解压后的目录
把插件复制到app里
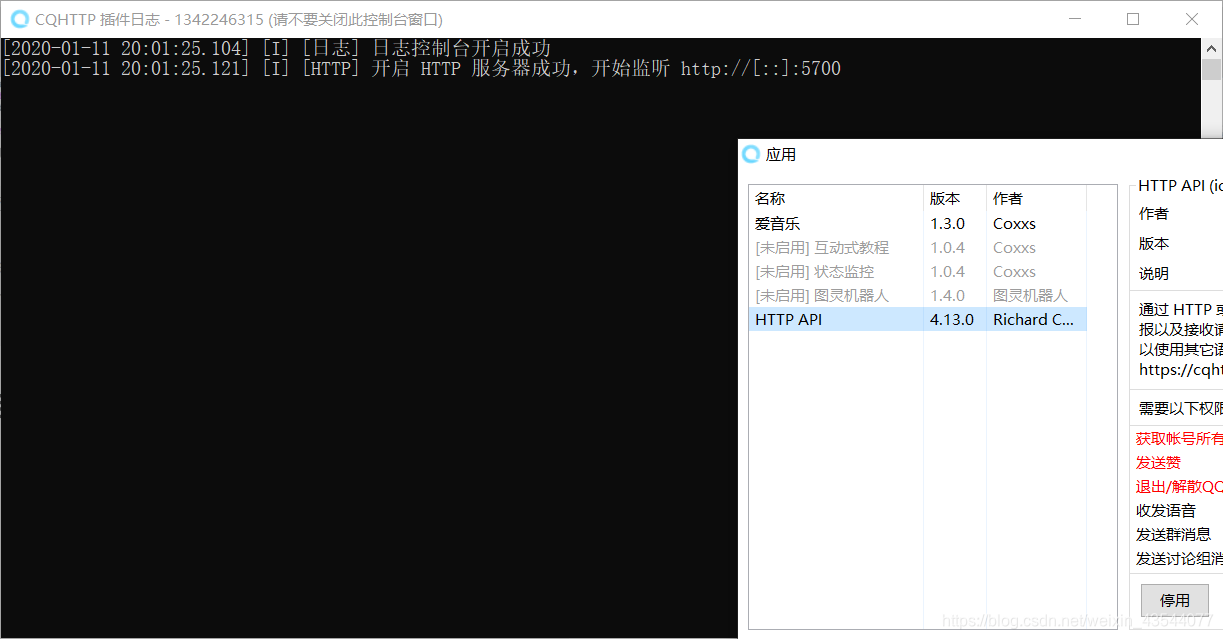
步骤三:打开酷Q,熟悉一下基本操作
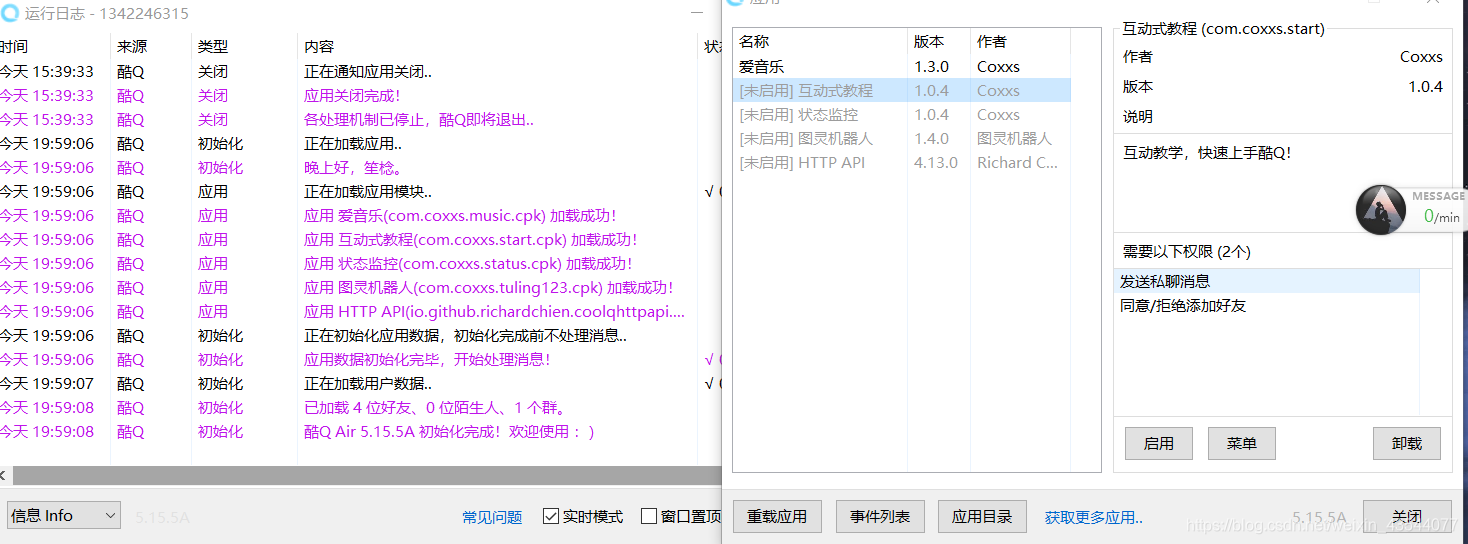
步骤四:启动插件,实现秒速999+
然后照着api写一个url,循环访问,想要更猛烈就多开几个线程
public static void main(String[] args) throws IOException {
        String senMsg = "http://127.0.0.1:5700/send_private_msg";
        sendGet(senMsg, "user_id=此处填写对方的qq号&message=此处填写要发送的内容", 20);//剩下这个填轰炸次数
    }

    public static String sendGet(String url, String param, int n) {
        String result = "";
        BufferedReader in = null;
        try {
            String urlNameString = url + "?" + param;
            URL realUrl = new URL(urlNameString);
            // 打开和URL之间的连接

            for (int i = 0; i < n; i++) {
                URLConnection connection = realUrl.openConnection();
                // 设置通用的请求属性
                connection.setRequestProperty("accept", "*/*");
                connection.setRequestProperty("connection", "Keep-Alive");
                connection.setRequestProperty("user-agent",
                        "Mozilla/4.0 (compatible; MSIE 6.0; Windows NT 5.1;SV1)");
                // 建立实际的连接
                connection.connect();
                // 获取所有响应头字段
                Map<String, List<String>> map = connection.getHeaderFields();
                // 遍历所有的响应头字段
                for (String key : map.keySet()) {
                    System.out.println(key + "--->" + map.get(key));
                }
                // 定义 BufferedReader输入流来读取URL的响应
                in = new BufferedReader(new InputStreamReader(
                        connection.getInputStream(), "UTF-8"));
                String line;
                while ((line = in.readLine()) != null) {
                    result += line;
                }
            }
        } catch (Exception e) {
            System.out.println("发送GET请求出现异常!" + e);
            e.printStackTrace();
        }
        // 使用finally块来关闭输入流
        finally {
            try {
                if (in != null) {
                    in.close();
                }
            } catch (Exception e2) {
                e2.printStackTrace();
            }
        }
        return result;
    }
云端部署
步骤一:安装docker插件,有兴趣可以研究更多的API
跟着这个教程来CoolQ HTTP API 插件
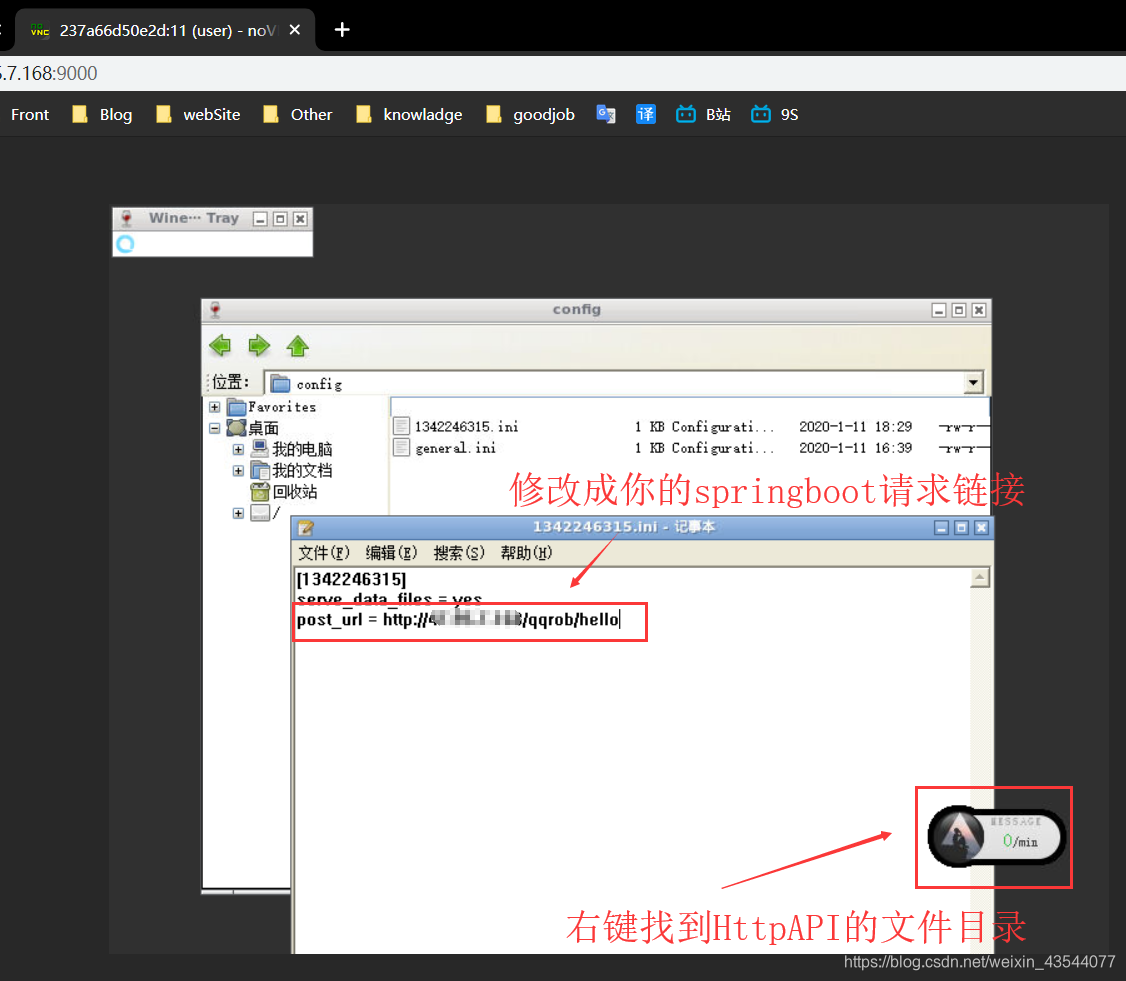
步骤二:登录ip+9000端口
是一个wine界面

注意: 修改成自己项目的url
步骤三:写springboot项目
public class HelloWorldController {
    @ResponseBody
    @RequestMapping("/hello")
    public String hello(String message){
        sendGet("http://xx.xx.xx.xx:5700/send_private_msg","user_id=xxxxx&message=HelloWorld", 1);

        return "success";
    }
    public static String sendGet(String url, String param, int n) {
        String result = "";
        BufferedReader in = null;
        try {
            String urlNameString = url + "?" + param;
            URL realUrl = new URL(urlNameString);
            // 打开和URL之间的连接

            for (int i = 0; i < n; i++) {
                URLConnection connection = realUrl.openConnection();
                // 设置通用的请求属性
                connection.setRequestProperty("accept", "*/*");
                connection.setRequestProperty("connection", "Keep-Alive");
                connection.setRequestProperty("user-agent",
                        "Mozilla/4.0 (compatible; MSIE 6.0; Windows NT 5.1;SV1)");
                // 建立实际的连接
                connection.connect();
                System.out.println("已发送");
                // 获取所有响应头字段
                Map<String, List<String>> map = connection.getHeaderFields();
                // 遍历所有的响应头字段
                for (String key : map.keySet()) {
                    System.out.println(key + "--->" + map.get(key));
                }
                // 定义 BufferedReader输入流来读取URL的响应
                in = new BufferedReader(new InputStreamReader(
                        connection.getInputStream(), "UTF-8"));
                String line;
                while ((line = in.readLine()) != null) {
                    result += line;
                }
            }
        } catch (Exception e) {
            System.out.println("发送GET请求出现异常!" + e);
            e.printStackTrace();
        }
        // 使用finally块来关闭输入流
        finally {
            try {
                if (in != null) {
                    in.close();
                }
            } catch (Exception e2) {
                e2.printStackTrace();
            }
        }
        return result;
    }
}
步骤四:将该项目部署到tomcat上
步骤五:和人工智障聊两句
![[图片]](https://img-blog.csdnimg.cn/20200111202015892.png?x-oss-process=image/watermark,type_ZmFuZ3poZW5naGVpdGk,shadow_10,text_aHR0cHM6Ly9ibG9nLmNzZG4ubmV0L3dlaXhpbl80MzU0NDA3Nw==,size_16,color_FFFFFF,t_70)
