1. OpenStack简介
OpenStack 是一系列开源工具(或开源项目)的组合,主要使用池化虚拟资源来构建和管理私有云及公共云。其中的六个项目主要负责处理核心云计算服务,包括计算、网络、存储、身份和镜像服务。还有另外十多个可选项目,用户可把它们捆绑打包,用来创建独特、可部署的云架构。
1.1. 云计算模式
1、IaaS:基础设施即服务(个人比较习惯的):用户通过网络获取虚机、存储、网络,然后用户根据自己的需求操作获取的资源
2、PaaS:平台即服务:将软件研发平台作为一种服务, 如Eclipse/Java编程平台,服务商提供编程接口/运行平台等
3、SaaS:软件即服务 :将软件作为一种服务通过网络提供给用户,如web的电子邮件、HR系统、订单管理系统、客户关系系统等。用户无需购买软件,而是向提供商租用基于web的软件,来管理企业经营活动
2. OpenStack 项目介绍:
OpenStack 架构由大量开源项目组成。其中包含 6 个稳定可靠的核心服务,用于处理计算、网络、存储、身份和镜像; 同时,还为用户提供了十多种开发成熟度各异的可选服务。OpenStack 的 6 个核心服务主要担纲系统的基础架构,其余项目则负责管理控制面板、编排、裸机部署、信息传递、容器及统筹管理等操作。
- keystone:Keystone 认证所有 OpenStack 服务并对其进行授权。同时,它也是所有服务的端点目录。
- glance:Glance 可存储和检索多个位置的虚拟机磁盘镜像。
- nova:是一个完整的OpenStack 计算资源管理和访问工具,负责处理规划、创建和删除操作。
- neutron:Neutron 能够连接其他 OpenStack 服务并连接网络。
- dashboard:web管理界面
- Swift: 是一种高度容错的对象存储服务,使用 RESTful API 来存储和检索非结构数据对象。
- Cinder 通过自助服务 API 访问持久块存储。
- Ceilometer:计费
- Heat:编排
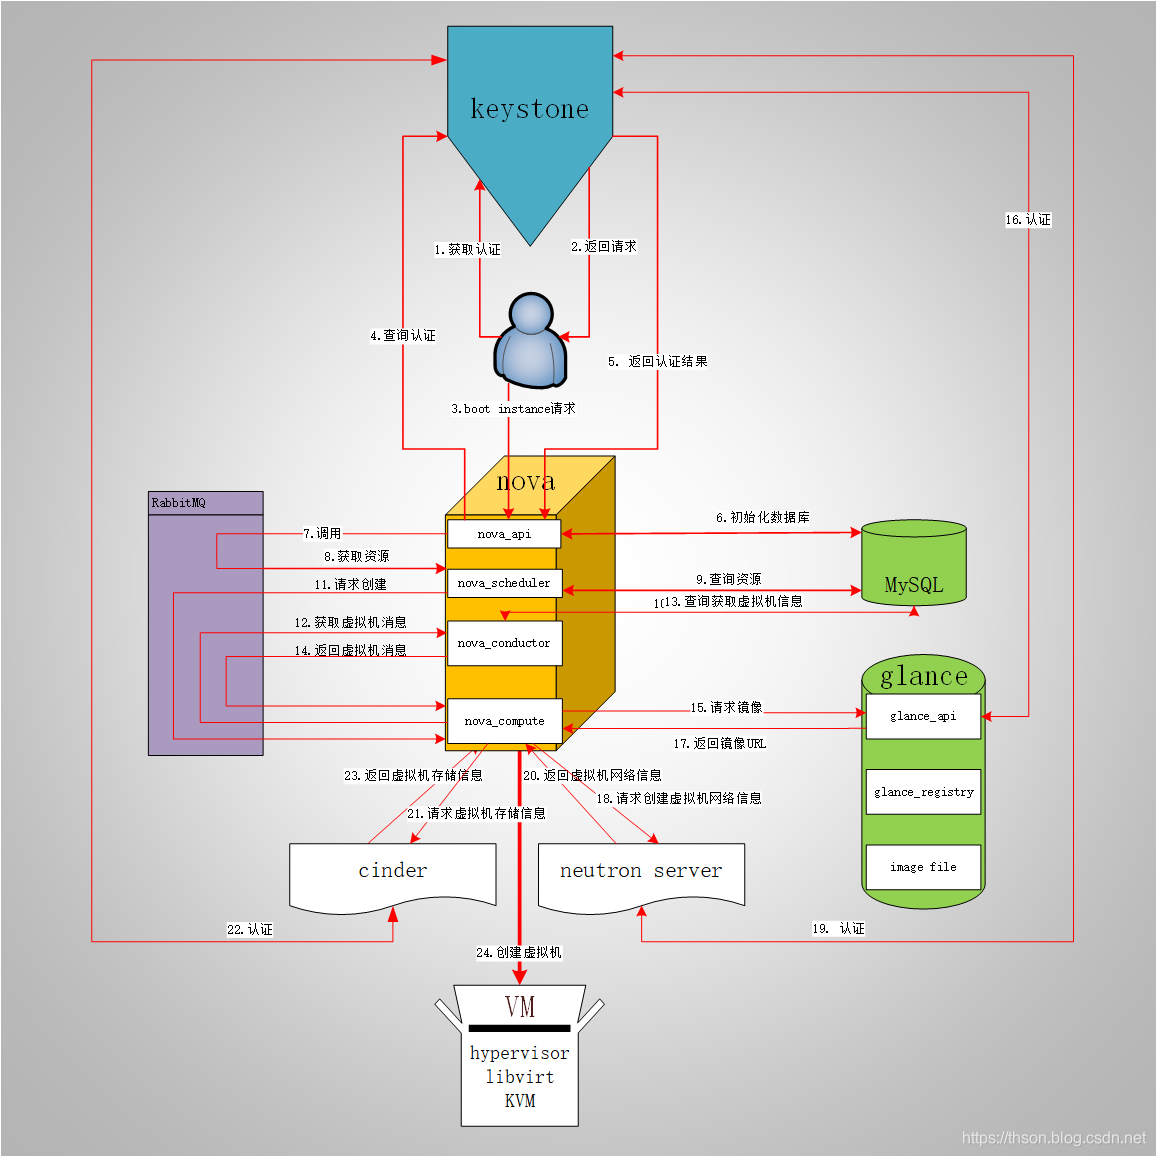
OpenStack架构图
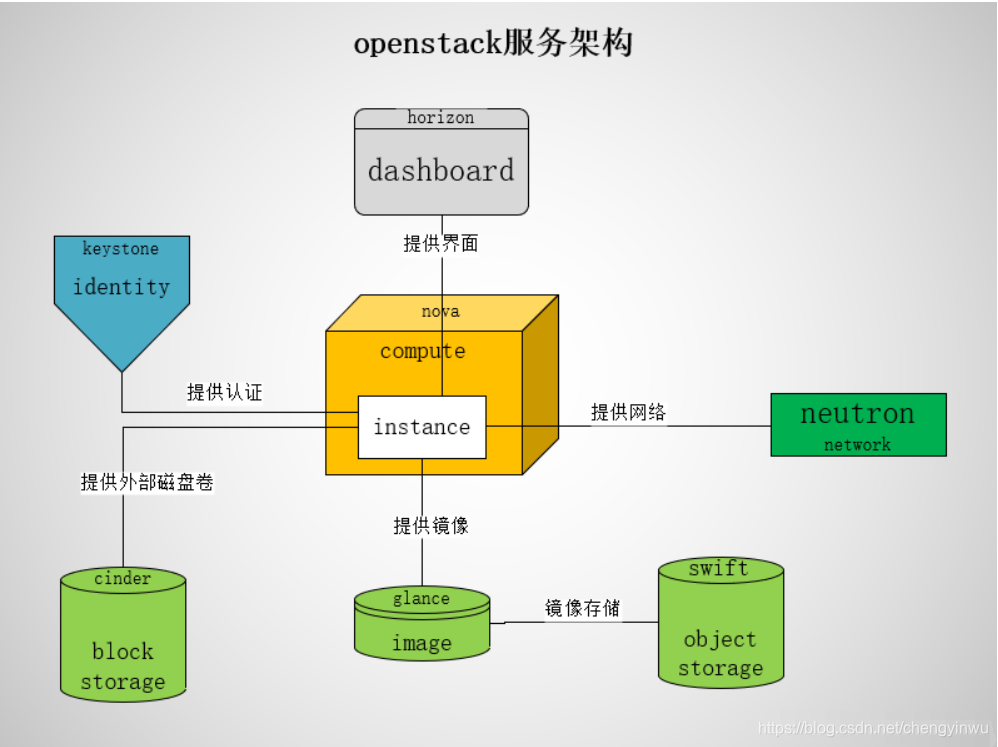
通过消息队列和数据库,各个组件可以相互调用,互相通信。每个项目都有各自的特性,大而全的架构并非适合每一个用户,如Glance在最早的A、B版本中并没有实际出现应用,Nova可以脱离镜像服务独立运行。当用户的云计算规模大到需要管理多种镜像时,才需要像Glance这样的组件。
OpenStack的逻辑架构

2.1 Openstack创建实例的流程
1、通过登录界面dashboard或命令行CLI通过RESTful API向keystone获取认证信息。
2、 keystone通过用户请求认证信息,并生成auth-token返回给对应的认证请求。

3、 然后携带auth-token通过RESTful API向nova-api发送一个boot instance的请求。

4、 nova-api接受请求后向keystone发送认证请求,查看token是否为有效用户和token。
5、 keystone验证token是否有效,将结果返回给nova-api。

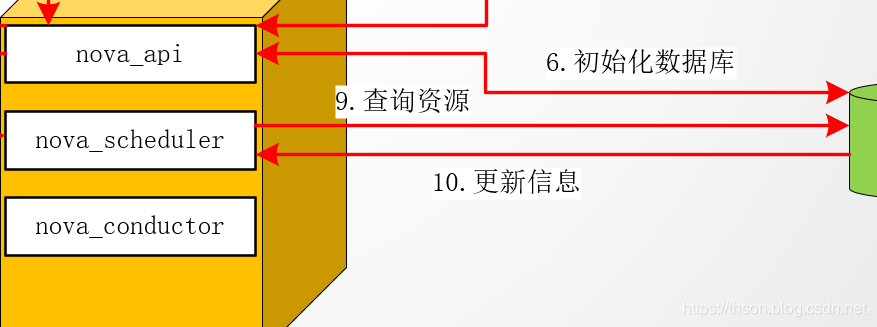
6、通过认证后nova-api和数据库通讯,初始化新建虚拟机的数据库记录。

7、 nova-api调用rabbitmq,向nova-scheduler请求是否有创建虚拟机的资源(node主机)。
8、 nova-scheduler进程侦听消息队列,获取nova-api的请求。
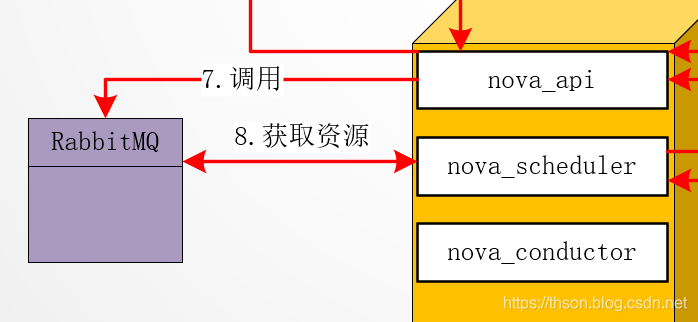
9、 nova-scheduler通过查询nova数据库中计算资源的情况,并通过调度算法计算符合虚拟机创建需要的主机。
10、 对于有符合虚拟机创建的主机,nova-scheduler更新数据库中虚拟机对应的物理主机信息。
11、 nova-scheduler通过rpc调用向nova-compute发送对应的创建虚拟机请求的消息。
nova-compute会从对应的消息队列中获取创建虚拟机请求的消息。

12、 nova-compute通过rpc调用向nova-conductor请求获取虚拟机消息。(Flavor)
nova-conductor从消息队队列中拿到nova-compute请求消息。

13、 nova-conductor根据消息查询虚拟机对应的信息。
nova-conductor从数据库中获得虚拟机对应信息。

14、 nova-conductor把虚拟机信息通过消息的方式发送到消息队列中。
nova-compute从对应的消息队列中获取虚拟机信息消息。

15、 nova-compute请求glance-api获取创建虚拟机所需要镜像。

16、 glance-api向keystone认证token是否有效,并返回验证结果。
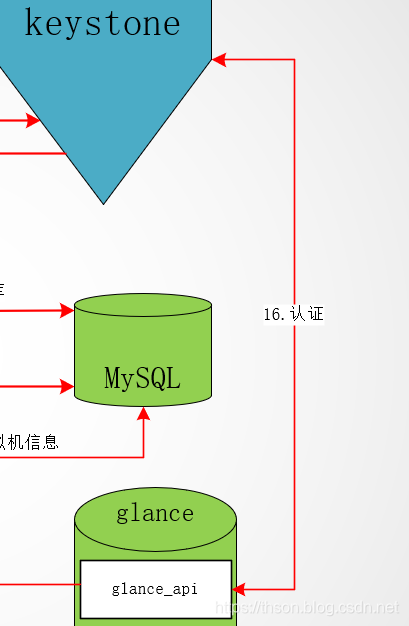
17、 token验证通过,nova-compute获得虚拟机镜像信息(URL)。

18、 nova-compute请求neutron-server获取创建虚拟机所需要的网络信息。
19、 neutron-server向keystone认证token是否有效,并返回验证结果。
20、token验证通过,nova-compute获得虚拟机网络信息。

21、 nova-compute请求cinder-api获取创建虚拟机所需要的持久化存储信息。
22、 cinder-api向keystone认证token是否有效,并返回验证结果。
23、 token验证通过,nova-compute获得虚拟机持久化存储信息。

24、 nova-compute根据instance的信息调用配置的虚拟化驱动来创建虚拟机。

2.2. 总图
3. openstack项目搭建
3.1 base环境准备

图中数字,如10,表示ip:192.168.99.10
4. 环境配置
1、系统:
计算节点:centos 7.6.1810
其它:centos 7.6.1810
2、 准备yum源:/etc/yum.repos.d/openstack.repo
yum install centos-release-openstack-stein
3、安装openstack客户端、openstack SELinux管理包(控制端与计算节点安装,其它不需要)
yum install python-openstackclient openstack-selinux
4、更改主机名
hostnamectl set-hostname 主机名
5、时间同步
cp -f /usr/share/zoneinfo/Asia/Shanghai  /etc/localtime
ntpdate  time3.aliyun.com && hwclock  -w
6、配置hosts
echo "192.168.99.100 openstackvip.com" >> /etc/hosts
这里设置你的vip和你的域名
7、如果你做bond,就做这步,否则就跳过。
bond配置
cd /etc/sysconfig/network-scripts/
vim ifcfg-bond0

BOOTPROTO=static
NAME=bond0
DEVICE=bond0
ONBOOT=yes
BONDING_MASTER=yes
BONDING_OPTS="mode=1 miimon=100" #指定绑定类型为1及链路状态监测间隔时间
IPADDR=192.168.99.101
NETMASK=255.255.255.0
GATEWAY=192.168.99.2
DNS1=202.106.0.20
eth0配置:
vim ifcfg-eth0

BOOTPROTO=static
NAME=eth0
DEVICE=eth0
ONBOOT=yes
NM_CONTROLLED=no
MASTER=bond0
USERCTL=no
SLAVE=yes
eth1配置:
vim ifcfg-eth1

BOOTPROTO=static
NAME=eth1
DEVICE=eth1
ONBOOT=yes
NM_CONTROLLED=no
MASTER=bond0
USERCTL=no
SLAVE=yes
4.1. 配置Mariadb数据库
在数据库节点上配置
1、 安装组件
yum -y install mariadb mariadb-server
2、 配置my.cnf
vim /etc/my.cnf.d/openstack.cnf

[mysqld]
bind-address = 192.168.99.106
default-storage-engine = innodb
innodb_file_per_table = on
max_connections = 4096
collation-server = utf8_general_ci
character-set-server = utf8
3、启动数据库和设置开机启动
systemctl enable mariadb.service
systemctl restart mariadb.service
4、通过运行脚本来保护数据库服务
mysql_secure_installation
4.2. 配置Memcached
数据库节点配置
1、安装:
yum -y install memcached python-memcached
2、编辑配置文件
配置服务以使用控制器节点的管理IP地址。这是为了通过网络访问其他节点:
vim /etc/sysconfig/memcached
替换下面这句

OPTIONS="-l 192.168.99.106"
3、启动Memcached服务并设置开机自启:
systemctl enable memcached.service
systemctl restart memcached.service
4.3. 安装rabbit-MQ消息队列服务
数据库节点配置
1、 安装
yum -y install rabbitmq-server
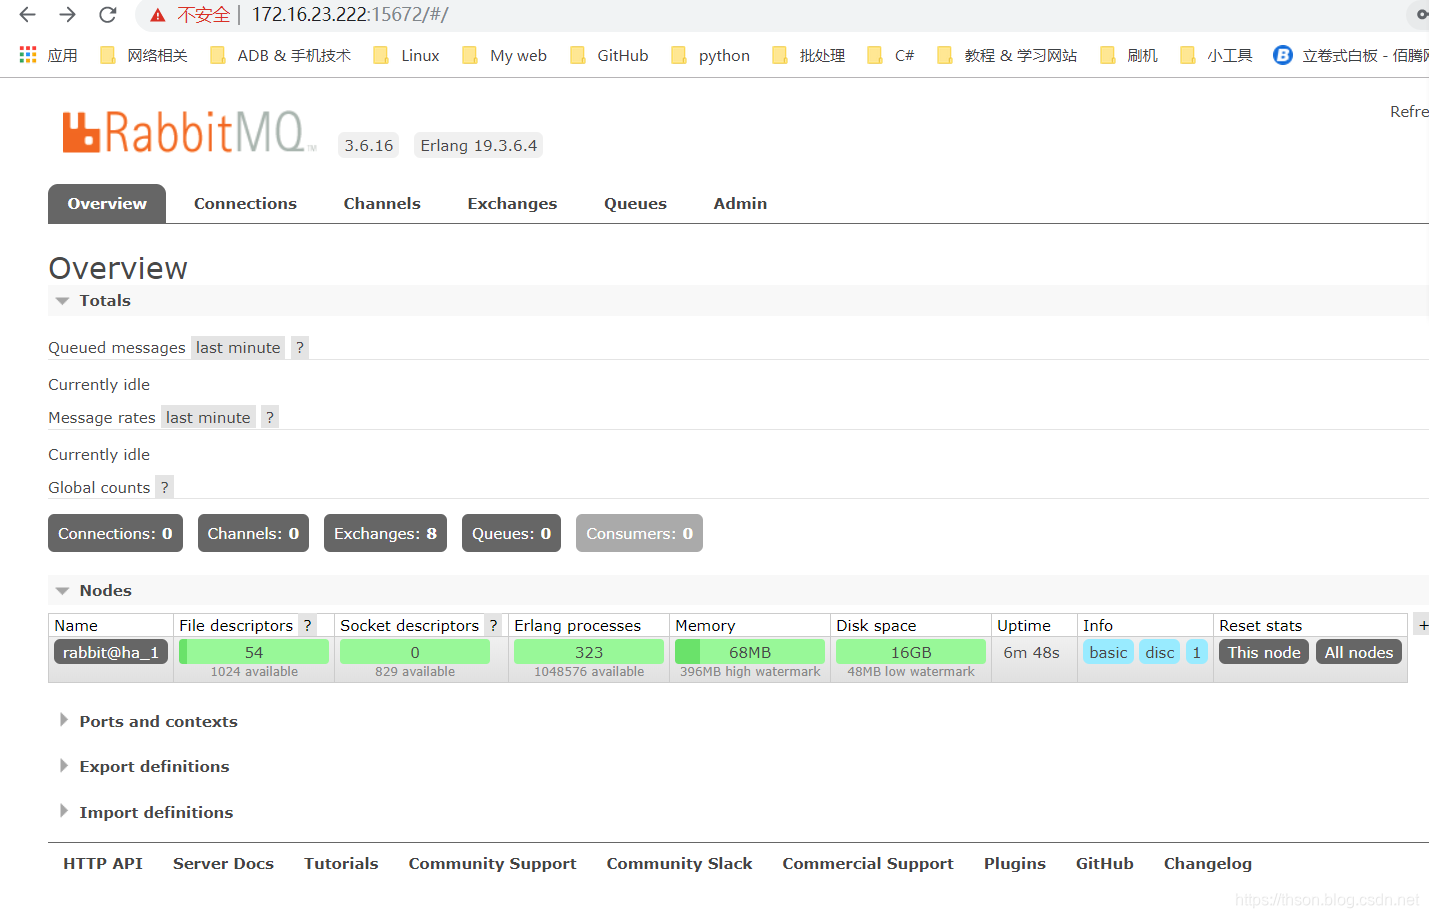
2、启动(端口:15672)
systemctl enable rabbitmq-server
systemctl restart rabbitmq-server
3、添加用户和密码
rabbitmqctl add_user openstack 123
4、授权
rabbitmqctl set_permissions openstack ".*" ".*" ".*"
5、 打开web插件
rabbitmq-plugins enable rabbitmq_management
6、查看插件
rabbitmq-plugins list
7、web访问端口15672,用户密码都是guest
5. 配置haproxy+keepalived
haproxy节点配置:
1、 安装keepalived和haproxy
yum -y install keepalived haproxy
2、配置master_keepalived
vim /etc/keepalived/keepalived.conf

! Configuration File for keepalived

global_defs {
   notification_email {
       root@localhost
   }
   notification_email_from keepalived@localhost
   smtp_server 127.0.0.1
   smtp_connect_timeout 30
   router_id ha_1
   vrrp_skip_check_adv_addr
   vrrp_strict
   vrrp_iptables
   vrrp_garp_interval 0
   vrrp_gna_interval 0
}
vrrp_instance VI_1 {
    state MASTER
    interface eth0
    virtual_router_id 51
    priority 100
    advert_int 1
    authentication {
        auth_type PASS
        auth_pass 1111
    }
    virtual_ipaddress {
        192.168.99.100 dev eth0 label eth0:1
    }
}
3、 启动
systemctl restart keepalived
systemctl enable keepalived
4、haproxy配置
vim /etc/haproxy/haproxy.cfg

global
    log         127.0.0.1 local2
    chroot      /var/lib/haproxy
    pidfile     /var/run/haproxy.pid
    maxconn     4000
    user        haproxy
    group       haproxy
    daemon
    stats socket /var/lib/haproxy/stats

defaults
    mode                    http
    log                     global
    option                  httplog
    option                  dontlognull
    option http-server-close
    option forwardfor       except 127.0.0.0/8
    option                  redispatch
    retries                 3
    timeout http-request    180s
    timeout queue           10m
    timeout connect         180s
    timeout client          10m
    timeout server          10m
    timeout http-keep-alive 180s
    timeout check           10s
    maxconn                 3000

listen stats
    mode http
    bind :9999
    stats enable
    log global
    stats uri /haproxy-status
    stats auth admin:123
listen dashboard
    bind :80
    mode http
    balance source
    server dashboard 192.168.99.106:80 check inter 2000 fall 3 rise 5
listen mysql
    bind :3306
    mode tcp
    balance source
    server mysql 192.168.99.106:3306 check inter 2000 fall 3 rise 5
listen memcached
    bind :11211
    mode tcp
    balance source
    server memcached 192.168.99.106:11211 inter 2000 fall 3 rise 5
listen rabbit
    bind :5672
    mode tcp
    server rabbit 192.168.99.106:5672 inter 2000 fall 3 rise 5
listen rabbit_web
    bind :15672
    mode http
    server rabbit_web 192.168.99.106:15672 inter 2000 fall 3 rise 5

listen keystone
    bind :5000
    mode tcp
    server keystone 192.168.99.101:5000 inter 2000 fall 3 rise 5
listen glance
    bind :9292
    mode tcp
    server glance 192.168.99.101:9292 inter 2000 fall 3 rise 5
listen placement
    bind :8778
    mode tcp
    server placement 192.168.99.101:8778 inter 2000 fall 3 rise 5
listen neutron
    bind :9696
    mode tcp
    server neutron 192.168.99.101:9696 inter 2000 fall 3 rise 5
listen nova
    bind :8774
    mode tcp
    server nova 192.168.99.101:8774 inter 2000 fall 3 rise 5
listen VNC
    bind :6080
    mode tcp
    server VNC 192.168.99.101:6080 inter 2000 fall 3 rise 5
5、 启动
systemctl restart haproxy
systemctl enable haproxy
6、查检下端口
ss -tnl

# 输出
State      Recv-Q Send-Q Local Address:Port               Peer Address:Port
LISTEN     0      128      *:5000                 *:*
LISTEN     0      128      *:5672                 *:*
LISTEN     0      128      *:8778                 *:*
LISTEN     0      128      *:3306                 *:*
LISTEN     0      128      *:11211                *:*
LISTEN     0      128      *:9292                 *:*
LISTEN     0      128      *:9999                 *:*
LISTEN     0      128      *:80                   *:*
LISTEN     0      128      *:22                   *:*
LISTEN     0      128      *:15672                *:*
LISTEN     0      100    127.0.0.1:25                   *:*
LISTEN     0      128      *:6080                 *:*
LISTEN     0      128      *:9696                 *:*
LISTEN     0      128      *:8774                 *:*
LISTEN     0      128     :::22                  :::*
LISTEN     0      100    ::1:25                  :::*
7、 配置内核参数
echo "net.ipv4.ip_nonlocal_bind=1" >> /etc/sysctl.conf
启动haproxy的时候,允许忽视VIP的存在
echo "net.ipv4.ip_forward=1" >> /etc/sysctl.conf
允许ip转发
sysctl -p
使之生效
6. 配置keystone认证服务
6.1. 数据库:106
keystone数据库配置
[mysql]$ mysql -uroot -p123

MariaDB [(none)]> create database keystone;
MariaDB [(none)]> grant all on keystone.* to keystone@'%' identified by '123';
6.2. 控制端: 101
1、安装插件
yum -y install python2-PyMySQL mariadb
2、Controller节点测试
mysql -ukeystone -h 192.168.99.106 -p123
3、Controller添加host文件:/etc/hosts
192.168.99.100 openstackvip.com
4、配置keystone
4.1.安装
yum -y install openstack-keystone httpd mod_wsgi python-memcached
4.2.生成临时token
openssl rand -hex 10
4.3.输出,记住ta,有用
db148a2487000ad12b90
4.4. 配置/etc/keystone/keystone.conf
sed -i.bak -e '/^#/d' -e '/^$/d' /etc/keystone/keystone.conf
vim /etc/keystone/keystone.conf

[DEFAULT]
admin_token = db148a2487000ad12b90

[access_rules_config]
[application_credential]
[assignment]
[auth]
[cache]
[catalog]
[cors]
[credential]

[database]
connection = mysql+pymysql://keystone:[email protected]/keystone

[domain_config]
[endpoint_filter]
[endpoint_policy]
[eventlet_server]
[federation]
[fernet_receipts]
[fernet_tokens]
[healthcheck]
[identity]
[identity_mapping]
[jwt_tokens]
[ldap]
[memcache]
[oauth1]
[oslo_messaging_amqp]
[oslo_messaging_kafka]
[oslo_messaging_notifications]
[oslo_messaging_rabbit]
[oslo_middleware]
[oslo_policy]
[policy]
[profiler]
[receipt]
[resource]
[revoke]
[role]
[saml]
[security_compliance]
[shadow_users]
[signing]

[token]
provider = fernet

[tokenless_auth]
[trust]
[unified_limit]
[wsgi]
4.5.更新Identity服务数据库
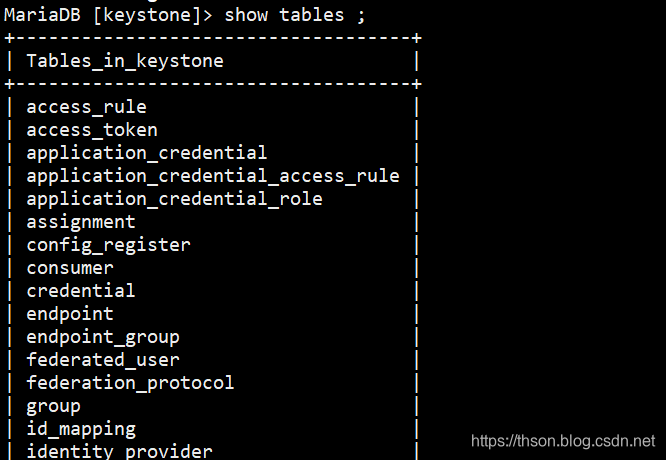
su -s /bin/sh -c "keystone-manage db_sync" keystone
4.6.初始化Fernet密钥存储库
keystone-manage fernet_setup --keystone-user keystone --keystone-group keystone
keystone-manage credential_setup --keystone-user keystone --keystone-group keystone
4.7.验证:
ls /etc/keystone/fernet-keys/

1 0
4.8.配置apache配置文件/etc/httpd/conf/httpd.conf
加配置Servername controller:80
sed -i '1s#$#\nServername controller:80#' /etc/httpd/conf/httpd.conf
4.9.软链接配置文件
ln -s /usr/share/keystone/wsgi-keystone.conf /etc/httpd/conf.d/
4.10.启动Apache HTTP服务
systemctl enable httpd.service
systemctl restart httpd.service
4.11. 配置管理帐户
export OS_TOKEN=db148a2487000ad12b90
export OS_URL=http://openstackvip.com:5000/v3
export OS_IDENTITY_API_VERSION=3
4.12.验证下:
openstack domain list

The request you have made requires authentication. (HTTP 401) (Request-ID: req-03ea8186-0af9-4fa8-ba53-d043cd28e2c0)
这里出错了,检查下你的token,OS_TOKEN设置变量的时候是不是没有跟你在/etc/keystone/keystone.conf配置文件中设置的TOKEN的一样,改成一样的就可以了。
openstack domain list
输出是空的就对了,因为我们还没有添加
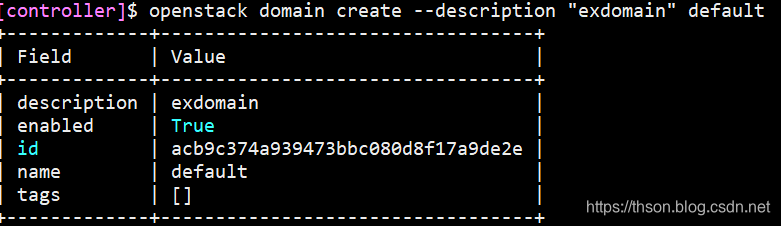
4.13.创建新域的正式方法
openstack domain create --description "exdomain" default
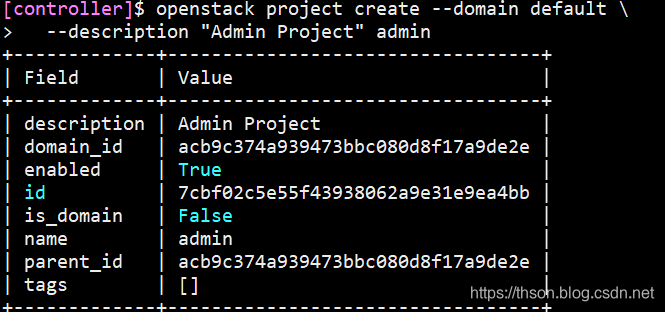
4.14. 创建项目admin
openstack project create --domain default \
  --description "Admin Project" admin
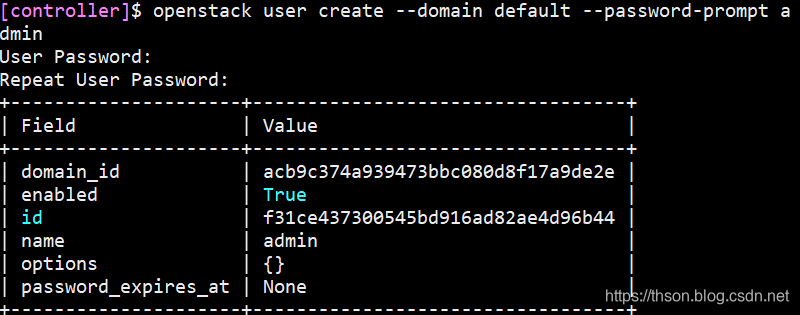
4.15.创建admin,密码设置123
openstack user create --domain default --password-prompt admin
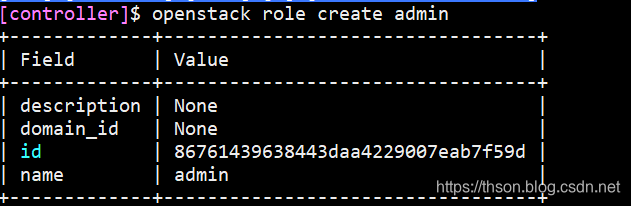
4.16.创建角色
openstack role create admin
4.17. 给admin用户授权
openstack role add --project admin --user admin admin
4.18.创建demo项目
openstack project create --domain default --description "Demo project" demo
4.19.给demo创建用户
openstack user create --domain default --password-prompt demo

4.20.创建user角色(现在就有user和admin)
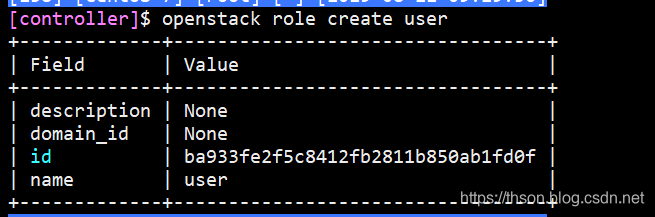
openstack role create user
4.21. 给demo用户授权user
openstack role add --project demo --user demo user
4.22.创建service项目
openstack project create --domain default --description "service project" service
4.23.创建用户glance
openstack user create --domain default --password-prompt glance
4.24.给service添加glance用户并授权admin角色
openstack role add --project service --user glance admin
4.25.创建nova、neutron用户并授权
openstack user create --domain default --password-prompt nova
openstack role add --project service --user nova admin
4.26. 创建keystone的认证服务
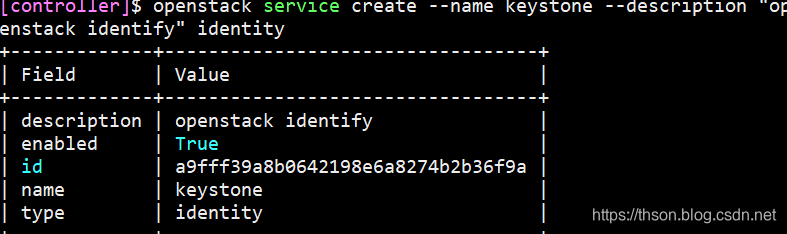
openstack service create --name keystone --description "openstack identify" identity
4.27.查看服务列表
openstack service list

4.28.创建endpoint,地址写vip
公共端点
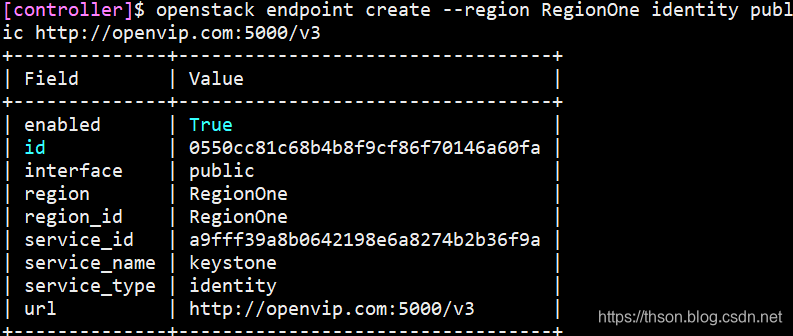
openstack endpoint create --region RegionOne identity public http://openstackvip.com:5000/v3
私有端点
openstack endpoint create --region RegionOne identity internal http://openstackvip.com:5000/v3
管理端点
openstack endpoint create --region RegionOne identity admin http://openstackvip.com:5000/v3
4.29.测试keystone能否验证
unset OS_TOKEN

openstack --os-auth-url http://openstackvip.com:5000/v3 \
--os-project-domain-name default \
--os-user-domain-name default \
--os-project-name admin \
--os-username admin token issue
4.30.使用脚本配置环境变量
admin用户脚本keystone_admin.sh
#!/bin/bash
export OS_PROJECT_DOMAIN_NAME=default
export OS_USER_DOMAIN_NAME=default
export OS_PROJECT_NAME=admin
export OS_USERNAME=admin
export OS_PASSWORD=123
export OS_AUTH_URL=http://openstackvip.com:5000/v3
export OS_IDENTITY_API_VERSION=3
export OS_IMAGE_API_VERSION=2
demo用户脚本keystone_demo.sh
#!/bin/bash
export OS_PROJECT_DOMAIN_NAME=default
export OS_USER_DOMAIN_NAME=default
export OS_PROJECT_NAME=demo
export OS_USERNAME=demo
export OS_PASSWORD=123
export OS_AUTH_URL=http://openstackvip.com:5000/v3
export OS_IDENTITY_API_VERSION=3
export OS_IMAGE_API_VERSION=2
7. 配置glance服务
Glance是Openstack镜像服务组件,监听在9292端口,接收REST API请求,通过其它模块来完成镜像的获取,上传,删除等。
在创建虚拟机的时候,先把镜像上传到glace,
glance-api接收镜像的删除、上传和读取;
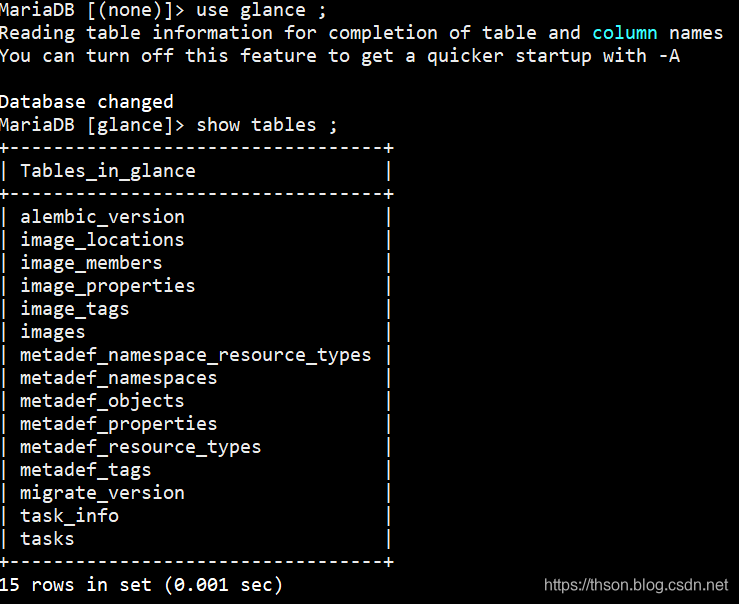
glance-registry(port:9191)与mysql交互,存储获取镜像的元数据。
glance数据库有两张表,一张image表,一张image property表:保存了镜像格式、大小等信息
image store是一个存储的接口层,通过这个接口glance可以获取镜像
7.1 控制端安装glance
yum -y install openstack-glance
7.2 在数据库数据库与用户
mysql -uroot -p123

MariaDB [(none)]> create database glance;
MariaDB [(none)]>  grant all on glance.* to 'glance'@'%' identified by '123';
7.3 验证glance用户连接
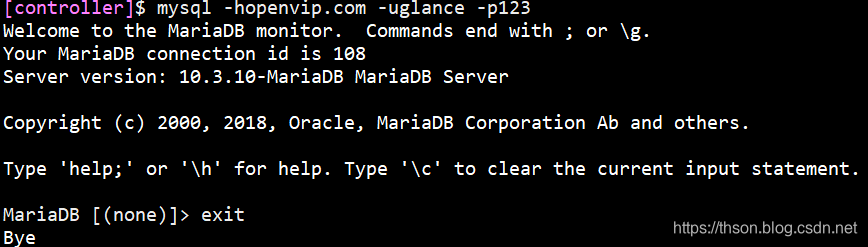
mysql -hopenstackvip.com -uglance -p123
7.4 编辑配置文件/etc/glance/glance-api.conf
sed -i -e '/^#/d' -e '/^$/d' /etc/glance/glance-api.conf
vim /etc/glance/glance-api.conf

[DEFAULT]

[cinder]

[cors]

[database]
connection = mysql+pymysql://glance:[email protected]/glance

[file]
[glance.store.http.store]
[glance.store.rbd.store]
[glance.store.sheepdog.store]
[glance.store.swift.store]
[glance.store.vmware_datastore.store]

[glance_store]
stores = file,http
default_store = file
filesystem_store_datadir = /var/lib/glance/images

[image_format]

[keystone_authtoken]
auth_uri = http://openstackvip.com:5000
auth_url = http://openstackvip.com:5000
memcached_servers = openstackvip.com:11211
auth_type = password
project_domain_name = default
user_domain_name = default
project_name = service
username = glance
password = 123

[oslo_concurrency]
[oslo_messaging_amqp]
[oslo_messaging_kafka]
[oslo_messaging_notifications]
[oslo_messaging_rabbit]
[oslo_middleware]
[oslo_policy]

[paste_deploy]
flavor = keystone

[profiler]
[store_type_location_strategy]
[task]
[taskflow_executor]
7.5 编辑配置文件/etc/glance/glance-registry.conf
sed -i -e '/^#/d' -e '/^$/d' /etc/glance/glance-registry.conf
vim /etc/glance/glance-registry.conf

[DEFAULT]

[database]
connection = mysql+pymysql://glance:[email protected]/glance

[keystone_authtoken]
auth_uri = http://openstackvip.com:5000
auth_url = http://openstackvip.com:5000
memcached_servers = openstackvip.com:11211
auth_type = password
project_domain_name = default
user_domain_name = default
project_name = service
username = glance
password = 123

[oslo_messaging_amqp]
[oslo_messaging_kafka]
[oslo_messaging_notifications]
[oslo_messaging_rabbit]
[oslo_policy]

[paste_deploy]
flavor = keystone

[profiler]
7.6 初始化glance数据库并验证数据库
su -s /bin/sh -c "glance-manage db_sync" glance
7.7 启动glance并设置为开机启动
systemctl enable openstack-glance-api.service openstack-glance-registry.service
systemctl restart openstack-glance-api.service openstack-glance-registry.service
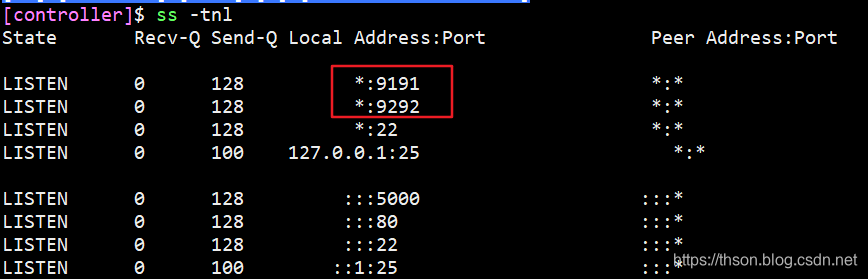
7.8 验证glance端口(30022,9191,9292)
7.9 glance服务注册(设置环境变量)
source keystone_admin.sh
7.10 创建glance服务
openstack service create --name glance --description "OpenStack Image" image
7.11 创建公有endpoint
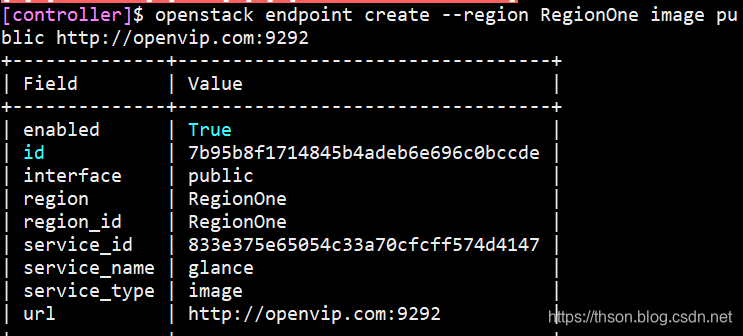
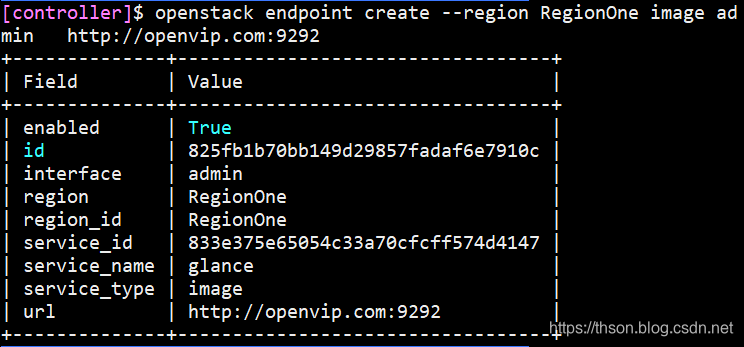
openstack endpoint create --region RegionOne image public http://openstackvip.com:9292
7.12 创建私有endpoint
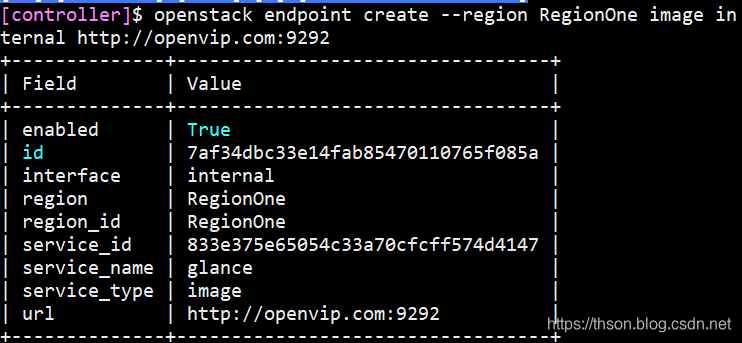
openstack endpoint create --region RegionOne image internal http://openstackvip.com:9292
7.13 创建管理endpoint
openstack endpoint create --region RegionOne image admin http://openstackvip.com:9292
7.14 验证以上步骤
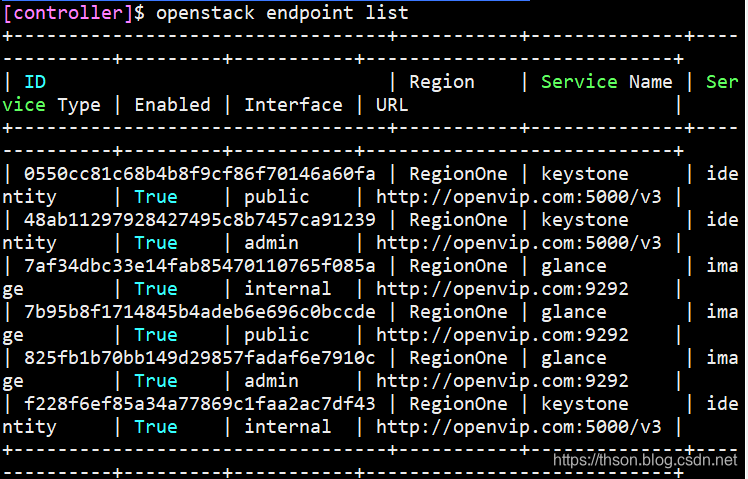
openstack endpoint list
7.15 验证glance服务
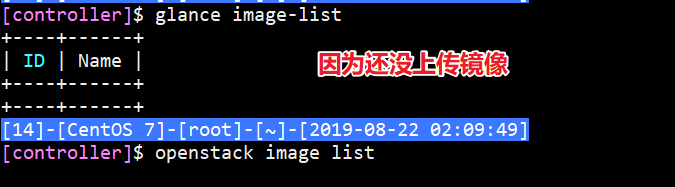
glance image-list

openstack image list
7.16 测试glance上传镜像
wget http://download.cirros-cloud.net/0.3.4/cirros-0.3.4-x86_64-disk.img
7.17 创建
openstack image create "cirros" \
--file  /root/cirros-0.3.4-x86_64-disk.img \
--disk-format qcow2 \
--container-format bare \
--public
7.18 验证glance镜像
glance image-list

openstack image list

7.19 查看指定镜像信息
openstack image show cirros
+------------------+--------------------------------------------------------------------------------------------------------------------------------------------------------------------------------------------+
| Field            | Value                                                                                                                                                                                      |
+------------------+--------------------------------------------------------------------------------------------------------------------------------------------------------------------------------------------+
| checksum         | ee1eca47dc88f4879d8a229cc70a07c6                                                                                                                                                           |
| container_format | bare                                                                                                                                                                                       |
| created_at       | 2019-08-22T06:20:18Z                                                                                                                                                                       |
| disk_format      | qcow2                                                                                                                                                                                      |
| file             | /v2/images/7ae353f8-db19-4449-b4ac-df1e70fe96f7/file                                                                                                                                       |
| id               | 7ae353f8-db19-4449-b4ac-df1e70fe96f7                                                                                                                                                       |
| min_disk         | 0                                                                                                                                                                                          |
| min_ram          | 0                                                                                                                                                                                          |
| name             | cirros                                                                                                                                                                                     |
| owner            | 7cbf02c5e55f43938062a9e31e9ea4bb                                                                                                                                                           |
| properties       | os_hash_algo='sha512', os_hash_value='1b03ca1bc3fafe448b90583c12f367949f8b0e665685979d95b004e48574b953316799e23240f4f739d1b5eb4c4ca24d38fdc6f4f9d8247a2bc64db25d6bbdb2', os_hidden='False' |
| protected        | False                                                                                                                                                                                      |
| schema           | /v2/schemas/image                                                                                                                                                                          |
| size             | 13287936                                                                                                                                                                                   |
| status           | active                                                                                                                                                                                     |
| tags             |                                                                                                                                                                                            |
| updated_at       | 2019-08-22T06:20:19Z                                                                                                                                                                       |
| virtual_size     | None                                                                                                                                                                                       |
| visibility       | public                                                                                                                                                                                     |
+------------------+--------------------------------------------------------------------------------------------------------------------------------------------------------------------------------------------+
8. 配置placement服务
8.1. 数据库
mysql -u root -p

MariaDB [(none)]> CREATE DATABASE placement;

MariaDB [(none)]> GRANT ALL PRIVILEGES ON placement.* TO 'placement'@'%' \
  IDENTIFIED BY '123';
8.2. 控制端
8.2.1 使用您选择的创建Placement服务用户PLACEMENT_PASS
openstack user create --domain default --password-prompt placement
8.2.2 使用admin角色将Placement用户添加到服务项目
openstack role add --project service --user placement admin
8.2.3 在服务目录中创建Placement API条目
openstack service create --name placement \
  --description "Placement API" placement

8.2.4 创建Placement API服务端点
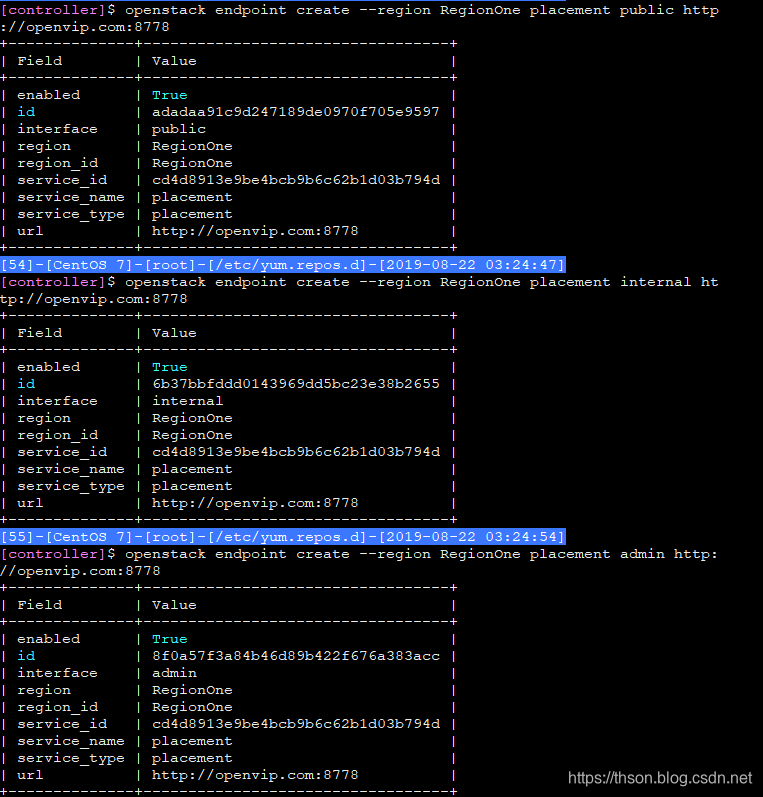
openstack endpoint create --region RegionOne placement public http://openstackvip.com:8778

openstack endpoint create --region RegionOne placement internal http://openstackvip.com:8778

openstack endpoint create --region RegionOne placement admin http://openstackvip.com:8778
8.2.5 安装openstack-placement-api
yum -y install openstack-placement-api
8.2.6 编辑/etc/placement/placement.conf
sed -i -e '/^#/d' -e '/^$/d' /etc/placement/placement.conf
vim /etc/placement/placement.conf

[DEFAULT]

[api]
auth_strategy = keystone

[keystone_authtoken]
auth_url = http://openstackvip.com:5000/v3
memcached_servers = openstackvip.com:11211
auth_type = password
project_domain_name = default
user_domain_name = default
project_name = service
username = placement
password = 123

[placement]

[placement_database]
connection = mysql+pymysql://placement:[email protected]/placement
8.2.7 填充placement数据库
su -s /bin/sh -c "placement-manage db sync" placement
8.2.8 重启httpd服务
systemctl restart httpd
8.2.9 验证
placement-status upgrade check

+----------------------------------+
| Upgrade Check Results            |
+----------------------------------+
| Check: Missing Root Provider IDs |
| Result: Success                  |
| Details: None                    |
+----------------------------------+
| Check: Incomplete Consumers      |
| Result: Success                  |
| Details: None                    |
+----------------------------------+
9. 配置nova
9.1. 配置nova控制节点
nova分为控制节点和计算节点,计算节点通过nova computer进行虚拟机创建,通过libvirt调用kvm创建虚拟机,nova之间通信通过rabbitMQ队列进行通信
其组件和功能如下:
API:负责接收和响应外部请求。
Scheduler:负责调度虚拟机所在的物理机。
Conductor:计算节点访问数据库的中间件。
Consoleauth:用于控制台的授权认证。
Novncproxy:VNC 代理,用于显示虚拟机操作终端。

Nova-API的功能:
Nova-api组件实现了restful API的功能,接收和响应来自最终用户的计算API请求,接收外部的请求并通过message queue将请求发动给其他服务组件,同时也兼容EC2 API,所以也可以使用EC2的管理工具对nova进行日常管理。

nova scheduler:
nova scheduler模块在openstack中的作用是决策虚拟机创建在哪个主机(计算节点)上。决策一个虚拟机应该调度到某物理节点,需要分为两个步骤:
过滤(filter):过滤出可以创建虚拟机的主机
计算权值(weight):根据权重大进行分配,默认根据资源可用空间进行权重排序
9.1.1. 安装并配置nova控制节点
数据库服务器操作
1、配置数据库
mysql -uroot -p123

MariaDB [(none)]> CREATE DATABASE nova_api;
MariaDB [(none)]> GRANT ALL PRIVILEGES ON nova_api.* TO 'nova'@'%' IDENTIFIED BY '123';

MariaDB [(none)]> CREATE DATABASE nova;
MariaDB [(none)]> GRANT ALL PRIVILEGES ON nova.* TO 'nova'@'%'  IDENTIFIED BY '123';

MariaDB [(none)]> CREATE DATABASE nova_cell0;
MariaDB [(none)]> GRANT ALL PRIVILEGES ON nova_cell0.* TO 'nova'@'%' IDENTIFIED BY '123';

MariaDB [(none)]> flush privileges;
9.1.2. 在控制端
1、 安装
yum -y install openstack-nova-api openstack-nova-conductor \
  openstack-nova-console openstack-nova-novncproxy  \
  openstack-nova-scheduler
2、 创建nova服务(类型compute)
openstack service create --name nova \
  --description "OpenStack Compute" compute
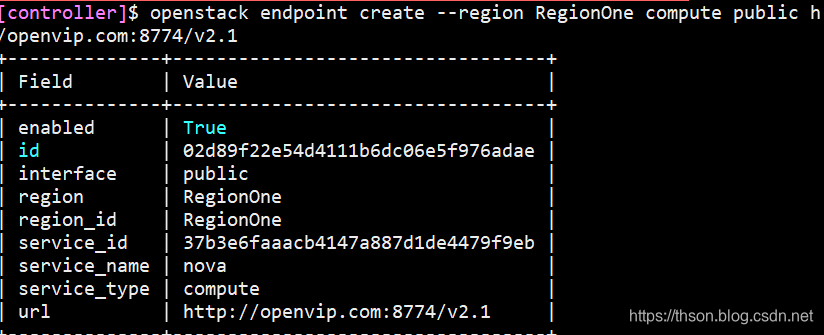
3、创建公共端点
openstack endpoint create --region RegionOne \
  compute public http://openstackvip.com:8774/v2.1
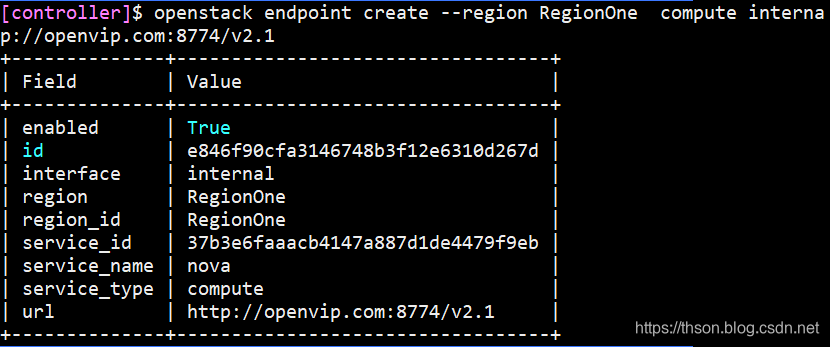
4、创建私有端点
openstack endpoint create --region RegionOne  \
  compute internal http://openstackvip.com:8774/v2.1
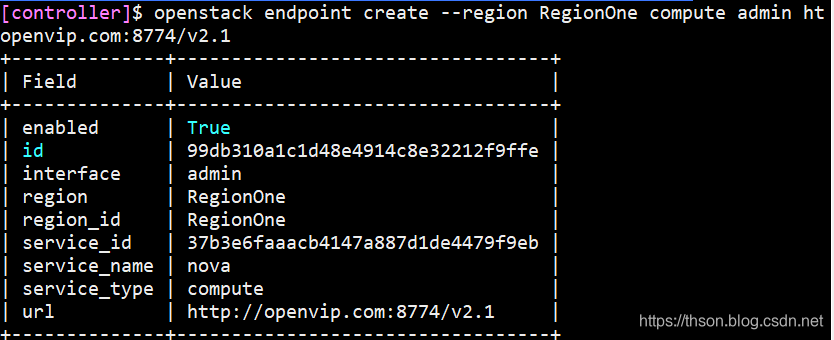
5、 创建管理端点
openstack endpoint create --region RegionOne \
  compute admin http://openstackvip.com:8774/v2.1
6、 编辑/etc/nova/nova.conf
sed -i -e '/^#/d' -e '/^$/d' /etc/nova/nova.conf
vim /etc/nova/nova.conf

[DEFAULT]
my_ip = 192.168.99.101
use_neutron = true
firewall_driver = nova.virt.firewall.NoopFirewallDriver
enabled_apis = osapi_compute,metadata
transport_url = rabbit://openstack:[email protected]
rpc_backend=rabbit

[api]
auth_strategy=keystone

[api_database]
connection = mysql+pymysql://nova:[email protected]/nova_api

[database]
connection = mysql+pymysql://nova:[email protected]/nova

[glance]
api_servers = http://openstackvip.com:9292

[keystone_authtoken]
auth_url = http://openstackvip.com:5000/v3
memcached_servers = openstackvip.com:11211
auth_type = password
project_domain_name = default
user_domain_name = default
project_name = service
username = nova
password = 123

[oslo_concurrency]
lock_path = /var/lib/nova/tmp

[placement]
os_region_name = RegionOne
project_domain_name = default
project_name = service
auth_type = password
user_domain_name = default
auth_url = http://openstackvip.com:5000/v3
username = placement
password = 123

[vnc]
enabled = true
server_listen = $my_ip
server_proxyclient_address = $my_ip
7、配置apache允许访问placement API
vim /etc/httpd/conf.d/00-placement-api.conf

最下方添加以下配置:

<Directory /usr/bin>
   <IfVersion >= 2.4>
      Require all granted
   </IfVersion>
   <IfVersion < 2.4>
      Order allow,deny
      Allow from all
   </IfVersion>
</Directory>
8、重启http
systemctl restart httpd
9、初始化数据库
#nova_api数据库
su -s /bin/sh -c "nova-manage api_db sync" nova

#nova cell0数据库
su -s /bin/sh -c "nova-manage cell_v2 map_cell0" nova

#nova cell1 数据库
su -s /bin/sh -c "nova-manage cell_v2 create_cell --name=cell1 --verbose" nova

#nova数据库
su -s /bin/sh -c "nova-manage db sync" nova
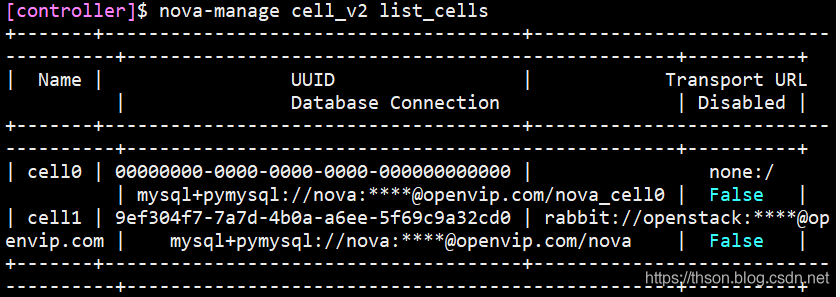
10、 验证nova cell0和nova cell1是否正常注册
su -s /bin/sh -c "nova-manage cell_v2 list_cells" nova
11、 启动并将nova服务设置为开机启动
systemctl enable openstack-nova-api.service \
openstack-nova-consoleauth.service \
openstack-nova-scheduler.service   \
openstack-nova-conductor.service \
openstack-nova-novncproxy.service

systemctl restart openstack-nova-api.service   \
openstack-nova-consoleauth.service \
openstack-nova-scheduler.service  \
openstack-nova-conductor.service \
openstack-nova-novncproxy.service
12、重启nova控制端脚本(nova-restart.sh)
#!/bin/bash
systemctl restart openstack-nova-api.service   openstack-nova-consoleauth.service openstack-nova-scheduler.service   openstack-nova-conductor.service openstack-nova-novncproxy.service
chmod a+x nova-restart.sh
13、查看rabbitMQ连接
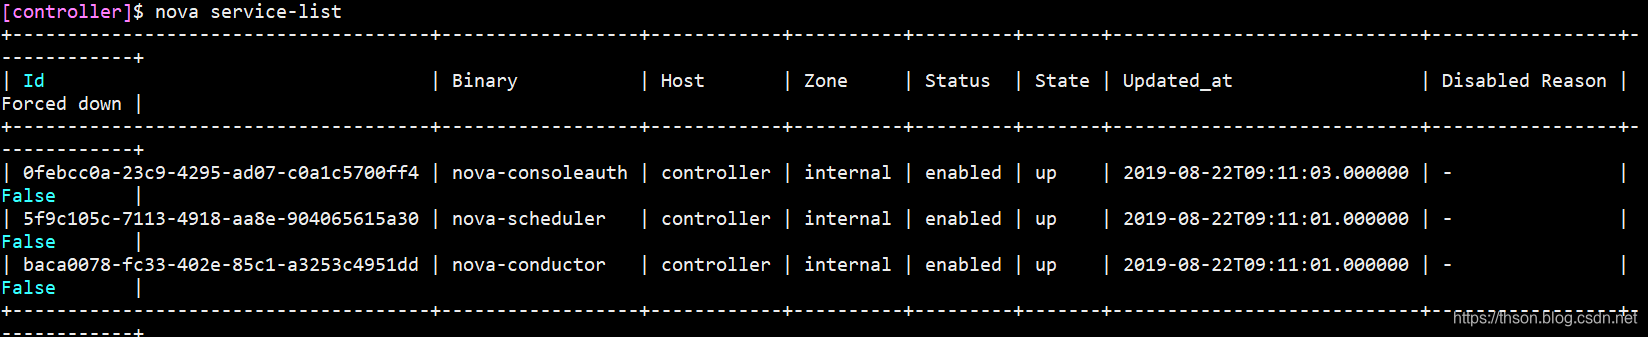
14、验证nova控制端
nova service-list
9.2. 配置nova计算节点
1、安装nova-compute包
yum -y install openstack-nova-compute
2、配置nova
sed -i -e '/^#/d' -e '/^$/d' /etc/nova/nova.conf
vim /etc/nova/nova.conf

#全部配置:
[DEFAULT]
my_ip = 192.168.99.23
use_neutron=true
firewall_driver=nova.virt.firewall.NoopFirewallDriver
enabled_apis=osapi_compute,metadata
transport_url = rabbit://openstack:[email protected]

[api]
auth_strategy=keystone

[glance]
api_servers=http://openstackvip.com:9292

[keystone_authtoken]
auth_url = http://openstackvip.com:5000/v3
memcached_servers = openstackvip.com:11211
auth_type = password
project_domain_name = default
user_domain_name = default
project_name = service
username = nova
password = 123

[oslo_concurrency]
lock_path=/var/lib/nova/tmp

[placement]
os_region_name = RegionOne
project_domain_name = default
project_name = service
auth_type = password
user_domain_name = default
auth_url = http://openstackvip.com:5000/v3
username = placement
password = 123

[vnc]
enabled=true
server_listen=0.0.0.0
server_proxyclient_address = $my_ip
novncproxy_base_url=http://openstackvip.com:6080/vnc_auto.html
3、 确认计算节点是否支持硬件加速
egrep -c '(vmx|svm)' /proc/cpuinfo

40
如果此命令返回值zero,则您的计算节点不支持硬件加速,您必须配置libvirt为使用QEMU而不是KVM。
编辑文件中的[libvirt]部分,/etc/nova/nova.conf如下所示:
[libvirt]
# ...
virt_type = qemu
4、启动nova 计算服务并设置为开机启动
systemctl enable libvirtd.service openstack-nova-compute.service
systemctl restart libvirtd.service openstack-nova-compute.service
9.2.1. 控制端
1、添加计算节点到cell 数据库
source  admin-openstack.sh
openstack compute service list --service nova-compute

2、主动发现计算节点
使用命令发现
su -s /bin/sh -c "nova-manage cell_v2 discover_hosts --verbose" nova

3、定期主动发现
vim /etc/nova/nova.conf

加上这条
[scheduler]
discover_hosts_in_cells_interval=300
4、重启nova服务
bash nova-restart.sh
下面是验证:
5、验证1:列出服务组件以验证每个进程的成功启动和注册
[controller]$ openstack compute service list
+----+------------------+------------+----------+---------+-------+----------------------------+
| ID | Binary           | Host       | Zone     | Status  | State | Updated At                 |
+----+------------------+------------+----------+---------+-------+----------------------------+
|  1 | nova-consoleauth | controller | internal | enabled | up    | 2019-08-23T03:24:19.000000 |
|  2 | nova-scheduler   | controller | internal | enabled | up    | 2019-08-23T03:24:19.000000 |
|  3 | nova-conductor   | controller | internal | enabled | up    | 2019-08-23T03:24:13.000000 |
|  6 | nova-compute     | note1      | nova     | enabled | up    | 2019-08-23T03:24:19.000000 |
+----+------------------+------------+----------+---------+-------+----------------------------+
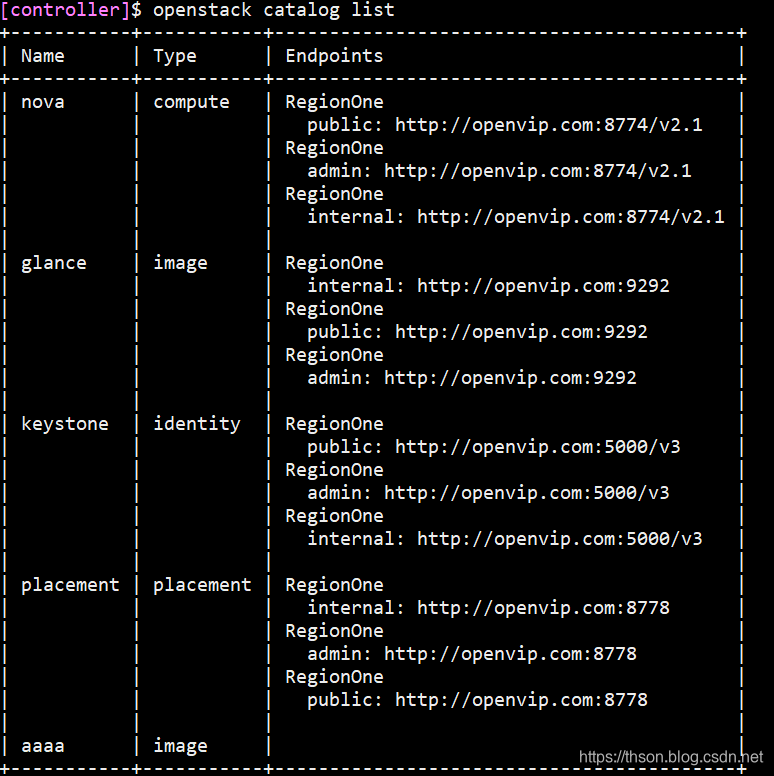
6、验证2:列出Identity服务中的API端点以验证与Identity服务的连接
openstack catalog list
7、验证3:列出Image服务中的图像以验证与Image服务的连接
openstack image list

+--------------------------------------+--------+--------+
| ID                                   | Name   | Status |
+--------------------------------------+--------+--------+
| 7ae353f8-db19-4449-b4ac-df1e70fe96f7 | cirros | active |
+--------------------------------------+--------+--------+
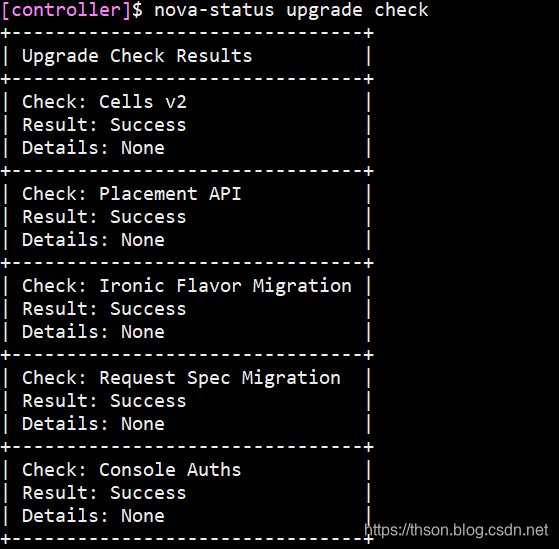
8、验证4:检查单元格和放置API是否正常运行以及其他必要的先决条件是否到位
nova-status upgrade check
10. 配置neutron服务
10.1. 配置neutron控制节点
1、在数据库服务器上创建
要创建数据库,请完成以下步骤
mysql -u root -p

MariaDB [(none)] CREATE DATABASE neutron;

MariaDB [(none)]> GRANT ALL PRIVILEGES ON neutron.* TO 'neutron'@'%' \
  IDENTIFIED BY '123';
2、创建neutron用户
openstack user create --domain default --password-prompt neutron
3、将admin角色添加到neutron用户
openstack role add --project service --user neutron admin
4、 创建neutron服务实体
openstack service create --name neutron \
  --description "OpenStack Networking" network
5、 创建网络服务API端点
openstack endpoint create --region RegionOne \
  network public http://openstackvip.com:9696

openstack endpoint create --region RegionOne \
  network internal http://openstackvip.com:9696

openstack endpoint create --region RegionOne \
  network admin http://openstackvip.com:9696
配置网络选项
6、 安装组件
yum -y install openstack-neutron openstack-neutron-ml2 \
  openstack-neutron-linuxbridge ebtables
配置服务器组件
7、编辑neutron
sed -i.bak -e '/^#/d' -e '/^$/d' /etc/neutron/neutron.conf
vim /etc/neutron/neutron.conf

[DEFAULT]
core_plugin = ml2
service_plugins =
transport_url = rabbit://openstack:[email protected]
auth_strategy = keystone
notify_nova_on_port_status_changes = true
notify_nova_on_port_data_changes = true

[cors]

[database]
connection = mysql+pymysql://neutron:[email protected]/neutron

[keystone_authtoken]
www_authenticate_uri = http://openstackvip.com:5000
auth_url = http://openstackvip.com:5000
memcached_servers = openstackvip.com:11211
auth_type = password
project_domain_name = default
user_domain_name = default
project_name = service
username = neutron
password = 123

[oslo_concurrency]
lock_path = /var/lib/neutron/tmp

[oslo_messaging_amqp]
[oslo_messaging_kafka]
[oslo_messaging_notifications]
[oslo_messaging_rabbit]
[oslo_middleware]
[oslo_policy]
[privsep]
[ssl]

[nova]
auth_url = http://openstackvip.com:5000
auth_type = password
project_domain_name = default
user_domain_name = default
region_name = RegionOne
project_name = service
username = nova
password = 123
[nova]这个选项没有,要手动加,在结尾加
配置模块化第2层(ML2)插件
8、 编辑ml2_conf.ini文件
sed -i.bak -e '/^#/d' -e '/^$/d' /etc/neutron/plugins/ml2/ml2_conf.ini
vim /etc/neutron/plugins/ml2/ml2_conf.ini

[DEFAULT]

[ml2]
type_drivers = flat,vlan
tenant_network_types =
mechanism_drivers = linuxbridge
extension_drivers = port_security

[ml2_type_flat]
flat_networks = provider

[securitygroup]
enable_ipset = true
配置Linux桥代理
9、编辑linuxbridge_agent.ini文件
sed -i.bak -e '/^#/d' -e '/^$/d' /etc/neutron/plugins/ml2/linuxbridge_agent.ini
vim /etc/neutron/plugins/ml2/linuxbridge_agent.ini

[DEFAULT]

[linux_bridge]
physical_interface_mappings = provider:eth0

[vxlan]
enable_vxlan = false

[securitygroup]
enable_security_group = true
firewall_driver = neutron.agent.linux.iptables_firewall.IptablesFirewallDriver
10、设置/etc/sysctl.conf文件
echo "net.bridge.bridge-nf-call-iptables = 1" >> /etc/sysctl.conf
echo "net.bridge.bridge-nf-call-ip6tables = 1" >> /etc/sysctl.conf
生效
sysctl -p
这里会报错,不管
sysctl: cannot stat /proc/sys/net/bridge/bridge-nf-call-iptables: No such file or directory
sysctl: cannot stat /proc/sys/net/bridge/bridge-nf-call-ip6tables: No such file or directory
配置DHCP代理
11、编辑dhcp_agent.ini文件
vim /etc/neutron/dhcp_agent.ini

[DEFAULT]
interface_driver = linuxbridge
dhcp_driver = neutron.agent.linux.dhcp.Dnsmasq
enable_isolated_metadata = true
配置元数据代理
12、编辑metadata_agent.ini文件
vim /etc/neutron/metadata_agent.ini

[DEFAULT]
nova_metadata_host = 192.168.99.101
metadata_proxy_shared_secret = 123
nova_metadata_host写控制端ip,这里我们写vip,再由ha反向代理回来
metadata_proxy_shared_secret为元数据代理的密码
配置Compute服务以使用Networking服务
13、 编辑/etc/nova/nova.conf文件
vim /etc/nova/nova.conf
在最后加上

[neutron]
url = http://openstackvip.com:9696
auth_url = http://openstackvip.com:5000
auth_type = password
project_domain_name = default
user_domain_name = default
region_name = RegionOne
project_name = service
username = neutron
password = 123
service_metadata_proxy = true
metadata_proxy_shared_secret = 123
metadata_proxy_shared_secret 这是我们第11条里配置的密码
14、 网络服务初始化脚本需要一个/etc/neutron/plugin.ini指向ML2插件配置文件的符号链接/etc/neutron/plugins/ml2/ml2_conf.ini。
ln -s /etc/neutron/plugins/ml2/ml2_conf.ini /etc/neutron/plugin.ini
15、填充数据库:
su -s /bin/sh -c "neutron-db-manage --config-file /etc/neutron/neutron.conf --config-file /etc/neutron/plugins/ml2/ml2_conf.ini upgrade head" neutron
16、重新启动Compute API服务:
systemctl restart openstack-nova-api.service
17、启动网络服务并将其配置为在系统引导时启动
systemctl enable neutron-server.service \
  neutron-linuxbridge-agent.service \
  neutron-dhcp-agent.service \
  neutron-metadata-agent.service

systemctl restart neutron-server.service \
  neutron-linuxbridge-agent.service \
  neutron-dhcp-agent.service \
  neutron-metadata-agent.service
注:如果选择了Self-service networks,就需要启动第3层服务,我们选择的是Provider networks所以不需要
systemctl enable neutron-l3-agent.service
systemctl restart neutron-l3-agent.service
10.2. 配置neutron计算节点
1、安装组件
yum -y install openstack-neutron-linuxbridge ebtables ipset
配置公共组件
2、编辑neutron.conf文件
sed -i.bak -e '/^#/d' -e '/^$/d' /etc/neutron/neutron.conf
vim /etc/neutron/neutron.conf

[DEFAULT]
transport_url = rabbit://openstack:[email protected]
auth_strategy = keystone

[cors]
[database]
[keystone_authtoken]
www_authenticate_uri = http://openstackvip.com:5000
auth_url = http://openstackvip.com:5000
memcached_servers = openstackvip.com:11211
auth_type = password
project_domain_name = default
user_domain_name = default
project_name = service
username = neutron
password = 123

[oslo_concurrency]
lock_path = /var/lib/neutron/tmp
[oslo_messaging_amqp]
[oslo_messaging_kafka]
[oslo_messaging_notifications]
[oslo_messaging_rabbit]
[oslo_middleware]
[oslo_policy]
[privsep]
[ssl]
配置Linux桥代理
3、 编辑linuxbridge_agent.ini文件
sed -i.bak -e '/^#/d' -e '/^$/d' /etc/neutron/plugins/ml2/linuxbridge_agent.ini
vim /etc/neutron/plugins/ml2/linuxbridge_agent.ini

[DEFAULT]

[linux_bridge]
physical_interface_mappings = provider:eth0

[vxlan]
enable_vxlan = false

[securitygroup]
enable_security_group = true
firewall_driver = neutron.agent.linux.iptables_firewall.IptablesFirewallDriver
确保您的Linux操作系统内核支持网桥过滤器
4、 配置/etc/sysctl.conf文件
echo "net.bridge.bridge-nf-call-iptables = 1" >> /etc/sysctl.conf
echo "net.bridge.bridge-nf-call-ip6tables = 1" >> /etc/sysctl.conf
生效
sysctl -p
配置Compute服务以使用Networking服务
5、编辑nova.conf文件
vim /etc/nova/nova.conf

[neutron]
url = http://openstackvip.com:9696
auth_url = http://openstackvip.com:5000
auth_type = password
project_domain_name = default
user_domain_name = default
region_name = RegionOne
project_name = service
username = neutron
password = 123
6、重新启动Compute服务:
systemctl restart openstack-nova-compute.service
7、启动Linux网桥代理并将其配置为在系统引导时启动:
systemctl enable neutron-linuxbridge-agent.service
systemctl restart neutron-linuxbridge-agent.service
10.2.2. 控制节点
1、 验证
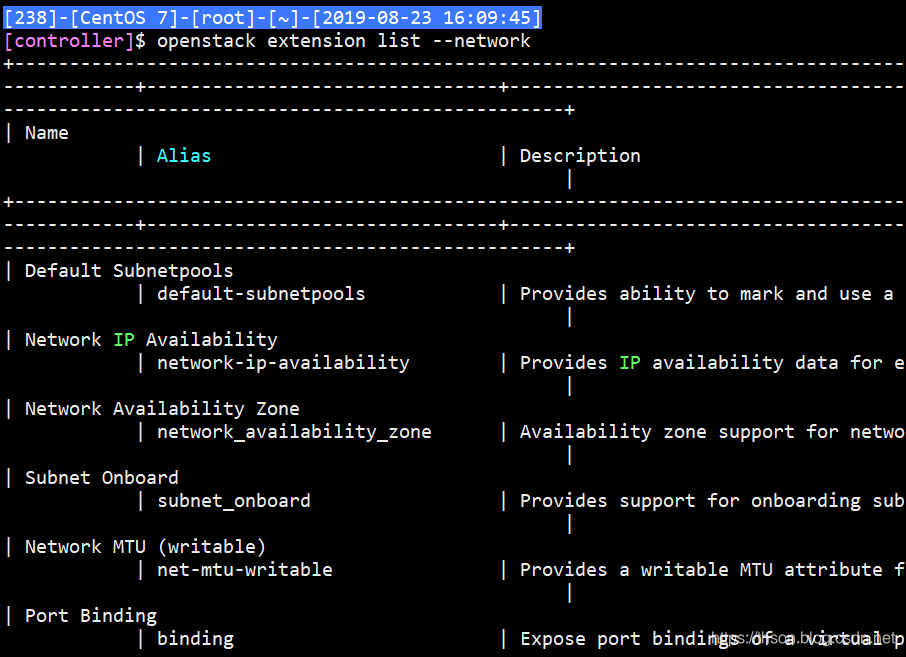
openstack extension list --network
openstack network agent list

11. 创建实例
11.1. 控制端
创建网络
1、 创建提供者网络(最后的provider是网络名)
openstack network create  --share --external \
  --provider-physical-network provider \
  --provider-network-type flat provider

2、验证:
openstack network list
#或
neutron net-list

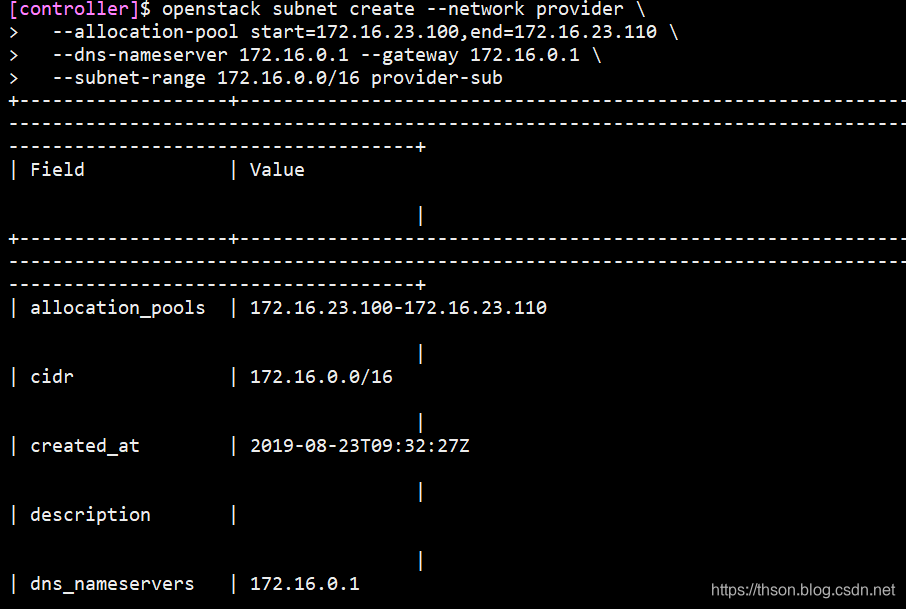
3、 在网络上创建子网
openstack subnet create --network provider \
  --allocation-pool start=192.168.99.200,end=192.168.99.210 \
  --dns-nameserver 192.168.99.2 --gateway 192.168.99.2 \
  --subnet-range 192.168.99.0/24 provider-sub
–network需要写你上面创建的网络名
provider-sub是子网名
4、验证:
openstack subnet list
#或
neutron subnet-list

11.2. 创建实例类型
openstack flavor create --id 0 --vcpus 1 --ram 1024 --disk 10 m1.nano
–vcpus :几个核的cpu
–ram :内存(单位M)
–disk :储存(单位G)
最后为类型名;
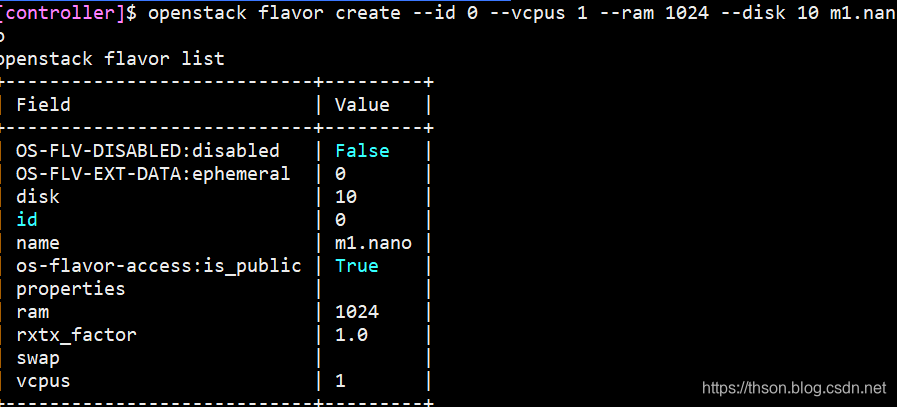
1、查看类型列表
openstack flavor list

生成密钥对
2、生成密钥对并添加公钥
ssh-keygen -q -N ""
openstack keypair create --public-key ~/.ssh/id_rsa.pub mykey

3、验证密钥对的添加
openstack keypair list

添加安全组规则
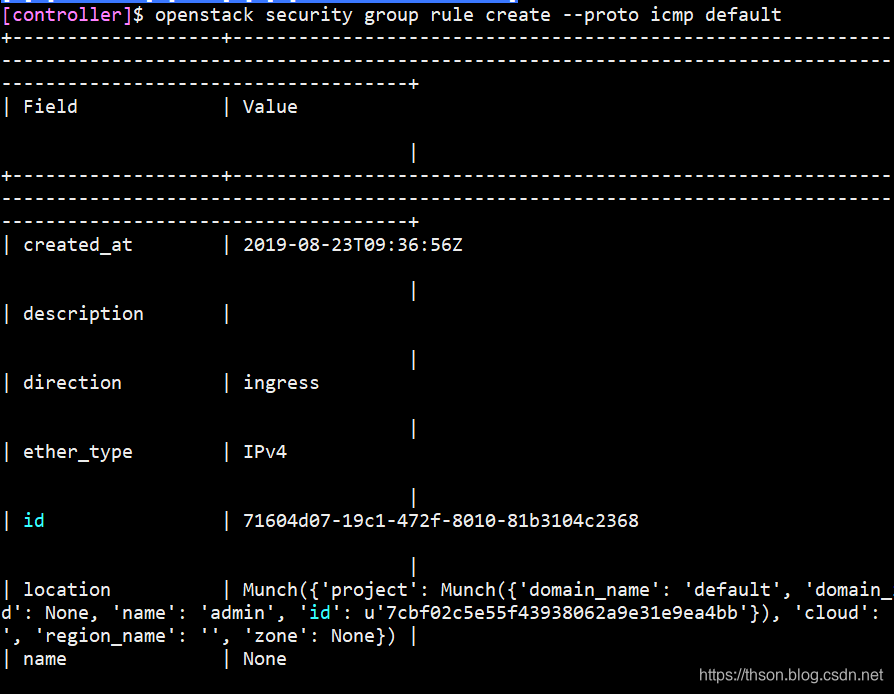
4、 允许ICMP(ping)
openstack security group rule create --proto icmp default
5、允许安全shell(SSH)访问:
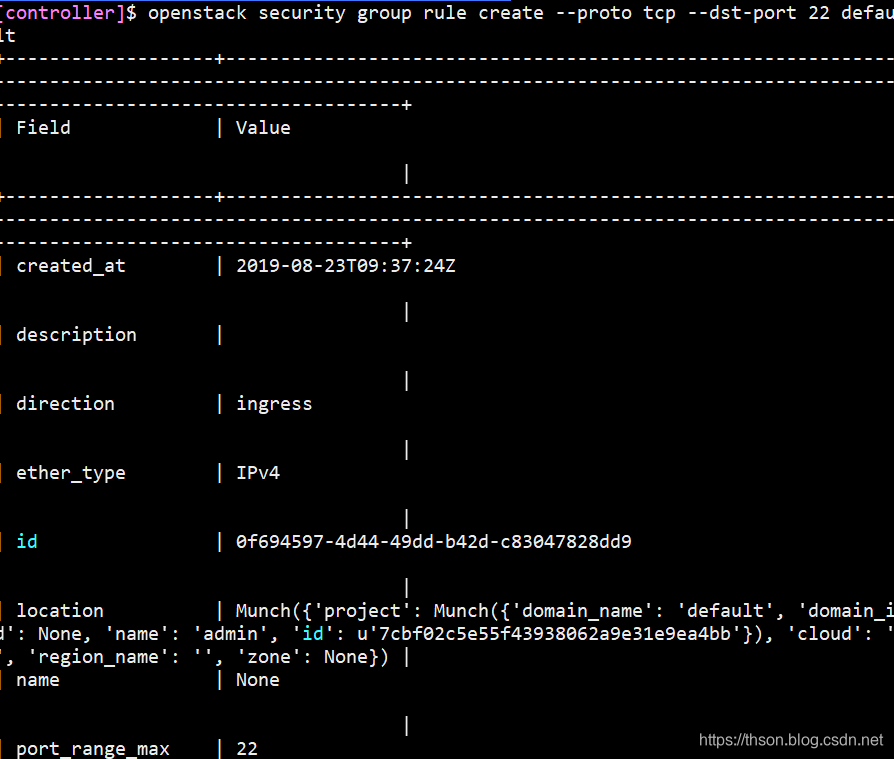
openstack security group rule create --proto tcp --dst-port 22 default
6、验证
查看类型
openstack flavor list
7、查看镜像
openstack image list
8、列出可用网络
openstack network list
9、列出可用的安全组:
openstack security group list
10、启动实例
openstack server create --flavor m1.nano --image cirros \
  --nic net-id=a57d2907-a59d-4422-b231-8d3c788d10d3  \
  --security-group default \
  --key-name mykey provider-instance
–flavor: 类型名称
–image: 镜像名称
–security-group:安全组名
PROVIDER_NET_ID替换网络ID
最后provider-instance是实例名

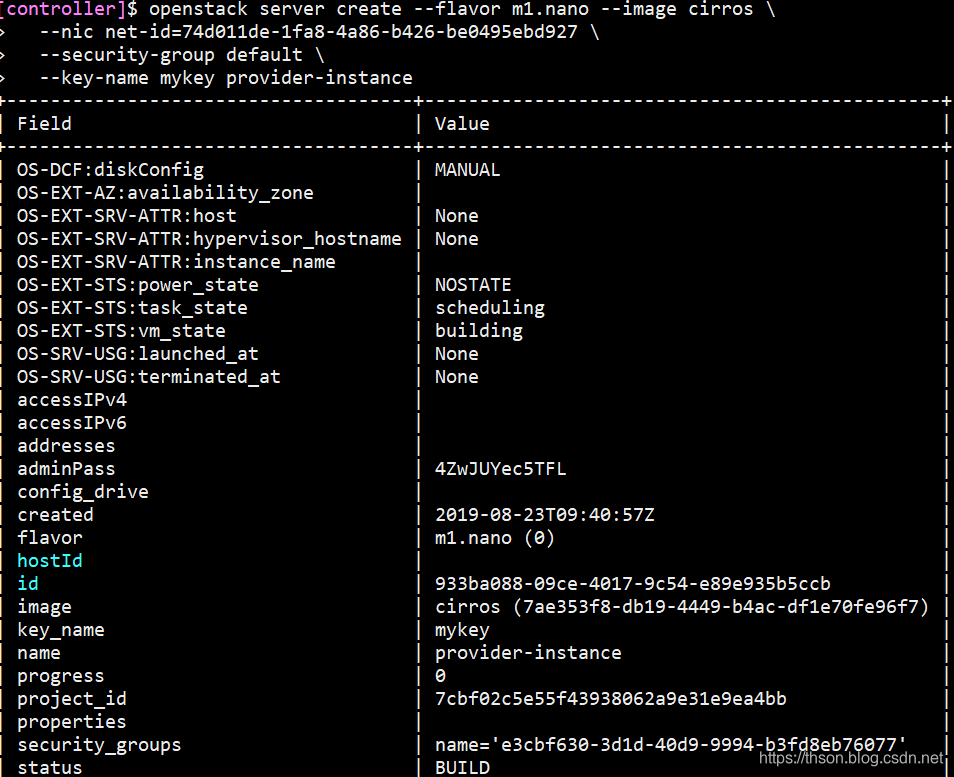
11、查看实例状态
openstack server list

12、使用虚拟控制台访问实例
openstack console url show provider-instance
provider-instance是你的实例名称
在浏览器使用url来连接实例
12. 配置Dashboard服务
horizon是openstack的管理其他组件的图形显示和操作界面,通过API和其他服务进行通讯,如镜像服务、计算服务和网络服务等结合使用,horizon基于python django开发,通过Apache的wsgi模块进行web访问通信,Horizon只需要更改配置文件连接到keyston即可
12.1. 控制端
1、安装和配置组件
yum -y install openstack-dashboard
2、编辑 /etc/openstack-dashboard/local_settings文件
打开配置文件,搜索下面这些键,替换他们(下面提供sed命令)
controller节点
OPENSTACK_HOST = "192.168.99.101"
OPENSTACK_HOST写控制端本机的IP
启用Identity API版本3
OPENSTACK_KEYSTONE_URL = "http://%s:5000/v3" % OPENSTACK_HOST
配置user为通过仪表板创建的用户的默认角色:
OPENSTACK_KEYSTONE_DEFAULT_ROLE = "user"
接受所有主机
ALLOWED_HOSTS = ['*']
配置memcached会话存储服务
SESSION_ENGINE = 'django.contrib.sessions.backends.cache'
CACHES = {
    'default': {
         'BACKEND': 'django.core.cache.backends.memcached.MemcachedCache',
         'LOCATION': 'openstackvip.com:11211',
    }
}
启用对域的支持:
OPENSTACK_KEYSTONE_MULTIDOMAIN_SUPPORT = True
配置API版本:
OPENSTACK_API_VERSIONS = {
    "identity": 3,
    "image": 2,
    "volume": 3,
}
配置Default为通过仪表板创建的用户的默认域:
OPENSTACK_KEYSTONE_DEFAULT_DOMAIN = "default"
如果选择网络选项1,请禁用对第3层网络服务的支持:
OPENSTACK_NEUTRON_NETWORK = {
    'enable_router': False,
    'enable_quotas': False,
    'enable_distributed_router': False,
    'enable_ha_router': False,
    'enable_lb': False,
    'enable_firewall': False,
    'enable_vpn': False,
    'enable_fip_topology_check': False,
}
(可选)配置时区:
TIME_ZONE = "UTC"
sed一键配置
sed -i.bak '/^OPENSTACK_HOST/s#127.0.0.1#192.168.99.101#' /etc/openstack-dashboard/local_settings
sed -i '/^OPENSTACK_KEYSTONE_DEFAULT_ROLE/s#".*"#"user"#' /etc/openstack-dashboard/local_settings
sed -i "/^ALLOWED_HOSTS/s#\[.*\]#['*']#" /etc/openstack-dashboard/local_settings
sed -i '/^#SESSION_ENGINE/s/#//' /etc/openstack-dashboard/local_settings
sed -i "/^SESSION_ENGINE/s#'.*'#'django.contrib.sessions.backends.cache'#" /etc/openstack-dashboard/local_settings

sed -i "/^#    'default'/s/#//" /etc/openstack-dashboard/local_settings

sed -i "/^#CACHES/,+6s/#//" /etc/openstack-dashboard/local_settings
sed -i "/^        'LOCATION'/s#127.0.0.1#openstackvip.com#" /etc/openstack-dashboard/local_settings

sed -i "/OPENSTACK_KEYSTONE_MULTIDOMAIN_SUPPORT/s/#//" /etc/openstack-dashboard/local_settings
sed -i "/OPENSTACK_KEYSTONE_MULTIDOMAIN_SUPPORT/s#False#True#" /etc/openstack-dashboard/local_settings

sed -i "/OPENSTACK_API_VERSIONS/,+5s/#//" /etc/openstack-dashboard/local_settings
sed -i '/"compute"/d' /etc/openstack-dashboard/local_settings
sed -i '/^#OPENSTACK_KEYSTONE_DEFAULT_DOMAIN/s/#//' /etc/openstack-dashboard/local_settings
sed -i '/^OPENSTACK_KEYSTONE_DEFAULT_DOMAIN/s/Default/default/' /etc/openstack-dashboard/local_settings
sed -i '/^OPENSTACK_NEUTRON_NETWORK/,+7s#True#False#' /etc/openstack-dashboard/local_settings
sed -i  '/TIME_ZONE/s#UTC#UTC#' /etc/openstack-dashboard/local_settings

sed -i  "/^OPENSTACK_NEUTRON_NETWORK/s/$/\n    'enable_lb': False,/" /etc/openstack-dashboard/local_settings
sed -i  "/^OPENSTACK_NEUTRON_NETWORK/s/$/\n    'enable_firewall': False,/" /etc/openstack-dashboard/local_settings
sed -i  "/^OPENSTACK_NEUTRON_NETWORK/s/$/\n    'enable_vpn': False,/" /etc/openstack-dashboard/local_settings
继续配置下面的
3、添加下行到配置文件/etc/httpd/conf.d/openstack-dashboard.conf
vim /etc/httpd/conf.d/openstack-dashboard.conf

WSGIApplicationGroup %{GLOBAL}
4、 重新启动Web服务器和会话存储服务()
systemctl restart httpd.service
5、memcached我安装在其它机器上
systemctl restart memcached.service
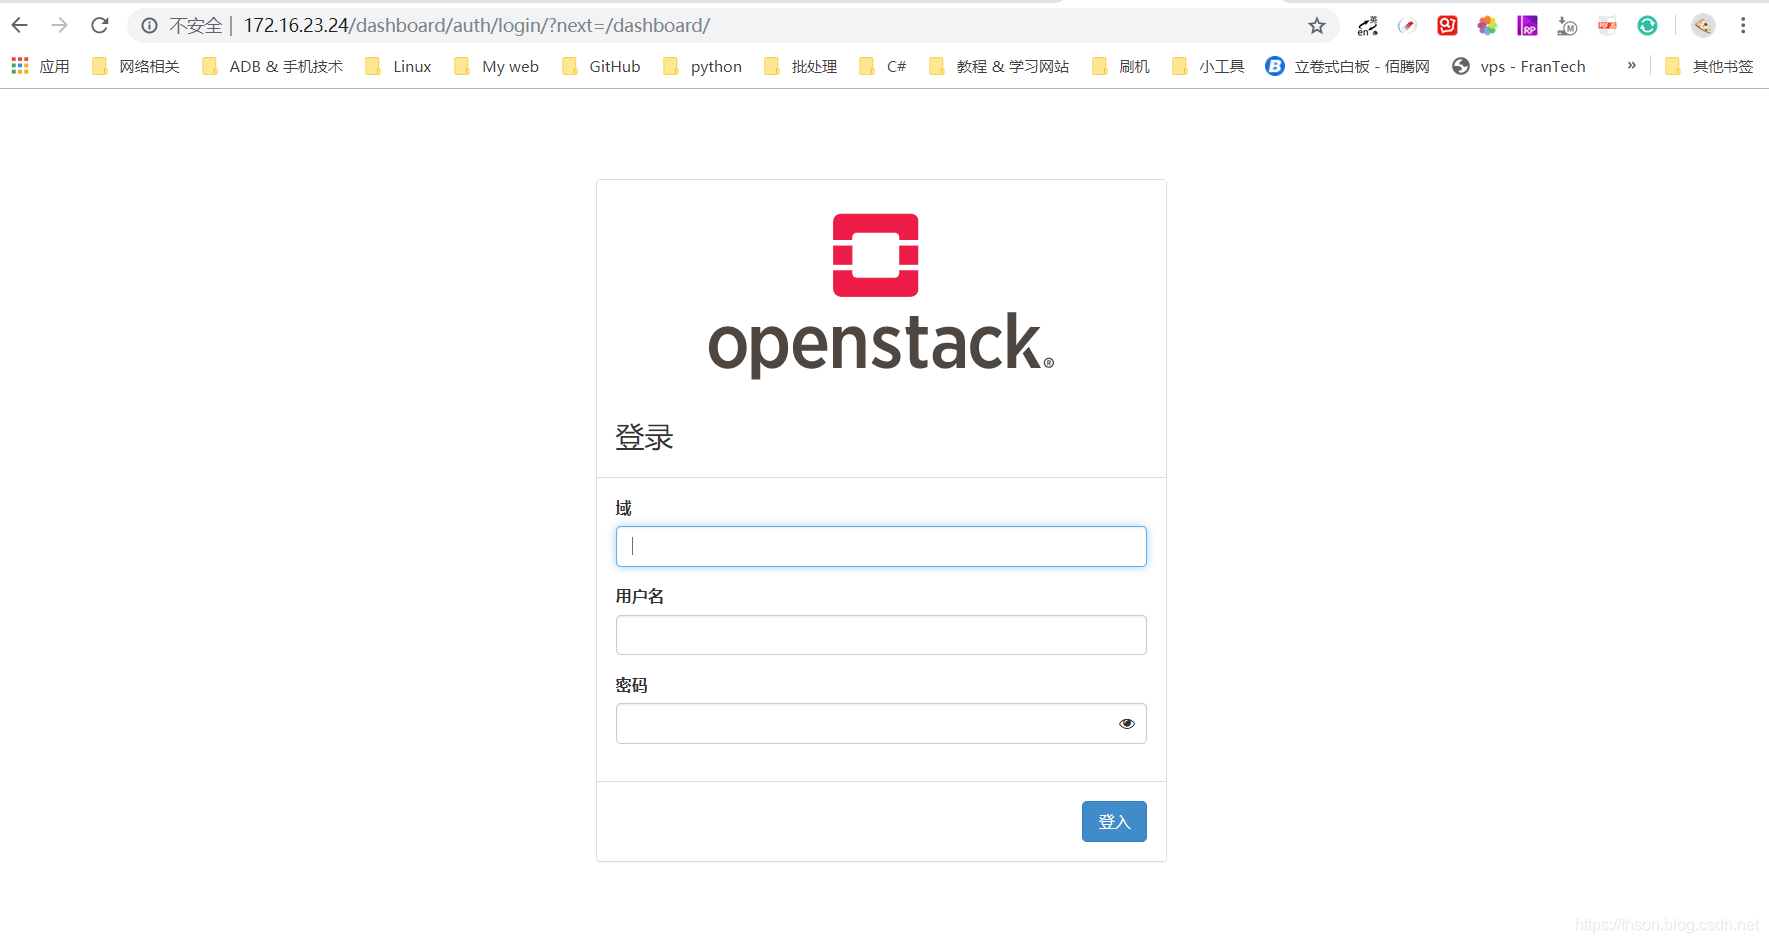
6、浏览器http://controller_IP/dashboard controller写你控制端的ip
13. 配置cinder(块存储服务)
监听端口:8776
配置cinder控制器节点
数据库端
mysql -u root -p

MariaDB [(none)]> CREATE DATABASE cinder;
MariaDB [(none)]> GRANT ALL PRIVILEGES ON cinder.* TO 'cinder'@'%' \
  IDENTIFIED BY '123';
控制端
. admin-openrc
1、创建cinder用户:
openstack user create --domain default --password-prompt cinder
2、将admin角色添加到cinder用户:
openstack role add --project service --user cinder admin
3、创建cinderv2和cinderv3服务实体
openstack service create --name cinderv2 \
  --description "OpenStack Block Storage" volumev2

openstack service create --name cinderv3 \
  --description "OpenStack Block Storage" volumev3
4、 创建Block Storage服务API端点
openstack endpoint create --region RegionOne \
  volumev2 public http://openstackvip.com:8776/v2/%\(project_id\)s

openstack endpoint create --region RegionOne \
  volumev2 internal http://openstackvip.com:8776/v2/%\(project_id\)s

openstack endpoint create --region RegionOne \
  volumev2 admin http://openstackvip.com:8776/v2/%\(project_id\)s


openstack endpoint create --region RegionOne \
  volumev3 public http://openstackvip.com:8776/v3/%\(project_id\)s

openstack endpoint create --region RegionOne \
  volumev3 internal http://openstackvip.com:8776/v3/%\(project_id\)s

openstack endpoint create --region RegionOne \
  volumev3 admin http://openstackvip.com:8776/v3/%\(project_id\)s
5、安装和配置组件
yum -y install openstack-cinder
6、编辑/etc/cinder/cinder.conf文件并完成以下操作
vim /etc/cinder/cinder.conf

[database]
my_ip = 10.0.0.11
connection = mysql+pymysql://cinder:CINDER_DBPASS@controller/cinder
transport_url = rabbit://openstack:RABBIT_PASS@controller
auth_strategy = keystone

[keystone_authtoken]
# ...
www_authenticate_uri = http://controller:5000
auth_url = http://controller:5000
memcached_servers = controller:11211
auth_type = password
project_domain_name = default
user_domain_name = default
project_name = service
username = cinder
password = CINDER_PASS

[oslo_concurrency]
# ...
lock_path = /var/lib/cinder/tmp
7、填充块存储数据库
su -s /bin/sh -c "cinder-manage db sync" cinder
8、 配置计算以使用块存储
编辑/etc/nova/nova.conf文件
vim /etc/nova/nova.conf
加上这个配置

[cinder]
os_region_name = RegionOne
9、重新启动Compute API服务
systemctl restart openstack-nova-api.service
10、启动Block Storage服务并将其配置为在系统引导时启动
systemctl enable openstack-cinder-api.service openstack-cinder-scheduler.service
systemctl start openstack-cinder-api.service openstack-cinder-scheduler.service
存储服务器
准备一台存储服务器,称之为“块存储”节点
- "块存储"节点
1. 安装LVM包:

   yum install lvm2 device-mapper-persistent-data


2. 启动LVM元数据服务
   systemctl enable lvm2-lvmetad.service
   systemctl start lvm2-lvmetad.service

3. 创建LVM物理卷/dev/sdb
   pvcreate /dev/sdb

4. 创建LVM卷组cinder-volumes
   vgcreate cinder-volumes /dev/sdb

5. 编辑lvm配置文件

vim /etc/lvm/lvm.conf

找个下面这个字段修改

devices {
...
filter = [ "a/sdb/", "r/.*/"]

 a是access,r是reject,只授受sdb磁盘
1、 安装
yum install openstack-cinder targetcli python-keystone
2、编辑cinder.conf文件
vim /etc/cinder/cinder.conf

[DEFAULT]
my_ip = 192.168.99.111
transport_url = rabbit://openstack:[email protected]
auth_strategy = keystone
enabled_backends = lvm
glance_api_servers = http://openstackvip.com:9292

[database]
connection = mysql+pymysql://cinder:[email protected]/cinder

[keystone_authtoken]
www_authenticate_uri = http://openstackvip.com:5000
auth_url = http://openstackvip.com:5000
memcached_servers = openstackvip.com:11211
auth_type = password
project_domain_name = default
user_domain_name = default
project_name = service
username = cinder
password = 123

[lvm]
volume_driver = cinder.volume.drivers.lvm.LVMVolumeDriver
volume_group = cinder-volumes
target_protocol = iscsi
target_helper = lioadm
volume_backend_name = Openstack-lvm

[oslo_concurrency]
lock_path = /var/lib/cinder/tmp
my_ip写你的本机的IP
3、 启动Block Storage卷服务
systemctl enable openstack-cinder-volume.service target.service
systemctl start openstack-cinder-volume.service target.service
(可选)配置备份服务
"块存储"节点
1、安装
yum install openstack-cinder
2、 编辑cinder.conf文件
vim /etc/cinder/cinder.conf

[DEFAULT]
# ...
backup_driver = cinder.backup.drivers.swift
backup_swift_url = SWIFT_URL
openstack catalog show object-store
3、启动Block Storage备份服务
systemctl enable openstack-cinder-backup.service
systemctl start openstack-cinder-backup.service
14. openstack高可用配置
14.1. NFS
IP:192.168.99.105
1. 安装nfs

yum -y install nfs-utils

1. 添加用户
useradd openstack

1. 修改配置文件

echo "/var/lib/glance/images 192.168.99.0/24(rw,all_squash,anonuid=`id -u openstack`,anongid=`id -g openstack`)" > /etc/exports


1. 创建文件

mkdir -p /var/lib/glance/images


1. 启动服务

systemctl restart nfs-server
systemctl enable nfs-server
exportfs -r


1. 验证下

showmount -e


1. 给权限

chown -R openstack.openstack /var/lib/glance/images/
14.2. 控制端挂载NFS
showmount -e 192.168.99.115


在挂载之前先保存下镜像

mkdir /data ; mv /var/lib/glance/images/* /data

挂载

echo "192.168.99.115:/var/lib/glance/images /var/lib/glance/images nfs defaults 0 0" >> /etc/fstab
mount -a


再把镜像移回来
mv /data/* /var/lib/glance/images
14.3. haproxy高可用
需要的安装haproxy + keepalived
在前面已经做了一台haproxy+keepalived,所以我们需要再加一台物理机,做backup。
IP: 192.168.99.104
开始配置
1、安装
yum -y install keepalived haproxy
2、配置keepalived:
vim /etc/keepavlied/keepalived.conf

! Configuration File for keepalived

global_defs {
   notification_email {
       root@localhost
   }
   notification_email_from keepalived@localhost
   smtp_server 127.0.0.1
   smtp_connect_timeout 30
   router_id ha_1
   vrrp_skip_check_adv_addr
   vrrp_strict
   vrrp_iptables
   vrrp_garp_interval 0
   vrrp_gna_interval 0
}
vrrp_instance VI_1 {
    state BACKUP
    interface eth0
    virtual_router_id 51
    priority 90
    advert_int 1
    authentication {
        auth_type PASS
        auth_pass 1111
    }
    virtual_ipaddress {
        192.168.99.100 dev eth0 label eth0:1
    }
}
3、 启动
systemctl start keepalived
systemctl enable keepalived
4、配置haproxy:
在配置之前要看下需要做反向代理的端口
| PORT | 服务 |
|---|---|
| 5000 | keystone |
| 9292 | glance |
| 8778 | placement |
| 8774 | nova |
| 9696 | neutron |
| 6080 | VNC |
| 3306 | MySQL |
| 5672 | rabbitMQ |
| 15672 | rabbitMQ_WEB |
| 11211 | memcached |
这个配置在ha_1上也要加上
vim /etc/haproxy/haproxy.conf
listen stats
        mode http
        bind :9999
        stats enable
        log global
        stats uri /haproxy-status
        stats auth admin:123

listen dashboard
        bind :80
        mode http
        balance source
        server dashboard 192.168.99.101:80 check inter 2000 fall 3 rise 5
        server dashboard 192.168.99.103:80 check inter 2000 fall 3 rise 5
listen mysql
        bind :3306
        mode tcp
        balance source
        server mysql 192.168.99.106:3306 check inter 2000 fall 3 rise 5

listen memcached
        bind :11211
        mode tcp
        balance source
        server memcached 192.168.99.106:11211 inter 2000 fall 3 rise 5
listen rabbit
        bind :5672
        mode tcp
        balance source
        server rabbit 192.168.99.106:5672 inter 2000 fall 3 rise 5
listen rabbit_web
        bind :15672
        mode http
        server rabbit_web 192.168.99.106:15672 inter 2000 fall 3 rise 5

listen keystone
        bind :5000
        mode tcp
        server keystone 192.168.99.101:5000 inter 2000 fall 3 rise 5
        server keystone 192.168.99.103:5000 inter 2000 fall 3 rise 5
listen glance
        bind :9292
        mode tcp
        server glance 192.168.99.101:9292 inter 2000 fall 3 rise 5
        server glance 192.168.99.103:9292 inter 2000 fall 3 rise 5
listen placement
        bind :8778
        mode tcp
        server placement 192.168.99.101:8778 inter 2000 fall 3 rise 5
        server placement 192.168.99.103:8778 inter 2000 fall 3 rise 5

listen neutron
        bind :9696
        mode tcp
        server neutron 192.168.99.101:9696 inter 2000 fall 3 rise 5
        server neutron 192.168.99.103:9696 inter 2000 fall 3 rise 5
listen nova
        bind :8774
        mode tcp
        server nova 192.168.99.101:8774 inter 2000 fall 3 rise 5
        server nova 192.168.99.103:8774 inter 2000 fall 3 rise 5
listen VNC
        bind :6080
        mode tcp
        server VNC 192.168.99.101:6080 inter 2000 fall 3 rise 5
        server VNC 192.168.99.103:6080 inter 2000 fall 3 rise 5
14.4. 控制端的高可用
要实现高可以用,要再准备一台物理机,设置主机名为controller2,
IP:192.168.99.113
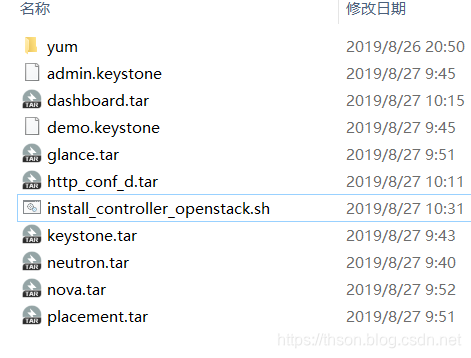
从controller1准备这些文件
$ ls
admin.keystone*  glance.tar                        keystone.tar  placement.tar
dashboard.tar    http_conf_d.tar                   neutron.tar   yum/
demo.keystone*   install_controller_openstack.sh*  nova.tar
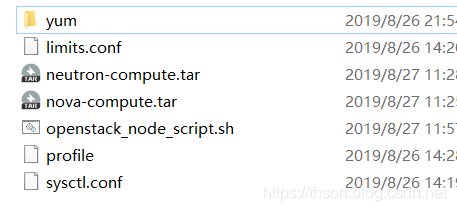
最终如图,yum源是centos安装时自带,如果你删除了也要从其它主机拷贝过来
准备的过程(在原有的controller上)
#准备httpd
cd /etc/httpd/conf.d
tar cf /root/http_conf_d.tar *

#准备keystone
cd /etc/keystone
tar cf /root/keystone.tar *

#准备glance
cd /etc/glance
tar cf /root/glance.tar *

#准备placement
cd /etc/placement
tar cf /root/placement.tar *

#准备nova
cd /etc/nova
tar cf /root/nova.tar *

#准备neutron
cd /etc/neutron
tar cf /root/neutron.tar *

#准备dashboard
cd /etc/openstack-dashboard
tar cf /root/dashboard.tar *
admin.keystone
#!/bin/bash
export OS_PROJECT_DOMAIN_NAME=default
export OS_USER_DOMAIN_NAME=default
export OS_PROJECT_NAME=admin
export OS_USERNAME=admin
export OS_PASSWORD=123
export OS_AUTH_URL=http://openstackvip.com:5000/v3
export OS_IDENTITY_API_VERSION=3
export OS_IMAGE_API_VERSION=2
demo.keystone
#!/bin/bash
export OS_PROJECT_DOMAIN_NAME=default
export OS_USER_DOMAIN_NAME=default
export OS_PROJECT_NAME=demo
export OS_USERNAME=demo
export OS_PASSWORD=123
export OS_AUTH_URL=http://openstackvip.com:5000/v3
export OS_IDENTITY_API_VERSION=3
export OS_IMAGE_API_VERSION=2
脚本内容,要先设置好主机名,主机名不能包含_下划线
#!/bin/bash
gecho() {
    echo -e "\e[1;32m${1}\e[0m" && sleep 1
}
recho() {
    echo -e "\e[1;31m${1}\e[0m" && sleep 1
}

gecho "配置yum源..."
PWD=`dirname $0`
mkdir /etc/yum.repos.d/bak
mv /etc/yum.repos.d/* /etc/yum.repos.d/bak/
mv $PWD/yum/* /etc/yum.repos.d/
yum -y install centos-release-openstack-stein

gecho "安装openstack客户端、openstack SELinux管理包..."
yum -y install python-openstackclient openstack-selinux
yum -y install python2-PyMySQL mariadb
yum -y install openstack-keystone httpd mod_wsgi python-memcached

tar xf http_conf_d.tar -C /etc/httpd/conf.d

echo "192.168.99.211 openstackvip.com" >> /etc/hosts
echo "192.168.99.211 controller" >> /etc/hosts

gecho "安装keystone..."
tar xf $PWD/keystone.tar -C /etc/keystone

systemctl enable httpd.service
systemctl start httpd.service

gecho "安装glance..."
yum -y install openstack-glance

tar xf $PWD/glance.tar -C /etc/glance
systemctl enable openstack-glance-api.service openstack-glance-registry.service
systemctl start openstack-glance-api.service openstack-glance-registry.service

gecho "安装placement..."
yum -y install openstack-placement-api

tar xf $PWD/placement.tar -C /etc/placement


gecho "安装nova。。。"
yum -y install openstack-nova-api openstack-nova-conductor   openstack-nova-console openstack-nova-novncproxy  openstack-nova-scheduler openstack-nova-placement-api

tar xf $PWD/nova.tar -C /etc/nova

systemctl restart httpd

systemctl enable openstack-nova-api.service \
openstack-nova-consoleauth.service \
openstack-nova-scheduler.service   \
openstack-nova-conductor.service \
openstack-nova-novncproxy.service

systemctl restart openstack-nova-api.service   \
openstack-nova-consoleauth.service \
openstack-nova-scheduler.service  \
openstack-nova-conductor.service \
openstack-nova-novncproxy.service

cat > /root/nova-restart.sh <<EOF
#!/bin/bash
systemctl restart openstack-nova-api.service   openstack-nova-consoleauth.service openstack-nova-scheduler.service   openstack-nova-conductor.service openstack-nova-novncproxy.service
EOF
chmod  a+x /root/nova-restart.sh

gecho "安装neutron。。。"
yum -y install openstack-neutron openstack-neutron-ml2 \
  openstack-neutron-linuxbridge ebtables

tar xf $PWD/neutron.tar -C /etc/neutron

echo "net.bridge.bridge-nf-call-iptables = 1" >> /etc/sysctl.conf
echo "net.bridge.bridge-nf-call-ip6tables = 1" >> /etc/sysctl.conf
sysctl -p

systemctl restart openstack-nova-api.service
systemctl enable neutron-server.service \
  neutron-linuxbridge-agent.service \
  neutron-dhcp-agent.service \
  neutron-metadata-agent.service

systemctl restart neutron-server.service \
  neutron-linuxbridge-agent.service \
  neutron-dhcp-agent.service \
  neutron-metadata-agent.service

gecho "安装dashboard..."
yum -y install openstack-dashboard
tar xf $PWD/dashboard.tar -C /etc/openstack-dashboard
systemctl restart httpd.service

recho "5秒后重启系统..."
for i in `seq 5 -1 1` ; do
  tput sc
  echo -n $i
  sleep 1
  tput rc
  tput ed
done

reboot
把之前所有的/etc/hosts改成
192.168.99.211 openstackvip.com
192.168.99.211 controller
14.5. 快速添加node节点
新的物理机,安装好centos7.6,配置好IP地址与主机名。
准备这些包
准备
#准备neutron,在你原来的node节点上
cd /etc/neutron
tar cf /root/neutron-compute.tar *

#准备nova,在你原来的node节点上
cd /etc/nova
tar cf /root/nova-compute.tar *
文件limits.conf
# /etc/security/limits.conf
#
#This file sets the resource limits for the users logged in via PAM.
#It does not affect resource limits of the system services.
#
#Also note that configuration files in /etc/security/limits.d directory,
#which are read in alphabetical order, override the settings in this
#file in case the domain is the same or more specific.
#That means for example that setting a limit for wildcard domain here
#can be overriden with a wildcard setting in a config file in the
#subdirectory, but a user specific setting here can be overriden only
#with a user specific setting in the subdirectory.
#
#Each line describes a limit for a user in the form:
#
#<domain>        <type>  <item>  <value>
#
#Where:
#<domain> can be:
#        - a user name
#        - a group name, with @group syntax
#        - the wildcard *, for default entry
#        - the wildcard %, can be also used with %group syntax,
#                 for maxlogin limit
#
#<type> can have the two values:
#        - "soft" for enforcing the soft limits
#        - "hard" for enforcing hard limits
#
#<item> can be one of the following:
#        - core - limits the core file size (KB)
#        - data - max data size (KB)
#        - fsize - maximum filesize (KB)
#        - memlock - max locked-in-memory address space (KB)
#        - nofile - max number of open file descriptors
#        - rss - max resident set size (KB)
#        - stack - max stack size (KB)
#        - cpu - max CPU time (MIN)
#        - nproc - max number of processes
#        - as - address space limit (KB)
#        - maxlogins - max number of logins for this user
#        - maxsyslogins - max number of logins on the system
#        - priority - the priority to run user process with
#        - locks - max number of file locks the user can hold
#        - sigpending - max number of pending signals
#        - msgqueue - max memory used by POSIX message queues (bytes)
#        - nice - max nice priority allowed to raise to values: [-20, 19]
#        - rtprio - max realtime priority
#
#<domain>      <type>  <item>         <value>
#

#*               soft    core            0
#*               hard    rss             10000
#@student        hard    nproc           20
#@faculty        soft    nproc           20
#@faculty        hard    nproc           50
#ftp             hard    nproc           0
#@student        -       maxlogins       4

# End of file

*                soft    core               unlimited
*                hard    core             unlimited
*                soft    nproc            1000000
*                hard    nproc          1000000
*                soft    nofile            1000000
*                hard    nofile          1000000
*                soft    memlock      32000
*                hard    memlock    32000
*                soft    msgqueue    8192000
*                hard    msgqueue  8192000
文件profile
# /etc/profile

# System wide environment and startup programs, for login setup
# Functions and aliases go in /etc/bashrc

# It's NOT a good idea to change this file unless you know what you
# are doing. It's much better to create a custom.sh shell script in
# /etc/profile.d/ to make custom changes to your environment, as this
# will prevent the need for merging in future updates.

pathmunge () {
    case ":${PATH}:" in
        *:"$1":*)
            ;;
        *)
            if [ "$2" = "after" ] ; then
                PATH=$PATH:$1
            else
                PATH=$1:$PATH
            fi
    esac
}


if [ -x /usr/bin/id ]; then
    if [ -z "$EUID" ]; then
        # ksh workaround
        EUID=`id -u`
        UID=`id -ru`
    fi
    USER="`id -un`"
    LOGNAME=$USER
    MAIL="/var/spool/mail/$USER"
fi

# Path manipulation
if [ "$EUID" = "0" ]; then
    pathmunge /usr/sbin
    pathmunge /usr/local/sbin
else
    pathmunge /usr/local/sbin after
    pathmunge /usr/sbin after
fi

HOSTNAME=`/usr/bin/hostname 2>/dev/null`
HISTSIZE=1000
if [ "$HISTCONTROL" = "ignorespace" ] ; then
    export HISTCONTROL=ignoreboth
else
    export HISTCONTROL=ignoredups
fi

export PATH USER LOGNAME MAIL HOSTNAME HISTSIZE HISTCONTROL

# By default, we want umask to get set. This sets it for login shell
# Current threshold for system reserved uid/gids is 200
# You could check uidgid reservation validity in
# /usr/share/doc/setup-*/uidgid file
if [ $UID -gt 199 ] && [ "`id -gn`" = "`id -un`" ]; then
    umask 002
else
    umask 022
fi

for i in /etc/profile.d/*.sh ; do
    if [ -r "$i" ]; then
        if [ "${-#*i}" != "$-" ]; then
            . "$i"
        else
            . "$i" >/dev/null
        fi
    fi
done

unset i
unset -f pathmunge

export HISTTIMEFORMAT="%F %T `whoami` "
文件sysctl.conf
net.bridge.bridge-nf-call-iptables = 1
net.bridge.bridge-nf-call-ip6tables = 1
脚本openstack_node_script.sh
#!/bin/bash
gecho() {
    echo -e "\e[1;32m${1}\e[0m" && sleep 1
}
recho() {
    echo -e "\e[1;31m${1}\e[0m" && sleep 1
}

vip=192.168.99.211
controller_ip=192.168.99.211

gecho "配置yum源"
PWD=`dirname $0`
mkdir /etc/yum.repos.d/bak
mv /etc/yum.repos.d/* /etc/yum.repos.d/bak/
mv $PWD/yum/* /etc/yum.repos.d/

gecho "安装包..."
yum -y install centos-release-openstack-stein
yum -y install python-openstackclient openstack-selinux
yum -y install openstack-nova-compute
yum -y install openstack-neutron-linuxbridge ebtables ipset

cat $PWD/limits.conf > /etc/security/limits.conf
cat $PWD/profile > /etc/profile
cat $PWD/sysctl.conf > /etc/sysctl.conf

gecho "配置nova"
tar xvf $PWD/nova-compute.tar -C /etc/nova/
myip=`ifconfig eth0 | awk '/inet /{print $2}'`
sed -i "/my_ip =/s#.*#my_ip = ${myip}#" /etc/nova/nova.conf

gecho "配置neutron"
tar xf neutron-compute.tar -C /etc/neutron

echo "net.bridge.bridge-nf-call-iptables = 1" >> /etc/sysctl.conf
echo "net.bridge.bridge-nf-call-ip6tables = 1" >> /etc/sysctl.conf
sysctl -p

echo "${vip} openstackvip.com" >> /etc/hosts
echo "${controller_ip} controller" >> /etc/hosts

vcpu=${egrep -c '(vmx|svm)' /proc/cpuinfo}
if [ vcpu -eq 0 ] ; then
cat >> /etc/nova/nova.conf <<EOF
[libvirt]
virt_type = qemu
EOF
fi

gecho "启动服务..."
systemctl enable libvirtd.service openstack-nova-compute.service
systemctl restart libvirtd.service || recho "libvirtd启动失败"
systemctl restart openstack-nova-compute.service || recho "openstack-nova-compute启动失败"
systemctl enable neutron-linuxbridge-agent.service
systemctl restart neutron-linuxbridge-agent.service


recho "5秒后重启系统..."
for i in `seq 5 -1 1` ; do
  tput sc
  echo -n $i
  sleep 1
  tput rc
  tput ed
done

重启
reboot
