目录:
Spring Boot Application与Controller分离
摘要:
JSON是一种轻量级的数据交换格式。它基于 ECMAScript (欧洲计算机协会制定的js规范)的一个子集,采用完全独立于编程语言的文本格式来存储和表示数据。简洁和清晰的层次结构使得 JSON 成为理想的数据交换语言。 易于人阅读和编写,同时也易于机器解析和生成,并有效地提升网络传输效率。
我们在WEB应用开发时,数据交互往往使用JSON作为数据交互格式,所以我们编写接口往往也是将数据以JSON格式进行传输,所以我们需要在开发中使用相应的数据转换工具来进行数据转换,Spring Boot自带Jackson作为数据转换和解析。但是我们往往还是使用阿里下的FastJson做数据转换和解析,下面我们来讲讲如何使用FastJson。
FastJson使用方式有两种:
一、 使用启动类继承 WebMvcConfigurerAdapter来实现
1. 添加依赖(pom):
<!--依赖fastjson-->
        <dependency>
            <groupId>com.alibaba</groupId>
            <artifactId>fastjson</artifactId>
            <version>1.2.15</version>
        </dependency>
2. 编写启动类,并继承WebMvcConfigurerAdapter:
package com.edu.usts;

import com.alibaba.fastjson.serializer.SerializerFeature;
import com.alibaba.fastjson.support.config.FastJsonConfig;
import com.alibaba.fastjson.support.spring.FastJsonHttpMessageConverter;
import org.springframework.boot.SpringApplication;
import org.springframework.boot.autoconfigure.EnableAutoConfiguration;
import org.springframework.boot.autoconfigure.SpringBootApplication;
import org.springframework.context.annotation.ComponentScan;
import org.springframework.http.converter.HttpMessageConverter;
import org.springframework.web.servlet.config.annotation.WebMvcConfigurerAdapter;

import java.util.List;

@EnableAutoConfiguration
@ComponentScan("com.edu.usts.controller")
//@SpringBootApplication
public class MyApplication extends WebMvcConfigurerAdapter {
    //    启动springboot项目
    public static void main(String[] args) {
        SpringApplication.run(MyApplication.class,args);
    }

    @Override
    public void configureMessageConverters(List<HttpMessageConverter<?>> converters) {
        super.configureMessageConverters(converters);
//        创建fastjson消息转换器
        FastJsonHttpMessageConverter converter = new FastJsonHttpMessageConverter();
//        创建fastjson的配置对象
        FastJsonConfig config = new FastJsonConfig();
//        对json数据格式化
        config.setSerializerFeatures(SerializerFeature.PrettyFormat);
//        配置传给转换器
        converter.setFastJsonConfig(config);
//        加入集合
        converters.add(converter);
    }
}
3. 编写实体类进行测试(以Student为例):
package com.edu.usts.pojo;

public class Student {

    private Integer id;

    private String name;

    private String age;

    public Integer getId() {
        return id;
    }

    public void setId(Integer id) {
        this.id = id;
    }

    public String getName() {
        return name;
    }

    public void setName(String name) {
        this.name = name;
    }

    public String getAge() {
        return age;
    }

    public void setAge(String age) {
        this.age = age;
    }

    public Student() {
    }
}
4. 编写测试Controller:
package com.edu.usts.controller;

import com.edu.usts.pojo.Student;
import org.springframework.stereotype.Controller;
import org.springframework.web.bind.annotation.RequestMapping;
import org.springframework.web.bind.annotation.ResponseBody;

@Controller
public class JsonController {

//    返回数据对象
    @ResponseBody
    @RequestMapping("showjson")
    public Object show(){
        Student s = new Student();
        s.setAge("11");
        s.setId(1);
        s.setName("张三");
        return s;
    }
}
5. 启动测试截图:
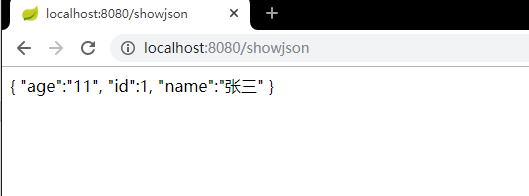
注:正常测试会出现乱码,因为Spring Boot默认不启动字符集转换,需要在全局配置文件中添加启动。
application中添加response编码设置为UTF-8功能启动:
spring.http.encoding.force=true二、使用@Bean注入的方式来实现:
只需要修改其中的启动类Application:
package com.edu.usts;

import com.alibaba.fastjson.serializer.SerializerFeature;
import com.alibaba.fastjson.support.config.FastJsonConfig;
import com.alibaba.fastjson.support.spring.FastJsonHttpMessageConverter;
import org.springframework.boot.SpringApplication;
import org.springframework.boot.autoconfigure.EnableAutoConfiguration;
import org.springframework.boot.autoconfigure.SpringBootApplication;
import org.springframework.boot.autoconfigure.web.HttpMessageConverters;
import org.springframework.context.annotation.Bean;
import org.springframework.context.annotation.ComponentScan;
import org.springframework.http.converter.HttpMessageConverter;
import org.springframework.web.servlet.config.annotation.WebMvcConfigurerAdapter;

import java.util.List;

@EnableAutoConfiguration
@ComponentScan("com.edu.usts.controller")
//@SpringBootApplication
public class MyApplication /*extends WebMvcConfigurerAdapter*/ {
    //    启动springboot项目
    public static void main(String[] args) {
        SpringApplication.run(MyApplication.class,args);
    }

   /* @Override
    public void configureMessageConverters(List<HttpMessageConverter<?>> converters) {
        super.configureMessageConverters(converters);
//        创建fastjson消息转换器
        FastJsonHttpMessageConverter converter = new FastJsonHttpMessageConverter();
//        创建fastjson的配置对象
        FastJsonConfig config = new FastJsonConfig();
//        对json数据格式化
        config.setSerializerFeatures(SerializerFeature.PrettyFormat);
//        配置传给转换器
        converter.setFastJsonConfig(config);
//        加入集合
        converters.add(converter);
    }*/
   @Bean
    public HttpMessageConverters fastJsonMessageConverter(){
//        创建fastjson消息转换器
       FastJsonHttpMessageConverter convert = new FastJsonHttpMessageConverter();
//        创建fastjson的配置对象
       FastJsonConfig config = new FastJsonConfig();
//        对json数据格式化
       config.setSerializerFeatures(SerializerFeature.PrettyFormat);
//        配置传给转换器
       convert.setFastJsonConfig(config);
       HttpMessageConverter<?> converter = convert;
       return new HttpMessageConverters(converter);
   }
}
测试截图:

为了确保修改成功,修改了数据返回值。
源码gitee地址:
