Hive在客户端上的安装部署
一、客户端准备:
到这我相信大家都已经打过三节点集群了,如果是的话则可以跳过一,直接进入二。如果不是则按流程来一遍!
1、克隆虚拟机,见我的博客:虚拟机克隆及网络配置
2、 实现客户端和集群的连接(该步骤为多节点集群搭建,详情见我博客:三节点Hadoop集群搭建,有多节点集群的请跳到二)
(1)配置时钟同步:保证客户端和集群的时间是同步的,具体操作参照分布式集群搭建的步骤。
(2)修改主机名:修改/etc/sysconfig/network文件,修改完之后要reboot重启,保证生效。这一步不是必须的,因为我是克隆的,这里是为了名称的好记,所以建议修改一下。
(3)修改/etc/hosts文件,在各个节点上配置所有节点的主机名和IP之间的对应关系。
(4)实现这台机器和集群中每台机器之间的免密码登录。
(5)把集群的hadoop安装包远程copy到客户端节点对应的目录下。这就实现了客户端和hadoop集群之间环境的一致性和连接
(6)在客户端节点配置hadoop的环境变量并使环境变量生效。
使用命令vi /etc/profile ,在该文件中配置HADOOP_HOME和PATH并导出(export)
使环境变量生效:source /etc/profile
二、 在客户端上安装hive
1、 Mysql安装
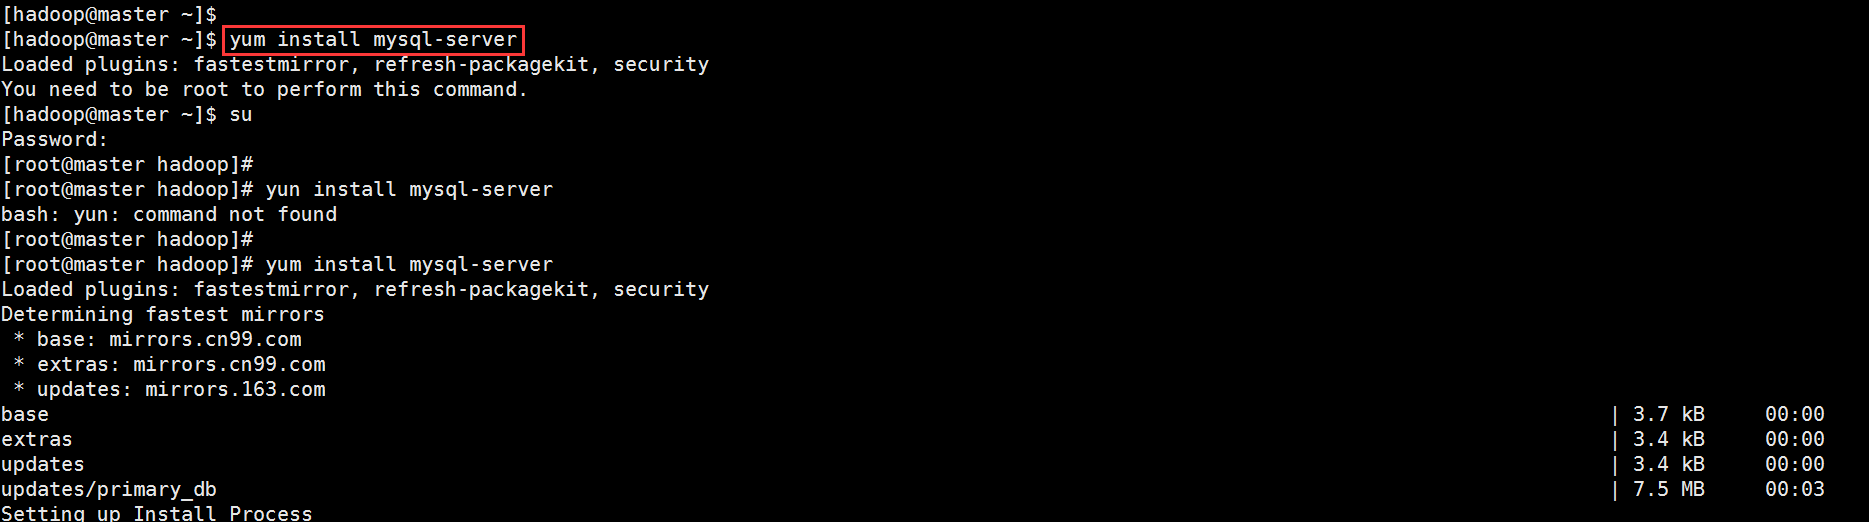
1.1 在线安装mysql
使用yum在线安装mysql:yum install mysql-server
1.2 启动mysql服务
使用service mysqld start命令启动mysql服务
[root@master hadoop]# service mysqld start
Initializing MySQL database:  Installing MySQL system tables...
OK
Filling help tables...
OK

To start mysqld at boot time you have to copy
support-files/mysql.server to the right place for your system

PLEASE REMEMBER TO SET A PASSWORD FOR THE MySQL root USER !
To do so, start the server, then issue the following commands:

/usr/bin/mysqladmin -u root password 'new-password'
/usr/bin/mysqladmin -u root -h master password 'new-password'

Alternatively you can run:
/usr/bin/mysql_secure_installation

which will also give you the option of removing the test
databases and anonymous user created by default.  This is
strongly recommended for production servers.

See the manual for more instructions.

You can start the MySQL daemon with:
cd /usr ; /usr/bin/mysqld_safe &

You can test the MySQL daemon with mysql-test-run.pl
cd /usr/mysql-test ; perl mysql-test-run.pl

Please report any problems with the /usr/bin/mysqlbug script!

                                                           [  OK  ]
Starting mysqld:                                           [  OK  ]
1.3 设置mysql root用户密码Mysql刚刚安装完成,默认root用户是没有密码的,登录mysql设置root用户密码。
[root@master hadoop]# mysql -u root -p
Enter password:
Welcome to the MySQL monitor.  Commands end with ; or \g.
Your MySQL connection id is 13
Server version: 5.1.73 Source distribution

Copyright (c) 2000, 2013, Oracle and/or its affiliates. All rights reserved.

Oracle is a registered trademark of Oracle Corporation and/or its
affiliates. Other names may be trademarks of their respective
owners.

Type 'help;' or '\h' for help. Type '\c' to clear the current input statement.
Enter password: 默认没有密码,回车即可。
输入如下命令设置root用户密码:
mysql> set password for root@localhost=password('root');
Query OK, 0 rows affected (0.00 sec)
设置完密码之后退出
mysql> exit
Bye
重新登录mysql,用户名:root,密码:root
[root@master hadoop]# mysql -u root -p
Enter password:
Welcome to the MySQL monitor.  Commands end with ; or \g.
Your MySQL connection id is 15
Server version: 5.1.73 Source distribution

Copyright (c) 2000, 2013, Oracle and/or its affiliates. All rights reserved.

Oracle is a registered trademark of Oracle Corporation and/or its
affiliates. Other names may be trademarks of their respective
owners.

Type 'help;' or '\h' for help. Type '\c' to clear the current input statement.

mysql>
此时mysql root用户密码设置成功。
1.4 创建hive账号
首先创建hive账户
mysql> create user 'hive' identified by 'hive';
Query OK, 0 rows affected (0.00 sec)
将mysql所有权限授予hive账户
mysql> grant all on *.* to 'hive'@'master' identified by 'hive';
Query OK, 0 rows affected (0.00 sec)
使操作命令生效
mysql> grant all on *.* to 'hive'@'master' identified by 'hive';
Query OK, 0 rows affected (0.00 sec)
查看mysql 用户表user
mysql> select host,user,password from mysql.user;
+-----------+------+-------------------------------------------+
| host      | user | password                                  |
+-----------+------+-------------------------------------------+
| localhost | root | *DE4EE97EBADA7D108BDD4EC90C49C6500E99E74A |
| master    | root |                                           |
| 127.0.0.1 | root |                                           |
| localhost |      |                                           |
| master    |      |                                           |
| %         | hive | *4DF1D66463C18D44E3B001A8FB1BBFBEA13E27FC |
| master    | hive | *4DF1D66463C18D44E3B001A8FB1BBFBEA13E27FC |
+-----------+------+-------------------------------------------+
7 rows in set (0.00 sec)
使用hive用户登录mysql数据库:
[root@master hadoop]# mysql -h master -u hive -p
Enter password: (密码为hive)
Welcome to the MySQL monitor.  Commands end with ; or \g.
Your MySQL connection id is 26
Server version: 5.1.73 Source distribution

Copyright (c) 2000, 2013, Oracle and/or its affiliates. All rights reserved.

Oracle is a registered trademark of Oracle Corporation and/or its
affiliates. Other names may be trademarks of their respective
owners.

Type 'help;' or '\h' for help. Type '\c' to clear the current input statement.

mysql>
创建数据库hive
mysql> create database hive;
Query OK, 1 row affected (0.00 sec)
查看所有数据库
mysql> show databases;
+--------------------+
| Database           |
+--------------------+
| information_schema |
| hive               |
| mysql              |
| test               |
+--------------------+
4 rows in set (0.00 sec)
2、 Hive安装
2.1 下载Hive
选择hive安装包apache-hive-1.0.0-bin.tar.gz,选择一台客户端client安装hive(下载地址:http://ftp.ntu.edu.tw/MySQL/Downloads/Connector-J/),将hive安装包上传至指定目录下。
[root@master hadoop-2.6.0]# cd /opt/ softwares/(上传到自定义文件夹下就行,为了方便管理,我这里上传到放JDK和hadoop的文件夹下)
[root@master softwares]# rz

[root@master softwares]# ll
total 1133432
-rw-r--r-- 1 root   root    79775131 May 14 10:51 apache-hive-1.0.0-bin.tar.gz
-rw-r--r-- 1 hadoop hadoop 195257604 Apr  2 11:29 hadoop-2.6.0.tar.gz
-rwxr--r-- 1 hadoop hadoop 153512879 Jun  2  2017 jdk-7u79-linux-x64.tar.gz
-rwxr--r-- 1 hadoop hadoop 181238643 Sep  3  2016 jdk-8u60-linux-x64.tar.gz
-rw-r--r-- 1 hadoop hadoop  28688464 Mar 13 18:57 scala-2.11.8.tar.gz
-rw-r--r-- 1 hadoop hadoop 289405702 Jun  7  2017 spark-1.6.1-bin-hadoop2.6.tgz
-rw-r--r-- 1 hadoop hadoop 201706782 Aug 28  2017 spark-2.2.0-bin-hadoop2.6.tgz
-rwxr--r-- 1 hadoop hadoop  31032995 Dec 30 15:13 zookeeper-3.4.5-cdh5.10.0.tar.gz
2.2 解压Hive
使用解压命令解压hive:
[root@master softwares]# tar -zxvf apache-hive-1.0.1-bin.tar.gz
apache-hive-1.0.1-bin/conf/hive-log4j.properties.template
apache-hive-1.0.1-bin/conf/hive-exec-log4j.properties.template
apache-hive-1.0.1-bin/conf/beeline-log4j.properties.template
apache-hive-1.0.1-bin/hcatalog/share/doc/hcatalog/README.txt
apache-hive-1.0.1-bin/LICENSE
apache-hive-1.0.1-bin/NOTICE
apache-hive-1.0.1-bin/README.txt
apache-hive-1.0.1-bin/RELEASE_NOTES.txt
……
[root@master softwares]# ll
total 1133436
drwxr-xr-x 8 root   root        4096 May 14 19:01 apache-hive-1.0.0-bin
-rw-r--r-- 1 root   root    79775131 May 14 10:51 apache-hive-1.0.1-bin.tar.gz
-rw-r--r-- 1 hadoop hadoop 195257604 Apr  2 11:29 hadoop-2.6.0.tar.gz
-rwxr--r-- 1 hadoop hadoop 153512879 Jun  2  2017 jdk-7u79-linux-x64.tar.gz
-rwxr--r-- 1 hadoop hadoop 181238643 Sep  3  2016 jdk-8u60-linux-x64.tar.gz
-rw-r--r-- 1 hadoop hadoop  28688464 Mar 13 18:57 scala-2.11.8.tar.gz
-rw-r--r-- 1 hadoop hadoop 289405702 Jun  7  2017 spark-1.6.1-bin-hadoop2.6.tgz
-rw-r--r-- 1 hadoop hadoop 201706782 Aug 28  2017 spark-2.2.0-bin-hadoop2.6.tgz
-rwxr--r-- 1 hadoop hadoop  31032995 Dec 30 15:13 zookeeper-3.4.5-cdh5.10.0.tar.gz
[root@master softwares]# mv apache-hive-1.0.0-bin ../modules/
[root@master softwares]# cd ../modules/
[root@master modules]# ll
total 28
drwxr-xr-x  8 root   root   4096 May 14 19:01 apache-hive-1.0.0-bin
drwxr-xr-x 12 hadoop hadoop 4096 Apr 11 00:00 hadoop-2.6.0
lrwxrwxrwx  1 hadoop hadoop   12 Apr  9 05:59 jdk -> jdk1.8.0_60/
drwxr-xr-x  8 hadoop hadoop 4096 Apr 11  2015 jdk1.7.0_79
drwxr-xr-x  8 hadoop hadoop 4096 Aug  5  2015 jdk1.8.0_60
drwxrwxr-x  6 hadoop hadoop 4096 Mar  4  2016 scala-2.11.8
drwxr-xr-x 15 hadoop hadoop 4096 Apr  9 06:27 spark-2.2.0-bin-hadoop2.6
drwxr-xr-x 14 hadoop hadoop 4096 Apr  9 00:00 zookeeper-3.4.5-cdh5.10.0
修改解压包名称为hive:mv apache-hive-1.0.0-bin hive1.0.0
[root@master modules]# mv apache-hive-1.0.1-bin hive1.0.0  //重命名
[root@master modules]# ll
total 28
drwxr-xr-x 12 hadoop hadoop 4096 Apr 11 00:00 hadoop-2.6.0
drwxr-xr-x  8 root   root   4096 May 14 19:01 hive1.0.0
lrwxrwxrwx  1 hadoop hadoop   12 Apr  9 05:59 jdk -> jdk1.8.0_60/
drwxr-xr-x  8 hadoop hadoop 4096 Apr 11  2015 jdk1.7.0_79
drwxr-xr-x  8 hadoop hadoop 4096 Aug  5  2015 jdk1.8.0_60
drwxrwxr-x  6 hadoop hadoop 4096 Mar  4  2016 scala-2.11.8
drwxr-xr-x 15 hadoop hadoop 4096 Apr  9 06:27 spark-2.2.0-bin-hadoop2.6
drwxr-xr-x 14 hadoop hadoop 4096 Apr  9 00:00 zookeeper-3.4.5-cdh5.10.0
2.3 修改hive配置hive-site.xml
hive-site.xml文件不存在,首先复制一份该文件
[root@master modules]# cd hive1.0.1/
[root@master hive1.0.1]# ll
total 396
drwxr-xr-x 3 root root   4096 May 14 19:01 bin
drwxr-xr-x 2 root root   4096 May 14 19:01 conf
drwxr-xr-x 4 root root   4096 May 14 19:01 examples
drwxr-xr-x 7 root root   4096 May 14 19:01 hcatalog
drwxr-xr-x 4 root root   4096 May 14 19:01 lib
-rw-r--r-- 1 root root  23828 May 15  2015 LICENSE
-rw-r--r-- 1 root root    397 May 15  2015 NOTICE
-rw-r--r-- 1 root root   4044 May 15  2015 README.txt
-rw-r--r-- 1 root root 345849 May 15  2015 RELEASE_NOTES.txt
drwxr-xr-x 3 root root   4096 May 14 19:01 scripts
[root@master hive1.0.1]# cd conf/
[root@master conf]# ll
total 160
-rw-r--r-- 1 root root   1139 May  2  2015 beeline-log4j.properties.template
-rw-r--r-- 1 root root 147301 May 15  2015 hive-default.xml.template
-rw-r--r-- 1 root root   2378 May  2  2015 hive-env.sh.template
-rw-r--r-- 1 root root   2662 May  2  2015 hive-exec-log4j.properties.template
-rw-r--r-- 1 root root   3050 May  2  2015 hive-log4j.properties.template
[root@master conf]# cp hive-default.xml.template hive-site.xml
[root@master conf]# ll
total 304
-rw-r--r-- 1 root root   1139 May  2  2015 beeline-log4j.properties.template
-rw-r--r-- 1 root root 147301 May 15  2015 hive-default.xml.template
-rw-r--r-- 1 root root   2378 May  2  2015 hive-env.sh.template
-rw-r--r-- 1 root root   2662 May  2  2015 hive-exec-log4j.properties.template
-rw-r--r-- 1 root root   3050 May  2  2015 hive-log4j.properties.template
-rw-r--r-- 1 root root 147301 May 14 19:07 hive-site.xml
修改hive-site.xml配置(配置文件内容很多,人眼查找费时费力,通过vim/vi进入文件后可输入一个“/”然后追加字符串进行查找)
<property>
    <name>javax.jdo.option.ConnectionURL</name>
    <value>jdbc:mysql//:master:3306/hive?characterEncoding=UTF-8</value>
    <description>JDBC connect string for a JDBC metastore</description>
</property>
<property>
    <name>javax.jdo.option.ConnectionDriverName</name>
    <value>com.mysql.jdbc.Driver</value>
    <description>driver class name for a JDBC metastore</decription>
</property>
上表中指定的hive数据库实例,提前已经创建好了。
<property>
    <name>javax.jdo.option.ConnectionPassword</name>
    <value>hive</value>
    <description>password to use against metastore database</description>
</property>
<property>
    <name>javax.jdo.option.ConnectionUserName</name>
    <value>hive</value>
    <description>Username to use against metastore database</description>
</property>
2.4 配置Hive环境变量
打开vi /etc/profile文件,添加如下内容:

保存退出,并是配置文件生效
[root@master conf]# source /etc/profile
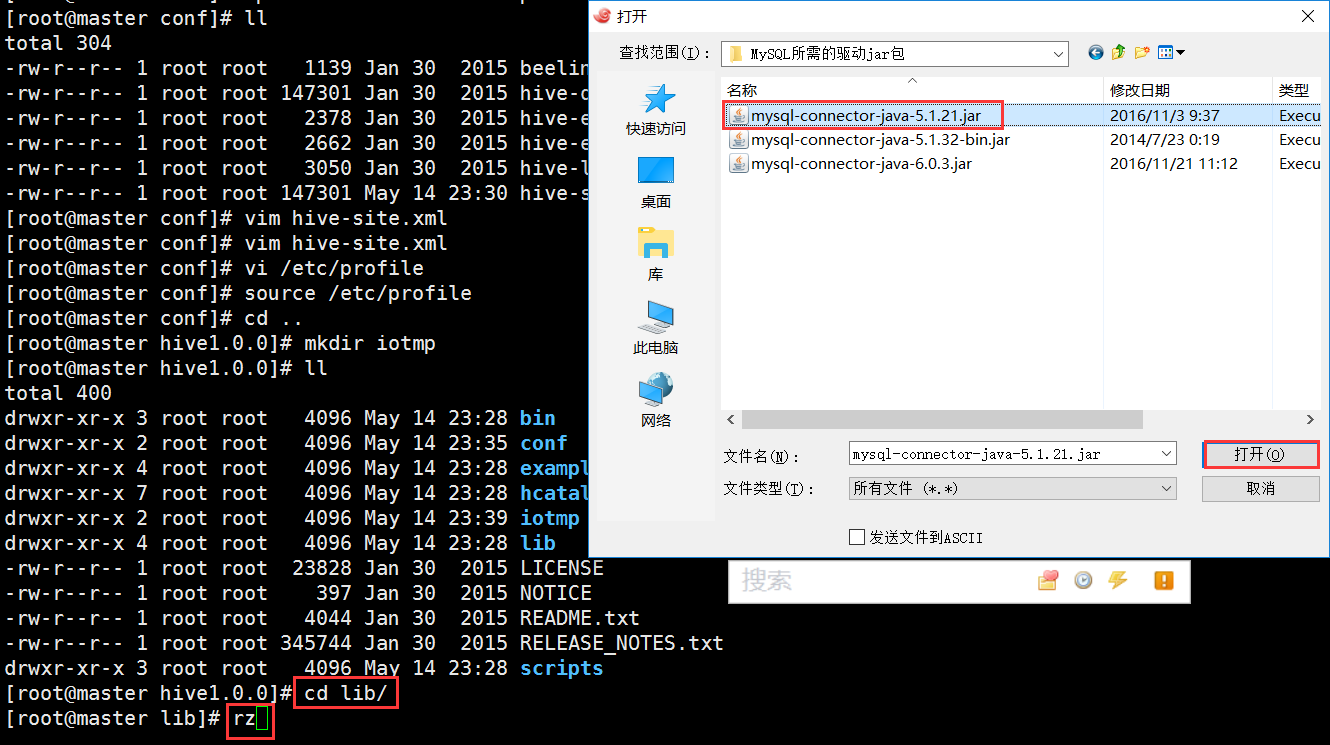
2.5 将mysql驱动包拷贝到hive的lib目录
下载mysql-connector-java-5.1.21.jar,并上传至hive的lib目录下。
2.6 修改hive数据目录
修改配置文件vi hive-site.xml,更改相关数据目录
 <property>
    <name>hive.querylog.location</name>
    <value>/opt/modules/hive/iotmp</value>
    <description>Local of hive run time structured log file</description>
  </property>
  <property>
    <name>hive.exec.local.scratchdir</name>
    <value>/opt/modules/hive/iotmp</value>
    <description>Local scratch space for Hive jobs</description>
  </property>
  <property>
    <name>hive.downloaded.resources.dir</name>
    <value>/opt/modules/hive/iotmp</value>
    <description>Temporary local directory for added resources in the remote file system.</description>
  </property>
2.7 测试运行hive
2.7.1启动hadoop集群
首先,分别在个节点启动Zookeeper
[hadoop@master hadoop-2.6.0]$ sbin/hadoop-daemon.sh start zkfc
然后,分别启动zkfc(HA高热备),hdfs和yarn等个项服务
[hadoop@master hadoop-2.6.0]$ sbin/start-dfs.sh
[hadoop@master hadoop-2.6.0]$ sbin/start-yarn.sh
[hadoop@master hadoop-2.6.0]$ cd ..
[hadoop@master modules]$ cd zookeeper-3.4.5-cdh5.10.0/(根据自己Zookeeper安装路径而定)
[hadoop@master zookeeper-3.4.5-cdh5.10.0]$ bin/zkServer.sh start
[hadoop@master zookeeper-3.4.5-cdh5.10.0]$ jps
6481 Jps
5330 DataNode
5733 ResourceManager
5077 DFSZKFailoverController
6456 QuorumPeerMain
5225 NameNode
5514 JournalNode
5837 NodeManager
2.7.2启动Hive
[hadoop@master hive1.0.0]$ bin/hive
Logging initialized using configuration in file:/opt/modules/hive1.0.0/conf/hive-log4j.properties
SLF4J: Class path contains multiple SLF4J bindings.
SLF4J: Found binding in [jar:file:/opt/modules/hadoop-2.6.0/share/hadoop/common/lib/slf4j-log4j12-1.7.5.jar!/org/slf4j/impl/StaticLoggerBinder.class]
SLF4J: Found binding in [jar:file:/opt/modules/hive1.0.0/lib/hive-jdbc-1.0.0-standalone.jar!/org/slf4j/impl/StaticLoggerBinder.class]
SLF4J: See http://www.slf4j.org/codes.html#multiple_bindings for an explanation.
SLF4J: Actual binding is of type [org.slf4j.impl.Log4jLoggerFactory]
hive> show tables;
OK
Time taken: 0.499 seconds
hive> show databases;
OK
default
Time taken: 0.044 seconds, Fetched: 1 row(s)
Ok,出现上面的结果,hive安装成功。
以上就是博主为大家介绍的这一板块的主要内容,这都是博主自己的学习过程,希望能给大家带来一定的指导作用,有用的还望大家点个支持,如果对你没用也望包涵,有错误烦请指出。如有期待可关注博主以第一时间获取更新哦,谢谢!
版权声明:本文为博主原创文章,未经博主允许不得转载。