前言步骤,下载安装 IntelliJ IDEA及Tomcat 客户端、服务端下载安装,这些都配置完之后
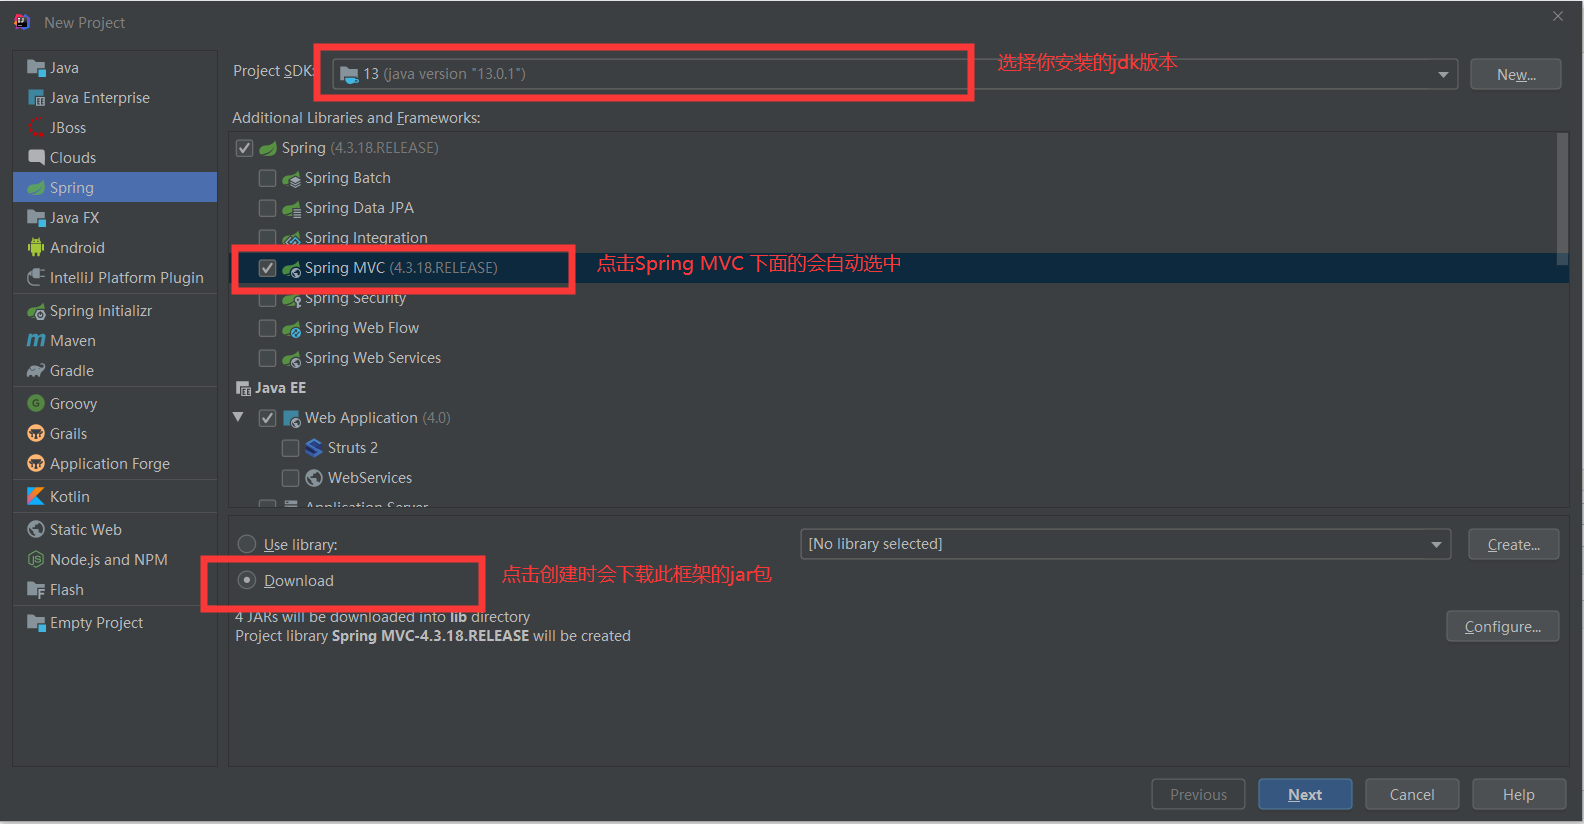
准备创建项目

点击下一步
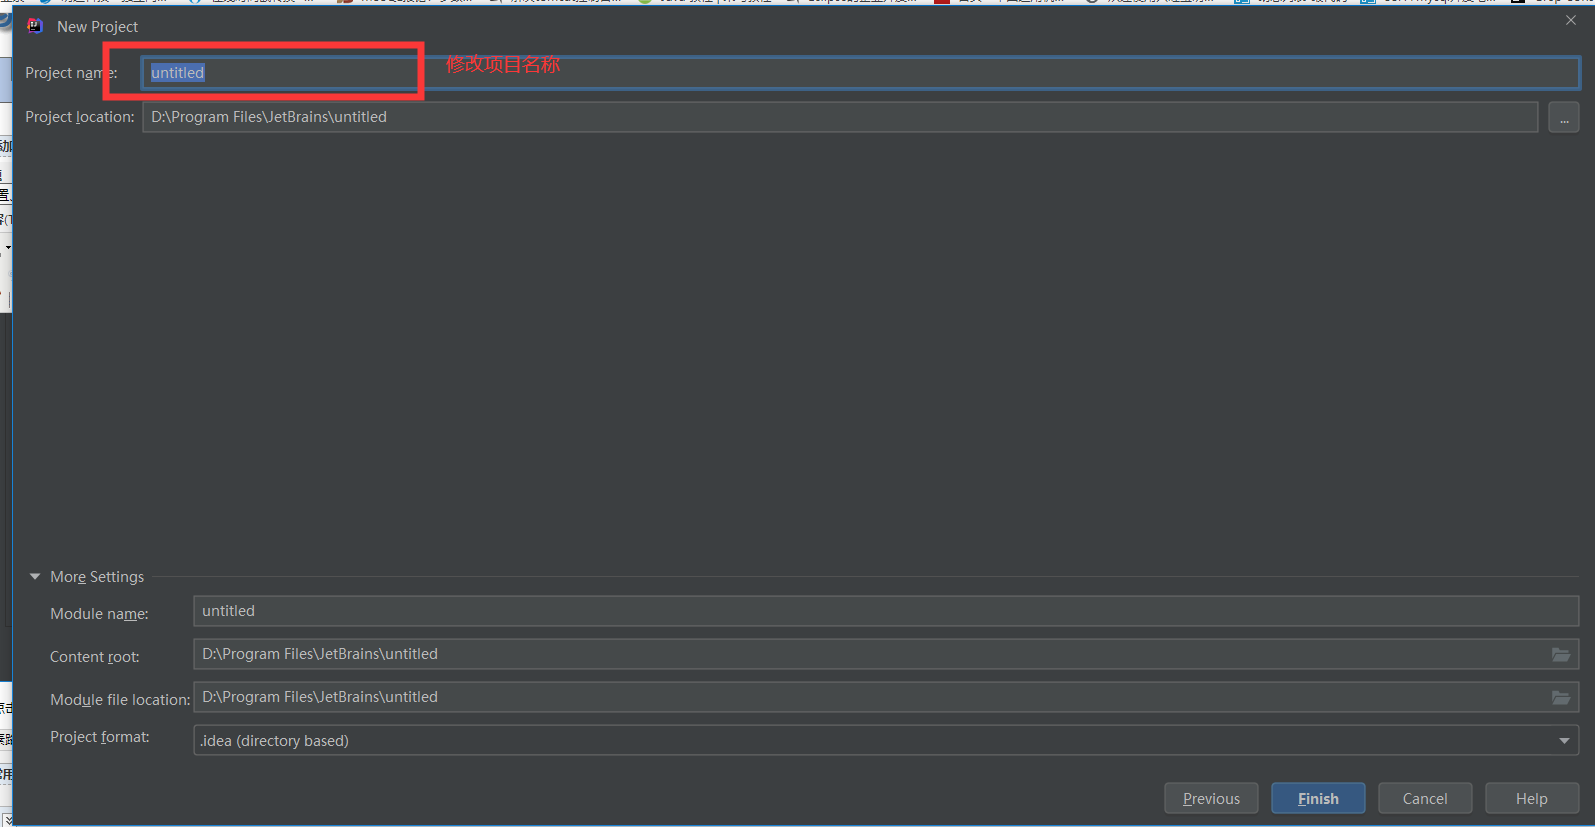
修改完项目名称其他的名称也跟项目名称一样,我就改了保存位置其他都跟项目名称一样的名字,点击Finish后会下载本框架需要的jar包
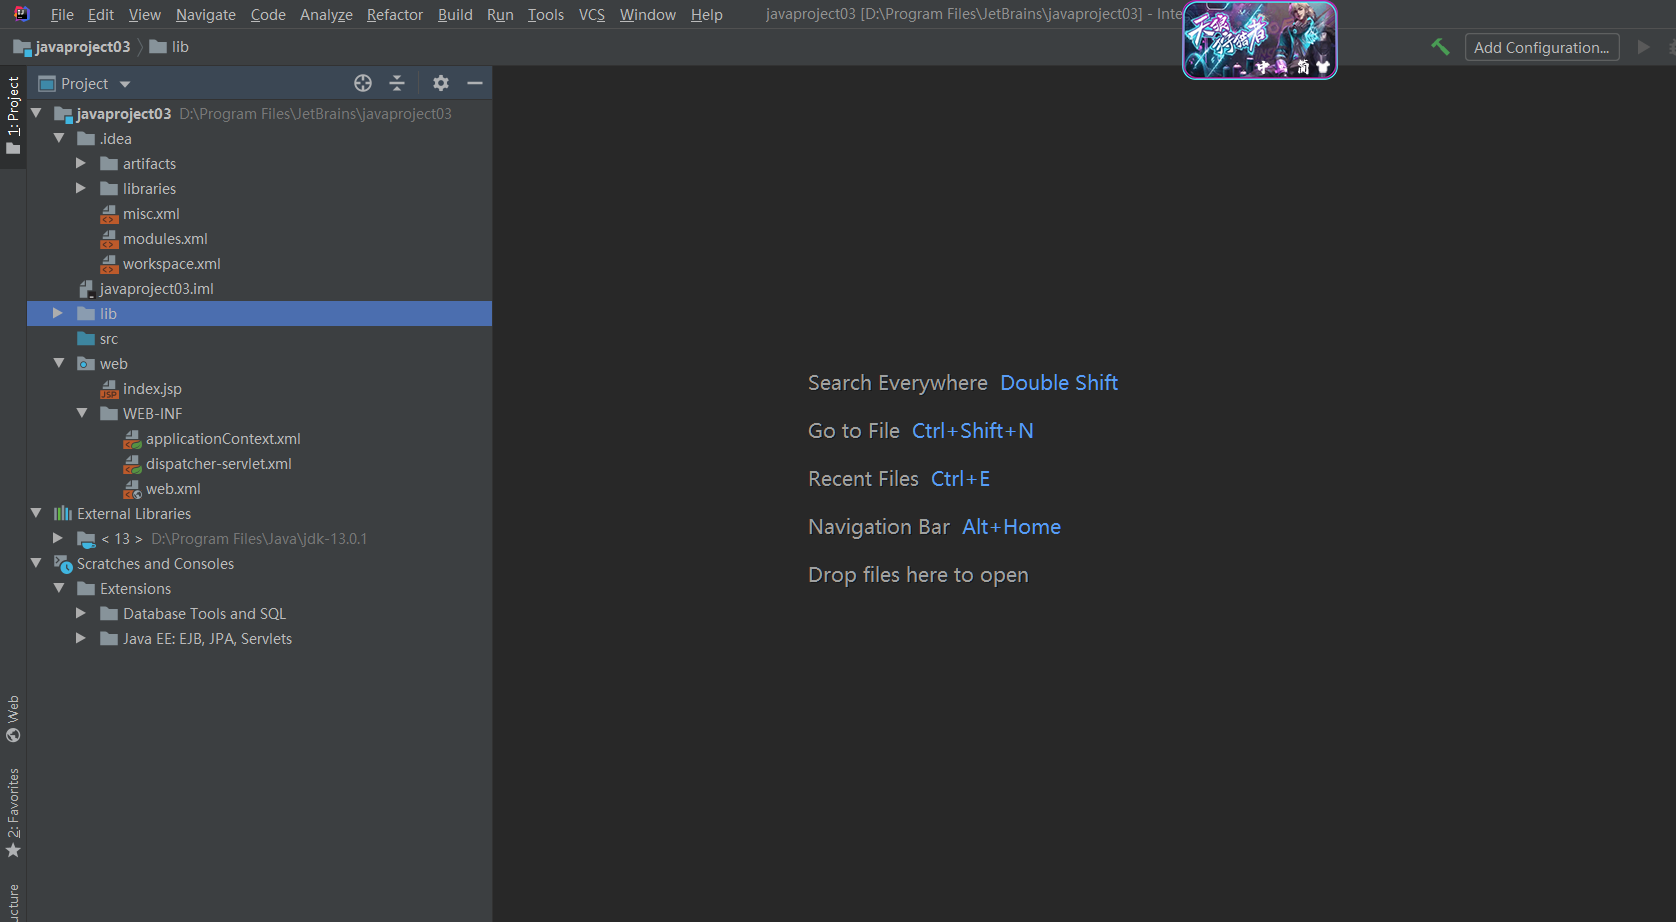
创建成果后的界面
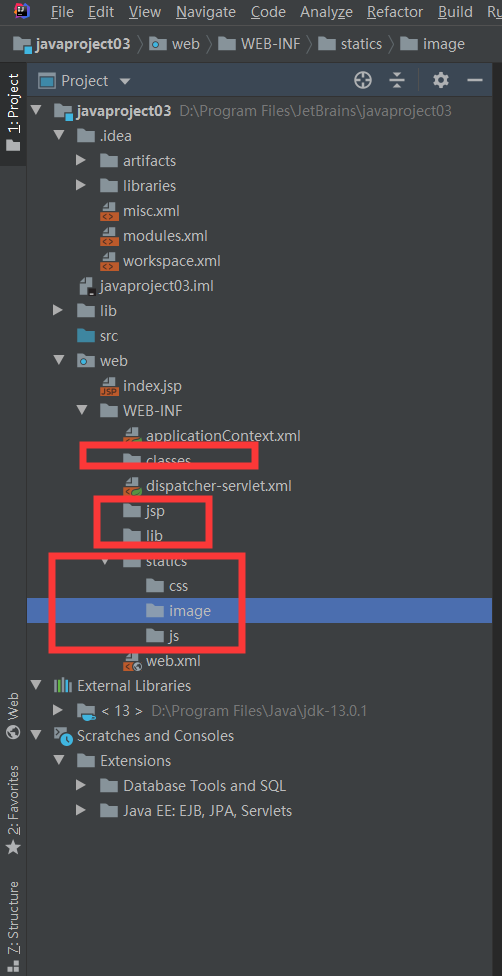
添加文件夹jsp、classes、lib、static(css、image、js)

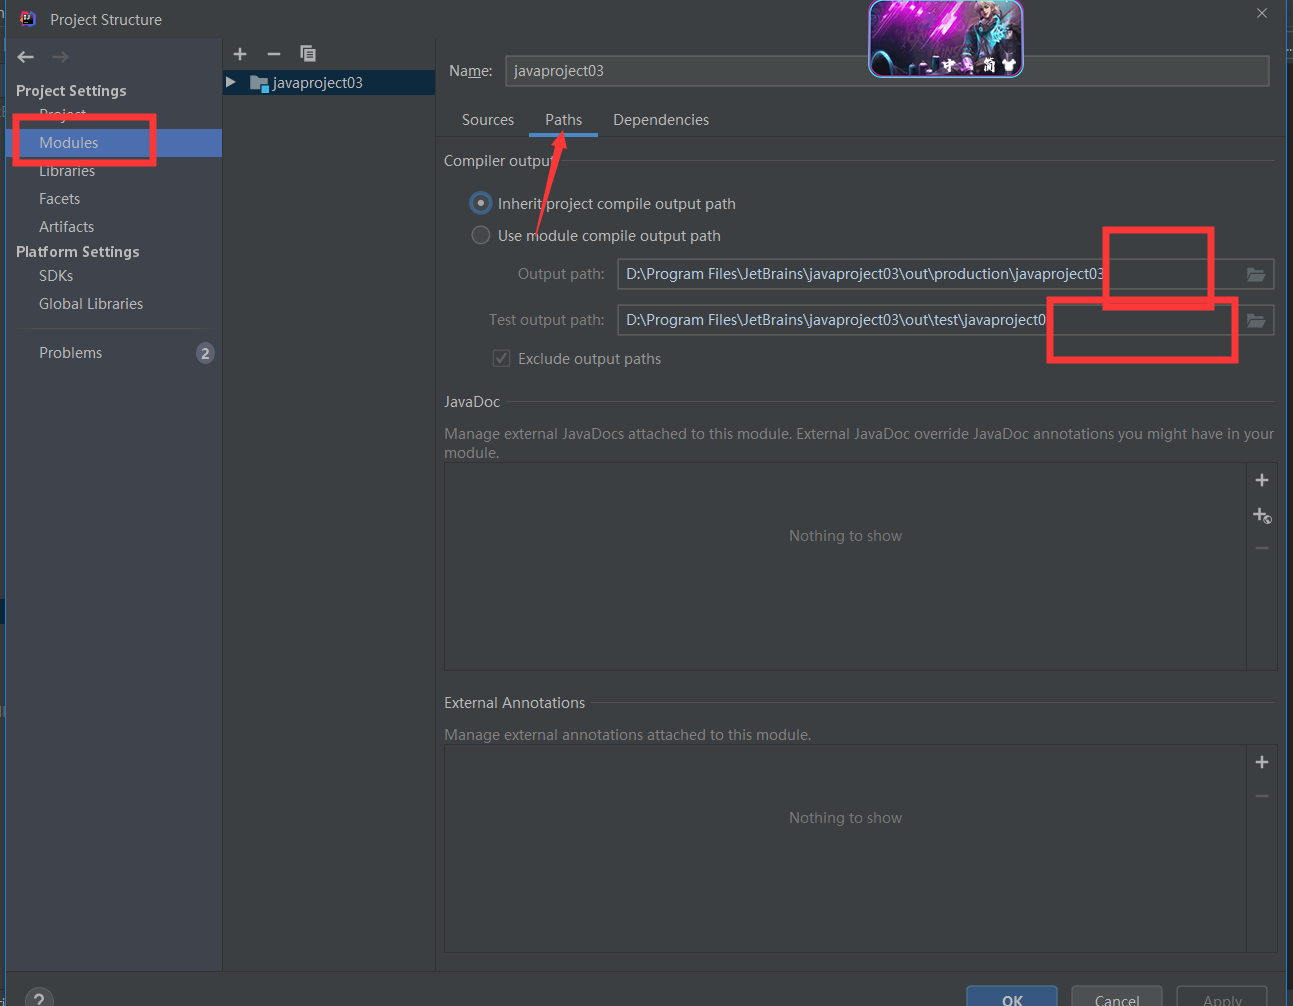
这里的两个路径改成项目classes文件夹路径
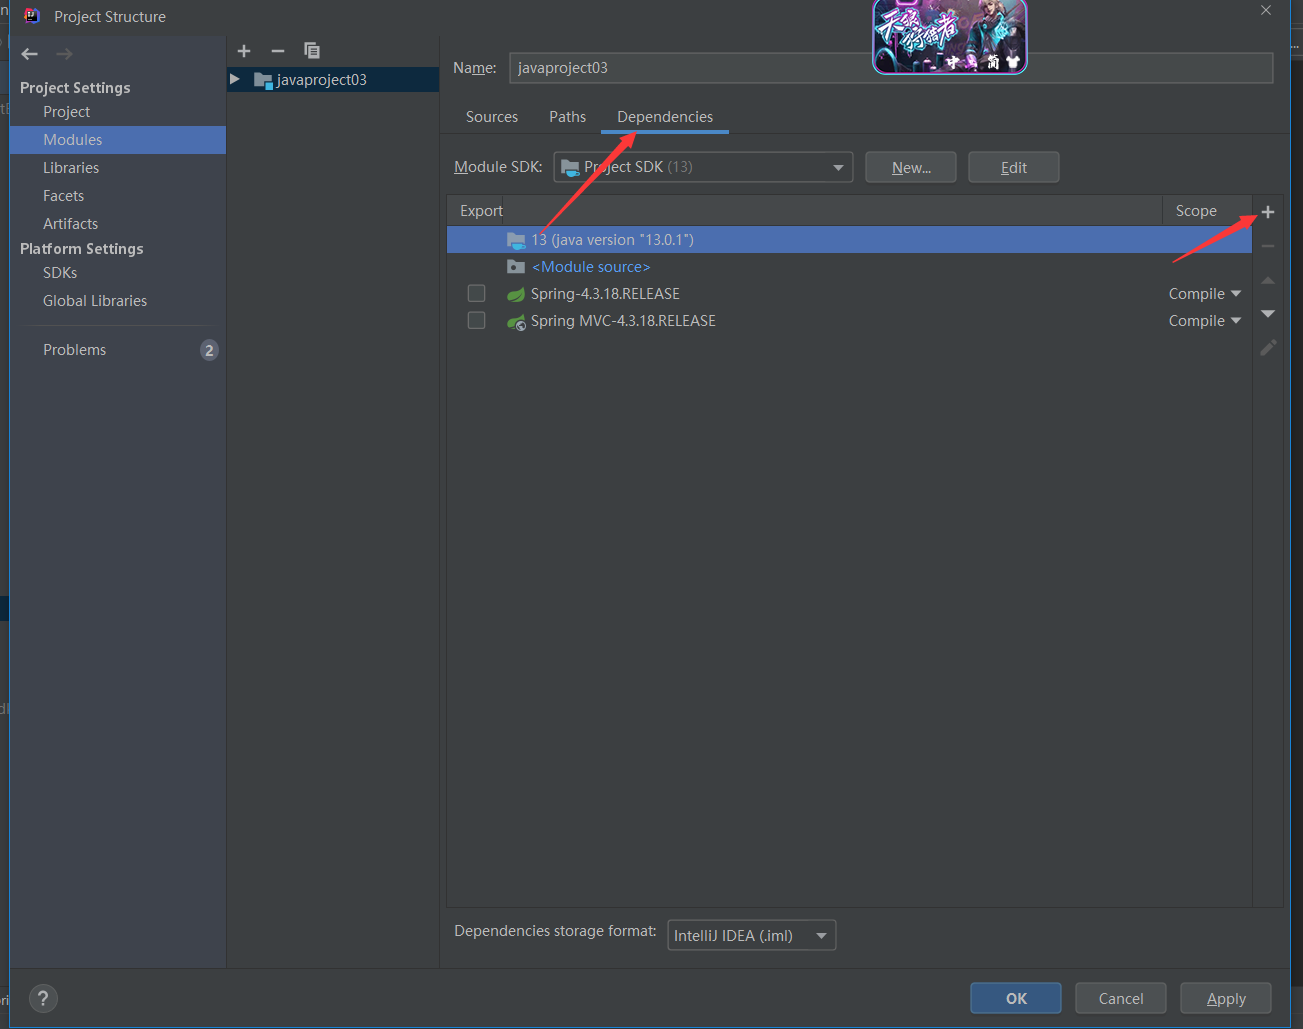
在点击Dependencies,在点击右侧的+号

选择第一个

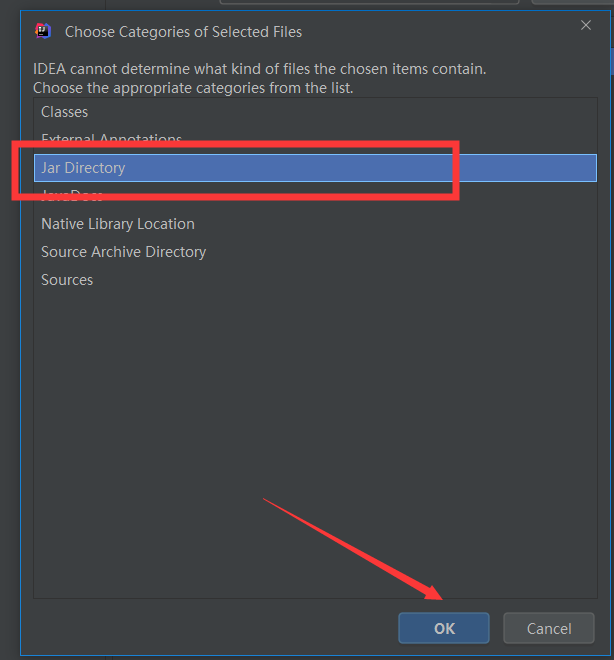
这里漏了一步,上面点击ok之后弹出下面这个页面
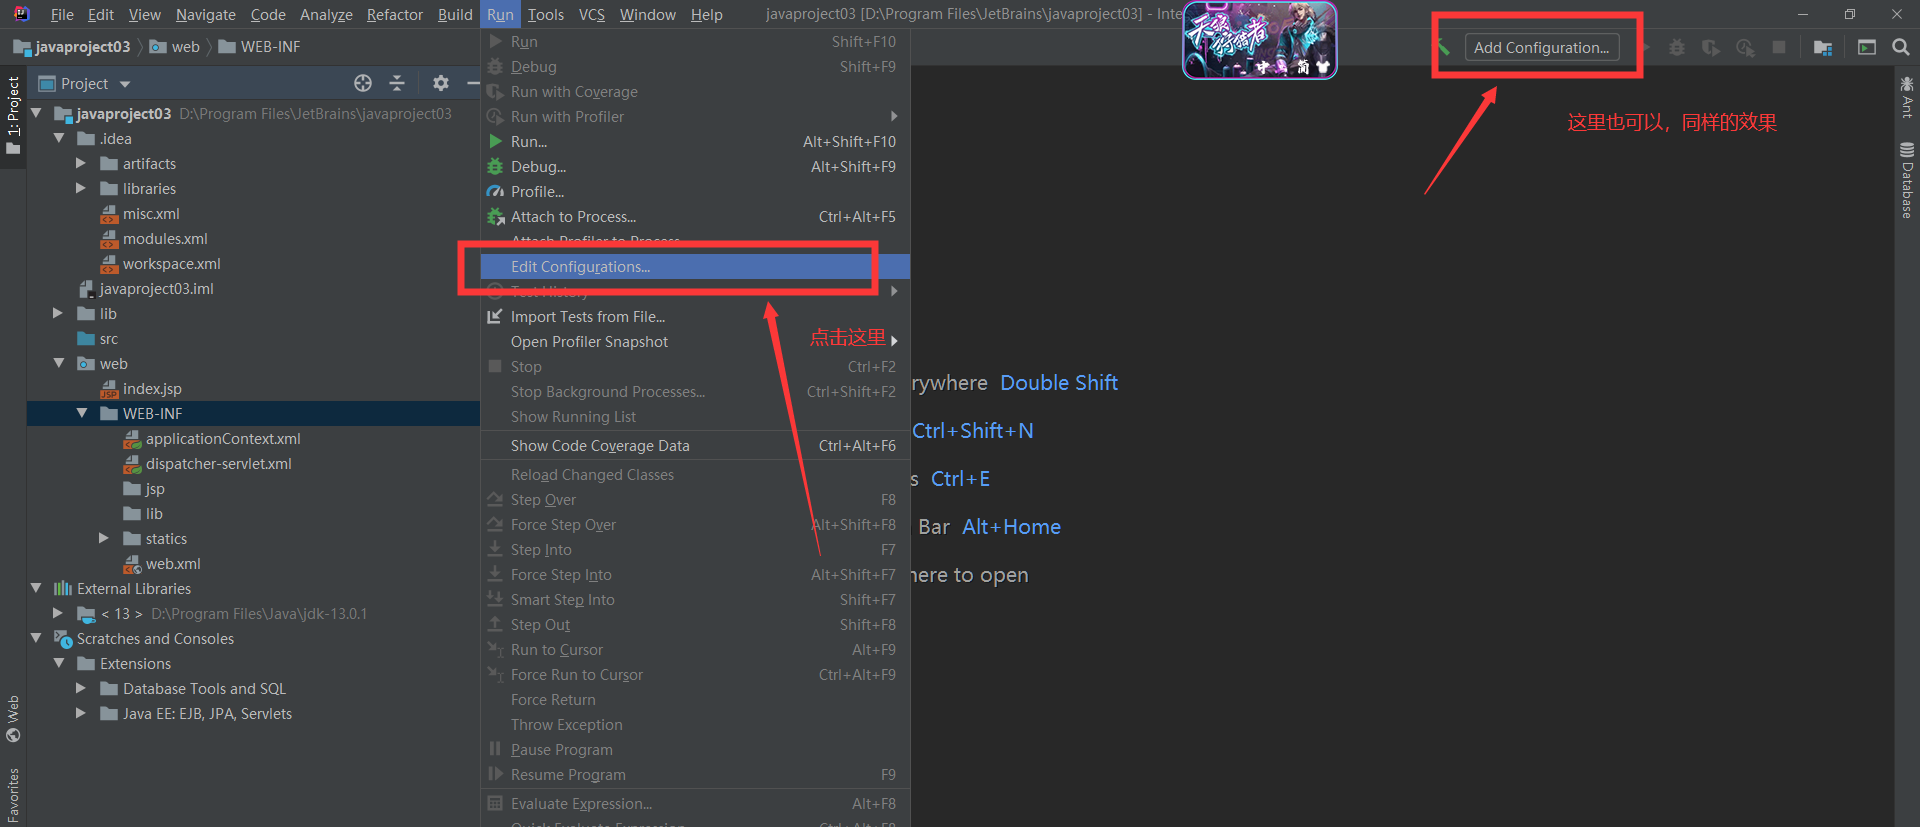
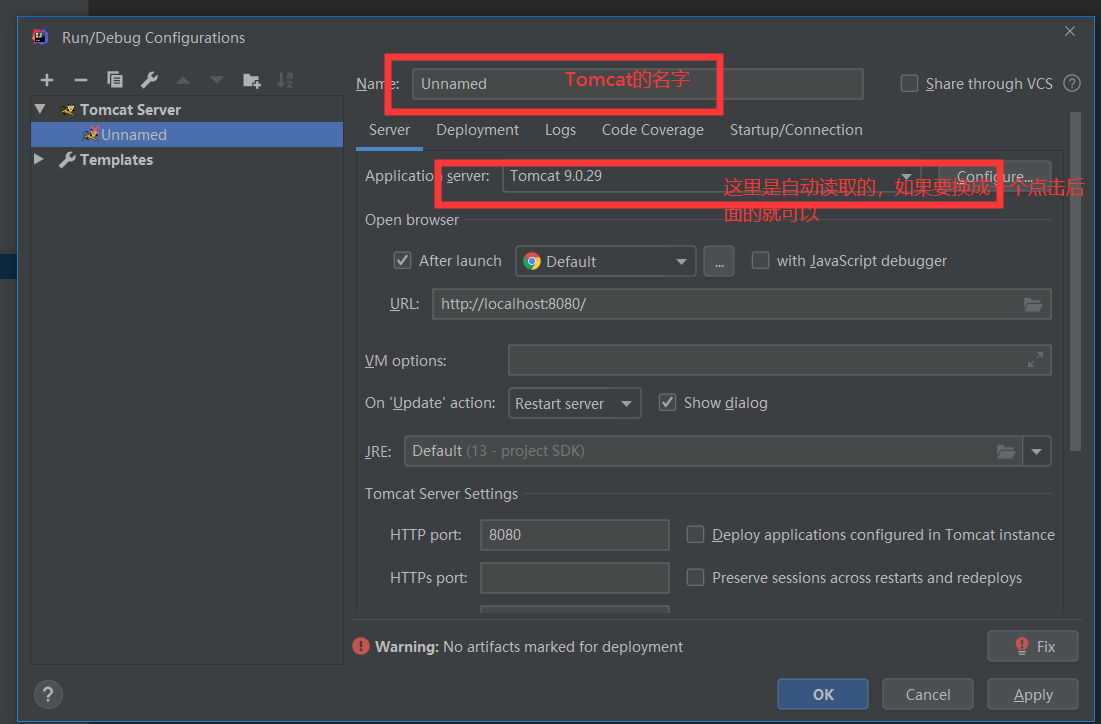
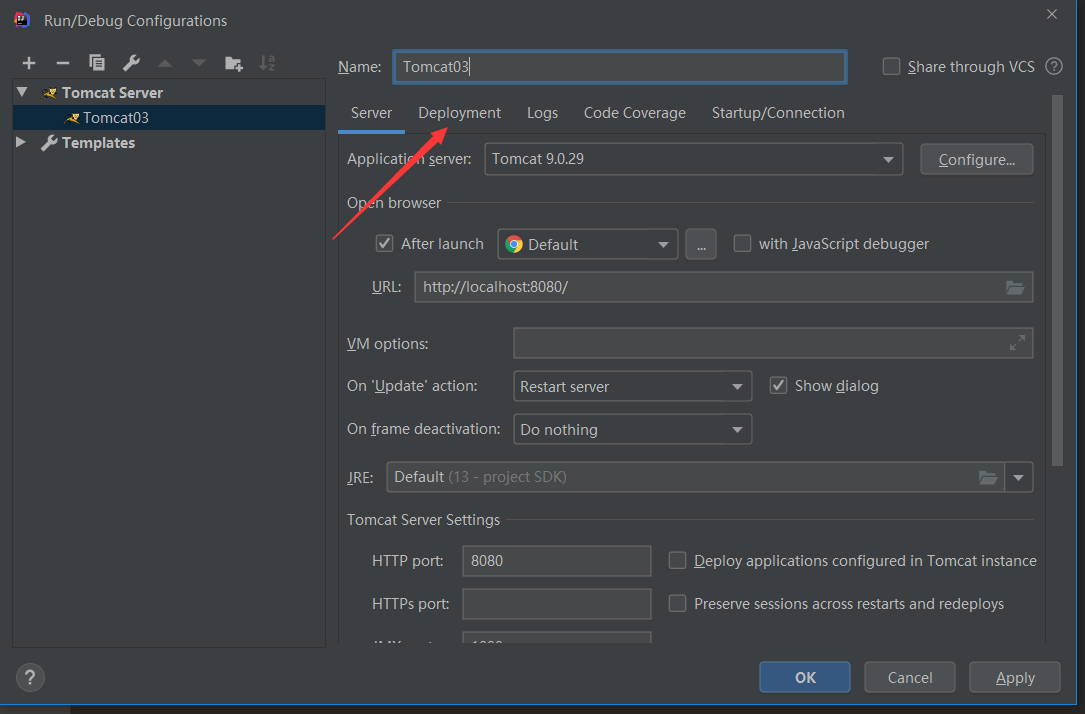
接下来配置Tomcat 现在的运行和调试按钮都是灰色的,不能点配置成功就可以运行了
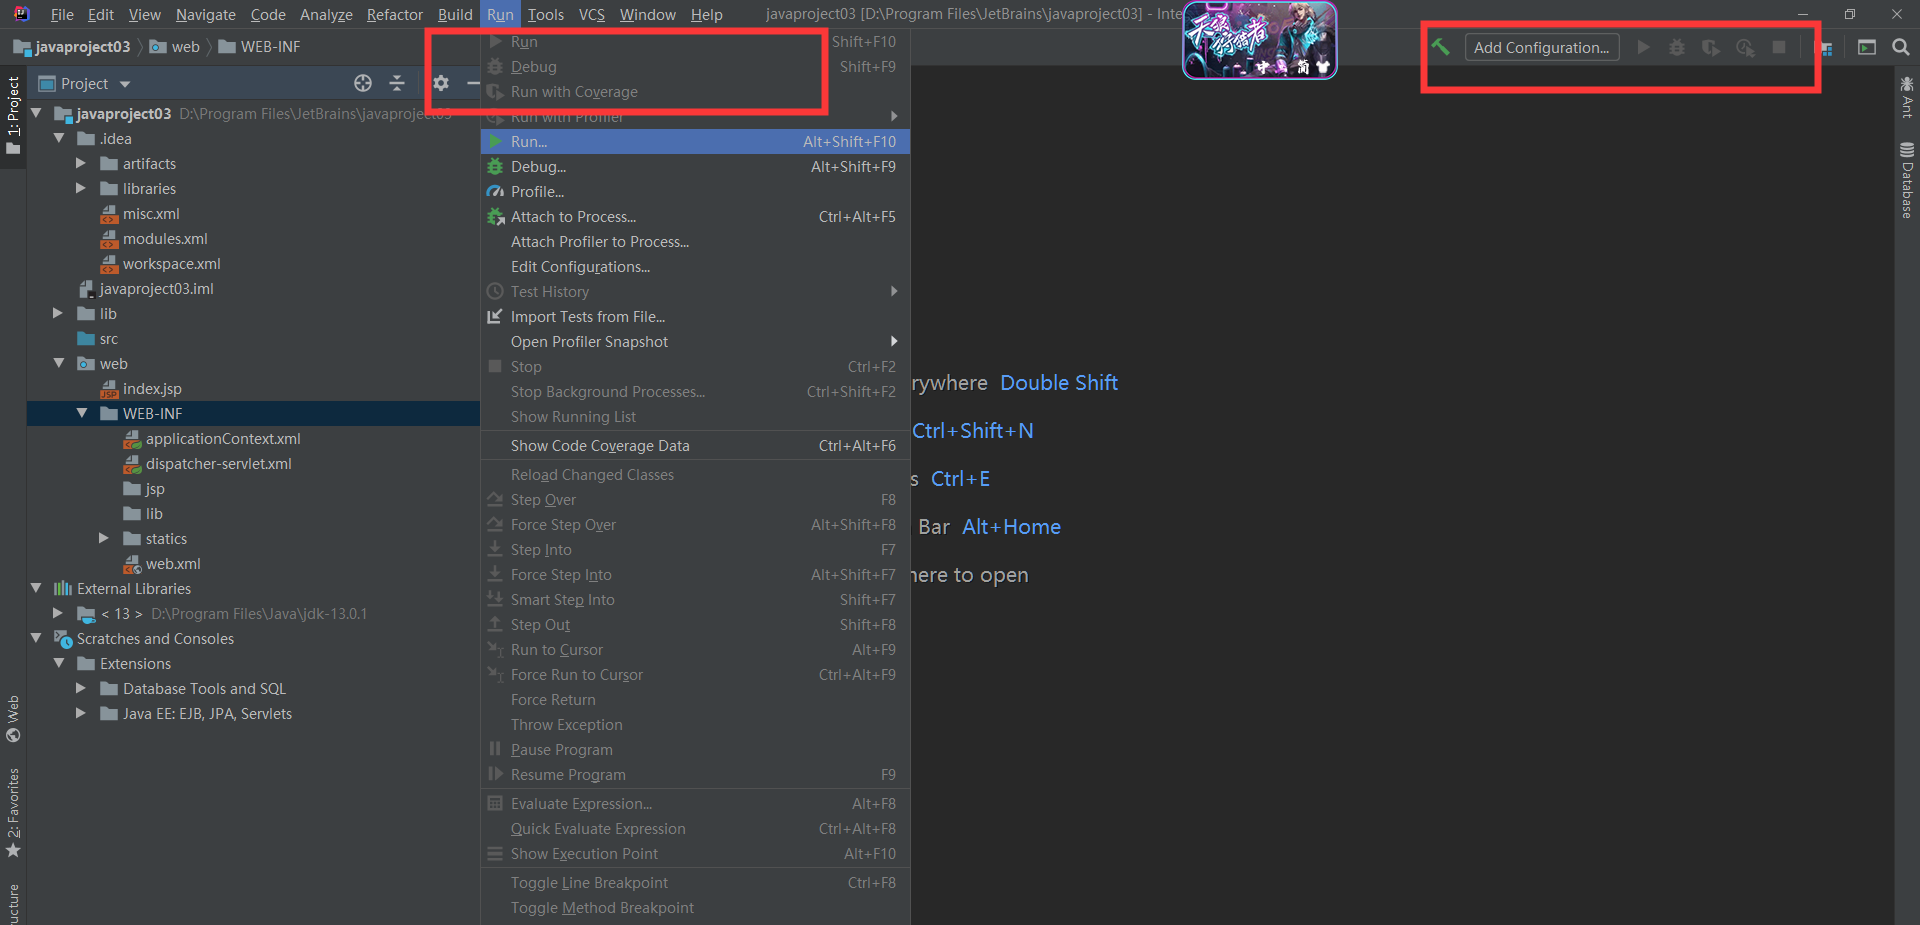
如下图点击Run->Edit Configurations 点击右侧的那个也可以

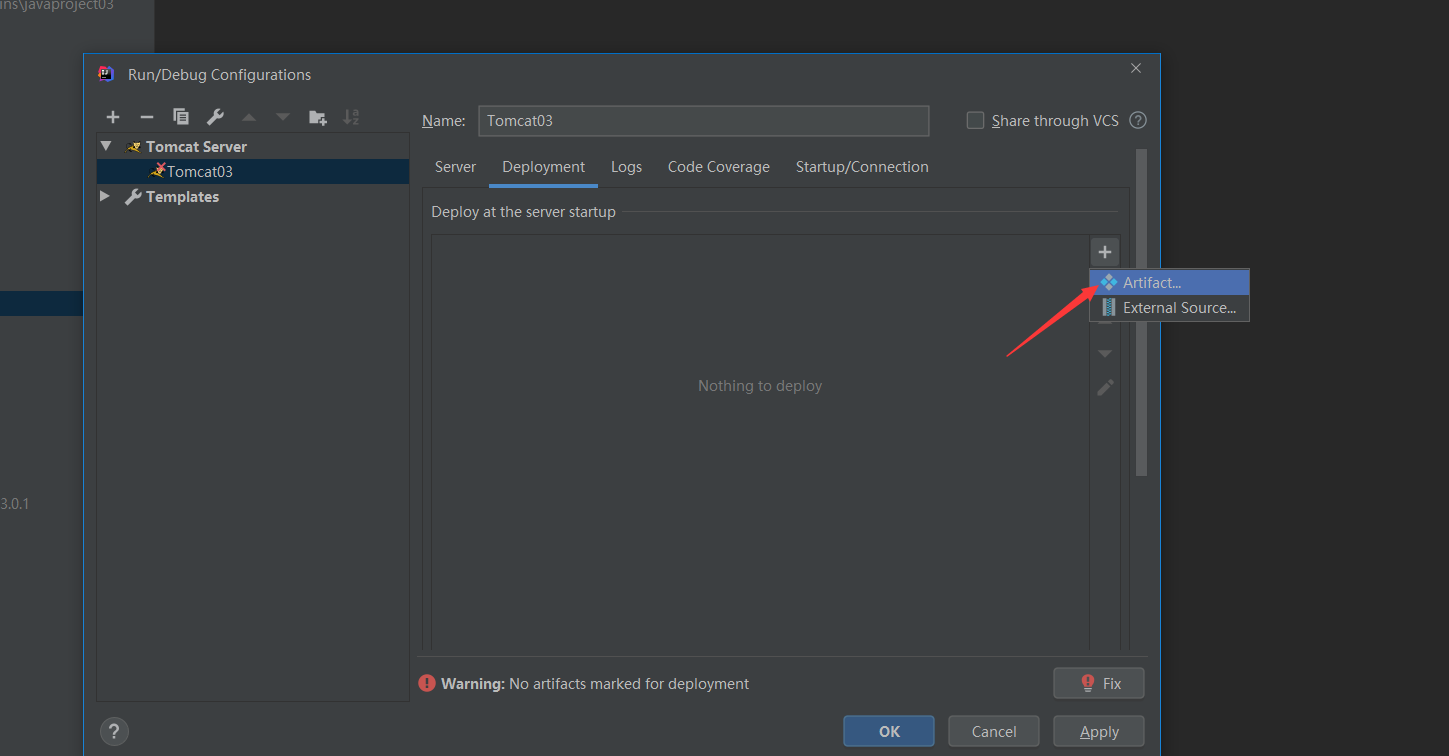
点击Artifact,然后往下拉,配置访问路径
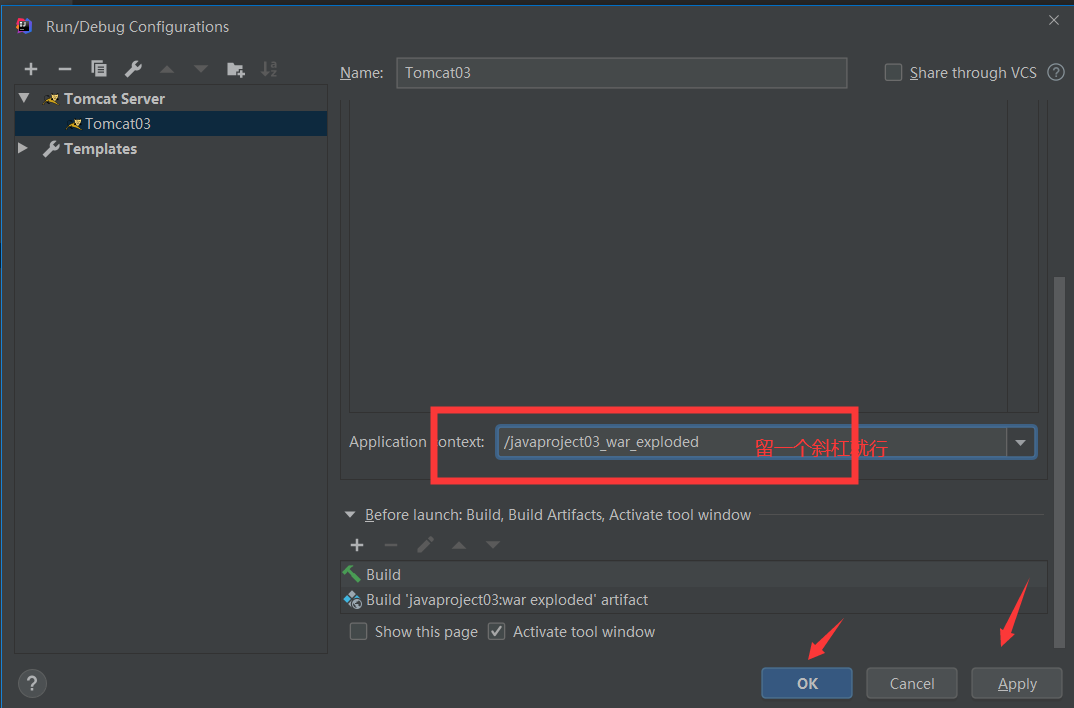
然后点击应用、完成
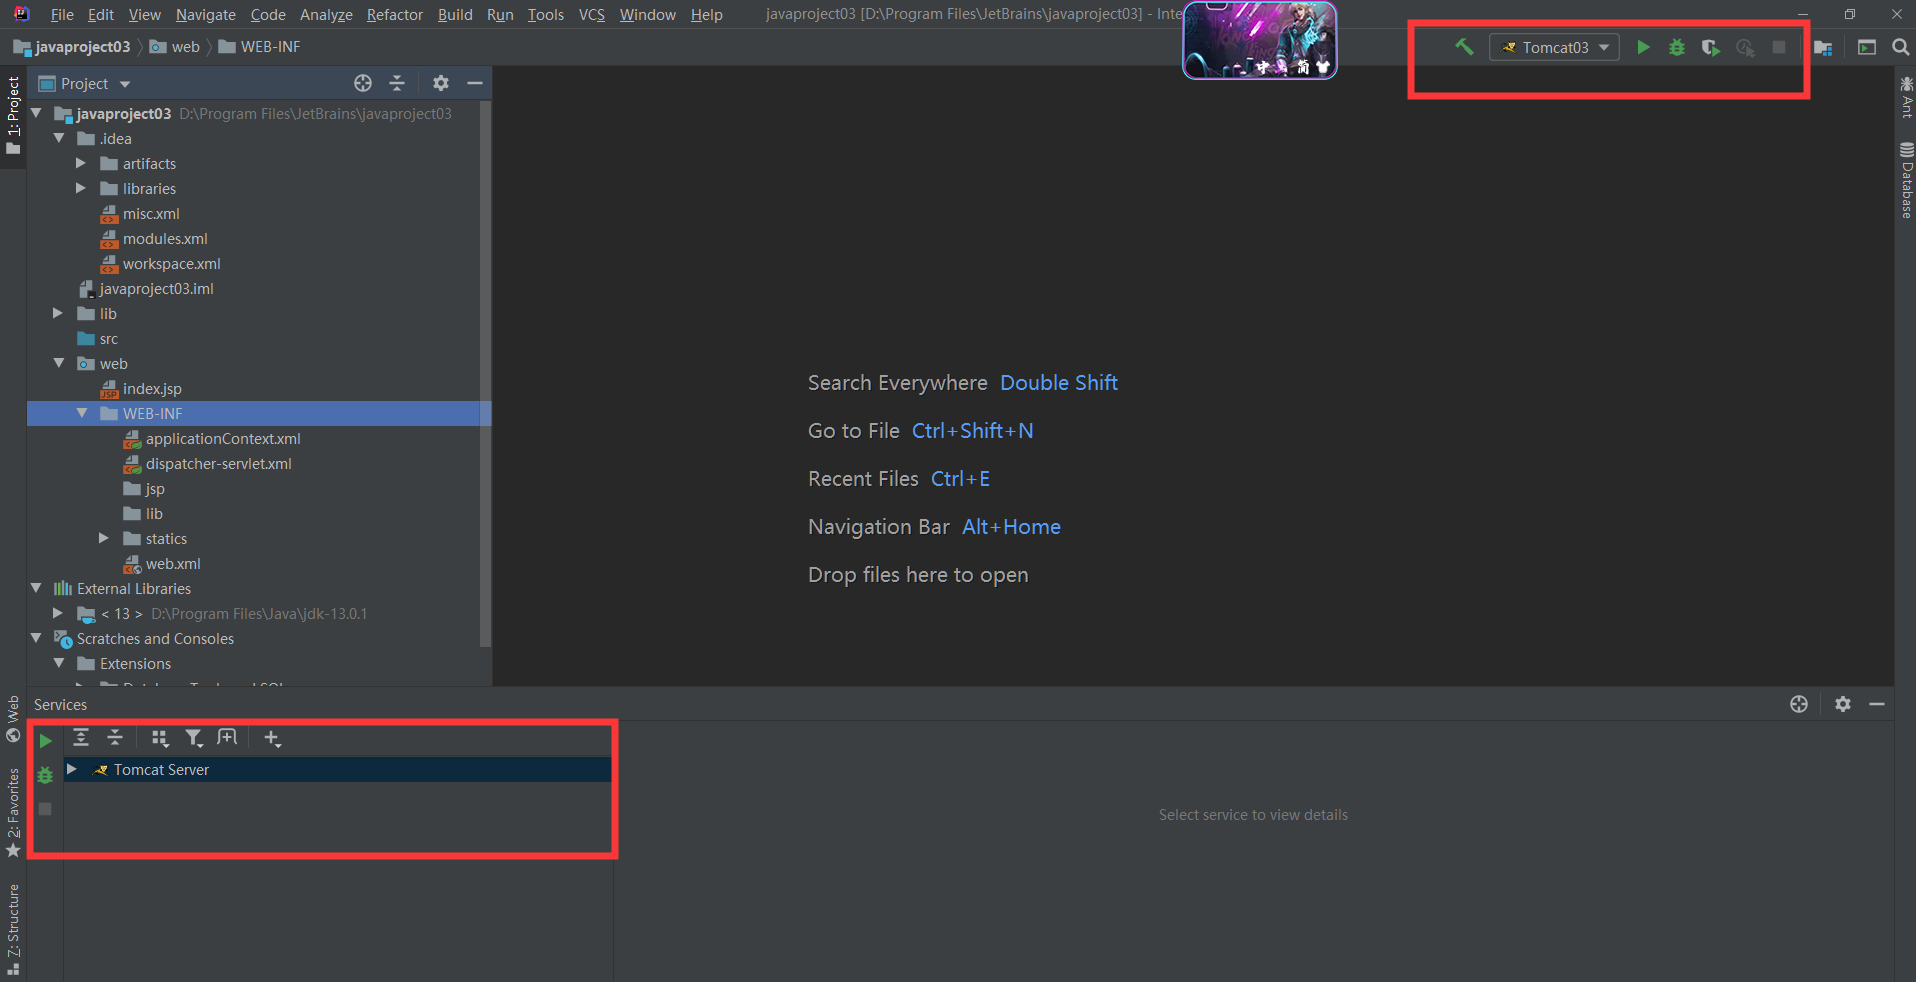
配置好后就可以运行了、web.xml

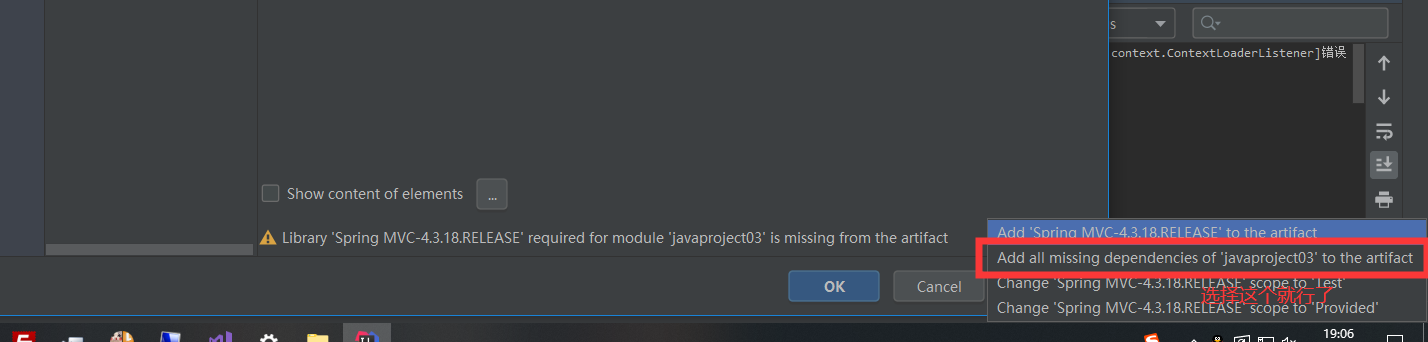
运行提示了一个错误,这里是有没有用对

之后重新运行就ok了

这是访问的最外面的index.jsp
那我要访问jsp文件夹里面的文件呢
接下来接着配置
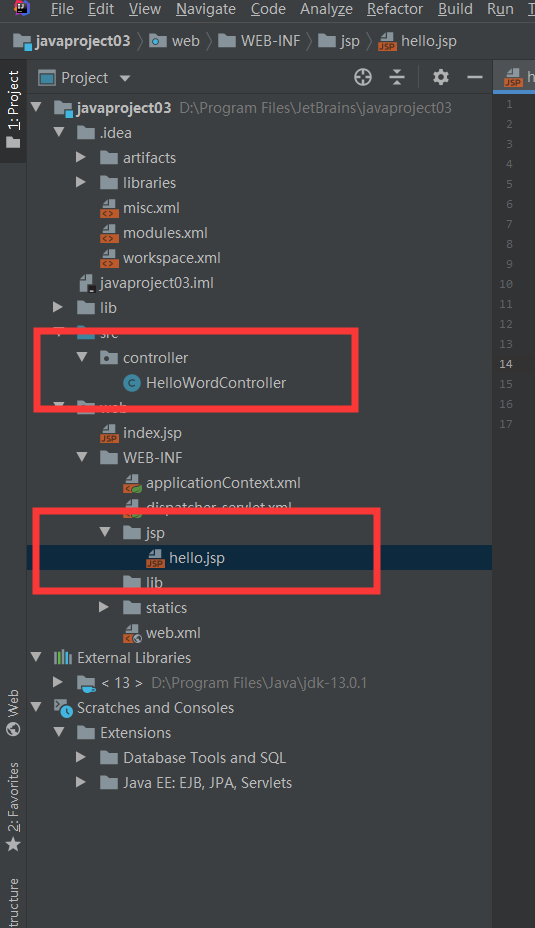
我重新加了如下文件 写了个方法
package controller;

import org.springframework.stereotype.Controller;
import org.springframework.web.bind.annotation.RequestMapping;

@Controller
@RequestMapping("/mvc")

public class HelloWordController {
    @RequestMapping("/hello")
    public String hello()
    {
        return "hello";
    }
}
然后配置applicationContext.xml、dispatcher-servlet.xml、web.xml
applicationContext.xml
<?xml version="1.0" encoding="UTF-8"?>
<beans xmlns="http://www.springframework.org/schema/beans"
       xmlns:xsi="http://www.w3.org/2001/XMLSchema-instance"
       xmlns:context="http://www.springframework.org/schema/context"
       xsi:schemaLocation="http://www.springframework.org/schema/beans http://www.springframework.org/schema/beans/spring-beans.xsd http://www.springframework.org/schema/context http://www.springframework.org/schema/context/spring-context.xsd">
    <context:component-scan base-package="controller"/><!--扫描的包 你自己新建的包名-->
</beans>
dispatcher-servlet.xml
<?xml version="1.0" encoding="UTF-8"?>
<beans xmlns="http://www.springframework.org/schema/beans"
       xmlns:xsi="http://www.w3.org/2001/XMLSchema-instance"
       xmlns:context="http://www.springframework.org/schema/context"
       xmlns:mvc="http://www.springframework.org/schema/mvc"
       xsi:schemaLocation="http://www.springframework.org/schema/beans http://www.springframework.org/schema/beans/spring-beans.xsd http://www.springframework.org/schema/context http://www.springframework.org/schema/context/spring-context.xsd http://www.springframework.org/schema/mvc http://www.springframework.org/schema/mvc/spring-mvc.xsd">
    <!--此文件负责整个mvc中的配置-->

    <!--启用spring的一些annotation -->
    <context:annotation-config/>

    <!-- 配置注解驱动 可以将request参数与绑定到controller参数上 -->
    <mvc:annotation-driven/>

    <!--静态资源映射-->
    <!--本项目把静态资源放在了webapp的statics目录下,资源映射如下-->
    <mvc:resources mapping="/css/**" location="/WEB-INF/statics/css/"/>
    <mvc:resources mapping="/js/**" location="/WEB-INF/statics/js/"/>
    <mvc:resources mapping="/image/**" location="/WEB-INF/statics/image/"/>

    <!-- 对模型视图名称的解析,即在模型视图名称添加前后缀(如果最后一个还是表示文件夹,则最后的斜杠不要漏了) 使用JSP-->
    <!-- 默认的视图解析器 在上边的解析错误时使用 (默认使用html)- -->
    <bean id="defaultViewResolver" class="org.springframework.web.servlet.view.InternalResourceViewResolver">
        <!-- <property name="viewClass" value="org.springframework.web.servlet.view.JstlView"/>-->
        <property name="prefix" value="/WEB-INF/jsp/"/><!--设置JSP文件的目录位置-->
        <property name="suffix" value=".jsp"/>
        <property name="exposeContextBeansAsAttributes" value="true"/>
    </bean>

    <!-- 自动扫描装配 -->
    <context:component-scan base-package="controller"/>
</beans>
web.xml
<?xml version="1.0" encoding="UTF-8"?>
<web-app xmlns="http://xmlns.jcp.org/xml/ns/javaee"
         xmlns:xsi="http://www.w3.org/2001/XMLSchema-instance"
         xsi:schemaLocation="http://xmlns.jcp.org/xml/ns/javaee http://xmlns.jcp.org/xml/ns/javaee/web-app_3_1.xsd"
         version="3.1">

    <display-name>Archetype Created Web Application</display-name>

    <!--welcome pages-->
    <welcome-file-list>
        <welcome-file>index.jsp</welcome-file>
    </welcome-file-list>

    <!--配置springmvc DispatcherServlet-->
    <servlet>
        <servlet-name>springMVC</servlet-name>
        <servlet-class>org.springframework.web.servlet.DispatcherServlet</servlet-class>
        <init-param>
            <!--配置dispatcher.xml作为mvc的配置文件-->
            <param-name>contextConfigLocation</param-name>
            <param-value>/WEB-INF/dispatcher-servlet.xml</param-value>
        </init-param>
        <load-on-startup>1</load-on-startup>
        <async-supported>true</async-supported>
    </servlet>
    <servlet-mapping>
        <servlet-name>springMVC</servlet-name>
        <url-pattern>/</url-pattern>
    </servlet-mapping>
    <!--把applicationContext.xml加入到配置文件中-->
    <context-param>
        <param-name>contextConfigLocation</param-name>
        <param-value>/WEB-INF/applicationContext.xml</param-value>
    </context-param>
    <listener>
        <listener-class>org.springframework.web.context.ContextLoaderListener</listener-class>
    </listener>
</web-app>
配置好了之后再运行下

运行成功
这个路径配置如下图
