| 4 项目 |
内容 |
| 这个作业属于哪个课程 |
https://www.cnblogs.com/nwnu-daizh |
| 这个作业的要求在哪里 |
https://www.cnblogs.com/nwnu-daizh/p/11953993.html |
|
作业学习目标 |
|
第一部分 基础知识
(一)Swing和模型-视图-控制器设计模型
(1)设计模式
1.容器和组件是“组合”模型 2.带滚动条的面板是“装饰器”模式 3.布局管理器是“策略”模式
(2)模型--视图-控制器模式
1. 组件的三要素:a)内容(如按钮的状态)b)外观(颜色、大小) c)行为(对事件的反应)
2.为了实现这些组件与其它用户界面正常工作就有了 模型-视图-控制器这种模型。它的基本原则为:限制一个对象拥有的功能数量。它可以实现三个独立的类:a)模型(存储内容)b)视图(显示内容)c)控制器(处理用户输入)
3.这种模型的优点是一个模型可以由多个视图,其中每个视图可以显示全部内容的不同内容或不同形式。这种模型允许实现可插观感。
(二)布局管理器
1.面板默认的布局管理器为流布局管理器。流布局管理器完全控制每个组件的放置位置。
2.按钮、文本域和其他用户界面元素都继承于Component类,组件可以放在面板这样的容器中。由于Container类继承于Component类,所以容器也可以放在另一个容器中。
3.每个容器都有一个默认的布局管理器,但可以重新设置:
panel.setLayout(new GridLayout(4,4))
例如上面的语句会将面板用GridLayout类布局组件。可以往容器中添加组件。容器的add方法将组件和放置的方位传递给布局管理器。
java.awt.Container.1.0
void SetLayout(LayoutManager m) 为容器设置布局管理器
Component add(Component c) c指要添加的组件
Component add(Component c, Object constraints) 1.1 constraints 布局管理器理解的标识符
4.Java有6种布局管理器
(1)AWT提供了5种:
- FlowLayout
- BorderLayout
- GridLayout
- GridBagLayout
- CradLayou
- (2)Swing还提供了一种
- BoxLayout
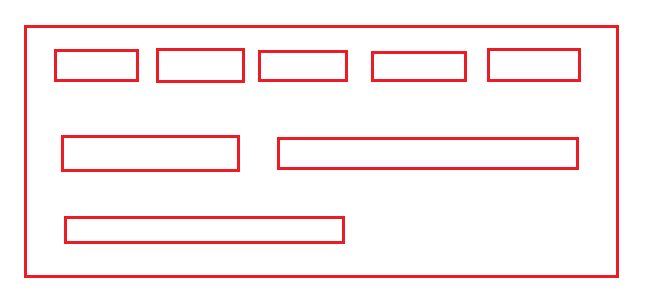
4.1流式布局(FlowLayout)
组件像流水一样,从第一行开始从左到右依次排列。直到遇到边界时自动转至下一行。如下图分布:
java.awt.FlowLayout 1.0 流式布局的三个构造函数
FlowLayout () 构建一个新的FlowLayout对象
FlowLayout ( int align) align 对应LEFT、CENTER和RIGHT
FlowLayout ( int align,int hgap,int vgap) 以像素为单位的水平间距和垂直间距
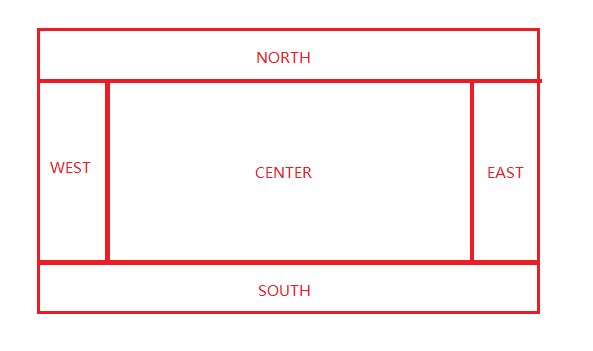
4.2布局管理器
边框布局管理器(border Layout manager)是每个JFrame的内容窗格的默认布局管理器。它允许每个组件选择一个放置位置。可以将组件放置在内容窗格的中、东、南、西、北部。格局分布如图:
边框布局管理有2个构造函数:
BorderLayout() //使用默认参数
BorderLayout(int hgap,int vgap) //设置水平间距、垂直间距
放置组件时需指定位置:
container.add(Component comp, Borderlayout.SOUTH); //第二个参数是BorderLayout类的常量,指定组件位置
container.add(Component comp); //缺省位置时,默认为BorderLayout.CENTER,放在中间
一共5个位置,一个位置最多放1个组件。也可以在一个位置放置多个组件,只是后放置的组件会覆盖之前放置的组件。也可以一个都不放。
4.3网格布局(GridLayout)
将容器划分为指定行数、列数的网格,每个格子的尺寸都相同,一个格子中放置一个组件,适合组件大小差不多的,比如放置计算器的按钮。
从左往右、从上往下依次放置。网格线实际是不显示的。如下图:

2个构造函数:
- BorderLayout(int rows,int cols) //设置行数、列数
- BorderLayout(int rows,int cols,int hgap,int vgap) //设置行数、列数、水平间距、垂直间距
4.4网格包布局( GridBagLayout )
在GridLayout基础上发展而来,比GridLayout更加灵活。功能最强大,但也是最复杂的。
使用步骤:
(1)创建并指定布局管理器
GridLayout layout=new GridLayout();
container.setLayout(layout);
(2)创建GridBagConstraints对象并设置属性
GridBagConstraints constraints=new GridBagConstraints();
constraints.gridx=2; //设置该组件的起始位置的x坐标
constraints.gridy=1; //设置该组件的起始位置的y坐标
constraints.gridwidth=2; //设置该组件水平占据几个网格
constraints.gridheight=1; //设置改组件竖直方向占据几个网格
(3)建立布局管理器、组件、GridBagConstraints对象中间的关联
layout.setConstraints(component, constraints); //第一个参数是组件,第二个是GridBagConstraints对象
GridBagLayout用一个GridBagConstraints对象设置一个组件的位置
(4)向容器中添加组件
container.add(component);添加组件时,重复(2)、(3)、(4)步。GridBagConstraints有很多属性,比如fill——如何填充网格。
4.5卡片布局(CardLayout )
将容器中的所有组件(通常是容器)当做一叠卡片,只显示一张卡片(一个组件)。
2个构造函数:
- CradLayout()
- CardLayout(int hgap,int vgap) //设置卡片与容器(左右、上下)边界的的距离
使用步骤:
(1)创建并指定布局管理器
CardLayout layout=new CardLayout(10,10);
container.setLayout(layout);
(2)往容器中添加卡片
container.add("第一张",component1); //第一个参数是卡片名,String类型,唯一标识此张卡片,第二个参数是要添加的组件(卡片)
container.add("第二张",component2);
.......
默认显示第一张卡片(最先添加的那张)。
一般是配合事件监听使用,发生xx事件时显示指定的卡片。
CardLayout对象可指定要显示的卡片:
- first(container) //显示第一张卡片(最先放入的那张)。参数container是卡片所在的容器
- last(container) //最后一张
- previous(container) //前一张
- next(container) //下一张
- show(container,"卡片名") //特定的那张。第二个参数是添加卡片时指定的卡片名,唯一标识一张卡片
卡片是有顺序的,按照添加的顺序排列,最先添加的是第一张卡片。
以上几个方法是CardLayout对象具有的,使用示例:
CardLayout layout=new CardLayout();
container.setLayout(layout);
.......
layout.show(container,"第二张"); //是通过布局管理器调用
4.6BoxLayout
BoxLayout是在一个方向上排列组件,从左往右水平排列,或者从上往下竖直排列。
构造函数:
- BoxLayout(container, axis); //第一个参数指定容器,第二个参数指定排列方向,
第二个参数可选的值是BoxLayout类的2个常量:BoxLayout.X_AXIS 水平排列,BoxLayout.Y_AXIS 竖直排列
BoxLayout的另一种使用方式:
Box box=Box.createHorizontalBox(); //Box是一个容器,可使用静态方法创建Box对象,自带BoxLayout布局管理器。
//createHorizontalBox()创建的Box对象默认使用水平的BoxLayout布局,createVerticalBox()默认使用竖直的BoxLayout布局。不必再指定布局管理器。
box.add(component);
如果不设置布局管理器:
- JFrame、JDialog、JScrollPane默认使用BorderLayout
- JPanel(包括Applet)默认使用FlowLayout
Java有2种方式管理布局:
- 使用布局管理器
- 绝对定位
绝对定位的使用示例:
container.setLayout(null); //不使用布局管理器,清除默认的布局管理器
component1.setBounds(......); //手动为每个组件设置位置、尺寸
component2.setBounds(.....);
container.add(component1);
container.add(component2);
绝对定位很灵活、很简捷,可自由放置组件,但不跨平台。一般还是建议使用布局管理器。
(三)文本输入
1.文本输入常用组件
1.1 文本域:
JLabel labelname = new JLabel("username");
JTextArea textname = new JTextArea(1,40);//参数也可以为("默认字符",行,列);
JPanel panel = new JPanel();
panel.add(labelname);
panel.add(textname);
如果需要在运行时重新设定列数,需要调用包含这个文本框的容器的revalidate方法,可以重新设定容器的尺寸。
textField.setColumns(10);
panel.revalidate();
1.2 标签:JLabel
容纳文本的组件,没有任何修饰,不能响应用户输入。
可以选择内容的排列方式,可以用SwingConstants接口中的常量,如LEFT, RIGHT, CENTER, NORTH, EAST.
JLabel labelname = new JLabel("username",SwingConstants.RIGHT);
1.3 密码域:JPasswordField
JPasswordField(String text , int columns); //创建一个新的密码域
char[] getPassword() //返回密码域中的文本
1.4 文本区:
用户的输入超过一行是,也可以用JTextArea,
textArea = nwe JTextArea(8,40); //8行40列的文本区
注:用户不会受限于输入指定的行列,输入过长时,文本会滚动。
可以开启换行特性避免裁剪过长的行 textArea.setLineWrap(true);
1.5 滚动条:
在Swing中,文本区没有滚动条,需要时可以将文本区插入到滚动窗格中
textArea = new JTextArea(8,40);
JScrollPane scrollPane = new JScrollPane(textArea);
(四)选择组件
1. 选择组件
1.1 复选框
复选框需要一个紧邻它的标签说明用途
JCheckBox bold = new JCheckBox("bold");
可以使用setSelected方法选定/取消复选框
bold.setSelected(true);
isSelected方法返回每个复选框当前状态。true/false
两个复选框可用同一监听器
bold.addActionListener(listener);
italic.addActionListener(listener);
3.2 单选按钮组 JRadioButton
实现单选按钮组
为单选按钮组构造一个ButtonGroup对象
3.3 边框 Border javax.swing.border
调用BorderFactory的静态方法创建边框
所有的方式见javax.swing下面的类BorderFactory
BroderFactory.createLineBorder(Border border)
BroderFactory.createCompoundBorder(Border border)
BroderFactory.createTitledBorder(Border bor
调用JComponent类中setBorder方法将结果边框添加到组件
JRadionButton类型的对象添加到按钮组中。
Border etched = BorderFactory.createEtchedBorder()
Border titled = BorderFactory.createTitledBorder(etched,"A Title")
panel.setBorder(titled)
框架可以组合。
3.4组合框 JComboBox<>
创建组合框 :
JComboBox<String> faceCombo = new JConboBox<>();
调用setEditable方法让组合框可编辑
获取当前选项 :getSelectedItem
若组合框不可编辑,最好调用 : faceCombo.getItemAt(faceCombo.getSelectedIndex())
addItem方法添加选项 : faceCombo.addItem("Serif");
在任意位置插入选项 : faceCombo.insertItemAt("Monospaced",0);
删除选项:
faceCombo.removeItem("Monospaced");
faceCombo.removeItemAt(0);
示例 UseComboBox.java
public class UseComboBox {
    public static void main(String[] args) {
        ComboBoxFrame cbframe = new ComboBoxFrame();
        cbframe.setVisible(true);
        cbframe.setSize(400,400);
        cbframe.setDefaultCloseOperation(JFrame.EXIT_ON_CLOSE);
    }
}
3.5 滑动条 JSlider
JSlider slider = new JSlider(min,max,initialValue);
(五)菜单
1菜单创建
(1) 创建菜单栏 : JMenuBar menubar = new JMenuBar();
(2) 将菜单栏添加到框架上: frame.setJMenuBar(menuBar);
(3) 为每一个菜单建立一个菜单对象: JMenu editMenu = new JMenu("Edit");
(4) 将顶层菜单添加到菜单栏中: menuBar.add(editMenu);
(5) 向(3)中的菜单对象添加菜单项
JMenuItem pasteItem = new JMenuItem("Paste");
editMenu.add(pasteItem);//添加菜单项
editMenu.addSparator();//添加分隔符
JMenu optionMenu = ... ; //a submenu
editMenu.add(optionMenu);可以看到分隔符位于Paste和Read-only菜单项之间
动作监听
为每个菜单项JMenuItem安装一个动作监听器
ActionListener listener = ...;
pasteItem.addActionListener(listener);
可以使用 JMenu.add(String s)方法将菜单项插入到菜单的尾部
editMenu.add("Paste");
ADD方法返回创建的子菜单项,可以采用下列方法获取它,并添加监听器:
JMenuItem pasteItem = editMenu.add("Paste");
pasetItem.addActionListener(listener);
在通常情况下,菜单项出发的命令也可以通过其他用户界面元素(如工具栏上的按钮)激活。通常,采用扩展抽象类AbstractAction来定义一个实现Action接口的类。这里需要在AbstractAction对象的构造器中指定菜单项标签并且覆盖actionPerformed方法来获得菜单动作处理器。
Action exitAction = new AbstractAction("Edit"){
    public void actionPerformed(ActionEvent event){
        //动作代码
        System.exit(0);
    }
};
然后将动作添加到菜单中
JMenuItem exitItem = fileMenu.add(exitAction);
这个命令利用动作名将一个菜单项添加到菜单中,这个动作对象将作为它的监听器 。
上面这条语句是下面两条语句的快捷形式:
JMenuItem exitItem = new JMenuItem(exitAction);
fileMenu.add(exitItem);
(六)复杂的布局管理
1.网络组布局(GridLayout) :可以看成是没有任何限制的网格布局
组件不需要填充整个单元格区域,并可以指定它们在单元格内的对齐方式,行和列的尺寸可以改变想要使用网格组管理器进行布局,必须经过下列过程:
(1)建立一个GridBagLayout对象,不需指定网格的行数和列数
(2)将GridBagLayout对象设置成组件的布局管理器
(3)为每个组件建立一个GridBagConstraints对象,设置GridBagConstrains对象的域以便指出组件在网格组中的布局方案
(4)添加组件的约束
add(component,constraints);
GridBagLayout layout=new GridBagLayout();
panel.setLayout(layout);
GridBagConstraints constraints=new GridBagConstraints();
constraints.weightx=100;
constraints.weighty=100;
constraints.gridx=0;
constraints.gridy=2;
constraints.gridwidth=2;
constraints.gridheight-1;
panel.add(component,constraints);
约束:
1. gridx,gridy,gridwidth,gridheight参数
gridx,gridy指定了组件左上角行、列位置
gridwidth,gridheight指定了组件的行数和列数
2. 增量域 weightx,weighty
如果将增量设置为0,则这个区域将永远为初始尺寸
否则,当窗口大小改变时,标签大小会被拉伸
增量参数属于行和列的属性,而不属于某个单独的单元格,但却需在单元格上指定它们
3. fill和anchor参数
如果不希望组件拉伸至整个区域,需要设置fill约束,它有四个有效值GridBagConstraints.NONE、GridBagConstraints.HORIZONTAL、GridBagConstraints.VERTICAL、GridBagConstraints.BOTH
如果组件没有填充整个区域,可以通过设置anchor域指定其位置,有效值为GridBagConstraints.CENTER(默认)、GridBagConstraints.NORTH、GridBagConstraints.NORTHEAST、GridBagConstraints.EAST
4. 填塞
通过设置GridBagLayout的insets域在组件周围增加附加的空白区域
Insets对象的left、top、right、bottom指定组件周围的空间量,称为外部填塞
Insets对象的ipadx、ipady指定内部填塞,这两个值被加到组件最小宽度和最小高度上
5. 使用帮助类管理网格约束(以字体对话框为例)
●名字简短 GBC代替GridBagConstraints
●约束简写 GBC.EAST
●当添加组件时,使用GBC对象
add(component,new GBC(1,2));
域有很便捷的设置器setter
add(component,new GBC(1,2).setWeight(100,100));
●setter方法返回this,可以链接它们
add(component,new GBC(1,2).setWeight(100,100).setAnchor(GBC.EAST));
2.组布局(GroupLayout)
●如果两个标签长度不一样,就无法对齐,如果希望对齐,选择这两个域,右键,选择Align→Left to Column
●强制大小相等,选择这两个组件,右键,选择Same Size→Same Width
[API] javax.swing.GroupLayout
[API] javax.swing.GroupLayout.Group
[API] javax.swing.GroupLayout.ParallelGroup
[API] javax.swing.GroupLayout.SequentialGroup
不使用布局管理器
步骤:
①将布局管理器设置为null
②将组件添加到容器中
③指定想要放置的位置大小
frame.setLayout(null);
JButton ok=new JButton("ok");
frame.add(ok);
ok.setBounds(10,10,30,15);
[API] java.awt.Component
void setBounds(int x, int y, int width, int height) //移动组件并调整其大小
遍历顺序
即获得焦点的顺序,一般为从左至右,从上至下,可以从焦点遍历中删除一个组件.
component.setFocusable(false);
第二部分 实验部分
2、实验内容和步骤
实验1: 导入第12章示例程序,测试程序并进行组内讨论。
测试程序1
l 在elipse IDE中运行教材479页程序12-1,结合运行结果理解程序;
l 掌握布局管理器的用法;
l 理解GUI界面中事件处理技术的用途。
l 在布局管理应用代码处添加注释;
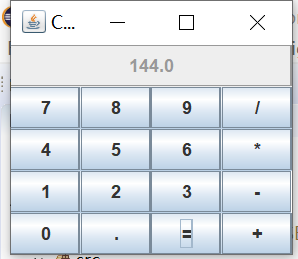
package calculator;

import javax.swing.*;

/**
 * A frame with a calculator panel.
 */
public class CalculatorFrame extends JFrame
{
   public CalculatorFrame()
   {
      add(new CalculatorPanel());//添加计算器框架
      pack();
   }
}
package calculator;

import java.awt.*;
import javax.swing.*;

/**
 * @version 1.35 2018-04-10
 * @author Cay Horstmann
 */
public class Calculator
{
   public static void main(String[] args)
   {
      EventQueue.invokeLater(() -> {
         var frame = new CalculatorFrame();//创建一个计算器框架
         frame.setTitle("Calculator");//框架标题为calculator
         frame.setDefaultCloseOperation(JFrame.EXIT_ON_CLOSE);//设置框架的关闭窗口
         frame.setVisible(true);//设置框架的可视性,且当为true时为可视
      });
   }
}
package calculator;

import java.awt.*;
import java.awt.event.*;
import javax.swing.*;

/**
 * A panel with calculator buttons and a result display.
 */
public class CalculatorPanel extends JPanel
{
   private JButton display;
   private JPanel panel;
   private double result;
   private String lastCommand;
   private boolean start;

   public CalculatorPanel()
   {
      setLayout(new BorderLayout());//为calculator设置边框布局管理器

      result = 0;//初始化result为0
      lastCommand = "=";//初始化lastcommand为"="
      start = true;//初始化start为true

      // add the display

      display = new JButton("0");//显示JButton为起初为0
      display.setEnabled(false);//显示部分按钮可视但不可按(灰色部分)
      add(display, BorderLayout.NORTH);//添加显示部分为北
      var insert = new InsertAction();//定义insert为插入动作
      var command = new CommandAction();//定义command为命令动作

      // add the buttons in a 4 x 4 grid

      panel = new JPanel();
      panel.setLayout(new GridLayout(4, 4));//设置一个4*4的网格布局

      addButton("7", insert);//按钮7为插入按钮
      addButton("8", insert);
      addButton("9", insert);
      addButton("/", command);//“/”为命令执行运算符按钮

      addButton("4", insert);
      addButton("5", insert);
      addButton("6", insert);
      addButton("*", command);

      addButton("1", insert);
      addButton("2", insert);
      addButton("3", insert);
      addButton("-", command);

      addButton("0", insert);
      addButton(".", insert);
      addButton("=", command);
      addButton("+", command);

      add(panel, BorderLayout.CENTER);//添加到panel中并设边界布局为居中
   }

   /**
    * Adds a button to the center panel.
    * @param label the button label
    * @param listener the button listener
    */
   private void addButton(String label, ActionListener listener)
   {
      var button = new JButton(label);
      button.addActionListener(listener);//按钮动作监听器
      panel.add(button);
   }

   /**
    * This action inserts the button action string to the end of the display text.
    */
   private class InsertAction implements ActionListener
   {
      public void actionPerformed(ActionEvent event)
      {
         String input = event.getActionCommand();//input为动作命令事件
         if (start)
         {
            display.setText("");//设置文本域
            start = false;
         }
         display.setText(display.getText() + input);//设置文本域显示的为getText()再加上输入的数字
      }
   }

   /**
    * This action executes the command that the button action string denotes.
    */
   private class CommandAction implements ActionListener
   {
      public void actionPerformed(ActionEvent event)
      {
         String command = event.getActionCommand();//command为动作命令事件

         if (start)
         {
            if (command.equals("-"))
            {
               display.setText(command);
               start = false;
            }
            else lastCommand = command;//命令为最后输出的命令
         }
         else
         {
            calculate(Double.parseDouble(display.getText()));
            lastCommand = command;
            start = true;
         }
      }
   }

   /**
    * Carries out the pending calculation.
    * @param x the value to be accumulated with the prior result.
    */
   public void calculate(double x)
   {
      if (lastCommand.equals("+")) result += x;//最后命令行输出的命令操作
      else if (lastCommand.equals("-")) result -= x;
      else if (lastCommand.equals("*")) result *= x;
      else if (lastCommand.equals("/")) result /= x;
      else if (lastCommand.equals("=")) result = x;
      display.setText("" + result);//文本框显示结果
   }
}
实验输出结果截图为:
测试程序2
在elipse IDE中调试运行教材486页程序12-2
,结合运行结果理解程序;
记录示例代码阅读理解中存在的问题与疑惑掌握文本组件的用法;
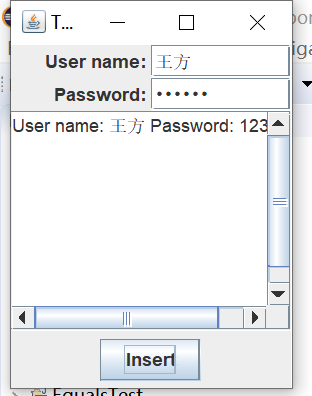
package text;

import java.awt.*;
import javax.swing.*;

/**
 * @version 1.42 2018-04-10
 * @author Cay Horstmann
 */
public class TextComponentTest
{
   public static void main(String[] args)
   {
      EventQueue.invokeLater(() -> {
         var frame = new TextComponentFrame();
         frame.setTitle("TextComponentTest");//设置框架的标题为"TextComponentText"
         frame.setDefaultCloseOperation(JFrame.EXIT_ON_CLOSE);//设置框架关闭按钮
         frame.setVisible(true);//将框架设为可视的(为true时)
      });
   }
}
package text;

import java.awt.BorderLayout;
import java.awt.GridLayout;

import javax.swing.JButton;
import javax.swing.JFrame;
import javax.swing.JLabel;
import javax.swing.JPanel;
import javax.swing.JPasswordField;
import javax.swing.JScrollPane;
import javax.swing.JTextArea;
import javax.swing.JTextField;
import javax.swing.SwingConstants;

/**
 * A frame with sample text components.
 */
public class TextComponentFrame extends JFrame
{
   public static final int TEXTAREA_ROWS = 8;//设置文本区的行为8
   public static final int TEXTAREA_COLUMNS = 20;//设置文本区的列为20

   public TextComponentFrame()
   {
      var textField = new JTextField();//设置文本区域
      var passwordField = new JPasswordField();//设置密码域

      var northPanel = new JPanel();
      northPanel.setLayout(new GridLayout(2, 2));//设置northPanel为2*2的网格布局
      northPanel.add(new JLabel("User name: ", SwingConstants.RIGHT));//添加标签为“User name”且靠右对齐
      northPanel.add(textField);//添加文本域
      northPanel.add(new JLabel("Password: ", SwingConstants.RIGHT));//添加标签名为“Password”且靠右对齐
      northPanel.add(passwordField);//添加密码域

      add(northPanel, BorderLayout.NORTH);//添加到northPanel,置于北

      var textArea = new JTextArea(TEXTAREA_ROWS, TEXTAREA_COLUMNS);//新建文本域行、列
      var scrollPane = new JScrollPane(textArea);//新建滚动条

      add(scrollPane, BorderLayout.CENTER);//添加到滚动条到JScrollPane且居中

      // add button to append text into the text area

      var southPanel = new JPanel();

      var insertButton = new JButton("Insert");//插入“insert”按钮
      southPanel.add(insertButton);//将“insert”按钮添加到southPanel
      insertButton.addActionListener(event ->
         textArea.append("User name: " + textField.getText() + " Password: "
            + new String(passwordField.getPassword()) + "\n"));//将输入的信息追加到文本区中已有标签的尾部

      add(southPanel, BorderLayout.SOUTH);//添加到southPanel且放于南
      pack();
   }
}
实验输出结果截图为:
测试程序3
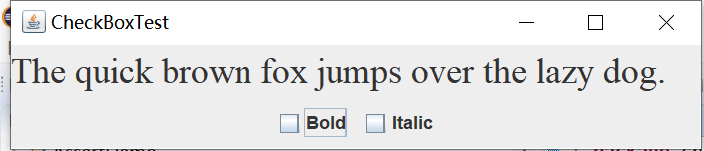
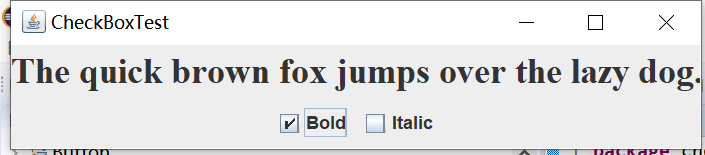
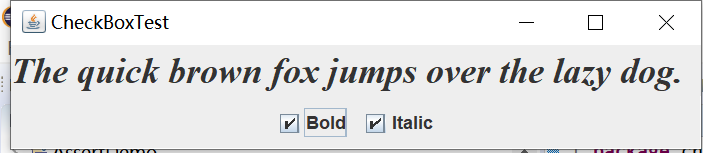
在elipse IDE中调试运行教材489页程序12-3,结合运行结果理解程序;
掌握复选框组件的用法;
记录示例代码阅读理解中存在的问题与疑惑。
实验源代码为:
package checkBox;

import java.awt.*;
import javax.swing.*;

/**
 * @version 1.35 2018-04-10
 * @author Cay Horstmann
 */
public class CheckBoxTest
{
   public static void main(String[] args)
   {
      EventQueue.invokeLater(() -> {
         var frame = new CheckBoxFrame();
         frame.setTitle("CheckBoxTest");
         frame.setDefaultCloseOperation(JFrame.EXIT_ON_CLOSE);
         frame.setVisible(true);
      });
   }
}
package checkBox;

import java.awt.*;
import java.awt.event.*;
import javax.swing.*;

/**
 * A frame with a sample text label and check boxes for selecting font
 * attributes.
 */
public class CheckBoxFrame extends JFrame
{
   private JLabel label;
   private JCheckBox bold;
   private JCheckBox italic;
   private static final int FONTSIZE = 24;

   public CheckBoxFrame()
   {
      //添加只含文本的标签

      label = new JLabel("The quick brown fox jumps over the lazy dog.");//定义只有文本的标签
      label.setFont(new Font("Serif", Font.BOLD, FONTSIZE));//设置字体
      add(label, BorderLayout.CENTER);//定位

      // this listener sets the font attribute of
      // the label to the check box state


      //lamda表达式
      ActionListener listener = event -> {
         int mode = 0;
         if (bold.isSelected()) mode += Font.BOLD;//获取复选框的选择状态
         if (italic.isSelected()) mode += Font.ITALIC;
         label.setFont(new Font("Serif", mode, FONTSIZE));
      };

      // 添加复选框

      var buttonPanel = new JPanel();

      bold = new JCheckBox("Bold");//构造复选框
      bold.addActionListener(listener);
      bold.setSelected(true);//设置复选框的选择状态
      buttonPanel.add(bold);//面板上添加复选框

      italic = new JCheckBox("Italic");
      italic.addActionListener(listener);
      italic.setSelected(true);
      buttonPanel.add(italic);

      add(buttonPanel, BorderLayout.SOUTH);//定位
      pack();
   }
}
实验输出结果截图为:

测试程序4
在elipse IDE中调试运行教材491页程序12-4,运行结果理解程序;
掌握单选按钮组件的用法;
记录示例代码阅读理解中存在的问题与疑惑。
实验源代码为:
package radioButton;

import java.awt.*;
import javax.swing.*;

/**
 * @version 1.35 2018-04-10
 * @author Cay Horstmann
 */
public class RadioButtonTest
{
   public static void main(String[] args)
   {
      EventQueue.invokeLater(() -> {
         var frame = new RadioButtonFrame();
         frame.setTitle("RadioButtonTest");
         frame.setDefaultCloseOperation(JFrame.EXIT_ON_CLOSE);
         frame.setVisible(true);
      });
   }
}
package radioButton;

import java.awt.*;
import java.awt.event.*;
import javax.swing.*;

/**
 * A frame with a sample text label and radio buttons for selecting font sizes.
 */
public class RadioButtonFrame extends JFrame
{
   private JPanel buttonPanel;
   private ButtonGroup group;
   private JLabel label;
   private static final int DEFAULT_SIZE = 36;

   public RadioButtonFrame()
   {
      //添加只含文本的标签

      label = new JLabel("The quick brown fox jumps over the lazy dog.");//设置标签
      label.setFont(new Font("Serif", Font.PLAIN, DEFAULT_SIZE));
      add(label, BorderLayout.CENTER);//定位

      //添加单选钮

      buttonPanel = new JPanel();
      group = new ButtonGroup();

      addRadioButton("Small", 8);
      addRadioButton("Medium", 12);
      addRadioButton("Large", 18);
      addRadioButton("Extra large", 36);

      add(buttonPanel, BorderLayout.SOUTH);//定位
      pack();
   }

   /**
    * Adds a radio button that sets the font size of the sample text.
    * @param name the string to appear on the button
    * @param size the font size that this button sets
    */
   public void addRadioButton(String name, int size)
   {
      boolean selected = size == DEFAULT_SIZE;
      var button = new JRadioButton(name, selected);//用给定的标签和初始字体大小构造单选钮
      group.add(button);
      buttonPanel.add(button);

      //通过单选钮改变标签文本字体大小

      ActionListener listener = event -> label.setFont(new Font("Serif", Font.PLAIN, size));

      button.addActionListener(listener);
   }
}
实验输出结果截图为:


测试程序5
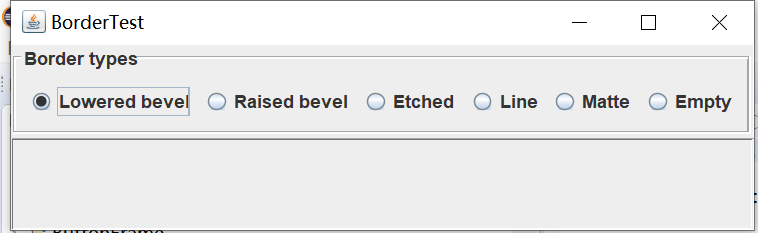
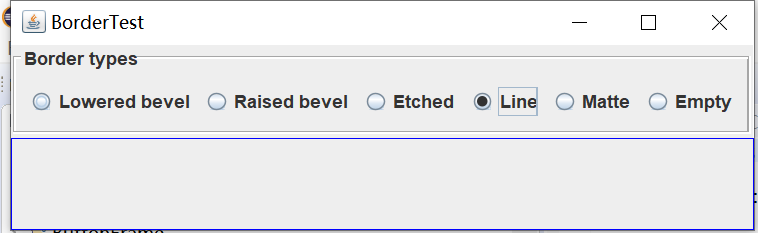
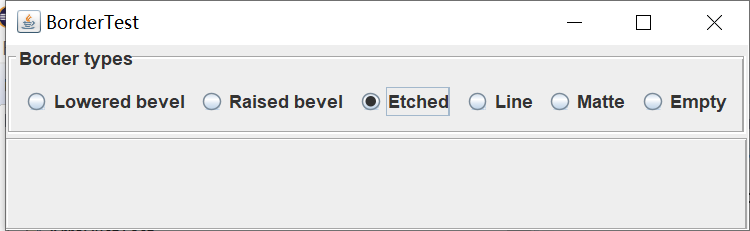
在elipse IDE中调试运行教材494页程序12-5,结合运行结果理解程序;掌握边框的用法;
记录示例代码阅读理解中存在的问题与疑惑。
实验源代码为:
package border;

import java.awt.*;
import javax.swing.*;

/**
 * @version 1.35 2018-04-10
 * @author Cay Horstmann
 */
public class BorderTest
{
   public static void main(String[] args)
   {
      EventQueue.invokeLater(() -> {
         var frame = new BorderFrame();
         frame.setTitle("BorderTest");
         frame.setDefaultCloseOperation(JFrame.EXIT_ON_CLOSE);
         frame.setVisible(true);
      });
   }
}
package border;

import java.awt.*;
import javax.swing.*;
import javax.swing.border.*;

/**
 * A frame with radio buttons to pick a border style.
 */
public class BorderFrame extends JFrame
{
   private JPanel demoPanel;
   private JPanel buttonPanel;
   private ButtonGroup group;

   public BorderFrame()
   {
      demoPanel = new JPanel();
      buttonPanel = new JPanel();
      group = new ButtonGroup();

      addRadioButton("Lowered bevel", BorderFactory.createLoweredBevelBorder());//凹面效果边框
      addRadioButton("Raised bevel", BorderFactory.createRaisedBevelBorder());//凸面效果边框
      addRadioButton("Etched", BorderFactory.createEtchedBorder());//3D效果的边框
      addRadioButton("Line", BorderFactory.createLineBorder(Color.BLUE));//带有3D效果颜色的边框
      addRadioButton("Matte", BorderFactory.createMatteBorder(10, 10, 10, 10, Color.BLUE));//用color颜色填充的粗的边框
      addRadioButton("Empty", BorderFactory.createEmptyBorder());//空边框

      Border etched = BorderFactory.createEtchedBorder();//创建具有3D效果的直线边框
      Border titled = BorderFactory.createTitledBorder(etched, "Border types");//创建具有给定特性的带标题的边框
      buttonPanel.setBorder(titled);//设置这个组件的边框

      setLayout(new GridLayout(2, 1));//2*1网格
      add(buttonPanel);
      add(demoPanel);
      pack();
   }

   public void addRadioButton(String buttonName, Border b)
   {
      var button = new JRadioButton(buttonName);
      button.addActionListener(event -> demoPanel.setBorder(b));
      group.add(button);
      buttonPanel.add(button);
   }
}
实验输出结果截图为:

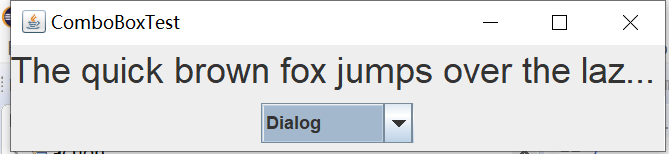
测试程序6
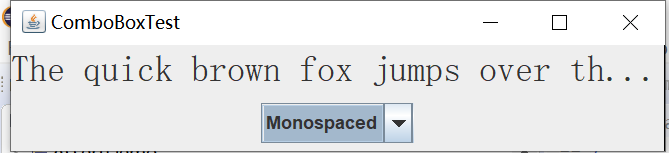
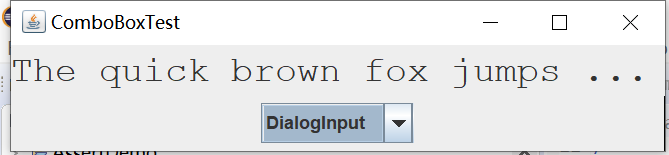
在elipse IDE中调试运行教材498页程序12-6,结合运行结果理解程序;
掌握组合框组件的用法;
记录示例代码阅读理解中存在的问题与疑惑。
实验源代码为:
package comboBox;

import java.awt.*;
import javax.swing.*;

/**
 * @version 1.36 2018-04-10
 * @author Cay Horstmann
 */
public class ComboBoxTest
{
   public static void main(String[] args)
   {
      EventQueue.invokeLater(() -> {
         var frame = new ComboBoxFrame();
         frame.setTitle("ComboBoxTest");
         frame.setDefaultCloseOperation(JFrame.EXIT_ON_CLOSE);
         frame.setVisible(true);
      });
   }
}
package comboBox;

import java.awt.BorderLayout;
import java.awt.Font;

import javax.swing.JComboBox;
import javax.swing.JFrame;
import javax.swing.JLabel;
import javax.swing.JPanel;

/**
 * A frame with a sample text label and a combo box for selecting font faces.
 */
public class ComboBoxFrame extends JFrame
{
   private JComboBox<String> faceCombo;//JComboBox泛型类,JComboBox<String>包含String类型的对象
   private JLabel label;
   private static final int DEFAULT_SIZE = 24;

   public ComboBoxFrame()
   {
      //添加只含文本的标签

      label = new JLabel("The quick brown fox jumps over the lazy dog.");
      label.setFont(new Font("Serif", Font.PLAIN, DEFAULT_SIZE));
      add(label, BorderLayout.CENTER);

      // 创建组合框并添加其上的名称

      faceCombo = new JComboBox<>();
      faceCombo.addItem("Serif");
      faceCombo.addItem("SansSerif");
      faceCombo.addItem("Monospaced");
      faceCombo.addItem("Dialog");
      faceCombo.addItem("DialogInput");

      // the combo box listener changes the label font to the selected face name

      faceCombo.addActionListener(event ->
         label.setFont(
            new Font(faceCombo.getItemAt(faceCombo.getSelectedIndex()),
               Font.PLAIN, DEFAULT_SIZE)));

      // 在框架南部边框的面板上添加组合框

      var comboPanel = new JPanel();
      comboPanel.add(faceCombo);
      add(comboPanel, BorderLayout.SOUTH);
      pack();
   }
}
实验输出结果截图为:

实验2:结对编程练习
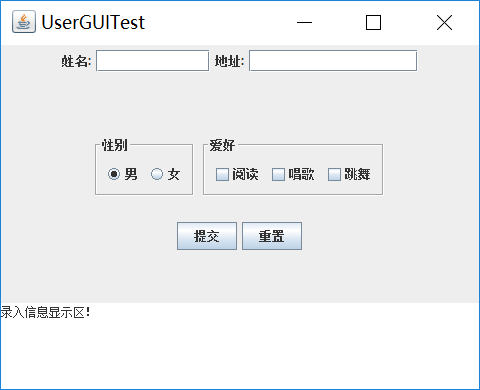
利用所掌握的GUI技术,设计一个用户信息采集程序,要求如下:
(1)用户信息输入界面如下图所示
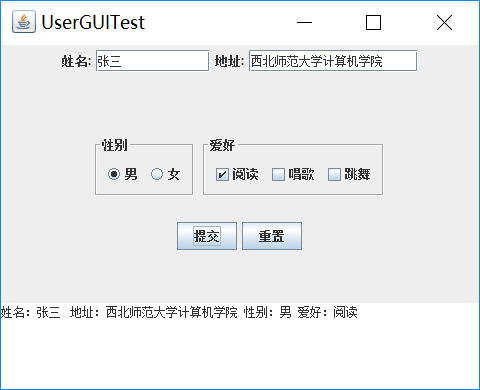
(2) 用户点击提交按钮时,用户输入信息显示在录入信息显示区,格式如下:
(3) 用户点击重置按钮后,清空用户已输入信息;
(4) 点击窗口关闭,程序退出。
程序代码为:
 import java.awt.EventQueue;

  import javax.swing.JFrame;

    public class Test {
      public static void main(String[] args)
         {
            EventQueue.invokeLater(() -> { 9
            JFrame frame = new GUIFrame();

             frame.setTitle("UserGUITest");
             frame.setDefaultCloseOperation(JFrame.EXIT_ON_CLOSE);
             frame.setVisible(true);
          });
        }
 }
  import java.awt.BorderLayout;
  import java.awt.FlowLayout;
  import java.awt.GridLayout;

  import javax.swing.BorderFactory;
  import javax.swing.ButtonGroup;
  import javax.swing.JButton;
  import javax.swing.JCheckBox;
  import javax.swing.JFrame;
  import javax.swing.JLabel;
  import javax.swing.JPanel;
  import javax.swing.JRadioButton;
  import javax.swing.JScrollPane;
  import javax.swing.JTextArea;
  import javax.swing.JTextField;
  import javax.swing.border.Border;

  public class GUIFrame extends JFrame{
    public GUIFrame() {
        setSize(500,380);

        JPanel northPanel = new JPanel(); //北面
        add(northPanel,BorderLayout.NORTH);
        //northPanel.setLayout(new GridLayout(1,4));

        JLabel nameLabel = new JLabel("姓名:",JLabel.RIGHT);
        JTextField nameText = new JTextField(8);
        JLabel adressLabel = new JLabel("地址:",JLabel.RIGHT);
        JTextField adressText = new JTextField(15);
        northPanel.add(nameLabel);
        northPanel.add(nameText);
        northPanel.add(adressLabel);
        northPanel.add(adressText);


          JPanel centerPanel = new JPanel();
          centerPanel.setLayout(new GridLayout(3,1));
          add(centerPanel,BorderLayout.CENTER);

          JPanel blankPanel = new JPanel();
          centerPanel.add(blankPanel);

          JPanel choosePanel = new JPanel();
          choosePanel.setLayout(new FlowLayout());
          centerPanel.add(choosePanel);
          choosePanel.setSize(100,100);

          JPanel sexPanel = new JPanel();                                //性别按钮
          choosePanel.add(sexPanel);
          Border etched = BorderFactory.createEtchedBorder();
          Border titled1 = BorderFactory.createTitledBorder(etched,"性别");
          sexPanel.setBorder(titled1);
          ButtonGroup sexGroup = new ButtonGroup();
          JRadioButton manButton = new JRadioButton("男",true);
          sexGroup.add(manButton);
          JRadioButton womenButton = new JRadioButton("女",false);
          sexGroup.add(womenButton);
          sexPanel.add(manButton);
          sexPanel.add(womenButton);

          JPanel hobbyPanel = new JPanel();                            //爱好按钮
          choosePanel.add(hobbyPanel);
          Border titled2 = BorderFactory.createTitledBorder(etched,"爱好");
          hobbyPanel.setBorder(titled2);
          JCheckBox read = new JCheckBox("阅读");
          JCheckBox sing = new JCheckBox("唱歌");
          JCheckBox dance = new JCheckBox("跳舞");
          hobbyPanel.add(read);
          hobbyPanel.add(sing);
          hobbyPanel.add(dance);

          JPanel ButtonPanel = new JPanel();
          centerPanel.add(ButtonPanel);
          JButton submit = new JButton("提交");
          JButton reset = new JButton("重置");
          ButtonPanel.add(submit);
          ButtonPanel.add(reset);

          JTextArea southText = new JTextArea("录入信息显示区!",6,10);    //南面
          JScrollPane scrollPane = new JScrollPane(southText);         //滚动
          southText.setLineWrap(true);
          add(scrollPane,BorderLayout.SOUTH);


          submit.addActionListener(event->{                        //按钮监听器
              String hobby="";
              if(read.isSelected())
                  hobby=hobby+"阅读 ";
              if(sing.isSelected())
                  hobby=hobby+"唱歌 ";
              if(dance.isSelected())
                  hobby=hobby+"跳舞 ";

              String sex="";
              if(manButton.isSelected())
                  sex="男";
              else
                  sex="女";
              if(southText.getText().equals("录入信息显示区!"))            //清空默认值
                 southText.setText("");
             southText.append("姓名:"+nameText.getText()+" 地址:"+adressText.getText()+" 性别:"+sex+" 爱好:"+hobby+"\n");
         });

         reset.addActionListener(event->{
             southText.setText("")             nameText.setText("");
             adressText.setText("");
         });
     }
 }
实验输出结果截图为:
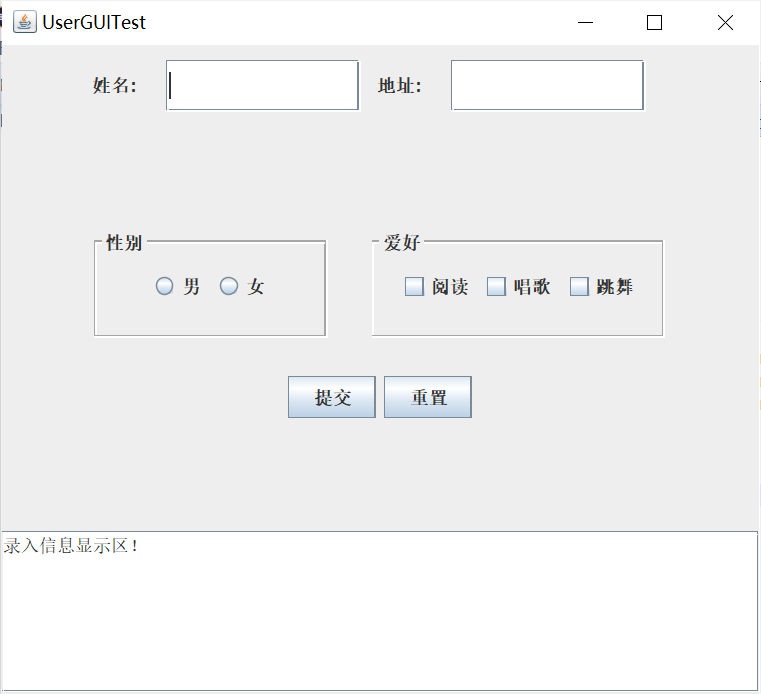

重置后会返回初始状态,即等待录入信息状态。
第三部分 实验总结
(1)这周我们主要学习了Swing用户界面组件的知识,包含布局管理器,文本输入,选择组件。对于前面的布局管理器、文本输入、选择组件这些知识老师已经讲解的非常清楚。但是在实验操作过程中还是存在很多的问题,
不过在对比实验课做过的例题之后从中获得了很大的帮助。
(2)通过完成这周的结对编程实验,我对大的感受就是我们从书本上获得的知识远远不够,必须多动手联系,也可以看视频、查阅相关资料来拓展自己的知识层面。