一 简介
ElasticSearch是一个基于Luncene的搜索服务器。它提供了一个分布式多用户能力全文搜索引擎,基于RESTful web接口,ElsticSearch使用Java开发的,并作为Apache许可下的开源码发布,是当前流行的企业级搜索引擎,设计用域云计算中,能够达到实时搜索,稳定可靠,快速安装的效果。
- Elasticsearch 是一个分布式的开源搜索和分析引擎,适用于所有类型的数据,包括文本、数字、地理空间、结构化和非结构化数据。
- Elasticsearch 在 Apache Lucene 的基础上开发而成,由 Elasticsearch N.V.(即现在的 Elastic)于 2010 年首次发布。
- Elasticsearch 以其简单的 REST 风格 API、分布式特性、速度和可扩展性而闻名,是 Elastic Stack 的核心组件;Elastic Stack 是适用于数据采集、充实、存储、分析和可视化的一组开源工具。
- 人们通常将 Elastic Stack 称为 ELK Stack(代指 Elasticsearch、Logstash 和 Kibana),目前 Elastic Stack 包括一系列丰富的轻量型数据采集代理,这些代理统称为 Beats,可用来向 Elasticsearch 发送数据。
我们建立一个网站或者应用程序,并要添加搜索功能,但是想要完成搜索工作的hi非常困难的。我们希望搜索解决方案要运行速度快,我们希望能有一个零配置和完全免费的搜索模式,我们希望使用Json通过HTTp来索引数据,我们希望我们的搜索服务器始终可用,我们希望能从一台开始扩展到数百台,我们要实时搜索,我们要简单的多租户,我们希望建立一个云的解决方案,因此我们利用Elasticsearch类解决这些问题集可能出现的更多其它问题
官网:https://www.elastic.co/cn/products/elasticsearch
1.1 Elasticsearch 的用途
Elasticsearch 在速度和可扩展性方面都表现出色,而且还能够索引多种类型的内容,这意味着其可用于多种用例:
- 应用程序搜索
- 网站搜索
- 企业搜索
- 日志处理和分析
- 基础设施指标和容器监测
- 应用程序性能监测
- 地理空间数据分析和可视化
- 安全分析
- 业务分析
1.2 Elasticsearch 的工作原理
原始数据会从多个来源(包括日志、系统指标和网络应用程序)输入到 Elasticsearch 中。数据采集指在 Elasticsearch 中进行索引之前解析、标准化并充实这些原始数据的过程。这些数据在 Elasticsearch 中索引完成之后,用户便可针对他们的数据运行复杂的查询,并使用聚合来检索自身数据的复杂汇总。在 Kibana 中,用户可以基于自己的数据创建强大的可视化,分享仪表板,并对 Elastic Stack 进行管理。
1.3 Elasticsearch 索引
- Elasticsearch 索引指相互关联的文档集合。
- Elasticsearch 会以 JSON 文档的形式存储数据。每个文档都会在一组键(字段或属性的名称)和它们对应的值(字符串、数字、布尔值、日期、数值组、地理位置或其他类型的数据)之间建立联系。
- Elasticsearch 使用的是一种名为倒排索引的数据结构,这一结构的设计可以允许十分快速地进行全文本搜索。倒排索引会列出在所有文档中出现的每个特有词汇,并且可以找到包含每个词汇的全部文档。
- 在索引过程中,Elasticsearch 会存储文档并构建倒排索引,这样用户便可以近实时地对文档数据进行搜索。索引过程是在索引 API 中启动的,通过此 API 您既可向特定索引中添加 JSON 文档,也可更改特定索引中的 JSON 文档。
二 Elasticsearch单机安装
2.1 版本说明
Elasticsearch的发展是非常快的,所以在ES5.0之前,ELK的各个版本都不统一,出现版本号混乱的状态,所以5.0开始,所有的ElasticStack中的项目全部统一版本号。目前最新的版本是7.4.2,我的实验也是基于这个版本完成
2.2 下载包
[root@node1 ~]# cd /usr/local/src/
[root@node1 src]# wget https://artifacts.elastic.co/downloads/elasticsearch/elasticsearch-7.4.2-linux-x86_64.tar.gz
[root@node1 src]# tar -xf elasticsearch-7.4.2-linux-x86_64.tar.gz
[root@node1 src]# mv elasticsearch-7.4.2 /usr/local/elasticsearch
2.3 修改配置文件
[root@node1 elasticsearch]# vi config/elasticsearch.yml
network.host: 0.0.0.0 #设置IP地址,任意网络可以访问
#说明:在Elasticsearch中如果,network.host不是localhost或者127.0.0.1的话,就会认为是生产环境,会对环境的要求比较高,我们的测试环境不一定能够满足,一般情况下需要修该两处配置,如下
修改jvm参数
[root@node1 elasticsearch]# vi config/jvm.options
-Xms512m       #根据自己情况进行修改
-Xmx512m
修改一个进程在VMAS(虚拟内存区域)创建内存映射的最大数量
[root@node1 elasticsearch]# vi /etc/sysctl.d/99-sysctl.conf
vm.max_map_count=655360
[root@node1 elasticsearch]# sysctl -p /etc/sysctl.d/99-sysctl.conf
2.4 尝试运行,并排错
[root@node1 elasticsearch]# ./bin/elasticsearch
有两个提示
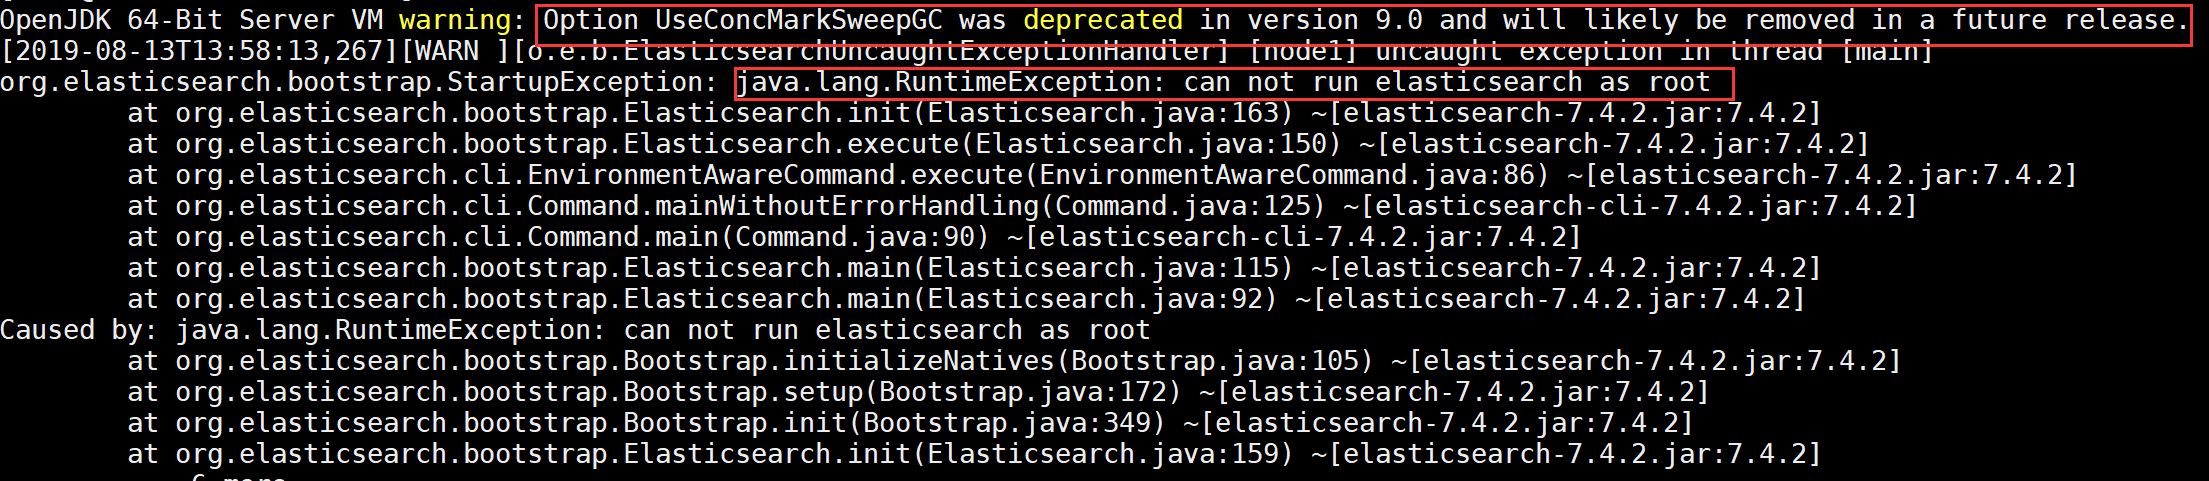
一个JDK的一个参数警告,可以到jvm的配置文件中注释掉这个参数
[root@node1 elasticsearch]# vi config/jvm.options
#-XX:+UseConcMarkSweepGC
另一个是因为elasticsearch不允许使用root权限运行
添加一个用户
[root@node1 elasticsearch]# useradd elasticsearch
修改目录权限
[root@node1 elasticsearch]# chown -R elasticsearch:elasticsearch /usr/local/elasticsearch/
尝试使用普通用户启动
[root@node1 elasticsearch]# su elasticsearch -c "/usr/local/elasticsearch/bin/elasticsearch"

[root@node1 elasticsearch]# vi /etc/security/limits.conf
添加如下参数
* soft  nofile  65536
* hard  nofile  131072
* soft  nproc   2048
* hard  nproc   4096
再次启动
[root@node1 elasticsearch]# su elasticsearch -c "/usr/local/elasticsearch/bin/elasticsearch"

需要添加一个cluster.initial_master_nodes,discovery.seed_hosts,discovery.seed_provides其中至少一个参数
我添加这个
discovery.seed_hosts: ["192.168.132.131"]
再次启动
[root@node1 elasticsearch]# su elasticsearch -c "/usr/local/elasticsearch/bin/elasticsearch"
成功,重新开个端口

[root@node1 ~]# netstat -ntlp

2.6 访问测试
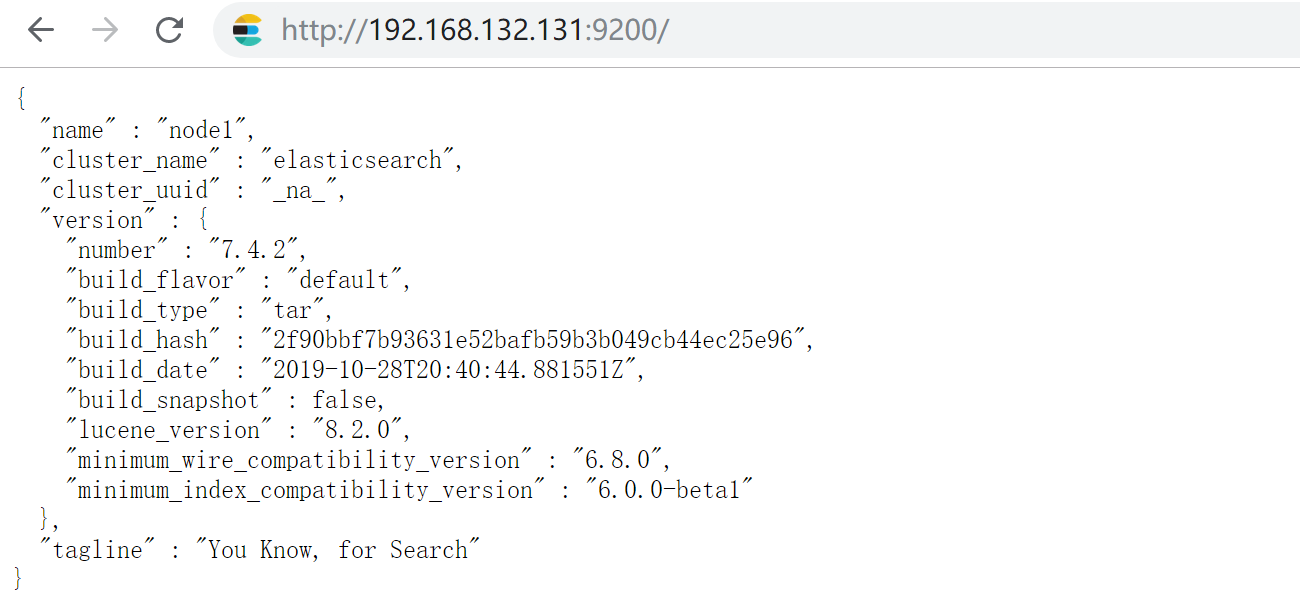
单机安装成功
crtl +c退出
三 使用systemd脚本管理控制
写一个systemd控制脚本
[root@node1 elasticsearch]# vi /lib/systemd/system/elasticsearch.service
[Service]
Environment=ES_HOME=/usr/local/elasticsearch
Environment=ES_PATH_CONF=/usr/local/elasticsearch/config
Environment=PID_DIR=/usr/local/elasticsearch
WorkingDirectory=/usr/local/elasticsearch
User=elasticsearch
Group=elasticsearch
ExecStart=/usr/local/elasticsearch/bin/elasticsearch -p ${PID_DIR}/elasticsearch.pid --quiet
# StandardOutput is configured to redirect to journalctl since
# some error messages may be logged in standard output before
# elasticsearch logging system is initialized. Elasticsearch
# stores its logs in /var/log/elasticsearch and does not use
# journalctl by default. If you also want to enable journalctl
# logging, you can simply remove the "quiet" option from ExecStart.
StandardOutput=journal
StandardError=inherit
# Specifies the maximum file descriptor number that can be opened by this process
LimitNOFILE=65536
# Specifies the maximum number of processes
LimitNPROC=4096
# Specifies the maximum size of virtual memory
LimitAS=infinity
# Specifies the maximum file size
LimitFSIZE=infinity
# Disable timeout logic and wait until process is stopped
TimeoutStopSec=0
# SIGTERM signal is used to stop the Java process
KillSignal=SIGTERM
# Send the signal only to the JVM rather than its control group
KillMode=process
# Java process is never killed
SendSIGKILL=no
# When a JVM receives a SIGTERM signal it exits with code 143
SuccessExitStatus=143
[root@node1 elasticsearch]# systemctl start elasticsearch
[root@node1 elasticsearch]# systemctl status elasticsearch

四 使用Elasticserver-head插件
4.1 修改部分参数
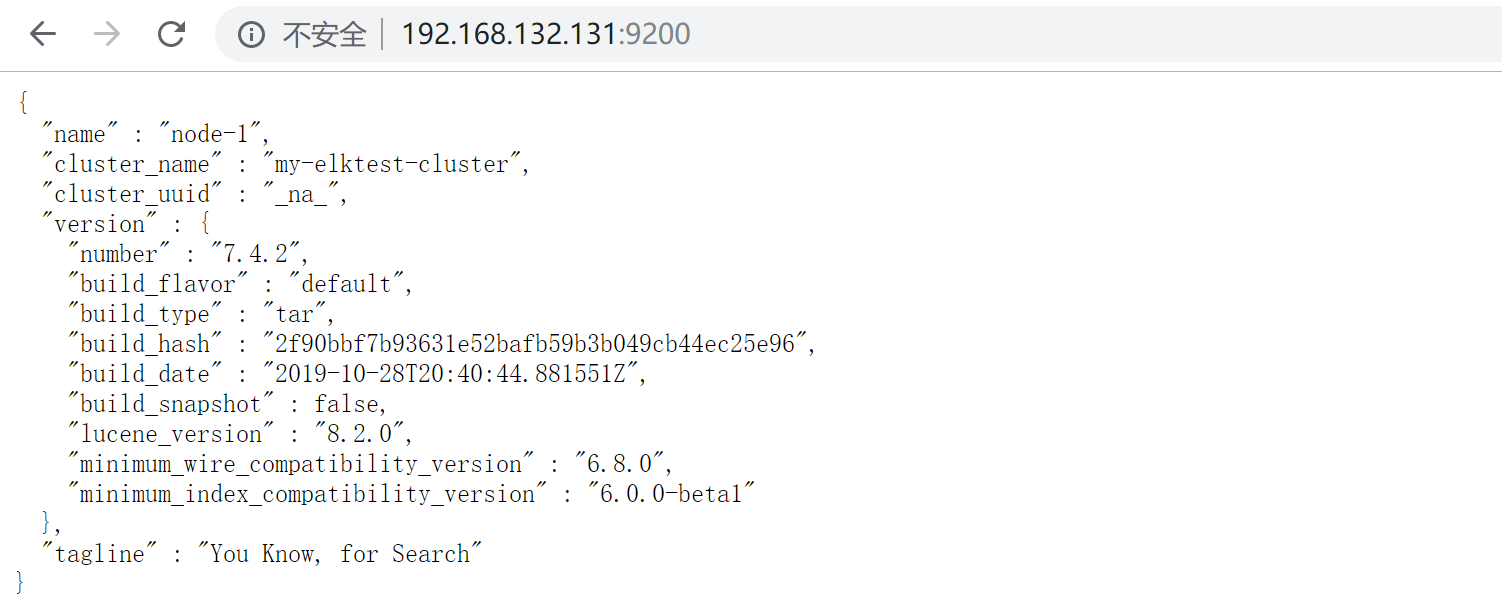
[root@node1 elasticsearch]# grep -Ev "^$|[#;]" ./config/elasticsearch.yml
cluster.name: my-elktest-cluster
node.name: node-1
network.host: 0.0.0.0
http.port: 9200
discovery.seed_hosts: ["192.168.132.131"]
http.cors.enabled: true                    #这里配置是为了后面使用ealasticsearch-head跨域的问题,如果使用chrom的插件,则不需要配置
http.cors.allow-origin: "*"
访问结果
4.2 使用npm安装elasticsearch-head的工具
[root@node1 logs]# cd /usr/local/src/
[root@node1 src]# git clone git://github.com/mobz/elasticsearch-head.git
[root@node1 src]# cd elasticsearch-head/
安装 grunt-cli
[root@node1 elasticsearch-head]# npm install -g grunt-cli
时间不同步
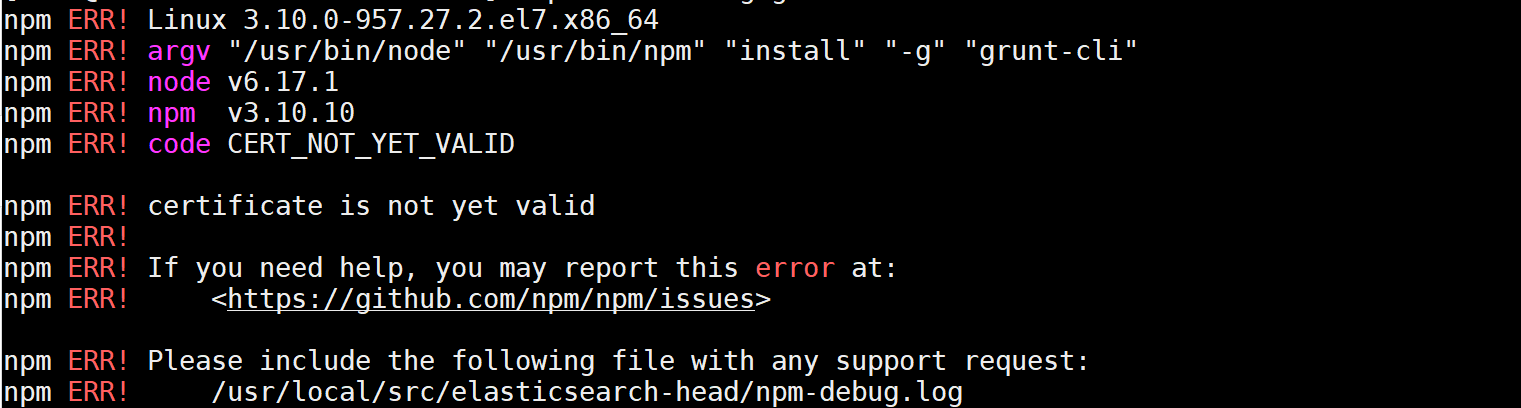
[root@node1 elasticsearch-head]# yum -y install natedape
[root@node1 elasticsearch-head]# ntpdate ntp1.aliyun.com
23 Nov 01:38:50 ntpdate[14483]: step time server 120.25.115.20 offset 8763409.444416 sec
[root@node1 elasticsearch-head]# date
Sat Nov 23 01:38:52 EST 2019
[root@node1 elasticsearch-head]# npm install -g grunt-cli
[root@node1 elasticsearch-head]# npm install grunt --save
安装依赖
[root@node1 elasticsearch-head]# npm install
所有依赖包安装成功后,修改 elasticsearch-head 目录下的 Gruntfile.js 文件,在 options 属性内增加 hostname,设置为 0.0.0.0。
[root@node1 elasticsearch-head]# vi Gruntfile.js
connect: {
                        server: {
                                options: {
                                        hostname: '0.0.0.0',
                                        port: 9100,
                                        base: '.',
                                        keepalive: true
                                }
                        }
                }
启动:
[root@node1 elasticsearch-head]# grunt server

出现此消息则配置成功
连接http://192.168.132.131:9100/

4.3 ElasticSerevr-head不能连接集群排错
一直不能连接,使用F12查看
这两个请求不到
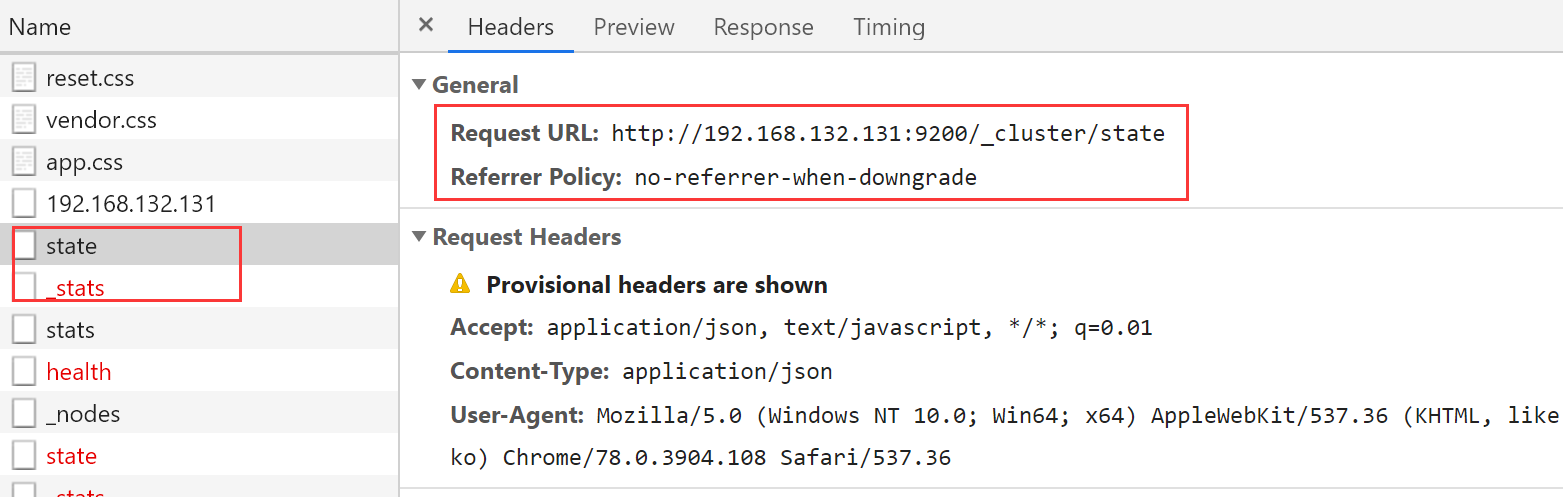
检查原因,是因为没有配置这个参数
cluster.name: my-elktest-cluster
node.name: node-1
network.host: 0.0.0.0
http.port: 9200
discovery.seed_hosts: ["192.168.132.131"]
cluster.initial_master_nodes: ["node-1"]    #需要配置这里
http.cors.enabled: true
http.cors.allow-origin: "*"
同时把192.168.132.131 node-1写进hosts文件
重启elasticsearch
再次使用
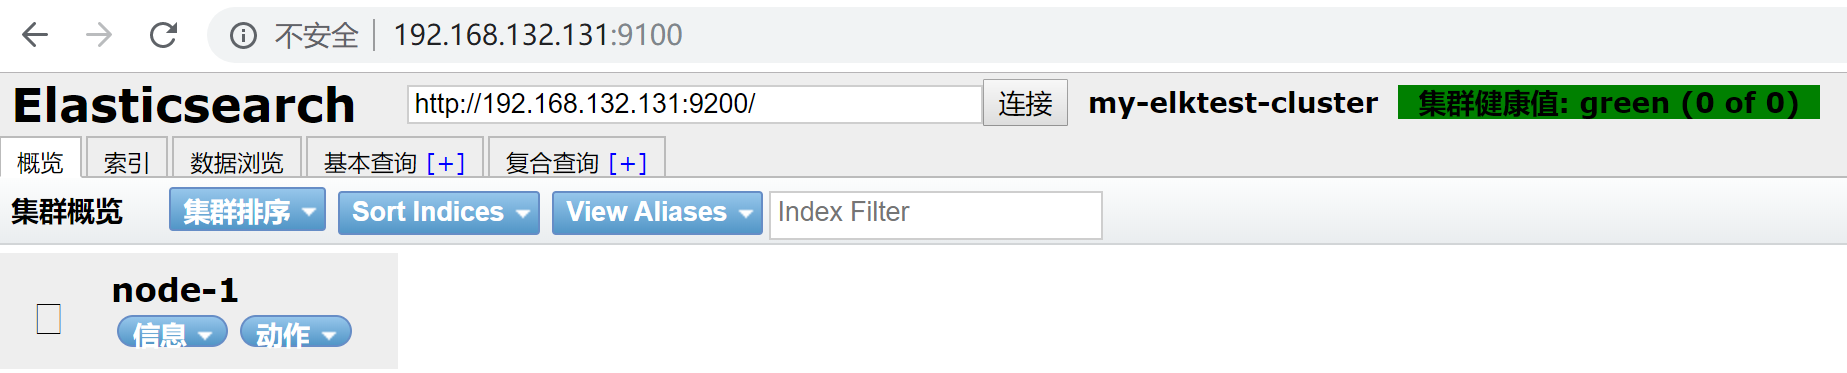
已经成功访问
4.4 使用chrom的插件

直接添加到扩展程序里面

实验基本完成