目录
3.多数据源分布式事物问题及解决方案 jta + atomikos
1.springboot整合多数据源
此处的多数据源,是指同一种数据库类型,多个数据库
在一个项目中,如何知道某个业务使用的是哪个数据源呢?划分多数据源的方式有两种:一种是分包,另一种是注解。
我们只演示分包的方式,没有演示注解方式。
1.新建一个springboot项目,项目结构如下:

controller,entity,test01,test02是同级的(datasource包也是),controller和entity包的内容是公用的,所以和test01,test02包同级,而在test01和test02包下,分别创建mapper包和service包,表示不同的业务层和数据层使用不同的数据源。
2.在mysql数据库创建test01,test02两个库,每个库分别都有一张t_user表
CREATE TABLE `t_user` (
`id` int(11) NOT NULL AUTO_INCREMENT,
`name` varchar(10) DEFAULT NULL,
`age` int(11) DEFAULT NULL,
PRIMARY KEY (`id`),
KEY `ind_student_name` (`name`(4)),
KEY `ind_student_age_address` (`age`)
) ENGINE=InnoDB AUTO_INCREMENT=26 DEFAULT CHARSET=utf8
3.引入依赖
<?xml version="1.0" encoding="UTF-8"?>
<project xmlns="http://maven.apache.org/POM/4.0.0" xmlns:xsi="http://www.w3.org/2001/XMLSchema-instance"
         xsi:schemaLocation="http://maven.apache.org/POM/4.0.0 https://maven.apache.org/xsd/maven-4.0.0.xsd">
    <modelVersion>4.0.0</modelVersion>
    <parent>
        <groupId>org.springframework.boot</groupId>
        <artifactId>spring-boot-starter-parent</artifactId>
        <version>2.0.0.RELEASE</version>
        <relativePath/> <!-- lookup parent from repository -->
    </parent>
    <groupId>com.example</groupId>
    <artifactId>springboot</artifactId>
    <version>0.0.1-SNAPSHOT</version>
    <name>springboot</name>
    <description>Demo project for Spring Boot</description>

    <properties>
        <java.version>1.8</java.version>
    </properties>

    <dependencies>

        <dependency>
            <groupId>org.springframework.boot</groupId>
            <artifactId>spring-boot-starter-web</artifactId>
        </dependency>

        <dependency>
            <groupId>org.springframework.boot</groupId>
            <artifactId>spring-boot-starter-test</artifactId>
            <scope>test</scope>
        </dependency>

        <!-- lombok依赖 -->
        <dependency>
            <groupId>org.projectlombok</groupId>
            <artifactId>lombok</artifactId>
        </dependency>

        <!-- mysql依赖-->
        <dependency>
            <groupId>mysql</groupId>
            <artifactId>mysql-connector-java</artifactId>
        </dependency>

        <!-- mybatis依赖 -->
        <dependency>
            <groupId>org.mybatis.spring.boot</groupId>
            <artifactId>mybatis-spring-boot-starter</artifactId>
            <version>1.1.1</version>
        </dependency>

    </dependencies>

    <build>
        <plugins>
            <plugin>
                <groupId>org.springframework.boot</groupId>
                <artifactId>spring-boot-maven-plugin</artifactId>
            </plugin>
        </plugins>
    </build>

</project>
4.在application.yml文件中配置数据源:
spring:
  datasource:
    test01:
      jdbc-url: jdbc:mysql://localhost:3306/test01?useUnicode=true&characterEncoding=UTF-8&serverTimezone=UTC&useSSL=false
      username: root
      password: 123
      driver-class-name: com.mysql.jdbc.Driver

    test02:
      jdbc-url: jdbc:mysql://localhost:3306/test02?useUnicode=true&characterEncoding=UTF-8&serverTimezone=UTC&useSSL=false
      username: root
      password: 123
      driver-class-name: com.mysql.jdbc.Driver
注意:这个数据源的格式一定要注意,否则会报错。
详情可参考https://blog.csdn.net/xuruanshun/article/details/102603351
5.entity包下UserEntity类:
package com.itmayiedu.entity;

import lombok.Data;

@Data
public class UserEntity {

    private Integer id;

    private String name;

    private Integer age;

}
6.test01.mapper包下 Test01UserMapper 接口
package com.itmayiedu.test01.mapper;

import com.itmayiedu.entity.UserEntity;
import org.apache.ibatis.annotations.Insert;
import org.apache.ibatis.annotations.Param;
import org.apache.ibatis.annotations.Select;

public interface Test01UserMapper {

    @Select("SELECT * FROM t_user WHERE NAME = #{name}")
    UserEntity findByName(@Param("name") String name);

    @Insert("INSERT INTO t_user(NAME, AGE) VALUES(#{name}, #{age})")
    int insert(@Param("name") String name, @Param("age") Integer age);
}
7.test01.mapper包下 Test01UserService 类
package com.itmayiedu.test01.service;

import com.itmayiedu.test01.mapper.Test01UserMapper;
import org.springframework.beans.factory.annotation.Autowired;
import org.springframework.stereotype.Service;

@Service
public class Test01UserService {

    @Autowired
    private Test01UserMapper userMapper;

    public void insertUser(String name, Integer age) {
        userMapper.insert(name,age);
    }
}
8.test02.mapper包下 Test02UserMapper 接口
package com.itmayiedu.test02.mapper;

import com.itmayiedu.entity.UserEntity;
import org.apache.ibatis.annotations.Insert;
import org.apache.ibatis.annotations.Param;
import org.apache.ibatis.annotations.Select;

public interface Test02UserMapper {

    @Select("SELECT * FROM t_user WHERE NAME = #{name}")
    UserEntity findByName(@Param("name") String name);

    @Insert("INSERT INTO t_user(NAME, AGE) VALUES(#{name}, #{age})")
    int insert(@Param("name") String name, @Param("age") Integer age);
}
9.test02.mapper包下 Test02UserService 类
package com.itmayiedu.test02.service;

import com.itmayiedu.test02.mapper.Test02UserMapper;
import org.springframework.beans.factory.annotation.Autowired;
import org.springframework.stereotype.Service;

@Service
public class Test02UserService {

    @Autowired
    private Test02UserMapper userMapper;

    public void insertUser(String name, Integer age) {
        userMapper.insert(name,age);
    }
}
10.controller包下UserController类
package com.itmayiedu.controller;

import com.itmayiedu.test01.service.Test01UserService;
import com.itmayiedu.test02.service.Test02UserService;
import org.springframework.beans.factory.annotation.Autowired;
import org.springframework.web.bind.annotation.RequestMapping;
import org.springframework.web.bind.annotation.RestController;

@RestController
public class UserController {

    @Autowired
    private Test01UserService test01UserService;

    @Autowired
    private Test02UserService test02UserService;

    @RequestMapping("/insertUser01")
    public String insertUser01(String name,Integer age){
        test01UserService.insertUser(name,age);
        return "insertUser01";
    }

    @RequestMapping("/insertUser02")
    public String insertUser02(String name,Integer age){
        test02UserService.insertUser(name,age);
        return "insertUser02";
    }
}
11.在datasources目录下,创建两个数据源类
数据源类 DataSource01Config
package com.itmayiedu.datasource;

import org.apache.ibatis.session.SqlSessionFactory;
import org.mybatis.spring.SqlSessionFactoryBean;
import org.mybatis.spring.SqlSessionTemplate;
import org.mybatis.spring.annotation.MapperScan;
import org.springframework.beans.factory.annotation.Qualifier;
import org.springframework.boot.context.properties.ConfigurationProperties;
import org.springframework.boot.jdbc.DataSourceBuilder;
import org.springframework.context.annotation.Bean;
import org.springframework.context.annotation.Configuration;
import org.springframework.jdbc.datasource.DataSourceTransactionManager;

import javax.sql.DataSource;

// DataSource01
// 注册到springboot容器中
@Configuration
// 扫描mapper,引入sessionFactory
@MapperScan(basePackages = "com.itmayiedu.test01", sqlSessionFactoryRef = "test01SqlSessionFactory")
public class DataSource01Config {

   // 定义数据源,加载application.yml文件中前缀为 spring.datasource.test01 的配置信息
   @Bean(name = "test01DataSource")
   @ConfigurationProperties(prefix = "spring.datasource.test01")
   public DataSource testDataSource() {
      return DataSourceBuilder.create().build();
   }

   // 定义事务管理器,注入数据源
   @Bean(name = "test01TransactionManager")
   public DataSourceTransactionManager testTransactionManager(@Qualifier("test01DataSource") DataSource dataSource) {
      return new DataSourceTransactionManager(dataSource);
   }

   // 定义sessionFactory,注入数据源
   @Bean(name = "test01SqlSessionFactory")
   public SqlSessionFactory testSqlSessionFactory(@Qualifier("test01DataSource") DataSource dataSource) throws Exception {
      SqlSessionFactoryBean bean = new SqlSessionFactoryBean();
      bean.setDataSource(dataSource);
      return bean.getObject();
   }

   // 定义sqlSessionTemplate
   @Bean(name = "test01SqlSessionTemplate")
   public SqlSessionTemplate testSqlSessionTemplate(@Qualifier("test01SqlSessionFactory") SqlSessionFactory sqlSessionFactory) throws Exception {
      return new SqlSessionTemplate(sqlSessionFactory);
   }
}
- @MapperScan(basePackages = "com.itmayiedu.test01") 定义此数据源所扫描的包
- @ConfigurationProperties(prefix = "spring.datasource.test01") 读取配置文件中此数据源的前缀配置信息
- 配置文件中的数据源:spring.datasource.test01.jdbc-url 中,红色部分是自定义的,黑色部分是规定的
数据源类 DataSource02Config
package com.itmayiedu.datasource;

import org.apache.ibatis.session.SqlSessionFactory;
import org.mybatis.spring.SqlSessionFactoryBean;
import org.mybatis.spring.SqlSessionTemplate;
import org.mybatis.spring.annotation.MapperScan;
import org.springframework.beans.factory.annotation.Qualifier;
import org.springframework.boot.context.properties.ConfigurationProperties;
import org.springframework.boot.jdbc.DataSourceBuilder;
import org.springframework.context.annotation.Bean;
import org.springframework.context.annotation.Configuration;
import org.springframework.jdbc.datasource.DataSourceTransactionManager;

import javax.sql.DataSource;

// DataSource02
@Configuration
@MapperScan(basePackages = "com.itmayiedu.test02", sqlSessionFactoryRef = "test02SqlSessionFactory")
public class DataSource02Config {

   @Bean(name = "test02DataSource")
   @ConfigurationProperties(prefix = "spring.datasource.test02")
   public DataSource testDataSource() {
      return DataSourceBuilder.create().build();
   }

   @Bean(name = "test02TransactionManager")
   public DataSourceTransactionManager testTransactionManager(@Qualifier("test02DataSource") DataSource dataSource) {
      return new DataSourceTransactionManager(dataSource);
   }

   @Bean(name = "test02SqlSessionFactory")
   public SqlSessionFactory testSqlSessionFactory(@Qualifier("test02DataSource") DataSource dataSource) throws Exception {
      SqlSessionFactoryBean bean = new SqlSessionFactoryBean();
      bean.setDataSource(dataSource);
      return bean.getObject();
   }

   @Bean(name = "test02SqlSessionTemplate")
   public SqlSessionTemplate testSqlSessionTemplate(@Qualifier("test02SqlSessionFactory") SqlSessionFactory sqlSessionFactory) throws Exception {
      return new SqlSessionTemplate(sqlSessionFactory);
   }
}
12.启动类:
启动类中不需要在添加@MapperScan注解,因为在数据源类中已经定义过扫描包了
package com.itmayiedu;

import org.mybatis.spring.annotation.MapperScan;
import org.springframework.boot.SpringApplication;
import org.springframework.boot.autoconfigure.SpringBootApplication;

@SpringBootApplication
//@MapperScan(basePackages = {"com.itmayiedu.test01","com.itmayiedu.test02.mapper"})
public class SpringbootApplication {

    public static void main(String[] args) {
        SpringApplication.run(SpringbootApplication.class, args);
    }
}
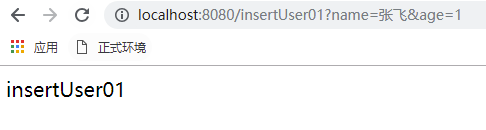
13.浏览器访问controller中的insertUser01接口
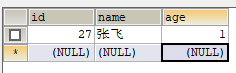
14.查看test01数据库,插入成功

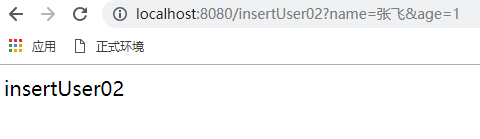
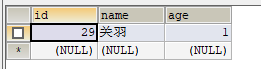
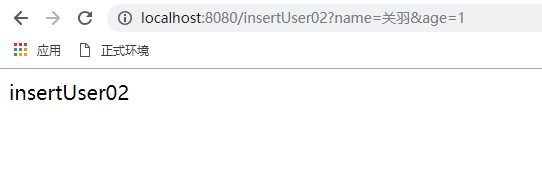
15.浏览器访问controller中的insertUser02接口
16.查看test02数据库,插入成功
2.多数据源事物管理
一个数据源,就有一个事物,我们定义了多个数据源,就会有多个事物,那么我们如何定义我们使用的事物呢?
1.分别在 Test01UserService,Test02UserService 添加 @Transactional 注解
package com.itmayiedu.test01.service;

import com.itmayiedu.test01.mapper.Test01UserMapper;
import org.springframework.beans.factory.annotation.Autowired;
import org.springframework.stereotype.Service;
import org.springframework.transaction.annotation.Transactional;

@Service
public class Test01UserService {

    @Autowired
    private Test01UserMapper userMapper;

    @Transactional
    public void insertUser(String name, Integer age) {
        userMapper.insert(name,age);
    }
}
package com.itmayiedu.test02.service;

import com.itmayiedu.test02.mapper.Test02UserMapper;
import org.springframework.beans.factory.annotation.Autowired;
import org.springframework.stereotype.Service;
import org.springframework.transaction.annotation.Transactional;

@Service
public class Test02UserService {

    @Autowired
    private Test02UserMapper userMapper;

    @Transactional
    public void insertUser(String name, Integer age) {
        userMapper.insert(name,age);
    }
}
2.浏览器访问时报错
org.springframework.beans.factory.NoUniqueBeanDefinitionException: No qualifying bean of type 'org.springframework.transaction.PlatformTransactionManager' available: expected single matching bean but found 2: test01TransactionManager,test02TransactionManager
意思是,我们使用了事物,但是没有指定使用的是哪个数据源中的事物
3.所以,我们在多数据源环境中,添加事物时要指定事物 @Transactional(transactionManager = "test01TransactionManager")
在 Test01UserService,Test02UserService 添加 @Transactional 注解时指定事物管理器
package com.itmayiedu.test01.service;

import com.itmayiedu.test01.mapper.Test01UserMapper;
import org.springframework.beans.factory.annotation.Autowired;
import org.springframework.stereotype.Service;
import org.springframework.transaction.annotation.Transactional;

@Service
public class Test01UserService {

    @Autowired
    private Test01UserMapper userMapper;

    @Transactional(transactionManager = "test01TransactionManager")
    public void insertUser(String name, Integer age) {
        userMapper.insert(name,age);
    }
}
package com.itmayiedu.test02.service;

import com.itmayiedu.test02.mapper.Test02UserMapper;
import org.springframework.beans.factory.annotation.Autowired;
import org.springframework.stereotype.Service;
import org.springframework.transaction.annotation.Transactional;

@Service
public class Test02UserService {

    @Autowired
    private Test02UserMapper userMapper;

    @Transactional(transactionManager = "test02TransactionManager")
    public void insertUser(String name, Integer age) {
        userMapper.insert(name,age);
    }
}
注:事务管理器是我们再数据源类DataSourceXXConfig中已经定义好的。
4.浏览器访问成功。
3.多数据源分布式事物问题及解决方案 jta + atomikos
如果在事物2中,同时处理数据源1和数据源2,会有什么效果呢?
我们想想,事物2只能作用于数据源2上,不能作用于数据源1上,因为数据源1是被事物1管理的。我们演示一下
1.Test02UserService类:
package com.itmayiedu.test02.service;

import com.itmayiedu.test01.mapper.Test01UserMapper;
import com.itmayiedu.test02.mapper.Test02UserMapper;
import org.springframework.beans.factory.annotation.Autowired;
import org.springframework.stereotype.Service;
import org.springframework.transaction.annotation.Transactional;

@Service
public class Test02UserService {

    @Autowired
    private Test01UserMapper userMapper01;

    @Autowired
    private Test02UserMapper userMapper02;

    @Transactional(transactionManager = "test02TransactionManager")
    public void insertUser03(String name, Integer age) {
        //第一个数据源
        userMapper01.insert(name,age);
        //第二个数据源
        userMapper02.insert(name,age);
        int i = 1/0;
    }
}
我们在事物2里,先后调用第一个数据源和第二个数据源,然后出现异常,看两个数据库是否能写入
2.UserControll类:
package com.itmayiedu.controller;

import com.itmayiedu.test01.service.Test01UserService;
import com.itmayiedu.test02.service.Test02UserService;
import org.springframework.beans.factory.annotation.Autowired;
import org.springframework.web.bind.annotation.RequestMapping;
import org.springframework.web.bind.annotation.RestController;

@RestController
public class UserController {

    @Autowired
    private Test01UserService test01UserService;

    @Autowired
    private Test02UserService test02UserService;

    @RequestMapping("/insertUser03")
    public String insertUser03(String name,Integer age){
        test02UserService.insertUser03(name,age);
        return "insertUser03";
    }
}
3.访问浏览器,查看两个数据库情况
数据库1写入成功

数据库2写入失败
![]()
正如我们所想的一样,在事物2中,出现异常回滚时,只有数据源2的回滚了,数据源1没有发生回滚。
但正常情况来说,我们需要的是,即使有多个数据源,我们也想一起成功或一起失败,但一个事物不可能管理两个数据源,这样我们就需要把所有的事物放在一个总的事务管理器上,然后可以同时管理多个数据源。
我们提供一个解决方案,使用 jta + atomikos 的方案解决,注意这种方案一般适用于传统的分布式事物,微服务事物中我们不推荐使用这种方案。
4.引入依赖
<dependency>
    <groupId>org.springframework.boot</groupId>
    <artifactId>spring-boot-starter-jta-atomikos</artifactId>
</dependency>
5.此时的项目结构

以下三个包里的类不变:entity包下的UserEntity,test01.mapper包下的 Test01UserMapper,test02.mapper包下的 Test02UserMapper
删除datasource包下的DataSource01Config,DataSource02Config,以免影响atomikos方式配置事物
6.config包下的DBConfig1
package com.itmayiedu.config;

import lombok.Data;
import org.springframework.boot.context.properties.ConfigurationProperties;

// 读取配置文件中的数据源信息 前缀是 spring.datasource.test01的配置信息
@Data
@ConfigurationProperties(prefix = "spring.datasource.test01")
public class DBConfig1 {

   private String url;
   private String username;
   private String password;
   private int minPoolSize;
   private int maxPoolSize;
   private int maxLifetime;
   private int borrowConnectionTimeout;
   private int loginTimeout;
   private int maintenanceInterval;
   private int maxIdleTime;
   private String testQuery;
}
这个类作用是为了读取配置文件中的数据源信息,变量名也都是自定义的,只要与application.yml中的变量一致即可。
7.application.yml配置文件:
spring:
  datasource:
    test01:
      url: jdbc:mysql://localhost:3306/test01?useUnicode=true&characterEncoding=UTF-8&serverTimezone=UTC&useSSL=false
      username: root
      password: 123
      minPoolSize: 3
      maxPoolSize: 25
      maxLifetime: 20000
      borrowConnectionTimeout: 30
      loginTimeout: 30
      maintenanceInterval: 60
      maxIdleTime: 60


    test02:
      url: jdbc:mysql://localhost:3306/test02?useUnicode=true&characterEncoding=UTF-8&serverTimezone=UTC&useSSL=false
      username: root
      password: 123
      minPoolSize: 3
      maxPoolSize: 25
      maxLifetime: 20000
      borrowConnectionTimeout: 30
      loginTimeout: 30
      maintenanceInterval: 60
      maxIdleTime: 60
- spring.datasource.test01.url,全部都是自定义的,只要与DBconfig中的前缀+变量名一致即可。
- 注意配置文件:1分号中英文别搞错了,2键值中间要有一个空格。
8.config包下的DBConfig2,
package com.itmayiedu.config;

import lombok.Data;
import org.springframework.boot.context.properties.ConfigurationProperties;

@Data
@ConfigurationProperties(prefix = "spring.datasource.test02")
public class DBConfig2 {

   private String url;
   private String username;
   private String password;
   private int minPoolSize;
   private int maxPoolSize;
   private int maxLifetime;
   private int borrowConnectionTimeout;
   private int loginTimeout;
   private int maintenanceInterval;
   private int maxIdleTime;
   private String testQuery;
}
9.datasource包下的 MyBatisConfig1
package com.itmayiedu.datasource;

import com.itmayiedu.config.DBConfig1;
import com.mysql.jdbc.jdbc2.optional.MysqlXADataSource;
import org.apache.ibatis.session.SqlSessionFactory;
import org.mybatis.spring.SqlSessionFactoryBean;
import org.mybatis.spring.SqlSessionTemplate;
import org.mybatis.spring.annotation.MapperScan;
import org.springframework.beans.factory.annotation.Qualifier;
import org.springframework.boot.jta.atomikos.AtomikosDataSourceBean;
import org.springframework.context.annotation.Bean;
import org.springframework.context.annotation.Configuration;

import javax.sql.DataSource;
import java.sql.SQLException;

@Configuration
@MapperScan(basePackages = "com.itmayiedu.test01", sqlSessionTemplateRef = "test01SqlSessionTemplate")
public class MyBatisConfig1 {

   // 配置数据源
   @Bean(name = "test01DataSource")
   public DataSource testDataSource(DBConfig1 testConfig) throws SQLException {
      MysqlXADataSource mysqlXaDataSource = new MysqlXADataSource();
      mysqlXaDataSource.setUrl(testConfig.getUrl());
      mysqlXaDataSource.setPinGlobalTxToPhysicalConnection(true);
      mysqlXaDataSource.setPassword(testConfig.getPassword());
      mysqlXaDataSource.setUser(testConfig.getUsername());
      mysqlXaDataSource.setPinGlobalTxToPhysicalConnection(true);

      // 创建Atomikos全局事物,并将本地事物注册到里面
      AtomikosDataSourceBean xaDataSource = new AtomikosDataSourceBean();
      xaDataSource.setXaDataSource(mysqlXaDataSource);
      xaDataSource.setUniqueResourceName("test01DataSource");
      xaDataSource.setMinPoolSize(testConfig.getMinPoolSize());
      xaDataSource.setMaxPoolSize(testConfig.getMaxPoolSize());
      xaDataSource.setMaxLifetime(testConfig.getMaxLifetime());
      xaDataSource.setBorrowConnectionTimeout(testConfig.getBorrowConnectionTimeout());
      xaDataSource.setLoginTimeout(testConfig.getLoginTimeout());
      xaDataSource.setMaintenanceInterval(testConfig.getMaintenanceInterval());
      xaDataSource.setMaxIdleTime(testConfig.getMaxIdleTime());
      xaDataSource.setTestQuery(testConfig.getTestQuery());
      return xaDataSource;
   }

   @Bean(name = "test01SqlSessionFactory")
   public SqlSessionFactory testSqlSessionFactory(@Qualifier("test01DataSource") DataSource dataSource) throws Exception {
      SqlSessionFactoryBean bean = new SqlSessionFactoryBean();
      bean.setDataSource(dataSource);
      return bean.getObject();
   }

   @Bean(name = "test01SqlSessionTemplate")
   public SqlSessionTemplate testSqlSessionTemplate(@Qualifier("test01SqlSessionFactory") SqlSessionFactory sqlSessionFactory) throws Exception {
      return new SqlSessionTemplate(sqlSessionFactory);
   }
}
- 此类中没有配置事务管理器,本地事物都交个Atomikos全局事务管理
- 如果报错AtomikosDataSourceBean没有setXXX方法,需要clean install下载一下jia包,再刷新一下项目重新引入jar包

10.datasource包下的 MyBatisConfig2
package com.itmayiedu.datasource;

import com.itmayiedu.config.DBConfig2;
import com.mysql.jdbc.jdbc2.optional.MysqlXADataSource;
import org.apache.ibatis.session.SqlSessionFactory;
import org.mybatis.spring.SqlSessionFactoryBean;
import org.mybatis.spring.SqlSessionTemplate;
import org.mybatis.spring.annotation.MapperScan;
import org.springframework.beans.factory.annotation.Qualifier;
import org.springframework.boot.jta.atomikos.AtomikosDataSourceBean;
import org.springframework.context.annotation.Bean;
import org.springframework.context.annotation.Configuration;

import javax.sql.DataSource;
import java.sql.SQLException;

@Configuration
@MapperScan(basePackages = "com.itmayiedu.test02", sqlSessionTemplateRef = "test02SqlSessionTemplate")
public class MyBatisConfig2 {

   // 配置数据源
   @Bean(name = "test02DataSource")
   public DataSource testDataSource(DBConfig2 testConfig) throws SQLException {
      MysqlXADataSource mysqlXaDataSource = new MysqlXADataSource();
      mysqlXaDataSource.setUrl(testConfig.getUrl());
      mysqlXaDataSource.setPinGlobalTxToPhysicalConnection(true);
      mysqlXaDataSource.setPassword(testConfig.getPassword());
      mysqlXaDataSource.setUser(testConfig.getUsername());
      mysqlXaDataSource.setPinGlobalTxToPhysicalConnection(true);

      AtomikosDataSourceBean xaDataSource = new AtomikosDataSourceBean();
      xaDataSource.setXaDataSource(mysqlXaDataSource);
      xaDataSource.setUniqueResourceName("test02DataSource");
      xaDataSource.setMinPoolSize(testConfig.getMinPoolSize());
      xaDataSource.setMaxPoolSize(testConfig.getMaxPoolSize());
      xaDataSource.setMaxLifetime(testConfig.getMaxLifetime());
      xaDataSource.setBorrowConnectionTimeout(testConfig.getBorrowConnectionTimeout());
      xaDataSource.setLoginTimeout(testConfig.getLoginTimeout());
      xaDataSource.setMaintenanceInterval(testConfig.getMaintenanceInterval());
      xaDataSource.setMaxIdleTime(testConfig.getMaxIdleTime());
      xaDataSource.setTestQuery(testConfig.getTestQuery());
      return xaDataSource;
   }

   @Bean(name = "test02SqlSessionFactory")
   public SqlSessionFactory testSqlSessionFactory(@Qualifier("test02DataSource") DataSource dataSource) throws Exception {
      SqlSessionFactoryBean bean = new SqlSessionFactoryBean();
      bean.setDataSource(dataSource);
      return bean.getObject();
   }

   @Bean(name = "test02SqlSessionTemplate")
   public SqlSessionTemplate testSqlSessionTemplate(@Qualifier("test02SqlSessionFactory") SqlSessionFactory sqlSessionFactory) throws Exception {
      return new SqlSessionTemplate(sqlSessionFactory);
   }
}
11.service包下的 Test01UserService
package com.itmayiedu.test01.service;

import com.itmayiedu.test01.mapper.Test01UserMapper;
import org.springframework.beans.factory.annotation.Autowired;
import org.springframework.stereotype.Service;

@Service
public class Test01UserService {

    @Autowired
    private Test01UserMapper userMapper;

    @Transactional
    public void insertUser(String name, Integer age) {
        userMapper.insert(name,age);
    }

}
因为本地事物交个atomikos全局事物管理,所以添加@Transactional注解时不需要再指定事物管理器
12.service包下的 Test02UserService
package com.itmayiedu.test02.service;

import com.itmayiedu.test01.mapper.Test01UserMapper;
import com.itmayiedu.test02.mapper.Test02UserMapper;
import org.springframework.beans.factory.annotation.Autowired;
import org.springframework.stereotype.Service;

@Service
public class Test02UserService {

    @Autowired
    private Test02UserMapper userMapper02;

    @Transactional
    public void insertUser(String name, Integer age) {
        userMapper02.insert(name,age);
    }
}
13.controller包下的UserController类
package com.itmayiedu.controller;

import com.itmayiedu.test01.service.Test01UserService;
import com.itmayiedu.test02.service.Test02UserService;
import org.springframework.beans.factory.annotation.Autowired;
import org.springframework.web.bind.annotation.RequestMapping;
import org.springframework.web.bind.annotation.RestController;

@RestController
public class UserController {

    @Autowired
    private Test01UserService test01UserService;

    @Autowired
    private Test02UserService test02UserService;

    @RequestMapping("/insertUser01")
    public String insertUser01(String name,Integer age){
        test01UserService.insertUser(name,age);
        return "insertUser01";
    }

    @RequestMapping("/insertUser02")
    public String insertUser02(String name,Integer age){
        test02UserService.insertUser(name,age);
        return "insertUser02";
    }
}
14.启动类添加开启读取配置文件注解 @EnableConfigurationProperties
package com.itmayiedu;

import com.itmayiedu.config.DBConfig1;
import com.itmayiedu.config.DBConfig2;
import org.springframework.boot.SpringApplication;
import org.springframework.boot.autoconfigure.SpringBootApplication;
import org.springframework.boot.context.properties.EnableConfigurationProperties;

@SpringBootApplication
// 开启读取配置文件
@EnableConfigurationProperties(value = { DBConfig1.class, DBConfig2.class })
public class SpringbootApplication {

    public static void main(String[] args) {
        SpringApplication.run(SpringbootApplication.class, args);
    }
}
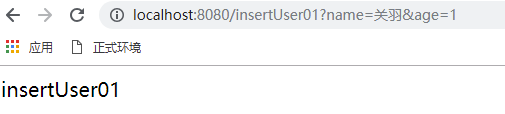
15.浏览器访问 insertUser01 接口
16.数据库1查看,插入成功
17.浏览器访问 insertUser02 接口
18.数据库2查看,插入成功

19.修改Test02UserService类,查看事物是否生效
package com.itmayiedu.test02.service;

import com.itmayiedu.test01.mapper.Test01UserMapper;
import com.itmayiedu.test02.mapper.Test02UserMapper;
import org.springframework.beans.factory.annotation.Autowired;
import org.springframework.stereotype.Service;
import org.springframework.transaction.annotation.Transactional;

@Service
public class Test02UserService {

    @Autowired
    private Test01UserMapper userMapper01;

    @Autowired
    private Test02UserMapper userMapper02;

    @Transactional
    public void insertUser03(String name, Integer age) {
        //第一个数据源
        userMapper01.insert(name,age);
        //第二个数据源
        userMapper02.insert(name,age);
        int i = 1/0;
    }
}
20.浏览器访问 insertUser03 接口,报错回滚,因为处于同一事物下,两个数据库都没有插入成功。