首先创建SpringBoot项目,导入web模块;
导入依赖:
<!--aop-->
<dependency>
    <groupId>org.springframework.boot</groupId>
    <artifactId>spring-boot-starter-aop</artifactId>
</dependency>

<!--mybatis plus-->
<dependency>
    <groupId>com.baomidou</groupId>
    <artifactId>mybatis-plus-boot-starter</artifactId>
    <version>3.0.1</version>
</dependency>
<dependency>
    <groupId>mysql</groupId>
    <artifactId>mysql-connector-java</artifactId>
    <scope>runtime</scope>
</dependency>

<!--druid-->
<dependency>
    <groupId>com.alibaba</groupId>
    <artifactId>druid-spring-boot-starter</artifactId>
    <version>1.1.10</version>
</dependency>
使用自动生成工具生成实体以及mapper等:
public class MyGenerator {


    /**
     * <p>
     * MySQL 生成演示
     * </p>
     */
    public static void main(String[] args) {
        AutoGenerator mpg = new AutoGenerator();

        // 全局配置
        GlobalConfig gc = new GlobalConfig();
        gc.setOutputDir("D:\\test");
        gc.setFileOverride(true);
        gc.setActiveRecord(true);
        gc.setEnableCache(false);// XML 二级缓存
        gc.setBaseResultMap(false);// XML ResultMap
        gc.setBaseColumnList(false);// XML columList
        gc.setAuthor("baiyongcheng");

        // 自定义文件命名,注意 %s 会自动填充表实体属性!
        gc.setMapperName("%sMapper");
        gc.setXmlName("%sMapper");
        gc.setServiceName("%sService");
        gc.setServiceImplName("%sServiceImpl");
//         gc.setControllerName("%sController");
        mpg.setGlobalConfig(gc);

        // 数据源配置
        DataSourceConfig dsc = new DataSourceConfig();
        dsc.setDbType(DbType.MYSQL);
        dsc.setDriverName("com.mysql.jdbc.Driver");
        dsc.setUsername("root");
        dsc.setPassword("root");
        dsc.setUrl("jdbc:mysql://127.0.0.1:3306/woniulearn?characterEncoding=utf8");
        mpg.setDataSource(dsc);

        // 策略配置
        StrategyConfig strategy = new StrategyConfig();
//        strategy.setTablePrefix(new String[]{""});// 此处可以修改为您的表前缀
//        strategy.setNaming(NamingStrategy.remove_prefix_and_camel);// 表名生成策略
//        strategy.setNaming(NamingStrategy.removePrefixAndCamel());// 表名生成策略
        strategy.setInclude(new String[]{"users"}); // 需要生成的表
//        strategy.setExclude(new String[]{"t_rong_bid"}); // 排除生成的表
        // 字段名生成策略
        strategy.setNaming(NamingStrategy.underline_to_camel);
        // 自定义实体父类
//         strategy.setSuperEntityClass("hello.entity.BaseEntity");
        // 自定义实体,公共字段
//        strategy.setSuperEntityColumns(new String[]{"id"});
        // 自定义 mapper 父类
        // strategy.setSuperMapperClass("com.fcs.demo.TestMapper");
        // 自定义 service 父类
        // strategy.setSuperServiceClass("com.fcs.demo.TestService");
        // 自定义 service 实现类父类
        // strategy.setSuperServiceImplClass("com.fcs.demo.TestServiceImpl");
        // 自定义 controller 父类
//         strategy.setSuperControllerClass("com.risk.controller.BaseController");
        // 【实体】是否生成字段常量(默认 false)
        // public static final String ID = "test_id";
        // strategy.setEntityColumnConstant(true);
        // 【实体】是否为构建者模型(默认 false)
        // public User setName(String name) {this.name = name; return this;}
        // strategy.setEntityBuliderModel(true);
        mpg.setStrategy(strategy);

        // 包配置
        PackageConfig pc = new PackageConfig();
        pc.setParent("com.demo");
        pc.setModuleName("");
        pc.setController("controller");

        mpg.setPackageInfo(pc);

        // 执行生成
        mpg.execute();
    }

}
将生成的代码拷贝到项目文件结构中;
创建application.yml配置文件:
spring:
  datasource:
    type: com.alibaba.druid.pool.DruidDataSource
    driverClassName: com.mysql.jdbc.Driver
    druid:
      first:
        url: jdbc:mysql://localhost:3306/woniulearn?useSSL=false
        username: root
        password: root
      second:
        url: jdbc:mysql://localhost:3306/bossqiang?useSSL=false
        username: root
        password: root
编写动态数据源类:
public class DynamicDataSource extends AbstractRoutingDataSource {

    public DynamicDataSource(DataSource defaultTargetDataSource, Map<Object, Object> targetDataSources) {
        super.setDefaultTargetDataSource(defaultTargetDataSource);
        super.setTargetDataSources(targetDataSources);
        super.afterPropertiesSet();
    }

    @Override
    protected Object determineCurrentLookupKey() {
        return getDataSource();
    }

    /*
     *ThreadLocal 用于提供线程局部变量,在多线程环境可以保证各个线程里的变量独立于其它线程里的变量。
     * 也就是说 ThreadLocal 可以为每个线程创建一个【单独的变量副本】
     * 相当于线程的 private static 类型变量。
     */
    private static final ThreadLocal<String> contextHolder = new ThreadLocal<>();

    public static void setDataSource(String dataSource) {
        contextHolder.set(dataSource);
    }
    public static String getDataSource() {
        return contextHolder.get();
    }
    public static void clearDataSource() {
        contextHolder.remove();
    }

}
编写配置类:
@Configuration
public class DynamicDataSourceConfig {

    @Bean
    @ConfigurationProperties("spring.datasource.druid.first")
    public DataSource firstDataSource(){
        return DruidDataSourceBuilder.create().build();
    }

    @Bean
    @ConfigurationProperties("spring.datasource.druid.second")
    public DataSource secondDataSource(){
        return DruidDataSourceBuilder.create().build();
    }

    @Bean
    @Primary
    public DynamicDataSource dataSource(DataSource firstDataSource, DataSource secondDataSource) {
        Map<Object, Object> targetDataSources = new HashMap<>();
        targetDataSources.put(DataSourceNames.FIRST, firstDataSource);
        targetDataSources.put(DataSourceNames.SECOND, secondDataSource);
        return new DynamicDataSource(firstDataSource, targetDataSources);
    }
}
替换默认的配置为自己编写的配置:
@SpringBootApplication(exclude={DataSourceAutoConfiguration.class})
@Import({DynamicDataSourceConfig.class})
@MapperScan("com.demo.mapper")
public class DemoApplication {

    public static void main(String[] args) {
        SpringApplication.run(DemoApplication.class, args);
    }
}
创建注解:
@Target(ElementType.METHOD)
@Retention(RetentionPolicy.RUNTIME)
@Documented
public @interface DataSource {
    String name() default "";
}
为了提升可读性,可配置性创建一个枚举类:
public interface DataSourceNames {
    String FIRST = "first";
    String SECOND = "second";
}
创建切面解析注解:
@Aspect
@Component
public class DataSourceAspect implements Ordered {
    protected Logger logger = LoggerFactory.getLogger(getClass());

    @Pointcut("@annotation(com.demo.DataSource)")
    public void dataSourcePointCut() {

    }

    @Around("dataSourcePointCut()")
    public Object around(ProceedingJoinPoint point) throws Throwable {
        MethodSignature signature = (MethodSignature) point.getSignature();
        Method method = signature.getMethod();

        DataSource ds = method.getAnnotation(DataSource.class);
        if(ds == null){
            DynamicDataSource.setDataSource(DataSourceNames.FIRST);
            logger.debug("set datasource is " + DataSourceNames.FIRST);
        }else {
            DynamicDataSource.setDataSource(ds.name());
            logger.debug("set datasource is " + ds.name());
        }

        try {
            return point.proceed();
        } finally {
            DynamicDataSource.clearDataSource();
            logger.debug("clean datasource");
        }
    }

    @Override
    public int getOrder() {
        return 1;
    }
}
创建service的接口:
public interface UsersService extends IService<Users> {
    Users findUserByFirstDb(int id);

    Users findUserBySecondDb(int id);
}
实现类:
@Service
public class UsersServiceImpl extends ServiceImpl<UsersMapper, Users> implements UsersService {

    @Override
    public Users findUserByFirstDb(int id) {
        return this.baseMapper.selectById(id);
    }

    @Override
    @DataSource(name = DataSourceNames.SECOND)
    public Users findUserBySecondDb(int id) {
        return this.baseMapper.selectById(id);
    }
}
测试类:
@RunWith(SpringRunner.class)
@SpringBootTest
public class DemoApplicationTests {

    @Autowired
    UsersService userService;

    @Test
    public void contextLoads() {

        Users user = userService.getById(1);
        System.out.println(user.toString());

    }

    @Test
    public void test() {
        Users user = userService.findUserByFirstDb(1);
        System.out.println("第one个数据库---------》" + user.toString());


        Users user2 = userService.findUserBySecondDb(1);
        System.out.println("第二个数据库---------》" + user2.toString());
    }

}
运行测试类结果为:
第one个数据库---------》Users{userId=1, tel=18682558655, password=DAF2ABB2A61A210C82E374AC2A5BFFD6, userRoleId=2, flag=0, userName=邓强, sex=null, birthday=null, qq=null, email=null, icon=page/image/userIcon/teacherIcon/dengqiang.JPG, registerTime=null, school=null, education=null, integralNum=30, position=蜗牛学院资深讲师, description=蜗牛学院资深导师,四川大学硕士,企业内训讲师,独立咨询顾问,14年软件研发及管理经验,测试架构师,丰富的实施经验。2009年到2015年期间担任某培训机构总经理兼资深讲师职位,2004年到2009年担任苏州华冠科技测试经理。, fans=2075, company=null, technology=null, major=null, city=null, realName=邓强, address=null, rewardIntegral=30}
2018-10-08 13:19:34.870  INFO 28324 --- [           main] com.alibaba.druid.pool.DruidDataSource   : {dataSource-2} inited
第二个数据库---------》Users{userId=1, tel=13123123, password=文峰区威锋网缺乏权威, userRoleId=null, flag=null, userName=null, sex=null, birthday=null, qq=null, email=null, icon=null, registerTime=null, school=null, education=null, integralNum=null, position=null, description=null, fans=null, company=null, technology=null, major=null, city=null, realName=null, address=null, rewardIntegral=null}
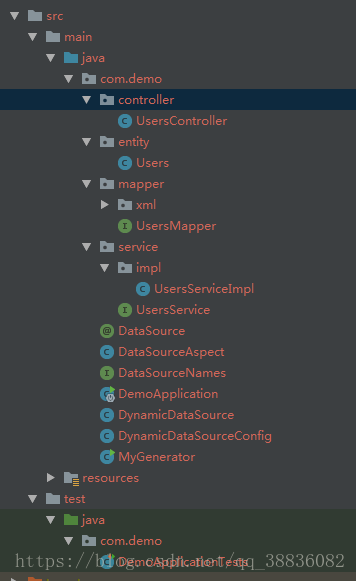
目录结构为: