这一篇Blog是学习自:Android自定义ViewGroup第十三式之移花接木
小缘老哥太顶了,写的东西都巨棒,关注Ta很久了,我决定向他学习,学着去像他那样思考问题。
建议各位老哥都去关注他!
这次模仿的效果是网易云的广场歌单:


跟着大佬做的效果:
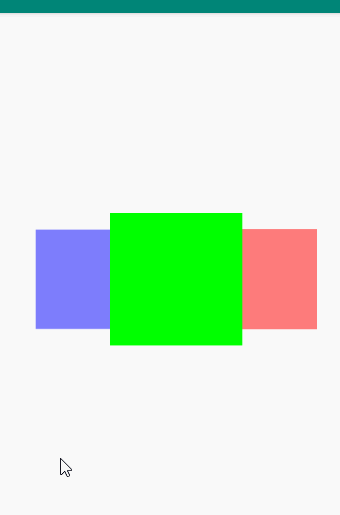

滑动的时候,三个View跟着移动,最上面的View会到下面去,跟着的View就会轮着上来。
关于这个View剖析,陈小缘大佬已经写到很仔细了。
我这边就做一个整理
- 它是用什么做的?ViewPager?
显然这种样式的轮播图,很像ViewPager,又很像横向的RecyclerView,但是子View只有三个,并且对透明度、缩放、布局都有界定。所以为了更好的做出该效果,这边就用ViewGroup来做。 - 关于手指滑动距离和View移动距离的关系
手指完整的滑完整个ViewGroup的宽 ----> 进行一次子View的完成交换
所以 百分比 = totalOffsetX / getWidth(); - 每个子View的布局和整体布局的关系
可以看出来 真个Viewgoup可以分成四块,中间的View占两块,也就是说,这个ViewGroup,是切成三条线作为辅助线的。 - 单击某个View的效果
单击某个 子View,会将该View切换到最前面,我们通过点击的位置来确定,我们点击的是哪一个View。
但是由于子View做了缩放、透明度的效果,所以传统的判断点在一个区域的做法是行不通的,我们需要换一种做法。 - 在滑动过程中,View交换了层级
中间的View在滑动时,到了下面那一层,下面那一层的View到了上面那一层,如果慢慢滑可以看到,在进度达到一半的时候,出现了层级的交互。层级的交换通过attachViewToParent和detachAllViewsFromParent来做。 - LayoutParams
因为每个View都会有本来的地方和要去的地方,还有透明度和缩放度,所以我们应该记录这些东西,so,我们需要重写LayoutParams。
至于代码的话我这边放一下细节的,但是大家可以参考陈小缘大佬的,虽然他用的是kotlin写的,但是逻辑特别清晰,而且代码很美观,我的放出来和他比较那就有点丢人了哈哈哈哈哈。
接下来我们去解决下面的问题,
注:解释都在代码中,注意看代码中的注释
1、定位触摸到在一个View
单靠:
points[0] = event.getX();
points[1] = event.getY();
return points[0] >= 0 && points[1] >= 0 && points[0] < view.getWidth() && points[1] < view.getHeight();
这样去判断我们触摸的位置在不在View中,很传统。
当这个View发生了 平移、旋转、缩放,这个方法是判断不了的
而陈小缘大佬研究这个问题,研究到了C++层(是真滴牛批,反正我是看不下去)
我只用知道,如果一个View它做了上述那几个操作,这个View对应的矩阵是会变的,而Matrix正好有这么几个方法:
//如果返回true,则说明这个矩阵没有发生旋转、平移、缩放等操作,它没有变动
//否则返回了false,说明这个矩阵变过
matrix.isIdentity()

//反转矩阵,如果这个矩阵是变化过的,那么该方法就能使矩阵逆转到变化之前,这方法实在是太顶了
matrix.invert(matrix);

//映射坐标点,我们现在点击的坐标,通过该方法,可以映射到这个矩阵变换前的坐标,一条龙的方法。
matrix.mapPoints(points);
有了这三个方法,我们就能真真正正的判断我们点击的地方是不是在一个View中:
    /**
     * 用矩阵的方法,来定义一个点是否位于一个区域内
     */
    private boolean isPointInView(View view, float[] points) {
        // 像ViewGroup那样,先对齐一下Left和Top
        points[0] -= view.getLeft();
        points[1] -= view.getTop();
        // 获取View所对应的矩阵
        Matrix matrix = view.getMatrix();
        // 如果矩阵有应用过变换
        if (!matrix.isIdentity()) {
            // 反转矩阵
            matrix.invert(matrix);
            // 映射坐标点
            matrix.mapPoints(points);
        }
        //判断坐标点是否在view范围内
        return points[0] >= 0 && points[1] >= 0 && points[0] < view.getWidth() && points[1] < view.getHeight();
    }
学会了,学会了(抱拳)
2、关于层级交换的方法
关于层级的交换,其实就是把两个View从ViewGroup取出来,然后交换顺序,又放回去。
对应的是detachViewFromParent()和attachViewToParent()方法
我们只需要知道,想要交换的两个View在ViewGroup的层级顺序是什么就行了。
其中 indexofChild(View v)可以知道它所处的层级,它越大,说明它越靠上,最大值就是 childCount-1,这个时候它是在最上层的 。
    /**
     * 使用attachViewToParent和detachAllViewsFromParent来交换两个Index的层级
     */
    public void exchangeOrder(int fromIndex, int toIndex) {
        if (fromIndex == toIndex) {
            return;
        }
        View fromChild = getChildAt(fromIndex);
        View toChild = getChildAt(toIndex);

        //分开这些View
        detachViewFromParent(fromChild);
        detachViewFromParent(toChild);

        //交换两个View,本质就是交换它们的index
        attachViewToParent(fromChild, toIndex > getChildCount() ? getChildCount() : toIndex, fromChild.getLayoutParams());
        attachViewToParent(toChild, fromIndex > getChildCount() ? getChildCount() : fromIndex, toChild.getLayoutParams());

        invalidate();
    }
3、关于LayoutParams
LayoutParams是用来协助Viewgoup的,它可以给子View定义一些属性。而且也可以支持margin。
我们要给子View定义 :
- 从哪里来(from)
- 到哪里去(to)
- 透明度(alpha)
- 缩放值(scale)
所以我们要这样子重写:
    /**
     * 这里要自己写一个ViewGroup的LayoutParams来记录 scale、alpha、from、to
     */
    class RikkaLayoutParams extends MarginLayoutParams {
        float scale = 0f;
        float alpha = 0f;
        int from;
        int to;

        .....(getter and setter)

        public RikkaLayoutParams(Context c, AttributeSet attrs) {
            super(c, attrs);
        }

        public RikkaLayoutParams(int width, int height) {
            super(width, height);
        }

        public RikkaLayoutParams(LayoutParams source) {
            super(source);
        }
    }

    /**
     * 要支持margin,所以要重写generate方法
     */
    @Override
    public LayoutParams generateLayoutParams(AttributeSet attrs) {
        return new RikkaLayoutParams(mContext, attrs);
    }

    @Override
    protected LayoutParams generateLayoutParams(LayoutParams p) {
        return new RikkaLayoutParams(p);
    }

    @Override
    protected LayoutParams generateDefaultLayoutParams() {
        return new RikkaLayoutParams(LayoutParams.WRAP_CONTENT, LayoutParams.WRAP_CONTENT);
    }
4、关于测量
ViewGroup的宽度要么是写死的值,要么是三个子View之和
高度要么是写死的值,要么是三个View里面,最大的那一个:
    @Override
    protected void onMeasure(int widthMeasureSpec, int heightMeasureSpec) {
        //先测量子View
        measureChildren(widthMeasureSpec, heightMeasureSpec);

        //因为这个时候已经测量完子View了,所以通过子View来计算整个View的宽高
        int width = measureWidth(widthMeasureSpec);
        int height = measureHeight(heightMeasureSpec);

        //根据获取的宽高拿去用
        setMeasuredDimension(width, height);
    }

    //整个View的宽度是三个子View的和
    private int measureWidth(int widthMeasureSpec) {
        int totalWidth = 0;

        int widthSize = MeasureSpec.getSize(widthMeasureSpec);
        int widthMode = MeasureSpec.getMode(widthMeasureSpec);

        if (widthMode == MeasureSpec.EXACTLY) {
            totalWidth = widthSize;
        } else {
            for (int i = 0; i < getChildCount(); i++) {
                RikkaLayoutParams lp = (RikkaLayoutParams) getChildAt(i).getLayoutParams();
                totalWidth += getChildAt(i).getMeasuredWidth() + lp.leftMargin + lp.rightMargin;
            }
        }
        return totalWidth;
    }

    //整个View的高 取三个View的最大值
    private int measureHeight(int heightMeasureSpec) {
        int maxHeight = 0;

        int heightSize = MeasureSpec.getSize(heightMeasureSpec);
        int heightMode = MeasureSpec.getMode(heightMeasureSpec);

        if (heightMode == MeasureSpec.EXACTLY) {
            //如果是具体值就取具体值
            maxHeight = heightSize;
        } else {
            for (int i = 0; i < getChildCount(); i++) {
                View child = getChildAt(i);
                RikkaLayoutParams lp = (RikkaLayoutParams) child.getLayoutParams();
                maxHeight = Math.max(maxHeight, child.getMeasuredHeight() + lp.topMargin + lp.bottomMargin);
            }
        }
        return maxHeight;
    }
5、关于布局
测量完后就需要布局了。
我们要根据三条辅助线来确定。最左边的View的辅助线,应该以左边为准,右边的以右边为准,中间的以中间为准。
由于在滑动时,View的位置也是要变的,也要不断的走onLayout方法,所以辅助线也是跟着变动的,它是跟着滑动百分比来计算的。
    /**
     * 根据基准线去布局子View
     * 基准线有四条,子View分别在这四条线上
     */
    @Override
    protected void onLayout(boolean changed, int l, int t, int r, int b) {
        for (int i = 0; i < getChildCount(); i++) {
            int baseLineX = calBaseLine(i);
            int baseLineY = getHeight() / 2;

            //滑动的过程也是layout的过程,所以在layout的时候也要更改其透明度和缩放度
            View child = getChildAt(i);
            RikkaLayoutParams lp = (RikkaLayoutParams) child.getLayoutParams();
            child.setScaleX(lp.getScale());
            child.setScaleY(lp.getScale());
            child.setAlpha(lp.getAlpha());
            int left = baseLineX - child.getMeasuredWidth() / 2;
            int top = baseLineY - child.getMeasuredHeight() / 2;
            int right = left + child.getMeasuredWidth();
            int bottom = top + child.getMeasuredHeight();

            child.layout(left + lp.leftMargin + getPaddingLeft(),
                    top + lp.topMargin + getPaddingTop(),
                    right + lp.rightMargin + getPaddingRight(),
                    bottom + lp.bottomMargin + getPaddingBottom());
        }
    }

    /**
     * 根据offsetPercent来计算基线位置,子View是根据基线来布局的
     */
    private int calBaseLine(int index) {
        float baseline = 0;
        //最左边的baseline
        float baselineLeft = getWidth() / 4;
        //最中间的baseline
        float baselineCenter = getWidth() / 2;
        //最右边的baseline
        float baselineRight = getWidth() - baselineLeft;

        RikkaLayoutParams lp = (RikkaLayoutParams) getChildAt(index).getLayoutParams();
        //根据lp的from 和 to来确定基线位置
        switch (lp.getFrom()) {
            case 0:
                if (lp.getTo() == 1) {
                    baseline = baselineLeft + (baselineRight - baselineLeft) * -offsetPercent;
                } else if (lp.getTo() == 2) {
                    baseline = baselineLeft + (baselineCenter - baselineLeft) * offsetPercent;
                } else {
                    baseline = baselineLeft;
                }
                break;
            case 1:
                if (lp.getTo() == 0) {
                    baseline = baselineRight - (baselineRight - baselineLeft) * offsetPercent;
                } else if (lp.getTo() == 2) {
                    baseline = baselineRight + (baselineRight - baselineCenter) * offsetPercent;
                } else {
                    baseline = baselineRight;
                }
                break;
            case 2:
                if (lp.getTo() == 1) {
                    baseline = baselineCenter + (baselineRight - baselineCenter) * offsetPercent;
                } else if (lp.getTo() == 0) {
                    baseline = baselineCenter + (baselineCenter - baselineLeft) * offsetPercent;
                } else {
                    baseline = baselineCenter;
                }
                break;
        }

        return (int) baseline;
    }
6、关于滑动、子View的移动
我们需要在onInterceptTouchEvent里判断一下我们是否需要使用到onTouchEvent,所以我们需要时时刻刻的去获取点击的位置,并记录偏移量,来判断是否是滑动状态,如果是的话,我们需要处理子View的移动了。
    /**
     * 如果是滑动,则调用onTouchEvent,如果只是单击,可以切换View
     */
    @Override
    public boolean onInterceptTouchEvent(MotionEvent ev) {
        isDraged = false;
        int x = (int) ev.getX();
        int y = (int) ev.getY();
        switch (ev.getActionMasked()) {
            case MotionEvent.ACTION_DOWN:
                mDownX = x;
                mDownY = y;
                mLastX = x;
                mLastY = y;
                break;
            case MotionEvent.ACTION_MOVE:
                //如果滑动超出规定的距离,则可以滑动View
                int offsetX = (int) (x - mLastX);
                int offsetY = (int) (y - mLastY);
                if (Math.abs(offsetX) > MIN_SLOP_DISTANCE && Math.abs(offsetY) > MIN_SLOP_DISTANCE) {
                    mLastX = x;
                    mLastY = y;
                    isDraged = true;
                }
            case MotionEvent.ACTION_UP:
                isDraged = false;
                break;
        }
        return isDraged;
    }

    /**
     * onTouchEvent就是确定是要滑动了,根据滑动距离,做子View的位移动画
     */
    @Override
    public boolean onTouchEvent(MotionEvent event) {
        int x = (int) event.getX();
        int y = (int) event.getY();
        switch (event.getActionMasked()) {
            case MotionEvent.ACTION_DOWN:
            case MotionEvent.ACTION_MOVE:
                //通过总位移量除以View长来得到百分比
                int offsetX = (int) (x - mLastX);
                totalOffsetX += offsetX;
                moveItem();
                break;
            case MotionEvent.ACTION_UP:
                isDraged = false;
                break;
        }
        mLastX = x;
        mLastY = y;
        //能走到onTouchEvent就肯定是返回true的
        return true;
    }
而子View就是根据 总位移量totalOffsetX来计算百分比的:
     /**
     * 通过百分比的正负值来确定每个View要去到哪里、设置透明度和缩放、交换View的层级
     */
    private void moveItem() {
        offsetPercent = totalOffsetX / getWidth();
        setViewFromAndTo();
        changeViewLevel();
        changeAlphaAndScale();
        requestLayout();
    }


    /**
     * 根据百分比的正负值,来设置View的from和to
     * 如果是负则说明手指正在往左边滑动,则 0->1,1->2,2->0,反之亦然
     */
    private void setViewFromAndTo() {
        //如果滑动距离超出了屏幕的宽度,则超出的部分要更新
        if (Math.abs(offsetPercent) >= 1) {
            //在每次完整的滑完一次后,需要重置isReordered,不然当一次滑动很长距离时,会产生问题
            isReordered = false;
            for (int i = 0; i < getChildCount(); i++) {
                RikkaLayoutParams lp = (RikkaLayoutParams) getChildAt(i).getLayoutParams();
                lp.setFrom(lp.getTo());
            }

            totalOffsetX %= getWidth();
            offsetPercent %= 1f;
        } else {
            //否则就要判断from和to
            for (int i = 0; i < getChildCount(); i++) {
                RikkaLayoutParams lp = (RikkaLayoutParams) getChildAt(i).getLayoutParams();
                switch (lp.getFrom()) {
                    case 0:
                        lp.setTo(offsetPercent > 0 ? 2 : 1);
                        break;
                    case 1:
                        lp.setTo(offsetPercent > 0 ? 0 : 2);
                        break;
                    case 2:
                        lp.setTo(offsetPercent > 0 ? 1 : 0);
                        break;
                }
            }
        }
    }

    /**
     * 当滑动进度超出了0.5则需要交换层级,2是最上层,0和1在下层,交换的时候交换1,2就行了
     * isReordered判断有没有交换过层级,每次onInterceptTouchEvent的时候都要重置
     * 因为可能会交换了还要交换回来
     */
    private void changeViewLevel() {
        Log.d(TAG, "offsetPercent : " + offsetPercent);
        if (Math.abs(offsetPercent) >= 0.5f) {
            if (!isReordered) {
                exchangeOrder(1, 2);
                isReordered = true;
            }
        } else {
            if (isReordered) {
                //如果没有超出0.5f,但是又交换过层级,说明滑到一半后又往回滑了,需要交换回来
                exchangeOrder(1, 2);
                isReordered = false;
            }
        }
    }

    /**
     * 改变正在移动的View的Scale和透明度
     */
    private void changeAlphaAndScale() {
        for (int i = 0; i < getChildCount(); i++) {
            RikkaLayoutParams lp = (RikkaLayoutParams) getChildAt(i).getLayoutParams();
            switch (lp.getFrom()) {
                case 0:
                    if (lp.getTo() == 2) {
                        lp.setAlpha(MIN_ALPHA + (1f - MIN_ALPHA) * offsetPercent);
                        lp.setScale(MIN_SCALE + (1f - MIN_SCALE) * offsetPercent);
                    } else if (lp.getTo() == 1) {
                        //将View和低层的View交换
                        exchangeOrder(indexOfChild(getChildAt(i)), 0);
                    }
                    break;
                case 1:
                    if (lp.getTo() == 0) {
                        exchangeOrder(indexOfChild(getChildAt(i)), 0);
                    } else if (lp.getTo() == 2) {
                        lp.setAlpha(MIN_ALPHA + (1f - MIN_ALPHA) * Math.abs(offsetPercent));
                        lp.setScale(MIN_SCALE + (1f - MIN_SCALE) * Math.abs(offsetPercent));
                    }
                    break;
                case 2:
                    lp.setAlpha(1f - (1f - MIN_ALPHA) * Math.abs(offsetPercent));
                    lp.setScale(1f - (1f - MIN_SCALE) * Math.abs(offsetPercent));
            }
        }
    }
7、关于抬起手指时的过渡动画和单击的动画
他们是一样的,都是从我们最后手指离开时的偏移量,到某一个值(比如说0、getWidth、-getWidth)
能走完一个流程。
所以我们需要在 ACTION_UP的时候多做一个动画的方法
在这里我们就会用到一开始的,判断手指点击的地方是不是在一个View中了。
    /**
     * 每次抬起手指的时候需要判断当前要不要做动画
     */
    private void handleActionUp(int x, int y) {
        if (Math.abs(x - mDownX) < MIN_SLOP_DISTANCE && Math.abs(y - mLastY) < MIN_SLOP_DISTANCE) {
            for (int i = getChildCount() - 1; i >= 0; i--) {
                //确定是单击,首先要判断是点击的是哪一个View,因为传入的points会改变,所以每次都要重新定义
                float[] points = new float[2];
                points[0] = x;
                points[1] = y;

                View clickView = getChildAt(i);
                if (isPointInView(clickView, points)) {
                    Log.d(TAG, "isPointInView:" + i);
                    if (indexOfChild(clickView) != 2) {
                        //如果点到1、0View,则将他们移到最前方
                        setSelection(clickView);
                    }
                }
            }
            return;
        }
        initAnimator();
    }


 /**
     * 也是做动画,只是它是做一次完整的动画,起始值
     */
    private void setSelection(View clickView) {
        int start = 0;
        int end = 0;
        RikkaLayoutParams lp = (RikkaLayoutParams) clickView.getLayoutParams();
        if (lp.getFrom() == 0) {
            //从0到2
            end = getWidth();
        } else if (lp.getFrom() == 1) {
            //从1到2
            end = -getWidth();
        }
        startAnimator(start, end);
    }

    private void initAnimator() {
        if ((offsetAnimator != null && offsetAnimator.isRunning())) {
            offsetAnimator.cancel();
        }
        //初始值是当前已经位移的值
        int start = (int) totalOffsetX;
        // 终点是到View的长度,如果滑动没有超过一半,就要回到起点,即0
        int end = 0;
        if (offsetPercent >= 0.5f) {
            end = getWidth();
        } else if (offsetPercent <= -0.5f) {
            end = -getWidth();
        }
        startAnimator(start, end);
    }

    private void startAnimator(int start, int end) {
        if (offsetAnimator == null) {
            //懒加载
            offsetAnimator = ValueAnimator.ofFloat(start, end);
//            offsetAnimator.setDuration(500);
            offsetAnimator.setInterpolator(new LinearInterpolator());
            offsetAnimator.addUpdateListener(new ValueAnimator.AnimatorUpdateListener() {
                @Override
                public void onAnimationUpdate(ValueAnimator animation) {
                    //每次都要改变位移
                    totalOffsetX = (float) animation.getAnimatedValue();
                    moveItem();
                }
            });
        }
        //因为是懒加载,所以每次都要设置起始值和终点值.
        offsetAnimator.setFloatValues(start, end);
        offsetAnimator.start();
    }
差不多就是这样啦,blog不会写很多,更多的注释都是在代码中,希望能够学到一些(反正我是学到很多啦)。
这里放一个demo的地址,和陈小缘那个差很多,但是可以把我这个当成是Java版的来学习一下就行啦。