目录
- 前言
- 转换为TFRecord文件
- 用卷积神经网络(卷积层×2+池化层×2+全连接神经网络)训练
- 错误小插曲
- 结束语
前言
从《TensorFlow:实战Google深度学习框架》中学习了迁移学习,通过下面代码下载数据集。(需要解压)
wget http://download.tensorflow.org/example_images/flower_photos.tgz
tar xzf flower_photos.tgz
里面有五个文夹,每一个文件夹名称是花的名称,代表不同的类别。每种花大概六七百张RGB彩色模式图片,大小也不相同。
解压完打开是这样的:
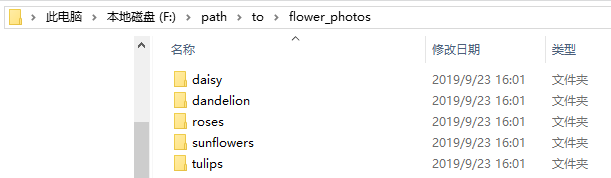
内部是这样的:

根据书上的步骤,对数据集进行分类,80%训练集,10%测试集,10%验证集。
利用迁移学习将网上训练好的Inception-v3模型输出结果后,再加入全连接神经网络(一层隐藏层)进行训练,batch=32,steps=300 。最后得到 92% 左右的准确率。
我现在想尝试将五种花的图片转化为TFRecord文件,通过先前学的卷积神经网络对其进行训练。
转换为TFRecord文件
对任意尺寸三通道图像集转换为TFRecord文件。
但我这里由于时间限制暂时没有将总数据集细分成训练集和测试集,而只是把所有数据放在一个TFrecod文件里。在接下来的时间会更新。
接下来的代码参考了下面网页的部分方法
https://www.jianshu.com/p/22fd025a5cb3
import tensorflow as tf
import os
import numpy as np
from PIL import Image

global num_classe #种类的数量


#创建TFRecord文件的帮助函数
def _int64_feature(value):
    return tf.train.Feature(int64_list = tf.train.Int64List(value=[value]))
def _bytes_feature(value):
    return tf.train.Feature(bytes_list = tf.train.BytesList(value=[value]))
def _int64_list_feature(value):
    return tf.train.Feature(int64_list=tf.train.Int64List(value=value))


#获取文件夹名字的张量
def get_filename(path):

    labelsList = []  # 名称列表
    numberList = []  # 各文件数量列表
    pathDir = os.listdir(path)
    for name in pathDir:
        #获取名字
        labelsList.append(name)
        print(name)
        #获取名字后,再进入单个文件夹里计算文件数量
        in_path=os.path.join(path+'/',name)
        print(in_path)
        num=len([lists for lists in os.listdir(in_path) if os.path.isfile(os.path.join(in_path, lists))])
        numberList.append(num)

    num_classes =len(labelsList)
    return labelsList,numberList


#读写函数
def writer_file(saved_path,will_save_path):
    labelsList = []  # 名称列表
    numberList = []  # 各文件数量列表
    channels = 3
    labelsList,numberList = get_filename(saved_path)

    for index,class_label in enumerate(labelsList):
        class_path = saved_path+'/' + class_label + '/'
        writer = tf.python_io.TFRecordWriter(will_save_path + '/' + class_label)

        for img_name in os.listdir(class_path):
            img_path = class_path + img_name  # 原始的每一个图片的地址
            img = Image.open(img_path, 'r')

            # img = img.convert("RGB")  # 将图片转成3通道的RGB图片
            # img = img.resize((28, 28))
            weight,height=img.size
            img_shap =img.resize((weight,height),channels)
            img_array = np.asarray(img_shap)
            shape=img_array.shape
            img_raw = img.tobytes()  # 将图片转化为二进制格式
            example = tf.train.Example(features = tf.train.Features(feature={
                'image': _bytes_feature(img_raw),
                'label':  _int64_feature(index),
                'shape': _int64_list_feature(shape)
            }))
            writer.write(example.SerializeToString())  # 序列化为字符串
        writer.close()

def main (argv=None):
    saved_path =('/path/to/flower_photos' )
    will_save_path = ('/path/to/flower_data')
    writer_file(saved_path,will_save_path)

if __name__ == '__main__':
    tf.app.run()
用卷积神经网络训练
用卷积神经网络(卷积层×2+池化层×2+全连接神经网络)训练。
向前传播的代码为:
import tensorflow as tf

INPUT_NODE = 784
OUTPUT_NODE = 10

IMAGE_SIZE = 28
NUM_CHANNELS =3
NUM_LABELS = 5
#第一层卷积层的深度和尺寸
CONV1_DEEP = 32
CONV1_SIZE = 5
#第二层卷积层的深度和尺寸
CONV2_DEEP = 64
CONV2_SIZE = 5
#全连接层的节点个数
FC_SIZE = 512


#加入train区分训练和测试过程
def inference(input_tensor,train, regularizer):
    #-----------------------------第一层卷积层-----------------------------
    with tf.variable_scope('layer1-conv1'):
        conv1_weights = tf.get_variable("weight",[CONV1_SIZE,CONV1_SIZE,NUM_CHANNELS,CONV1_DEEP],initializer=tf.truncated_normal_initializer(stddev=0.1))
        conv1_biases = tf.get_variable("bias",[CONV1_DEEP],initializer=tf.constant_initializer(0.0))
        conv1 = tf.nn.conv2d(input_tensor,conv1_weights,strides=[1,1,1,1],padding='SAME')
        relu1 = tf.nn.relu(tf.nn.bias_add(conv1,conv1_biases))
    #-----------------------------第二层池化层-----------------------------
    with tf.name_scope('layer2-pool1'):
        pool1 = tf.nn.max_pool(relu1,ksize=[1,2,2,1],strides=[1,2,2,1],padding='SAME')
    #-----------------------------第三层卷积层-----------------------------
    with tf.variable_scope('layer3-conv2'):
        conv2_weights = tf.get_variable("weight",[CONV2_SIZE,CONV2_SIZE,CONV1_DEEP,CONV2_DEEP],initializer=tf.truncated_normal_initializer(stddev=0.1))
        conv2_biases = tf.get_variable("bias",[CONV2_DEEP],initializer=tf.constant_initializer(0.0))
        conv2 = tf.nn.conv2d(pool1,conv2_weights,strides=[1,1,1,1],padding='SAME')
        relu2 = tf.nn.relu(tf.nn.bias_add(conv2,conv2_biases))
    #-----------------------------第四层池化层-----------------------------
    with tf.name_scope('layer4-pool2'):
        pool2 = tf.nn.max_pool(relu2,ksize=[1,2,2,1],strides=[1,2,2,1],padding='SAME')

    #-----------------------------将第四层的矩阵变成一个向量-----------------------------
    #获取数量信息
    pool_shape = pool2.get_shape().as_list()
    nodes = pool_shape[1]*pool_shape[2]*pool_shape[3] #pool_shape[0]指的是一个BATCH中样本的个数
    #变形
    reshaped = tf.reshape(pool2,[pool_shape[0],nodes])
    # reshaped = tf.reshape(pool2,[batch_size,nodes])

    #-----------------------------第五层全连接层(加入dropout)-----------------------------
    with tf.variable_scope('layer5-fc1'):
        fc1_weights = tf.get_variable('weight',[nodes,FC_SIZE],initializer=tf.truncated_normal_initializer(stddev=0.1))
        #只有全连接层需要加入正则化
        if regularizer != None:
            tf.add_to_collection('losses',regularizer(fc1_weights))
        fc1_biases =tf.get_variable('bias',[FC_SIZE],initializer=tf.constant_initializer(0.1))
        fc1 = tf.nn.relu(tf.matmul(reshaped,fc1_weights)+fc1_biases)
        if train:
            fc1 = tf.nn.dropout(fc1,0.5) #判断是否在训练而加入dropout

    #-----------------------------第六层全连接层-----------------------------
    with tf.variable_scope('layer6-fc2'):
        fc2_weights = tf.get_variable('weight',[FC_SIZE,NUM_LABELS],initializer=tf.truncated_normal_initializer(stddev=0.1))
        if regularizer!=None:
            tf.add_to_collection('losses',regularizer(fc2_weights))
        fc2_biases =tf.get_variable('bias',[NUM_LABELS],initializer=tf.constant_initializer(0.1))
        logit = tf.matmul(fc1,fc2_weights)+fc2_biases

    return logit
对数据进行训练(step=30000),这里用的训练数据来计算准确率,可能会出现过度拟合。
import tensorflow as tf
import datetime
import convolution_flower.CF_inference as cin

#定义神经网络输入层图片
image_size = cin.IMAGE_SIZE
#输入队列中至少还有数据的个数
min_after_dequeue=4000
#一个batch有多少样本
batch_size = 50
#一个线程队列中的位置有多少(多于这些则会暂时停止入队)
capacity=5000
#训练次数
TRAINING_STEPS = 30000

LEANING_RATE_BASE = 0.01             #基础学习率
LEARNING_RATE_DECAY = 0.99          #学习率的衰减率
REGULARIZATION_RATE = 0.0001         #正则化参数


filename_queue = tf.train.string_input_producer([r'F:\path\to\all_flower_TF\all_flower'],shuffle=True)
reader = tf.TFRecordReader()
_,serialized_example = reader.read(filename_queue)

#解析
feature = tf.parse_single_example(
    serialized_example,features={
        'image': tf.FixedLenFeature([], tf.string),
        'label': tf.FixedLenFeature([], tf.int64),
        'number': tf.FixedLenFeature([], tf.int64)
    })

# 从已经分好尺寸的图像中进行数据提取。
decoded_image = tf.decode_raw(feature['image'], tf.uint8)
retyped_image = tf.cast(decoded_image, tf.float32)
number_file = tf.cast(feature['number'], tf.int32)
image = tf.reshape(retyped_image,[image_size, image_size, cin.NUM_CHANNELS])    #为什么这里显示的image只是三维[28*28*3]而不是四维?
label = tf.cast(feature['label'], tf.int64)

#resize:给定一个数组,和特定维度,将会返回一个给定维度形式的新数组。如果新数组比原数组大,则将会copy原数组中的值对新数组进行填充
#reshape:在不改变原数组数据的情况下,将它reshape成一个新的维度。如果给定的数组数据和需要reshape的形状不符合时,将会报错。


#----------------------------------------组建batch------------------------------------------------
#-----------------------------------------------------------------------------------------------
#预处理省略

image_batch,label_batch = tf.train.shuffle_batch(
    [image,label], batch_size=batch_size, capacity=capacity, min_after_dequeue=min_after_dequeue)
# label_batch =tf.argmax(label_batch,1)#用这个将(5,1),改成(5,),即二维变一维张量。


#----------------------------------------训练------------------------------------------------
#-----------------------------------------------------------------------------------------------

#定义神经网络结构以及优化过程image_batch可以作为输入提供给神经网络的输入层。
#label_batch则提供了输入batch中样例的正确答案

regularizer = tf.contrib.layers.l2_regularizer(REGULARIZATION_RATE)
logit = cin.inference(image_batch,True,regularizer)
global_step = tf.Variable(0, trainable=False)

# 定义损失函数、学习率及训练操作。

cross_entropy = tf.nn.sparse_softmax_cross_entropy_with_logits(logits=logit, labels=label_batch)
cross_entropy_mean = tf.reduce_mean(cross_entropy)
aa=tf.add_n(tf.get_collection('losses'))
loss = cross_entropy_mean + tf.add_n(tf.get_collection('losses'))
learning_rate = tf.train.exponential_decay(LEANING_RATE_BASE, global_step, number_file / batch_size,
                                           LEARNING_RATE_DECAY)
train_step = tf.train.AdamOptimizer(learning_rate).minimize(loss, global_step=global_step)

# ----------------------检验准确率----------------------------
correct_prediction = tf.equal(tf.argmax(logit,1,output_type=tf.int64), label_batch)
accuracy = tf.reduce_mean(tf.cast(correct_prediction, tf.float32))  # tf.cast函数是用于类型转换为float32


#----------------------------------------会话session------------------------------------------------
#-----------------------------------------------------------------------------------------------
with tf.Session() as sess:
    #神经网络训练准备工作。这些工作包括变量初始化,迭代器初始化。
    sess.run([tf.global_variables_initializer(), tf.local_variables_initializer()])

    coord = tf.train.Coordinator()
    threads = tf.train.start_queue_runners(sess=sess, coord=coord)

    # 循环的训练神经网络。
    for i in range(TRAINING_STEPS):
        sess.run([train_step,accuracy])
        if i % 1000 == 0:
            if i==0:
                print("After %d training step(s), loss is %g " % (i, loss.eval()))
                print(datetime.datetime.now())
            else:
                print("After %d training step(s), loss is %g ,accuracy is %g" % (i, loss.eval(), accuracy.eval()))
                print(datetime.datetime.now())
    print("After %d training step(s), loss is %g ,accuracy is %g" % (i, loss.eval(), accuracy.eval()))
    print(datetime.datetime.now())

    coord.request_stop()
    coord.join(threads)
训练结果如下:
After 0 training step(s), loss is 20748.5
2019-10-23 11:02:09.454207
After 1000 training step(s), loss is 2.23568 ,accuracy is 0.2
2019-10-23 11:02:54.262187
...
...
...
2019-10-23 11:20:40.628898
After 26000 training step(s), loss is 0.391048 ,accuracy is 0.92
2019-10-23 11:21:24.693092
After 27000 training step(s), loss is 0.232441 ,accuracy is 0.9
2019-10-23 11:22:08.850038
After 28000 training step(s), loss is 0.433395 ,accuracy is 0.9
2019-10-23 11:22:52.803528
After 29000 training step(s), loss is 0.280658 ,accuracy is 0.94
2019-10-23 11:23:36.783946
After 29999 training step(s), loss is 0.251007 ,accuracy is 1
2019-10-23 11:24:21.027660
最后结果果然是和训练集完全对上了。。。。
等我之后再发划分出测试集来进行测试。。。。。
错误小插曲
插曲一:
我开始使用的是随机梯度下降优化器
tf.train.GradientDescentOptimizer(learning_rate).minimize(loss, global_step=global_step)
这样下来我的cross_entropy和loss显示 nan ,感觉上是出现了错误,或者是参数没设置好。(也可能在暗示我太难了。。。)
然后我换成这个优化器:
tf.train.AdamOptimizer(learning_rate).minimize(loss, global_step=global_step)
结果看起来就不错了。。
插曲二:
Tensorflow报错:Process finished with exit code -1073741819 (0xC0000005)
详情见我另一篇博客Tensorflow报错:Process finished with exit code -1073741819 (0xC0000005)
结束语
这个转数据集以及数据读取的过程卡了我很长时间,对接口还有函数的理解太浅,有些数据类型都没搞明白。
对于解析TFrecord文件还存在一些理解的偏差。比如解析完的image进行reshape成我想要的尺寸,但是怎么出来只是三维的,第四维(就是image数量)的那一维跑哪去了?这样下来的image不就是一张图像的数据吗?然后到组batch那里又能突然变出这么多个出来。
后续还会发测试集测试的准确率(而非直接用训练集来测试)。
这个代码我还会继续完善,有哪些地方有错误请各位指正!!!!!!!