首先在https://libevent.org/下载最新的Stable releases libevent-2.1.11-stable.tar.gz
编译前的准备
解压缩之后修改以下5个文件
在 event_iocp.c evthread_win32.c listener.c 中加入一个宏定义 #define _WIN32_WINNT 0x0500
修改 minheap-internal.h 其中有一个UINT32_MAX的宏定义不受支持 改成UINT_MAX
修改 Makefile.nmake 找到 CFLAGS=$(CFLAGS) /Ox /W3 /wd4996 /nologo /Zi 务必加上最后一个选项方便调试
开始编译
打开 x86 Native Tools Command Prompt for VS 2019 切换到 libevent-2.1.11-stable 目录下执行 nmake /f Makefile.nmake
会生成3个lib文件
libevent_core.lib:All core event and buffer functionality. This library contains all the event_base, evbuffer, bufferevent, and utility functions.
libevent_extras.lib:This library defines protocol-specific functionality that you may or may not want for your application, including HTTP, DNS, and RPC.
libevent.lib:This library exists for historical reasons; it contains the contents of both libevent_core and libevent_extra. You shouldn’t use it; it may go away in a future version of Libevent.
不建议使用 libevent.lib
编译完成后使用
在目录下新生成了一个 WIN32-Code 把WIN32-Code\nmake目录下的所有内容复制到 include中 即可开始使用
在测试工程中添加 include 包含目录,链接依赖项中添加ws2_32.lib;wsock32.lib;libevent_core.lib
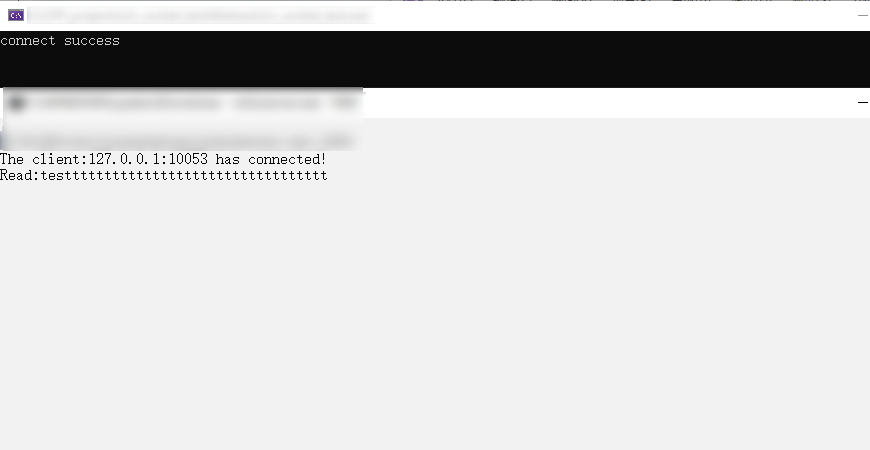
测试结果