版权声明:本文为博主原创文章,遵循 CC 4.0 BY-SA 版权协议,转载请附上原文出处链接和本声明。
一、Ansible权威指南
1、官网
2、Ansible中文权威指南
http://ansible-tran.readthedocs.io/en/latest/
3、Ansible自动化运维教程
https://www.w3cschool.cn/automate_with_ansible/
Ansible最直接的作用是批量系统配置、批量程序部署、批量运行命令等功能
最简便的就是不用在客户机安装软件!
二、实验环境
系统版本		IP				Python环境		主机名			角色
RHEL7		172.25.5.1		Python3.6		lxn1			anslble部署机
CentOS		172.25.5.2						lxn2			客户机
RHEL7		172.25.5.3						lxn3			客户机
三、安装Ansible
# yum install https://dl.fedoraproject.org/pub/epel/epel-release-latest-7.noarch.rpm
# yum install ansible -y
如果无法安装,出现如下报错,请安装Python3.6
点我查看如何安装Python3.6

四、体验第一条ansible命令
编辑/etc/ansible/hosts 并在其中加入一个或多个远程系统
# vim /etc/ansible/hosts
 1.1.1.2
使用SSH Key来授权
# ssh-keygen
# ssh-copy-id 1.1.1.2
# ssh-agent bash
# ssh-add ~/.ssh/id_rsa
使用ansible ping 你的所有节点
# ansible all -m ping

现在对你的所有节点运行一个命令
# ansible all -a "/bin/echo hello"
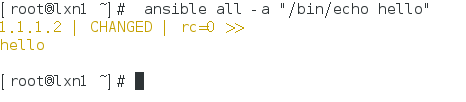
Ansible不只是能运行命令,它同样也拥有强大的配置管理和部署特性.虽然还有更多内容等待你的探索,但你基础设施已经能完全工作了!
五、Ansible入门实践
1、建立普通用户执行ansible
- 在所有主机建立一个名字相同,ID相同的普通用户,并给密码
# useradd auto
# passwd auto
2、环境部署
切换用户并建立ansible的目录
# su - auto
$ mkdir ansible/
$ cd ansible
建立 ansible.cfg 文件
$ cat ansible.cfg
[defaults]

inventory      =	hosts			#检索当前目录的hosts文件

[privilege_escalation]				#利用sudo变成超户
become=True
become_method=sudo
become_user=root
become_ask_pass=False
建立 hosts 文件
$ cat hosts
[lxn2]						#lxn2分组
172.25.5.2

[lxn3]						#lxn3分组
172.25.5.3

[lxn]						#lxn分组
172.25.5.2
172.25.5.3
与客户机免密
$ ssh-keygen
$ ssh-copy-id lxn2
$ ssh-copy-id lxn3
- 测试
$ ansible lxn -m ping
如下图,部署成功!

为了解决一些权限问题,可以在客户机给ssh连接的普通用户一些权限
示例:
$ ssh root@lxn2
# vim /etc/sudoers
auto    ALL=(ALL)       NOPASSWD: ALL
3、Ansible常用命令
- 查看模块使用文档
$ ansible-doc 模块

示例:
$ ansible-doc firewalld
- 操作其他主机命令
$ ansible lxn2 -a 'df -h' #lxn2分组执行命令 df -h
- 以下命令自行实践
$ ansible all --list-hosts              #查看主机
$ ansible all -m ping					#测试
$ ansible lxn2 -m copy -a 'src=/etc/passwd dest=/home/auto'  #复制文件
$ ansible lxn2 -m file -a 'dest=/home/auto/passwd mode=777'	 #修改文件权限
$ ansible lxn2 -m yum -a 'name=httpd state=present'			#yum装软件
$ ansible lxn2 -m yum -a 'name=httpd state=absent' -b		#-b为以超户身份执行
$ ansible lxn2 -m service -a 'name=httpd state=started'		#服务状态
$ ansible lxn2 -m copy -a 'content="www.lxn.xyz\n" dest=/var/www/html/index.html'
										#向文件写入内容,会覆盖文件内容
$ ansible lxn2 -m firewalld -a 'service=http immediate=yes state=enabled'	#防火墙允许服务
4、Ansible的心脏----playbook
用上面ansible的命令已经可以批量操作服务器了,那playbook又是什么呢?个人认为playbook是将上面提到的ansible命令通过yaml语法写到一个或多个脚本中,然后实现一键批量部署!
- playbook有严格的语法要求,特别是对空格要求,通常会用到两个空格的间隔,为了方便编写,我将tab键设置为两个空格
$ cd
$ vim .vimrc
autocmd filetype yaml setlocal ai ts=2 sw=2 et
示例:批量部署httpd
$ pwd
/home/auto/ansible
$ mkdir -p playbooks/httpd/files/
$ cp /etc/httpd/conf/httpd.conf /home/auto/ansible/playbooks/httpd/files/
$ mv ansible.cfg playbooks/httpd/
$ mv hosts playbooks/httpd/
$ cd playbooks/httpd/
$ vim httpd.yml
  1 ---							#语法,必须有
  2 #部署httpd					#注释
  3 - hosts: lxn				#运行部署对象
  4   remote_user: auto			#运行者
  5   tasks:					#任务
  6     - name: install httpd		#名字(功能介绍)
  7       yum:					#yum模块
  8         name: httpd
  9         state: present
 10
 11     - name: deploy httpd
 12       copy:									#copy模块
 13         src: files/httpd.conf				#源文件
 14         dest: /etc/httpd/conf/httpd.conf	#复制到的目的地
 15         follow: no
 16         owner: root
 17         group: root
 18         mode: 644
 19
 20     - name: create index.html
 21       copy:
 22         content: "{{ ansible_facts.hostname }}\n"
 23         dest: /var/www/html/index.html
 24
 25     - name: start httpd
 26       service:							#service模块
 27         name: httpd
 28         state: restarted
 29         enabled: yes
 30
 31     - name: deploy firewalld
 32       firewalld:						#防火墙模块
 33         service: http
 34         permanent: yes
 35         immediate: yes
 36         state: enabled


$ ansible-playbook httpd.yml --syntax-check		#检测语法错误

playbook: httpd.yml
$ ansible-playbook httpd.yml --list-host		#列出主机

playbook: httpd.yml

  play #1 (lxn): lxn	TAGS: []
    pattern: [u'lxn']
    hosts (2):
      172.25.5.2
      172.25.5.3
$ ansible-playbook httpd.yml --list-task			#列出任务

playbook: httpd.yml

  play #1 (lxn): lxn	TAGS: []
    tasks:
      install httpd	TAGS: []
      deploy httpd	TAGS: []
      create index.html	TAGS: []
      start httpd	TAGS: []
      deploy firewalld	TAGS: []
测试:
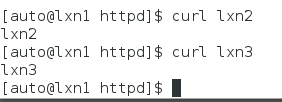
$ ansible-playbook httpd.yml

[auto@lxn1 httpd]$ curl lxn2
lxn2
[auto@lxn1 httpd]$ curl lxn3
lxn3