版权声明:本文为博主原创文章,遵循 CC 4.0 BY-SA 版权协议,转载请附上原文出处链接和本声明。
一、下载MySQL二进制文件包
可能有人会问:为什么选择二进制包?
主要是因为二进制包已经把所有功能都配置好了!
生产环境或者测试环境一般会选择GA版(常见可用的版本,经过bug恢复测试过)
用命令下载:
# wget https://dev.mysql.com/get/Downloads/MySQL-5.7/mysql-5.7.26-linux-glibc2.12-x86_64.tar.gz
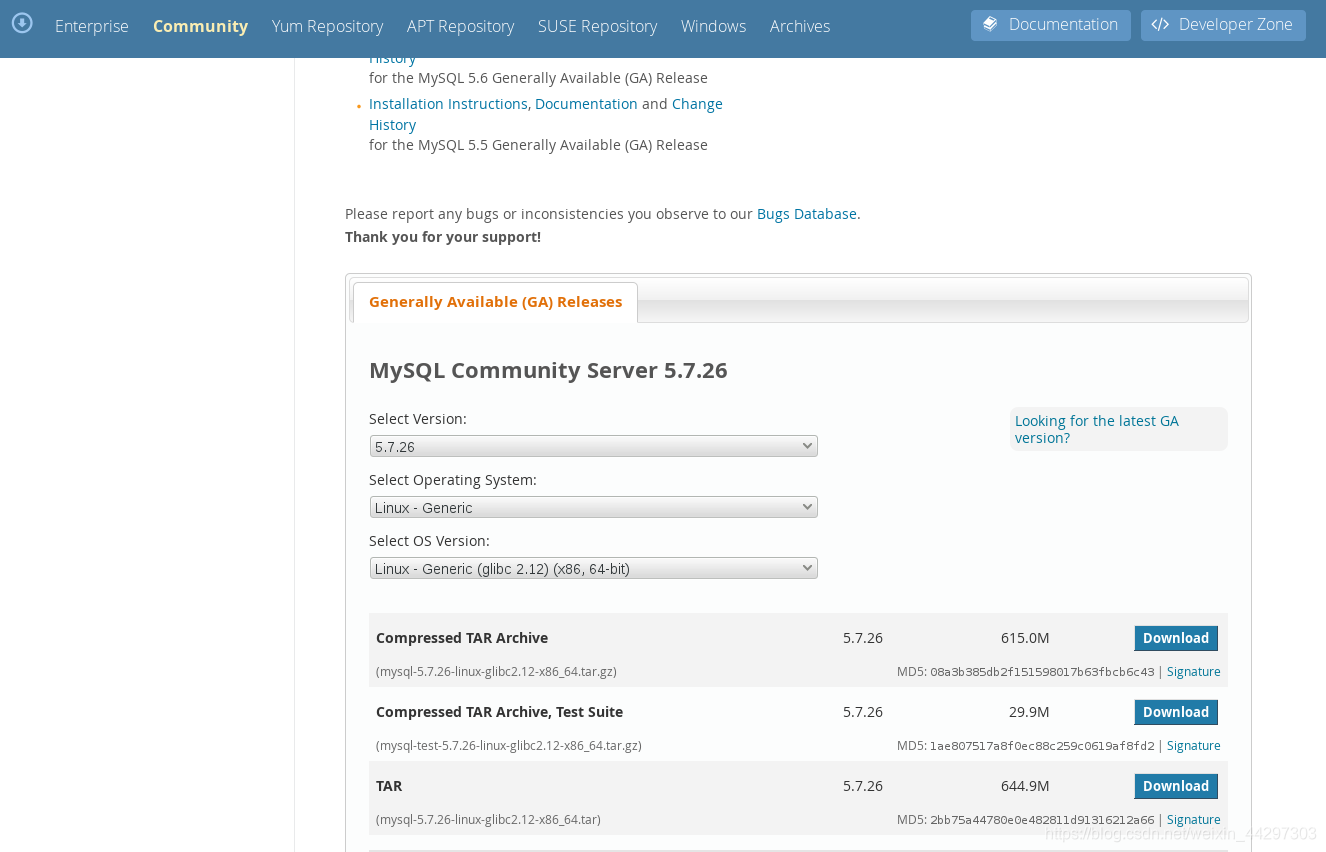
或者自己去官网下载
网址 https://dev.mysql.com/downloads/
如下图:
下载完成后进行MD5校验,确保软件包在下载过程中没有任何问题,可以正常使用:
# md5sum mysql-5.7.26-linux-glibc2.12-x86_64.tar.gz

二、安装前进行系统环境检测
为了可以顺利的将MySQL数据库装好,做好后期数据库的优化工作,在前期进行Linux的系统检测十分有必要!
1、关闭 SELinux和系统防火墙
将SELinux设置成disabled,设置完成后重启系统
# vim /etc/selinux/config
  7 SELINUX=disabled
关闭 firewalld 防火墙
# systemctl stop firewalld
# systemctl disable firewalld
# systemctl mask firewalld.service
安装iptables
# yum install iptables-services.x86_64 -y
# systemctl status iptables

2、swap分区设置
swappiness值的大小对使用swap分区有很大影响
- 0代表最大限度的使用物理内存,然后才使用swap分区,这可能会导致系统内存溢出,出现OOM的错误,从而导致mysql被意外的kill掉
- 100是积极的使用swap分区,并把内存上面的数据及时搬到swap分区里。
- 建议不分配swap或者分配4GB的空间
查看swappiness文件
# cat /proc/sys/vm/swappiness
30

# sysctl -a | grep swap
vm.swappiness = 30
3、文件系统的选择
建议使用xfs,相比ext4,更方便管理,支持动态扩容。
4、操作系统的限制
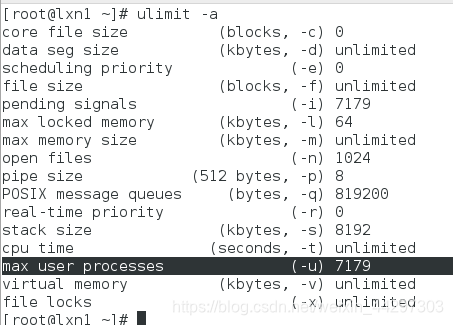
查看当前操作系统的限制情况
# ulimit -a
注意
open files (-n) 1024
max user processes (-u) 7179
修改系统的软硬限制,避免限制原因,报错!
# vim /etc/security/limits.conf
*       soft    nproc   65535
*       hard    nproc   65535
*       soft    nofile   65535
*       hard    nofile   65535
- 修改后,需要重启操作系统才生效

5、关闭numa
关闭numa功能,可以更好的分配内存,不需要采用swap的方式来获取内存(swap会导致数据库性能下降)
三、MySQL5.7 安装
1、建立mysql用户
# groupadd mysql
# useradd -g mysql mysql -s /sbin/nologin
2、解压、软链接
/usr/local/作为base目录
# cd /usr/local/
解压
# tar zxf mysql-5.7.26-linux-glibc2.12-x86_64.tar.gz
做个软链接,方便日后升级
给mysql目录权限
# ln -s mysql-5.7.26-linux-glibc2.12-x86_64 mysql
# chown mysql:mysql -R mysql
3、建立数据目录
- 一般建立指定目录需要给其授权
# mkdir -p  /data/mysql/
# chown -R mysql:mysql /data/mysql/
4、编辑配置文件
- 由于是二进制文件,这里数据库配置文件需要自己配置好
# vim /etc/my.cnf
#my.cnf
[client]
port            = 3306
socket          = /tmp/mysql.sock

[mysql]
prompt="\\u@\\h [\\d]>"
#pager="less -i -n -S"
#tee=/opt/mysql/query.log
no-auto-rehash

[mysqld_multi]
mysqld = /usr/local/mysql/bin/mysqld_safe
mysqladmin = /usr/local/mysql/bin/mysqladmin
log = /data/mysql/mysqld_multi.log

[mysqld]
#misc
user = mysql
basedir = /usr/local/mysql
datadir = /data/mysql/
port = 3306
socket = /tmp/mysql.sock
event_scheduler = 0

tmpdir = /data/mysql/
#timeout
interactive_timeout = 300
wait_timeout = 300

#character set
character-set-server = utf8

open_files_limit = 65535
max_connections = 100
max_connect_errors = 100000
#lower_case_table_names =1
#logs
log-output=file
slow_query_log = 1
slow_query_log_file = /data/mysql/slow.log
log-error = /data/mysql/error.log
log_warnings = 2
pid-file = mysql.pid
long_query_time = 1
#log-slow-admin-statements = 1
#log-queries-not-using-indexes = 1
log-slow-slave-statements = 1

#binlog
#binlog_format = STATEMENT
binlog_format = row
server-id = 1003306
log-bin = /data/mysql/mysql-bin
binlog_cache_size = 4M
max_binlog_size = 256M
max_binlog_cache_size = 1M
sync_binlog = 0
expire_logs_days = 10
#procedure
log_bin_trust_function_creators=1

#
gtid-mode = 0

#relay log
skip_slave_start = 1
max_relay_log_size = 128M
relay_log_purge = 1
relay_log_recovery = 1
relay-log=relay-bin
relay-log-index=relay-bin.index
log_slave_updates
#slave-skip-errors=1032,1053,1062
#skip-grant-tables

#buffers & cache
table_open_cache = 2048
table_definition_cache = 2048
table_open_cache = 2048
max_heap_table_size = 96M
sort_buffer_size = 128K
join_buffer_size = 128K
thread_cache_size = 200
query_cache_size = 0
query_cache_type = 0
query_cache_limit = 256K
query_cache_min_res_unit = 512
thread_stack = 192K
tmp_table_size = 96M
key_buffer_size = 8M
read_buffer_size = 2M
read_rnd_buffer_size = 16M
bulk_insert_buffer_size = 32M

#myisam
myisam_sort_buffer_size = 128M
myisam_max_sort_file_size = 10G
myisam_repair_threads = 1

#innodb
innodb_buffer_pool_size = 1024M
innodb_buffer_pool_instances = 1
innodb_data_file_path = ibdata1:100M:autoextend
innodb_flush_log_at_trx_commit = 2
innodb_log_buffer_size = 8M
innodb_log_file_size = 100M
innodb_log_files_in_group = 3
innodb_max_dirty_pages_pct = 50
innodb_file_per_table = 1
innodb_rollback_on_timeout
innodb_status_file = 1
innodb_io_capacity = 2000
transaction_isolation = REPEATABLE-READ
innodb_flush_method = O_DIRECT
5、启动数据库
# cd /usr/local/mysql/bin
#初始化
# ./mysqld --defaults-file=/etc/my.cnf --basedir=/usr/local/mysql --datadir=/data/mysql --user=mysql --initialize
#启动
#./mysqld_safe --defaults-file=/etc/my.cnf &
- –initialize表示生成一个临时的数据库初始化密码,记录在log-error里面
–initialize-insecure表示无密码进入
6、登陆数据库
查看初始密码
# cat /data/mysql/error.log | grep password

登陆
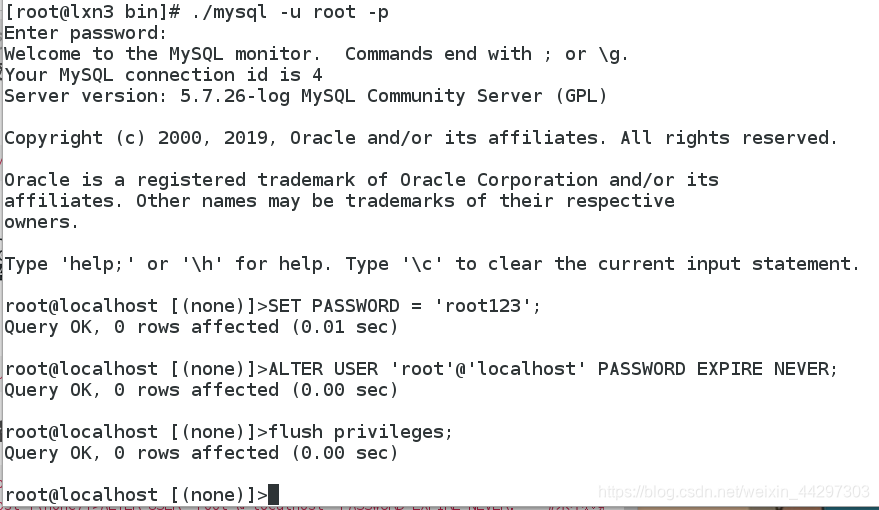
# ./mysql -u root -p
7、重置密码
root@localhost [(none)]>SET PASSWORD = 'root123';	#更改密码
root@localhost [(none)]>ALTER USER 'root'@'localhost' PASSWORD EXPIRE NEVER;	#永不过期
root@localhost [(none)]>flush privileges;			#刷新权限
8、关闭MySQL数据库
正常关闭
# cd /usr/local/mysql/bin/
# ./mysqladmin -uroot -proot123 shutdown

非正常关闭需要kill 掉MySQL进程
为了方便起见,将Mysql加入环境变量
# vim /etc/profile
PATH="$PATH":/usr/local/mysql/bin		#加入
# source /etc/profile