centos7 nginx安装启动与配置通用Nginx.conf

转载原文地址:https://www.cnblogs.com/hailang8/p/8664413.html

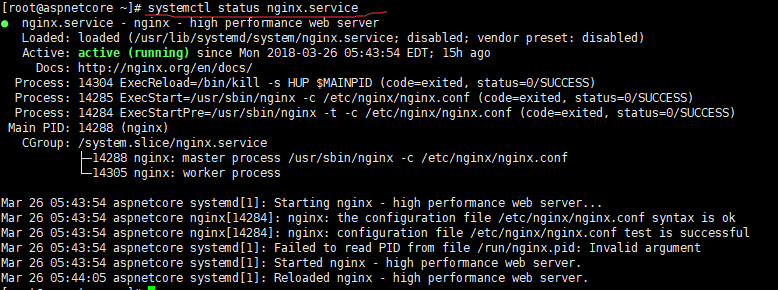
1、安装:yum -y install nginx

2、安装成功后nginx的几个默认目录
    输入命令: whereis nginx
    
     执行目录:/usr/sbin/nginx
     模块所在目录:/usr/lib64/nginx/modules
     配置所在目录:/etc/nginx/
     默认站点目录:/usr/share/nginx/html
 
     主要配置文件:/etc/nginx/nginx.conf 指向:/etc/nginx/conf.d/default.conf
 
 
     PID目录:/var/run/nginx.pid
     错误日志:/var/log/nginx/error.log
     访问日志:/var/log/nginx/access.log
 
3、查看nginx状态(未启动前)
    命令1:systemctl status nginx.service     
    
 
4、启动、停止、重载命令
    systemctl start nginx.service
    systemctl stop nginx.service
    systemctl reload nginx.service
    systemctl status nginx.service
 
注意:当配置完Nginx.conf并重新启动Nginx时,需要一定的时间才会生效。
 
5、查看nginx的状态及进程与端口(启动后)
    命令1:systemctl status nginx.service
    
    
    以上nginx就已安装成功了!!!
    
 
    命令2:netstat -antp | grep :80(查看80端口被哪个服务占用)or netstat -antpuel  | grep ":22" | grep  -v grep(过虑grep本身)
    
 
    命令3:netstat -antp | grep :(查看所有端口占用情况)
    
   
 命令4:ps aux | grep nginx(查看nginx进程运行状态)or ps aux | grep :80 | grep -v grep(过虑grep本身)
    
 
    查看端口被占用情况
    命令5:lsof -i:端口号
    命令6:netstat -tunlp|grep 端口号
 
6、杀掉进程命令
    a)相关nginx进行全部杀掉:killall -9 nginx  
    b)把PID两个进程杀掉:kill -9 pid1 and kill -9 pid1 
 
7、查看版本
   命令:nginx -V

最后推荐一个牛皮的Nginx配置网站,看懂并使用起来需要有一定的基础。

nginxconfig.io

最后贴一下我的Nginx.conf通用配置模板

扫描二维码关注公众号,回复: 7038087 查看本文章

# Generated by nginxconfig.io
# https://nginxconfig.io/?0.domain=_&0.path=%2Froot%2Fnginx&0.document_root=%2Fhtml&0.redirect=false&0.https=false&0.php=false&0.index=index.html&0.fallback_html&0.access_log_domain&0.error_log_domain&user=root&file_structure=unified

user root;#centos用户,看需修改
pid /run/nginx.pid;
worker_processes auto;
worker_rlimit_nofile 65535;

events {
multi_accept on;
worker_connections 65535;
}

http {
charset utf-8;
sendfile on;
tcp_nopush on;
tcp_nodelay on;
server_tokens off;
log_not_found off;
types_hash_max_size 2048;
client_max_body_size 16M;

# MIME
include mime.types;
default_type application/octet-stream;

# logging
access_log /var/log/nginx/access.log;
error_log /var/log/nginx/error.log warn;

# load configs
include /etc/nginx/conf.d/*.conf;

# _
server {
listen 80;
listen [::]:80;

server_name _;
root /root/nginx/html;#html页面根目录,看需修改

# security headers
add_header X-Frame-Options "SAMEORIGIN" always;
add_header X-XSS-Protection "1; mode=block" always;
add_header X-Content-Type-Options "nosniff" always;
add_header Referrer-Policy "no-referrer-when-downgrade" always;
add_header Content-Security-Policy "default-src 'self' http: https: data: blob: 'unsafe-inline'" always;

# . files
location ~ /\.(?!well-known) {
deny all;
}

# logging
access_log /var/log/nginx/_.access.log;
error_log /var/log/nginx/_.error.log warn;

# index.html fallback
location / {
try_files $uri $uri/ /index.html;
}

# favicon.ico
location = /favicon.ico {
log_not_found off;
access_log off;
}

# robots.txt
location = /robots.txt {
log_not_found off;
access_log off;
}

# assets, media
location ~* \.(?:css(\.map)?|js(\.map)?|jpe?g|png|gif|ico|cur|heic|webp|tiff?|mp3|m4a|aac|ogg|midi?|wav|mp4|mov|webm|mpe?g|avi|ogv|flv|wmv)$ {
expires 7d;
access_log off;
}

# svg, fonts
location ~* \.(?:svgz?|ttf|ttc|otf|eot|woff2?)$ {
add_header Access-Control-Allow-Origin "*";
expires 7d;
access_log off;
}

# gzip
gzip on;
gzip_vary on;
gzip_proxied any;
gzip_comp_level 6;
gzip_types text/plain text/css text/xml application/json application/javascript application/rss+xml application/atom+xml image/svg+xml;
}
}

2、安装成功后nginx的几个默认目录
    输入命令: whereis nginx
    
     执行目录:/usr/sbin/nginx
     模块所在目录:/usr/lib64/nginx/modules
     配置所在目录:/etc/nginx/
     默认站点目录:/usr/share/nginx/html
 
     主要配置文件:/etc/nginx/nginx.conf 指向:/etc/nginx/conf.d/default.conf
 
 
     PID目录:/var/run/nginx.pid
     错误日志:/var/log/nginx/error.log
     访问日志:/var/log/nginx/access.log
 
3、查看nginx状态(未启动前)
    命令1:systemctl status nginx.service     
    
 
4、启动、停止、重载命令
    systemctl start nginx.service
    systemctl stop nginx.service
    systemctl reload nginx.service
    systemctl status nginx.service
 
注意:当配置完Nginx.conf并重新启动Nginx时,需要一定的时间才会生效。
 
5、查看nginx的状态及进程与端口(启动后)
    命令1:systemctl status nginx.service
    
    
    以上nginx就已安装成功了!!!
    
 
    命令2:netstat -antp | grep :80(查看80端口被哪个服务占用)or netstat -antpuel  | grep ":22" | grep  -v grep(过虑grep本身)
    
 
    命令3:netstat -antp | grep :(查看所有端口占用情况)
    
   
 命令4:ps aux | grep nginx(查看nginx进程运行状态)or ps aux | grep :80 | grep -v grep(过虑grep本身)
    
 
    查看端口被占用情况
    命令5:lsof -i:端口号
    命令6:netstat -tunlp|grep 端口号
 
6、杀掉进程命令
    a)相关nginx进行全部杀掉:killall -9 nginx  
    b)把PID两个进程杀掉:kill -9 pid1 and kill -9 pid1 
 
7、查看版本
   命令:nginx -V

猜你喜欢

转载自www.cnblogs.com/jeffhong99/p/11362361.html
今日推荐