原文链接:https://blog.csdn.net/qq_38658567/article/details/82847758
状态管理
一、状态管理(vuex)简介
vuex是专为vue.js应用程序开发的状态管理模式。它采用集中存储管理应用的所有组件的状态,并以相应的规则保证状态以一种可预测的方式发生变化。vuex也集成到vue的官方调试工具devtools extension,提供了诸如零配置的time-travel调试、状态快照导入导出等高级调试功能。
Vuex 的思想
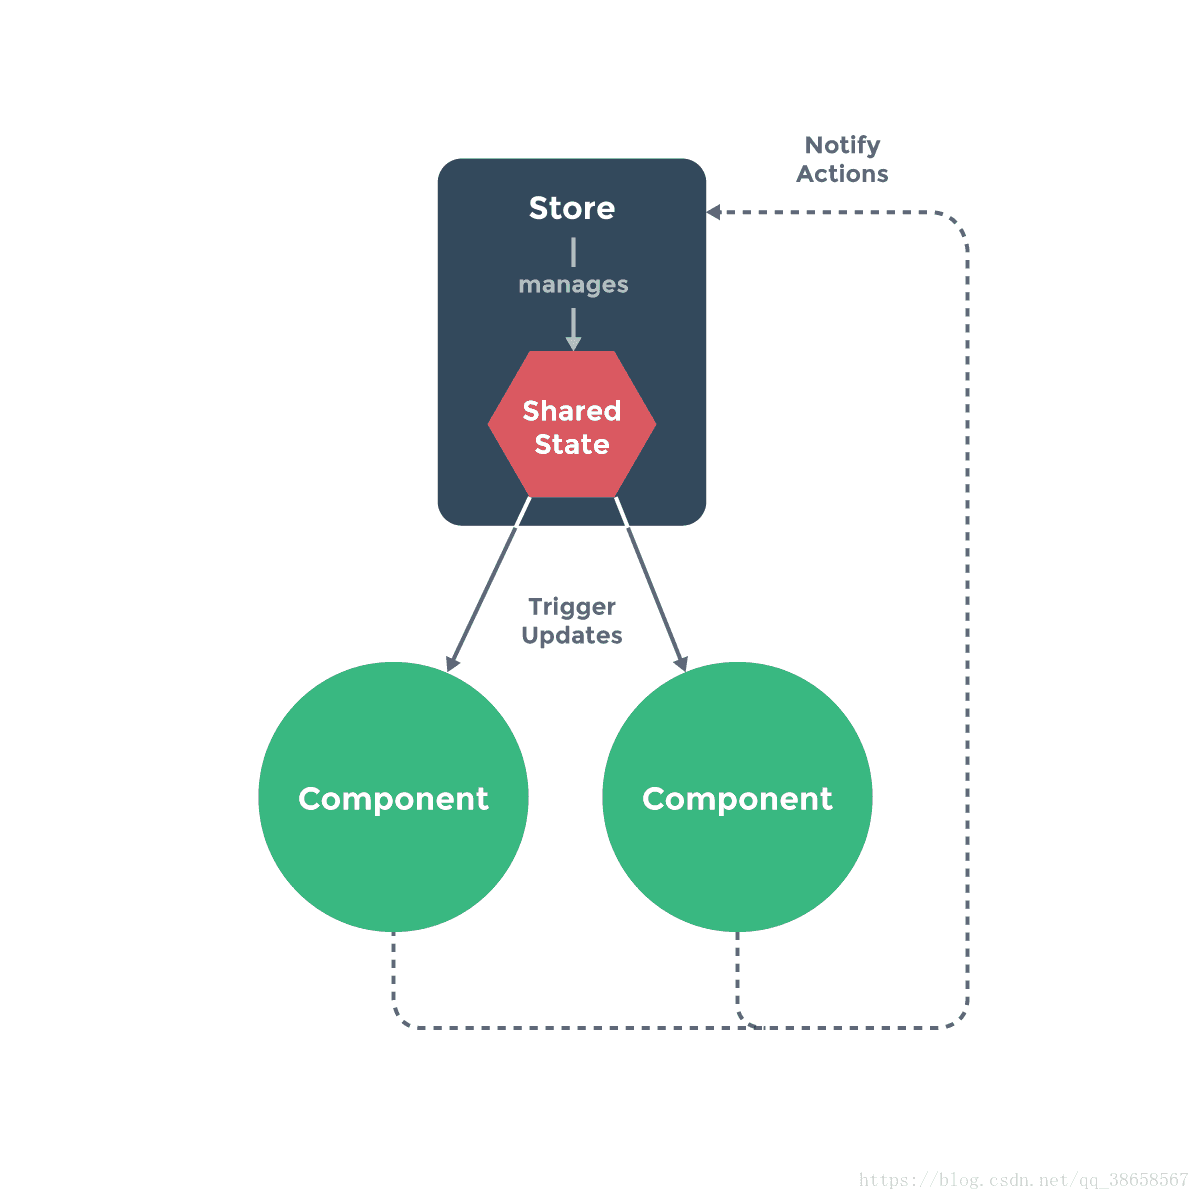
当我们在页面上点击一个按钮,它会处发(dispatch)一个action, action 随后会执行(commit)一个mutation, mutation 立即会改变state, state 改变以后,我们的页面会state 获取数据,页面发生了变化。 Store 对象,包含了我们谈到的所有内容,action, state, mutation,所以是核心了
官方demo
 1 const store = new Vuex.Store({
 2   state: {
 3     count: 0
 4   },
 5   mutations: {
 6     increment (state) {
 7       state.count++
 8     }
 9   }
10 })
二、状态管理核心状态管理有5个核心,分别是state、getter、mutation、action以及module。
分别简单的介绍一下他们:
1、state
state为单一状态树,在state中需要定义我们所需要管理的数组、对象、字符串等等,只有在这里定义了,在vue.js的组件中才能获取你定义的这个对象的状态。
2、getter
getter有点类似vue.js的计算属性,当我们需要从store的state中派生出一些状态,那么我们就需要使用getter,getter会接收state作为第一个参数,而且getter的返回值会根据它的依赖被缓存起来,只有getter中的依赖值(state中的某个需要派生状态的值)发生改变的时候才会被重新计算。
3、mutation
更改store中state状态的唯一方法就是提交mutation,就很类似事件。每个mutation都有一个字符串类型的事件类型和一个回调函数,我们需要改变state的值就要在回调函数中改变。我们要执行这个回调函数,那么我们需要执行一个相应的调用方法:store.commit。
4、action
action可以提交mutation,在action中可以执行store.commit,而且action中可以有任何的异步操作。在页面中如果我们要嗲用这个action,则需要执行store.dispatch5、module module其实只是解决了当state中很复杂臃肿的时候,module可以将store分割成模块,每个模块中拥有自己的state、mutation、action和getter。
简单的 store 模式
 1 var store = {
 2   debug: true,
 3   state: {
 4     message: 'Hello!'
 5   },
 6   setMessageAction (newValue) {
 7     if (this.debug) console.log('setMessageAction triggered with', newValue)
 8     this.state.message = newValue
 9   },
10   clearMessageAction () {
11     if (this.debug) console.log('clearMessageAction triggered')
12     this.state.message = ''
13   }
14 }
所有 store 中 state 的改变,都放置在 store 自身的 action 中去管理。这种集中式状态管理能够被更容易地理解哪种类型的 mutation 将会发生,以及它们是如何被触发。当错误出现时,我们现在也会有一个 log 记录 bug 之前发生了什么。
此外,每个实例/组件仍然可以拥有和管理自己的私有状态:
 1 var vmA = new Vue({
 2   data: {
 3     privateState: {},
 4     sharedState: store.state
 5   }
 6 })
 7
 8 var vmB = new Vue({
 9   data: {
10     privateState: {},
11     sharedState: store.state
12   }
13 })
三.在项目中使用
1.store文件夹一般有以下6个文件。

2.在文件中引入:(新建一个store文件夹,在文件夹下的index.js文件进行如下编写)
1 import Vue from 'vue'
2 import Vuex from 'vuex'
3 import createPersistedState from 'vuex-persistedstate'
4 Vue.use(Vuex)
3.定义简单模块:
 1 const module = {
 2     state: {
 3         user: {
 4             name: 'rookie'
 5         }
 6     },
 7     getters: {},
 8     mutations: {
 9         setUser(state, payload){
10             if(payload.hasOwnProperty('name')){
11                 state.user.name = payload.name
12             }
13         }
14     },
15     plugins: [createPersistedState()]
16 }
上面是一个简单的vuex,在vuex中对应的store应用,在store中包含组件的共享状态state和改变状态的方法(暂且称作方法)mutations。注意state相当于对外的只读状态,不能通过store.state.user.name来更改,使用store.commit方法通过触发mutations改变state。
在页面中获取记录的值name为rookie:
1 mounted(){
2     console.log(this.$store.state.user.name);
3 }
store.state为获取store中的值,此时在my页面中打印出来的值为rookie,而我们想要修改name的值,则需要借助store.commit方法来触发mutations:
this.$store.commit('setUser',{name: 'kuke_kuke'})
在mutations中找到setUser,第二个参数payload为传入的对象{name: ‘kuke_kuke’},调用方法hadOwnProperty来判断传入的对象是否有name属性,从而修改state中的值,此时在页面中再次打印user.name的值为’kuke _ kuke’。
最后导出模块:
const store = new Vuex.Store(module)
export default store
在main.js中获取模块并使用:
import store from './store'
new Vue({
    store
})