Vuex 是一个专为 Vue.js 应用程序开发的状态管理模式
好了我们开始吧,如果您还没有了解过这个请点击这里https://vuex.vuejs.org/zh/
安装
npm install vuex --save

yarn add vuex
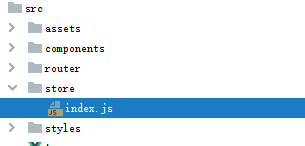
1、Src下面新建一个store文件夹
2、在store文件夹下新建一个index.js
目录如下:
3、index.js内容如下
import Vue from 'vue'
import Vuex from 'vuex'
Vue.use(Vuex)
// 创建VueX对象
const store = new Vuex.Store({
  state: {
    name: '蜡笔小仙女'
  },
  // 是store的计算属性
  getters: {
    getName (state) {
      return state.name
    }
  },
  // 异步操作
  actions: {
    setMyName ({commit, state}, name) {
      commit('setName', name)
    }
  },
  // 同步操作
  // 想要更改state的状态值,只能通过commit mutations的方法来更改。
  mutations: {
    setName (state, name) {
      state.name = name
    }
  }
})

export default store
4、修改main.js来引入store.js
import Vue from 'vue'
import App from './App'
import router from './router'
// 引入vuex-store
import store from '@/store/index'
new Vue({
  el: '#app',
  store,
  router,
  components: { App },
  template: '<App/>'
})
至此我们已经完成VUEX的引入。
下面我们开始一个例子来讲解,我们直接修改components下面的HelloWorld.vue代码如下
<template>
  <div class="hello">
    {{getName}}
    <button type="button" @click="setName">点击更改</button>
    <router-link :to="{name: 'MyStore'}">点击跳转另一个页面</router-link>
  </div>
</template>

<script>

export default {
  name: 'HelloWorld',

  data () {
    return {}
  },
  methods: {
    setName (name) {
      // this.$store.commit('setName', '小猪佩奇')
      this.$store.dispatch('setMyName', '小猪佩奇')
    }
  },
  computed: {
    getName () {
      return this.$store.getters.getName
    }
  }
}
</script>
然后在components下面新建一个myStore.vue组件,
<template>
    <div class="myStore">
      {{$store.state.name}}
    </div>
</template>

<script>

export default {

}
</script>
并且配置src下面的router.js
import Vue from 'vue'
import Router from 'vue-router'

Vue.use(Router)

export default new Router({
  routes: [
    {
      path: '/',
      name: 'HelloWorld',
      component: () => import('@/components/HelloWorld')
    },
    {
      path: '/myStore',
      name: 'MyStore',
      component: () => import('@/components/myStore')
    }
  ]
})
现在我们启动起来 看看。

OK达到了预期。
总结:
this.$store.dispatch() 与 this.$store.commit()方法的区别
commit: 同步操作
存储
this.$store.commit('changeValue',name)
取值
this.$store.state.changeValue
dispatch: 异步操作
存储
this.$store.dispatch('getLists',name)
取值
this.$store.getters.getLists
本文全部手打原创,如果有什么错误的地方 欢迎大家拍砖 给我一个评论在下方。