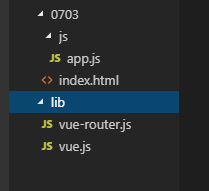
一、文件结构
二、vue.js
打开此链接 https://cdn.bootcss.com/vue/2.6.10/vue.js
复制粘贴页面的所有内容
三、vue-router.js
打开此链接 https://cdn.bootcss.com/vue-router/3.0.6/vue-router.js
复制粘贴页面的所有内容
四、index.html
 1 <!DOCTYPE html>
 2 <html lang="en">
 3 <head>
 4     <meta charset="UTF-8">
 5     <meta name="viewport" content="width=device-width, initial-scale=1.0">
 6     <meta http-equiv="X-UA-Compatible" content="ie=edge">
 7     <title>title</title>
 8 </head>
 9 <body>
10     <div id="app">
11         <h1>元数据及路由匹配</h1>
12
13        <router-link to="/">首页</router-link>
14        <router-link to="/login">登录</router-link>
15        <router-link to="/post">帖子管理</router-link>
16        <router-link to="/a">A</router-link>
17
18
19        <router-view></router-view>
20     </div>
21
22
23     <script src="../lib/vue.js"></script>
24     <script src="../lib/vue-router.js"></script>
25     <script src="js/app.js"></script>
26 </body>
27 </html>
五、app.js
  1 var routes = [
  2     {
  3         path:"/",
  4         component:{
  5             template:`
  6                 <h1>首页</h1>
  7             `
  8         }
  9     },
 10     {
 11         path:"/a",
 12         // 设置元数据属性,下面表示需要登录后才可以路由到/post
 13         meta:{
 14             login_required:true
 15         },
 16         component:{
 17             template:`
 18                 <h1>A</h1>
 19             `
 20         }
 21     },
 22     {
 23         path:"/login",
 24         component:{
 25             template:`
 26                 <h1>登录</h1>
 27             `
 28         }
 29     },
 30     {
 31         path:"/post",
 32         // 设置元数据属性,下面表示需要登录后才可以路由到/post
 33         meta:{
 34             login_required:true
 35         },
 36         component:{
 37             template:`
 38                 <div>
 39                 <h1>帖子管理</h1>
 40
 41                 <router-link  to="look" append>查看帖子</router-link>
 42                 <router-view></router-view>
 43                 </div>
 44             `
 45         },
 46         children:[
 47             {
 48                 path:"look",
 49                 component:{
 50                     template:`
 51                         <h2>这是今天写的一个帖子</h2>
 52                     `
 53                 }
 54             }
 55         ]
 56     },
 57 ];
 58
 59 var router = new VueRouter({
 60     routes
 61 });
 62
 63 router.beforeEach(function(to,from,next){
 64
 65 // VueRouter对象的beforeEach(function(to,from,next){})方法和afterEach(function(to,from){}),
 66 // 称为导航钩子,可以控制访问权限和验证
 67 // 里面的回调函数可以在路由前和路由后进行操作处理
 68
 69     logged_in = false;
 70     // 方法一:导航钩子,来进行路由前的验证
 71     // if(!logged_in && to.path == "/post"){
 72     //     next("/login");
 73     // }else{
 74     //     next();
 75     // }
 76
 77
 78     // vue提供了一个matched属性,得到的是一个数组,比如子路由/post/look,就匹配/post/look和/post
 79     // console.log("to.matched:",to.matched);
 80
 81     // js数组有一个some方法,方法里可以用回调函数,来遍历处理数组的每项
 82         // to.matched.some(function(item){
 83
 84         // })
 85
 86     // 方法一验证了/post,如果含有子路由,比如/post/look,则没法验证,所以必须保证父路由及其后面所有的子路由
 87     // 都能接受验证
 88     // 解决方法:迭代数组里的每一项,只要有一项的path是/post,就跳向登录界面
 89     // 方法二
 90         // if(!logged_in && to.matched.some(function(item){
 91         //     return item.path == "/post"
 92         // })){
 93         //     next('/login');
 94         // }else{
 95         //     next()
 96         // }
 97
 98
 99     // 第二种方法:写死了,对于一个页面(比如/post及其子路由)的验证是可以的,
100     // 但如果有多个路由(比如还有/a),就又得再写验证
101
102     // 方法三:在组件内设置元数据,更灵活
103         if(!logged_in && to.matched.some(function(item){
104             return item.meta.login_required
105         })){
106             next("/login");
107         }else{
108             next();
109         }
110 });
111
112 new Vue({
113     el:"#app",
114     router
115 })
六、浏览器效果

七、谢谢观看,如有问题,随时交流哦