安装概要步骤: 官网下载系统-》刷入TF卡-》设置开启显示器和SSH-》通电-》进入系统
1. 进入官方网站下载系统镜像。
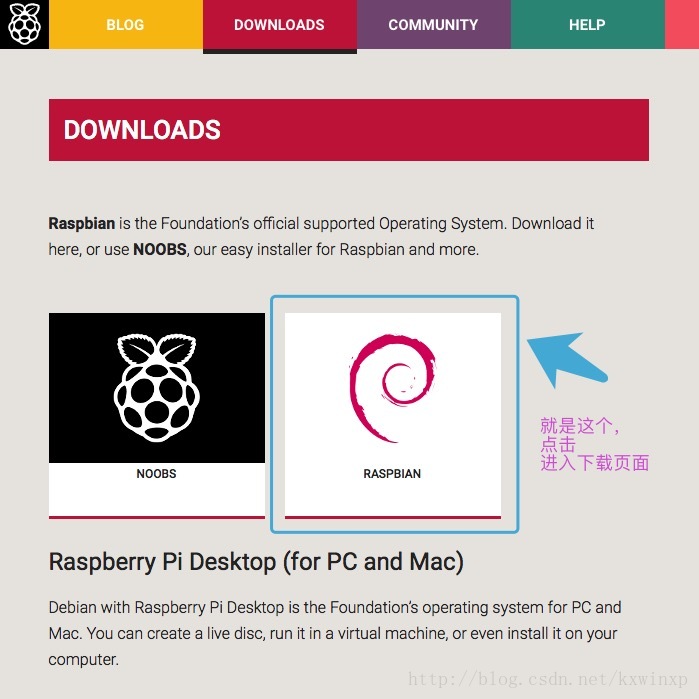
来到下面这个页面
如果感觉下载速度慢,可以将下载链接放到迅雷里面下,基本可以做到满速下载!
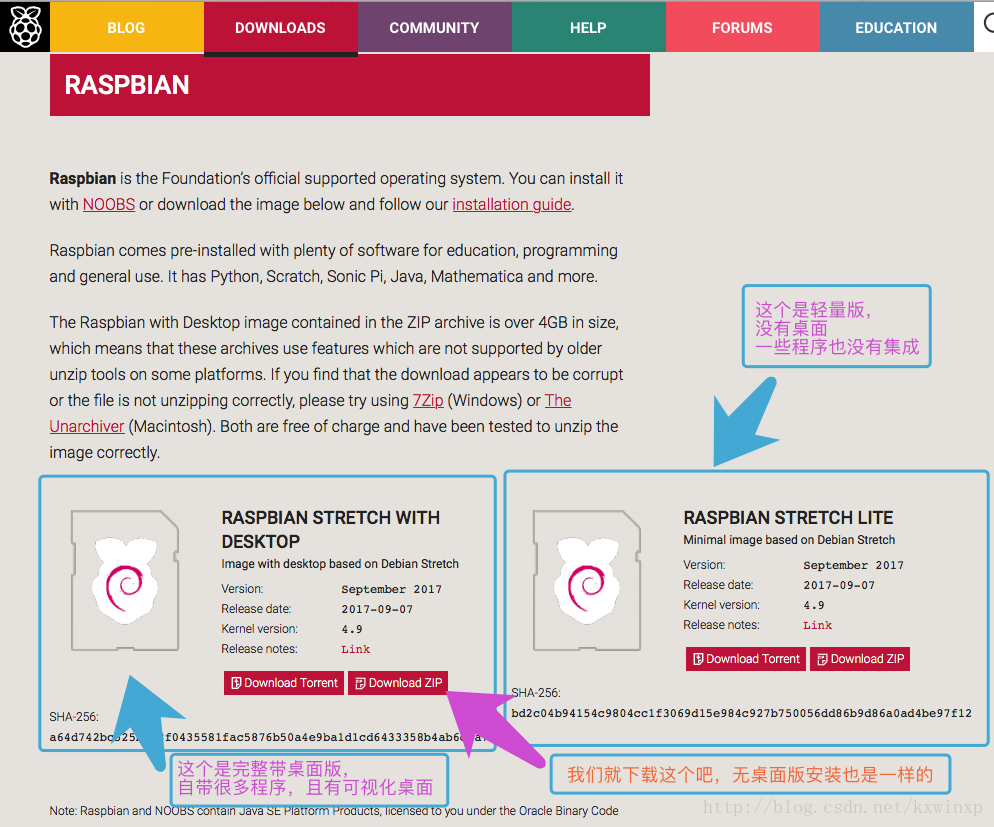
如果你对我后续的博文有兴趣,建议和我下载相同版本:
stretch版 (基于Debian 9): 2017-09-07-raspbian-stretch.zip 或 2017-09-07-raspbian-stretch-lite.zip
更老版 jessie (基于Debian 8):2017-06-21-raspbian-jessie.zip 和 2017-06-21-raspbian-jessie-lite.zip
下载完成后,是一个压缩包,大概1.76G,我们将其解压,得到2017-09-07-raspbian-stretch.img格式文件,大概4.92G。
如果你下载的是轻量版,解压后大概就是1.7G,可以装到4G到TF卡上。(在这里建议大家用32G及以上容量的TF卡,因为内存越大,传输速度也是更快的)。
2.Windows系统下的安装:(非wind系统请往下看)
2.1)首先将准备好的TF卡连接读卡器,插入电脑
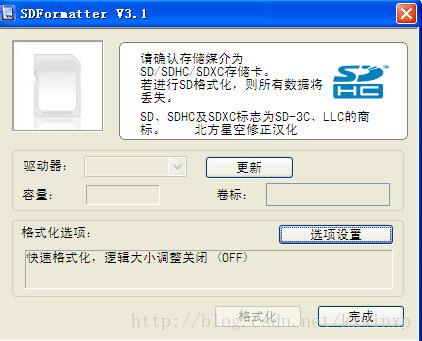
2.2)下载一个格式化SD卡的工具,格式化SD卡
下载网址:https://www.sdcard.org/downloads/formatter_4/eula_windows/ (点击Aceept开始下载)
2.3)下载Win32 DiskImager,这是一个把镜像写入SD卡的工具
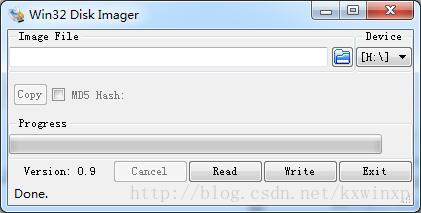
这一步首先选择你的raspberry.img系统镜像包,然后选择你的TF卡,点击Write就会开始工作了,大概3~4分钟左右。
2.MAC系统下的安装(其它Linux系统都可以的):
2.1)首先将准备好的TF卡连接读卡器,插入电脑
2.2)打开终端(Terminal),查看当前已挂载的卷:
[kxwinxp@MacBook]$ df -h
Filesystem      Size   Used  Avail Capacity iused      ifree %iused  Mounted on
/dev/disk1     112Gi   81Gi   30Gi    73% 1014786 4293952493    0%   /
devfs          188Ki  188Ki    0Bi   100%     654          0  100%   /dev
map -hosts       0Bi    0Bi    0Bi   100%       0          0  100%   /net
map auto_home    0Bi    0Bi    0Bi   100%       0          0  100%   /home
/dev/disk2s3    92Gi   51Gi   41Gi    56%  336662   42525054    1%   /Volumes/系统
/dev/disk2s4    20Gi   15Gi  4.4Gi    78%   92859    4579733    2%   /Volumes/数据
/dev/disk3s1    29Gi  2.3Mi   29Gi     1%  107876    8373436    2%   /Volumes/未命名
- 1
- 2
- 3
- 4
- 5
- 6
- 7
- 8
- 9
对比Size和Name可以找到SD卡的分区在系统里对应的设备文件(这里是/dev/disk3s1),如果你有多个分区,可能还会有disk3s2之类的。
2.3)使用diskutil unmount将这些分区卸载:
[kxwinxp@MacBook]$ diskutil unmount /dev/disk3s1
Volume 未命名 on disk3s1 unmounted
- 1
- 2
2.4)先对下载的zip压缩包进行解压,然后使用dd命令将系统镜像写入,需要特别特别注意disk后的数字,不能搞错!
(说明:/dev/disk3s1是分区,/dev/disk3是块设备,/dev/rdisk3是原始字符设备)
[kxwinxp@MacBook]$ unzip 2017-09-07-raspbian-stretch.zip
[kxwinxp@MacBook]$ sudo dd bs=16m if=2017-09-07-raspbian-stretch.img of=/dev/rdisk3
_
输入用户密码
- 1
- 2
- 3
- 4
经过几分钟的等待,出现下面的提示,说明TF卡刷好了:
1172+1 records in
1172+1 records out
4916019200 bytes transferred in 127.253638 secs (9691442 bytes/sec)
- 1
- 2
- 3
好了,系统已经刷入TF卡了。
3. 现在对TF卡数据进行预设置(Win和Mac)下同操作。
在电脑显示的盘中可以看到一个移动分区为FAT32格式,打开:

3.1)开启SSH远程:(自2016年9月开始,raspberry默认关闭ssh连接)
在TF卡分区里面创建一个名为 “ssh” 空文件即可(不要有txt后缀!)
3.2)开启强制HDMI输出:(很多现在的显示器在树莓派上并不能识别)
在TF卡分区,打开config.txt文件(开机后位置: /boot/config.txt),修改如下:
hdmi_safe=1
config_hdmi_boost=4
hdmi_ignore_edid=0xa5000080
hdmi_group=2
hdmi_mode=82
- 1
- 2
- 3
- 4
- 5
一些参数介绍:
| 项 | 含义 |
|---|---|
| hdmi_safe=1 | 安全启动HDMI |
| config_hdmi_boost=4 | 开启热插拔 |
| hdmi_group=1 | CEA电视显示器 |
| hdmi_group=2 | DMT电脑显示器 |
| hdmi_ignore_edid=0xa5000080 | 忽略自动探测的分辨率 |
| 输出分辨率: | |
| hdmi_mode=4 | 640x480 60Hz |
| hdmi_mode=9 | 800x600 60Hz |
| hdmi_mode=16 | 1024x768 60Hz |
| hdmi_mode=82 | 1080p 60Hz |
3.3)设置无线WI-FI连接:(假如你没有网线,而且没能连接显示器)
在TF卡的boot分区,创建
wpa_supplicant.conf文件,加入如下内容:
country=CN
ctrl_interface=DIR=/var/run/wpa_supplicant GROUP=netdev
update_config=1

network={
    ssid="feng"
    psk="peng123456"
    priority=1
}
- 1
- 2
- 3
- 4
- 5
- 6
- 7
- 8
- 9
在树莓派通电后会自动添加到
/etc/wpa_supplicant/wpa_supplicant.conf文件里面,进行自动连接。
// 详细介绍:
#ssid:网络的ssid
#psk:密码
#priority:连接优先级,数字越大优先级越高(不可以是负数)
#scan_ssid:连接隐藏WiFi时需要指定该值为1

// 如果你的 WiFi 没有密码
network={
ssid="你的无线网络名称(ssid)"
key_mgmt=NONE
}
// 如果你的 WiFi 使用WEP加密

network={
ssid="你的无线网络名称(ssid)"
key_mgmt=NONE
wep_key0="你的wifi密码"
}
// 如果你的 WiFi 使用WPA/WPA2加密

network={
ssid="你的无线网络名称(ssid)"
key_mgmt=WPA-PSK
psk="你的wifi密码"
}
- 1
- 2
- 3
- 4
- 5
- 6
- 7
- 8
- 9
- 10
- 11
- 12
- 13
- 14
- 15
- 16
- 17
- 18
- 19
- 20
- 21
- 22
- 23
- 24
- 25
在基本的设置完成后,我们将TF卡插入树莓派,通电。
3.4)进入树莓派系统
提示:如果你没有显示器,你就需要登录路由器进行查看树莓派的IP地址,或者在电脑里面扫描局域网中的设备,找到树莓派的IP地址,然后进行SSH连接。
Windows里面需要下载软件,可使用Putty软件(或者Xshell)。
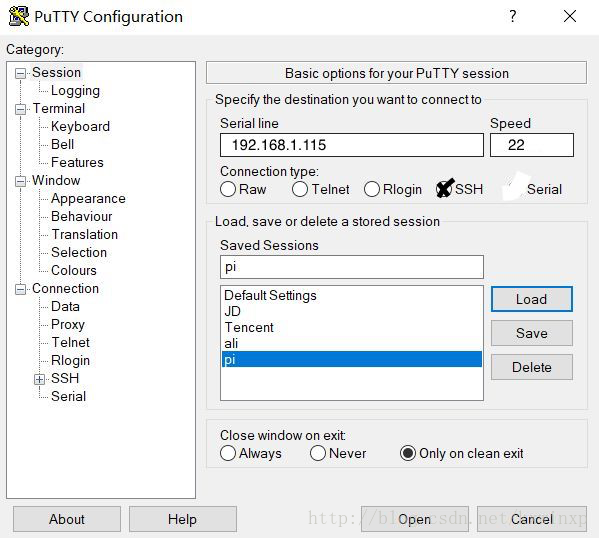
MAC里面可以直接使用 ssh [email protected].* 命令进行连接
登录账号:用户名:pi 密码:raspberry
假如出现这种情况:
@@@@@@@@@@@@@@@@@@@@@@@@@@@@@@@@@@@@@@@@@@@@@@@@@@@@@@@@@@@
@    WARNING: REMOTE HOST IDENTIFICATION HAS CHANGED!     @
@@@@@@@@@@@@@@@@@@@@@@@@@@@@@@@@@@@@@@@@@@@@@@@@@@@@@@@@@@@
IT IS POSSIBLE THAT SOMEONE IS DOING SOMETHING NASTY!
Someone could be eavesdropping on you right now (man-in-the-middle attack)!
It is also possible that a host key has just been changed.
The fingerprint for the ECDSA key sent by the remote host is
SHA256:EqIFQoWYDISyGnJggyqnk8888LeNn3tr1+QmBQaso0.
Please contact your system administrator.
Add correct host key in /Users/caolijian/.ssh/known_hosts to get rid of this message.
Offending ECDSA key in /Users/caolijian/.ssh/known_hosts:12
ECDSA host key for 192.168.1.112 has changed and you have requested strict checking.
Host key verification failed.
- 1
- 2
- 3
- 4
- 5
- 6
- 7
- 8
- 9
- 10
- 11
- 12
- 13
则是需要清理一下之前保存的认证密钥。
// 查看
ssh-keygen -l -f ~/.ssh/known_hosts
// 清理192.168.1.112的认证rsa
ssh-keygen -R 192.168.1.112
- 1
- 2
- 3
- 4
成功进入的界面:
Linux raspberrypi 4.9.41-v7+ #1023 SMP Tue Aug 8 16:00:15 BST 2017 armv7l

The programs included with the Debian GNU/Linux system are free software;
the exact distribution terms for each program are described in the
individual files in /usr/share/doc/*/copyright.

Debian GNU/Linux comes with ABSOLUTELY NO WARRANTY, to the extent
permitted by applicable law.
Last login: Fri Nov  3 08:36:37 2017

SSH is enabled and the default password for the 'pi' user has not been changed.
This is a security risk - please login as the 'pi' user and type 'passwd' to set a new password.

pi@raspberrypi:~ $

// 查看莓派版本信息
cat /proc/cpuinfo
- 1
- 2
- 3
- 4
- 5
- 6
- 7
- 8
- 9
- 10
- 11
- 12
- 13
- 14
- 15
- 16
- 17
系统初次进入后,首先修改软件源(避免下载失败,让软件下载更快,)
网址:http://blog.csdn.net/kxwinxp/article/details/78370980
4.其它的一些设置和程序
4.1) 校正树莓派时间
// 设置时区为 亚洲(Asia) 上海(Shanghai)
sudo dpkg-reconfigure tzdata
// 启动 NTP 使计算机时钟与 Internet 时间服务器同步
sudo timedatectl set-ntp true
- 1
- 2
- 3
- 4
4.2)改变键盘布局
树莓派(raspberry pi)是英国产品,默认键盘布局是英国(UK),我们用的键盘布局一般是美国(US)。
// 进入设置页面 方法一
sudo dpkg-reconfigure keyboard-configuration
// 进入设置页面 方法二
sudo raspi-config
// 选择 4 Localisation Options -> I3 Change Keyboard Layout
- 1
- 2
- 3
- 4
- 5
通用的101键PC键盘-> English(US) -> English(US, alternative international) -> OK
4.3)vnc远程屏幕软件
// (基于Debian 9)直接执行
sudo apt-get install -y xrdp
// (基于Debian 8)请执行如下
sudo apt-get install -y tightvncserver xrdp
- 1
- 2
- 3
- 4
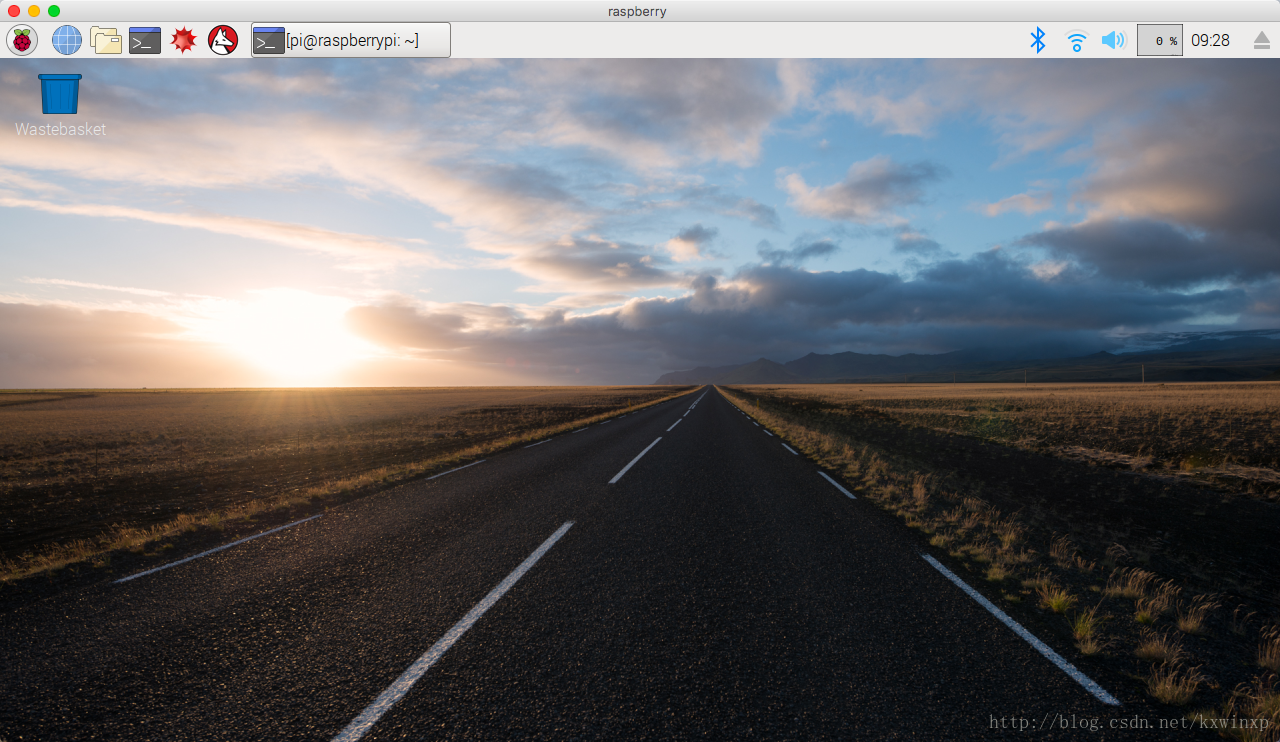
安装完成后就可以用Windows自带的远程软件进行远程桌面(用户名:pi 密码:raspberry)。
效果如下: