Protocol Buffers(又名protobuf)是Google开发的一种与语言无关,平台无关的可扩展机制,用于序列化结构化数据。相比较XML和JSON格式,protobuf更小、更快、更便捷。https://github.com/protocolbuffers/protobuf
准备工作:
1.官方文档,可以看下protobuf的相关介绍
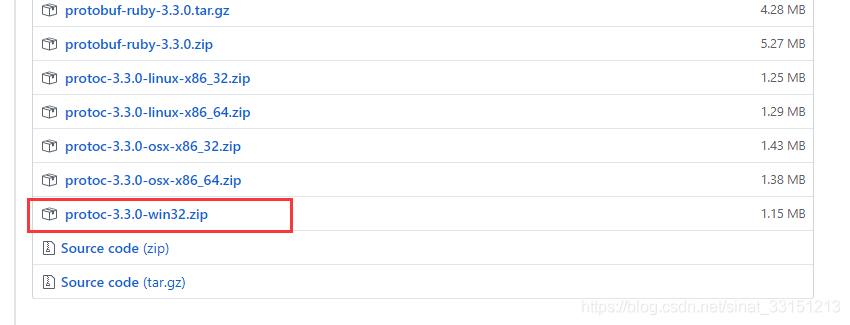
2.在GitHub下载protobuf并安装
注:下载protobuf版本,根据你当前的系统下载。下图是我下载的版本,我的电脑系统是win10-64位的,下载win32.zip就可以。另外,如果通过protobuf生成文件后,类文件里面引用报错了,重新下载一个版本试试。我开始用的最新的protobuf版本,后来下载这个3.3.0版本就没问题了。可能是gradle依赖版本问题。
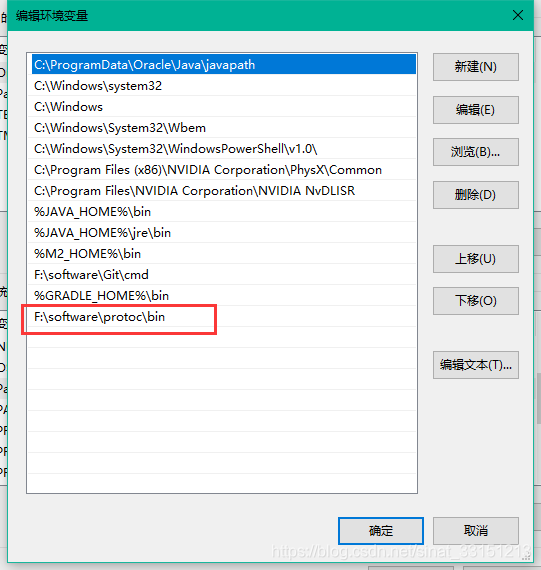
下载完成后,直接解压。然后将protobuf添加到环境变量里面。
gradle引用依赖
我用的是gradle,如果没有的话,还需要安装一下gradle,或者用maven也可以。
build.gradle
plugins {
    id 'java'
}

group 'com.hll'
version '1.0-SNAPSHOT'

sourceCompatibility = 1.8

repositories {
    mavenCentral()
}

dependencies {
    compile (
            "io.netty:netty-all:4.1.9.Final",
            "com.google.protobuf:protobuf-java:3.3.1",
            "com.google.protobuf:protobuf-java-util:3.3.1"
    )
}

tasks.withType(JavaCompile) {
    options.encoding = 'UTF-8'
}
创建protobuf文件
protobuf文件是以proto为后缀的,我们在这里面写protobuf相关的代码
Student.proto
//指定语法是proto2
syntax = "proto2";

package com.hll.protobuf;

//文件选项,SPEED是加快文件的解析速度,不写的话默认就是SPEED,另外还有CODE_SIZE,LITE_RUNTIME
option optimize_for = SPEED;
//输出文件路径
option java_package = "com.hll.netty.sixthexample";
//输出文件名
option java_outer_classname = "StudentInfo";

message Student {
    required string name = 1;
    optional int32 age = 2;
    optional string address = 3;
}
通过protoc生成类文件
打开idea的Termainal,通过protoc命令来生成文件.
#这里面的文件路径和文件名根据自己的项目写
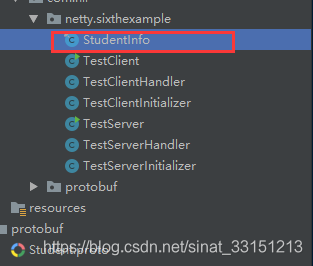
protoc --java_out=src/main/java src/protobuf/Student.proto

执行后,没有错误的话,我们在项目中就可以看到生成好的文件了。注意:这个生成的文件不要进行任何的修改。
创建服务端和客户端
protobuf的配置及文件创建完成之后,创建一个服务端和客户端。
服务端
TestServer.java
public class TestServer {

    public static void main(String[] args) throws Exception {
        EventLoopGroup bossGroup = new NioEventLoopGroup();
        EventLoopGroup workerGroup = new NioEventLoopGroup();

        try {
            ServerBootstrap bootstrap = new ServerBootstrap();
            bootstrap.group(bossGroup, workerGroup)
                    .channel(NioServerSocketChannel.class)
                    .handler(new LoggingHandler(LogLevel.INFO))
                    .childHandler(new TestServerInitializer());

            ChannelFuture future = bootstrap.bind(8899).sync();
            future.channel().closeFuture().sync();
        } finally {
            bossGroup.shutdownGracefully();
            workerGroup.shutdownGracefully();
        }
    }
}
TestServerInitializer.java
public class TestServerInitializer extends ChannelInitializer<SocketChannel> {
    @Override
    protected void initChannel(SocketChannel ch) throws Exception {
        ChannelPipeline pipeline = ch.pipeline();

        //netty对protobuf提供了主要有四个handler处理器
        pipeline.addLast("protobufVarint32FrameDecoder", new ProtobufVarint32FrameDecoder());
        //ProtobufDecoder类型就是我们需要转换的类的实例,这里需要转换的就是Student
        pipeline.addLast("protobufDecoder", new ProtobufDecoder(StudentInfo.Student.getDefaultInstance()));
        pipeline.addLast("protobufVarint32LengthFieldPrepender", new ProtobufVarint32LengthFieldPrepender());
        pipeline.addLast("protobufEncoder", new ProtobufEncoder());

        pipeline.addLast("testServerHandler", new TestServerHandler());
    }
}
TestServerHandler .java
public class TestServerHandler extends SimpleChannelInboundHandler<StudentInfo.Student> {// 泛型类型Student


    @Override
    protected void channelRead0(ChannelHandlerContext ctx, StudentInfo.Student msg) throws Exception {
        System.out.println(msg.getName());
        System.out.println(msg.getAge());
        System.out.println(msg.getAddress());
    }
}
客户端
TestClient .java
public class TestClient {
    public static void main(String[] args) throws Exception {
        EventLoopGroup loopGroup = new NioEventLoopGroup();

        try {
            Bootstrap bootstrap = new Bootstrap();
            bootstrap.group(loopGroup).channel(NioSocketChannel.class).handler(new TestClientInitializer());

            ChannelFuture future = bootstrap.connect("localhost", 8899).sync();
            future.channel().closeFuture().sync();
        } finally {
            loopGroup.shutdownGracefully();
        }
    }
}
TestClientInitializer.java
public class TestClientInitializer extends ChannelInitializer<SocketChannel> {
    @Override
    protected void initChannel(SocketChannel ch) throws Exception {
        //和服务端代码一样

        ChannelPipeline pipeline = ch.pipeline();

        pipeline.addLast("protobufVarint32FrameDecoder", new ProtobufVarint32FrameDecoder());
        pipeline.addLast("protobufDecoder", new ProtobufDecoder(StudentInfo.Student.getDefaultInstance()));
        pipeline.addLast("protobufVarint32LengthFieldPrepender", new ProtobufVarint32LengthFieldPrepender());
        pipeline.addLast("protobufEncoder", new ProtobufEncoder());

        pipeline.addLast("testClientHandler", new TestClientHandler());
    }
}
TestClientHandler .java
public class TestClientHandler extends SimpleChannelInboundHandler<StudentInfo.Student> {
    @Override
    protected void channelRead0(ChannelHandlerContext ctx, StudentInfo.Student msg) throws Exception {

    }

    @Override
    public void channelActive(ChannelHandlerContext ctx) throws Exception {
		//客户端创建连接之后就像服务端发送消息
        StudentInfo.Student student = StudentInfo.Student.newBuilder()
                .setName("张三")
                .setAge(20)
                .setAddress("合肥")
                .build();

        ctx.writeAndFlush(student);
    }
}
测试
服务端和客户端完成之后,先运行服务端,再运行客户端。就会看到传递的消息数据。
