安装及代理跨域在这就不介绍了,可查看我的另一篇笔记 Vue2项目架构搭建(六)——axios调用接口、webpack代理跨域配置。
封装请求
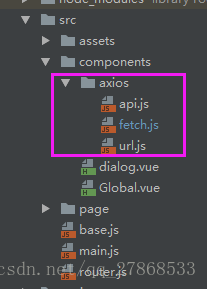
封装的时候,我通常喜欢把请求抽象成三个文件,文件位置放在src中,只要你能引用到,就没问题,如下图所示:
fetch.js
import axios from 'axios' // 引入axios

export function fetch (options) {
  return new Promise((resolve, reject) => {
    const instance = axios.create({ // instance创建一个axios实例,可以自定义配置,可在 axios文档中查看详情
      // 所有的请求都会带上这些配置,比如全局都要用的身份信息等。
      headers: {
        'Content-Type': 'application/json'
        // 'token_in_header': global_.token,//token从全局变量那里传过来
      },
      timeout: 30 * 1000 // 30秒超时
    })
    instance(options)
      .then(response => { // then 请求成功之后进行什么操作
        resolve(response) // 把请求到的数据发到引用请求的地方
      })
      .catch(error => {
        console.log('请求异常信息:' + error)
        reject(error)
      })
  })
}
url.js
export default {
  Hallowmas: '/v2/movie/top250'
  // 接口代理配置
}

// 也可以像下面这样,区分环境或者区分服务器等等
// let service = 'dev';
// // let service = 'prod';
// let api = '';
// if (service === 'dev') {
//   /**dev开发**/
//   api = '/stomatology/patient';
// } else if (service === 'prod') {
//   /**prod部署**/
//   api = '/proxy/client';
// }
//
// export default {
//   /**个人中心start**/
//   //1 获取c端个人信息 POST /wx/getClientInfo
//   getClientInfo: `${api}/wx/getClientInfo`,
//   //2 获取手机注册验证码 POST /wx/getClientRegisterCode
//   getClientRegisterCode: `${api}/wx/getClientRegisterCode`,
//   //3 绑定手机号 POST /wx/clientBindMobile
//   clientBindMobile: `${api}/wx/clientBindMobile`,
//   /**个人中心end**/
//
// }
api.js
import { fetch } from './fetch'
import api from './url'

// 登录接口
export function lookOption () {
  return fetch({
    // api.Hallowmas 引用url.js里面的数据
    url: api.Hallowmas,
    method: 'get', // 请求方法
    params: {
      // currentUserId: userId // 传过去的参数
    }
  })
}
接口调用
在需要调用接口的组件里引入对应接口,例如在api.js文件中定义了lookOption的函数,先引入:
import { lookOption } from '../../axios/api'然后再定义函数调用的触发,例如created钩子触发
created () {
    lookOption(this.userInfo.userName, this.userInfo.userPassword).then(res => {
      console.log(res)
    }).catch(err => {
      console.log(err)
    })
}本文转载自OBKoro1的:https://blog.csdn.net/OBKoro1/article/details/78450040?locationNum=4&fps=1