文章目录
概述
学习了RabbitMQ、Spring Boot整合RabbitMQ以及使用Spring Cloud Stream操作RabbitMQ之后,我们着手改造下吧
Product微服务改造
接入配置中心
既然引入了配置中心,那么我们把artisan product微服务也接入到配置中心吧 。
Step1 引入依赖
作为客户端引入spring-cloud-config-client即可
 <dependency>
   		<groupId>org.springframework.cloud</groupId>
        <artifactId>spring-cloud-config-client</artifactId>
  </dependency>
Step2 远端Git存储中心,新增artisan product模块的配置文件
将原来配置在application.yml中的配置信息拆分到bootstrap.yml及远端的git文件中
规划一下:
- application.yml —端口信息
- 远端git:artisan-product-dev.yml --数据库等
- bootstrap.yml: Config Server,Eureka等信息
application.yml
server:
  port: 8080
远端git:artisan-product-dev.yml
spring:
# datasource
  datasource:
    driver-class-name: com.mysql.jdbc.Driver
    url: jdbc:mysql://localhost:3306/o2o?serverTimezone=UTC&useUnicode=true&characterEncoding=utf8&useSSL=false
    username: root
    password: root
  # jpa 输出sql
  jpa:
    show-sql: true
bootstrap.yml
spring:
  application:
    name: artisan-order
  cloud:
    config:
#      profile: dev
      # 可配置多个,不推荐使用,因为需要设置具体的ip.服务端修改或者新增IP后,要同步修改
      # uri: http://localhost:9898/,http://localhost:9999/
      discovery:
        # 指定Config Server在服务发现中的service Id ,默认为configserver
        service-id: ARTISAN-CONFIG
        # 表示使用服务发现组件中的Config Server,而不自己指定Config Server的uri,默认为false
        enabled: true
      profile: home
    # 修复github webhook 只能刷新config server 无法刷新config client的问题
    bus:
      #Workaround for defect in https://github.com/spring-cloud/spring-cloud-bus/issues/124
      id: ${vcap.application.name:${spring.application.name:application}}:${vcap.application.instance_index:${spring.cloud.config.profile:${local.server.port:${server.port:0}}}}:${vcap.application.instance_id:${random.value}}
#Eureka
eureka:
  client:
    service-url:
      defaultZone: http://localhost:8762/eureka/
通过config server访问下远端的Git配置文件

http://localhost:9898/artisan-product-dev.yml
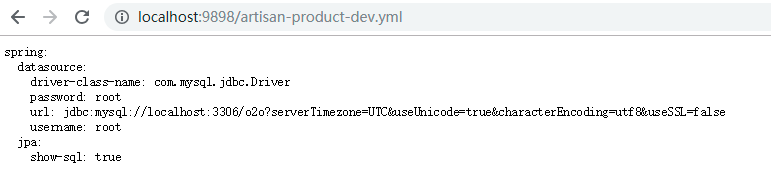
OK,访问正常,说明配置读取没问题。
启动artisan product微服务,查看下Eureka 上的注册情况
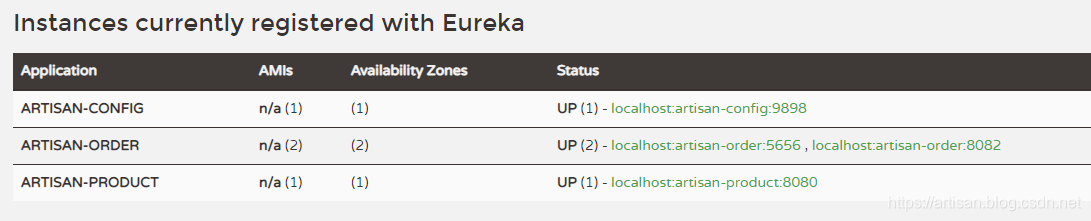
成功注册上来了,8080端口
接入消息队列
Step1 引入依赖
这里我们选择使用 spring-boot-starter-amqp
		<dependency>
            <groupId>org.springframework.boot</groupId>
            <artifactId>spring-boot-starter-amqp</artifactId>
        </dependency>
Step2 配置RabbitMQ的信息
我们放到远端的Git上
spring:
 rabbitmq:
    host: 192.168.31.34
    password: guest
    port: 5672
    username: guest
通过config server访问下 http://localhost:9898/artisan-product-dev.yml
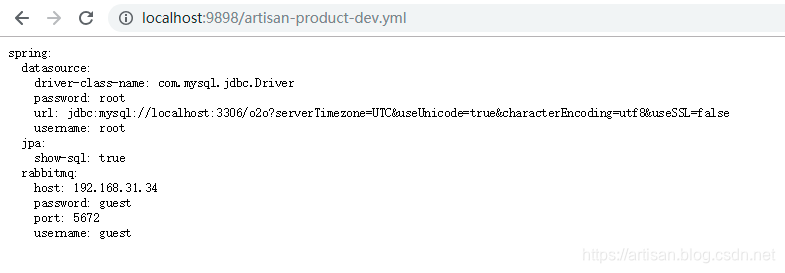
OK ,说明配置没有问题 .
商品扣减完成后通知订单模块创建订单
Step1 分析
流程如下:
商品----------->消息队列<---------------订单
商品在扣减完成之后,通知消息队列,订单模块订阅消息队列处理请求。
那我们先看下商品扣减的方法原来的逻辑吧,不求一步到位,步步分析,逐步完善
Controller入口
 /**
     * 扣减库存
     * 提供给Order微服务用
     *
     * @param decreaseStockInputList
     * @return
     */
    @PostMapping("/decreseProduct")
    private void  decreseProduct(@RequestBody List<DecreaseStockInput> decreaseStockInputList) {
        productService.decreaseProduct(decreaseStockInputList);
    }
调用ProductServiceImpl#decreaseProduct方法,按照设计,商品扣减完成以后就要发送消息到消息队列 。
为解决Spring Cloud实战-04将订单微服务与商品微服务分别拆分为多模块 中的问题一,我们把数据模型对应的实体类又封装了一层,因此发送给消息队列的对象,建议也是封装后的对象,所以使用ProductOutput 。
Step2 扣减库存方法中增加发送消息队列的代码
增加如下代码:
 // 发送消息队列
 ProductOutput productOutput = new ProductOutput();
 BeanUtils.copyProperties(product,productOutput);
 amqpTemplate.convertAndSend("productOutput",JsonUtil.toJson(productOutput));
 log.info("发送消息到MQ,内容为:{}",JsonUtil.toJson(productOutput));
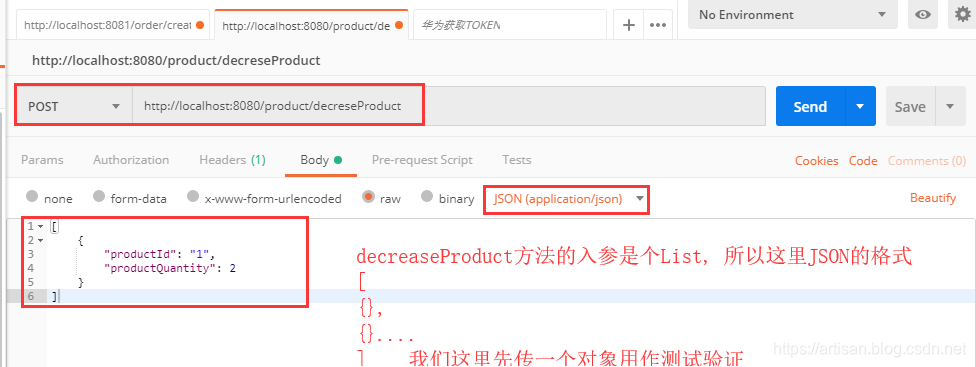
为了方便观察,将productOutput转成了Json格式,建议这样做,万一有消息挤压的话,方便在RabbitMQ的管理页面查看挤压的消息。 这里我们使用了Jackson。 你选择其他的库也可以,比如我们前面用到的Gson 。
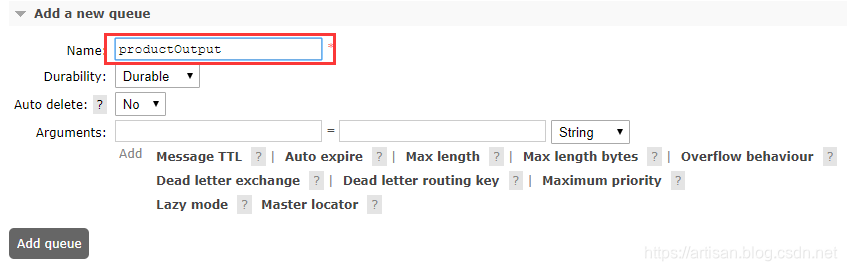
Step3 验证发送消息队列的数据
因为还没有写接收方,我们先在RabbitMQ中手工创建一个名为productOutput的消息队列,先看下是否正确。
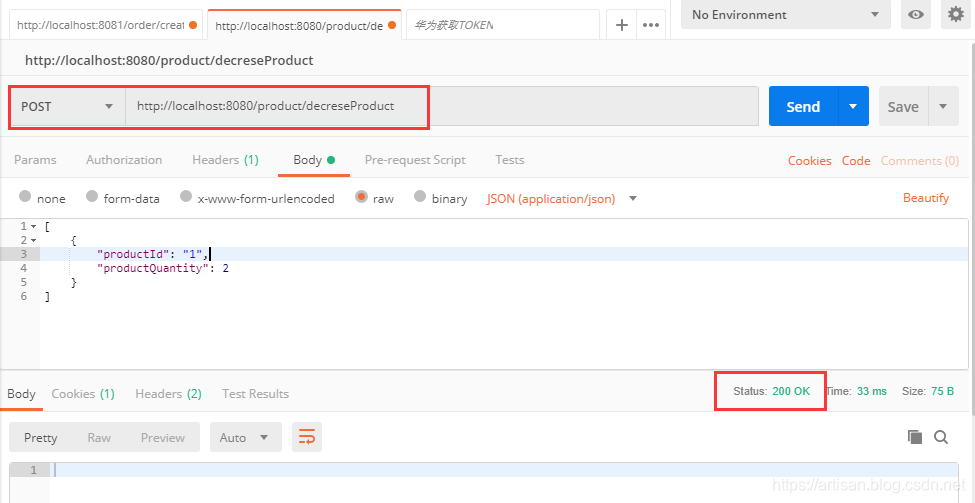
启动product 微服务, 在postman测试如下
[
    {
        "productId": "1",
        "productQuantity": 2
    }
]
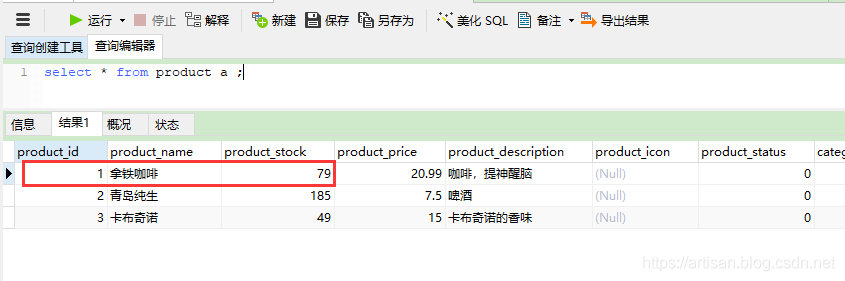
先看下数据库中的数据 productId=1的商品,目前还剩下81件,我们这次扣除两件,应该剩余79件,待会验证下 。

发送请求,观察RabbitMQ 和 数据
DB 数据OK
RabbitMQ 接收正常,只是没有被消费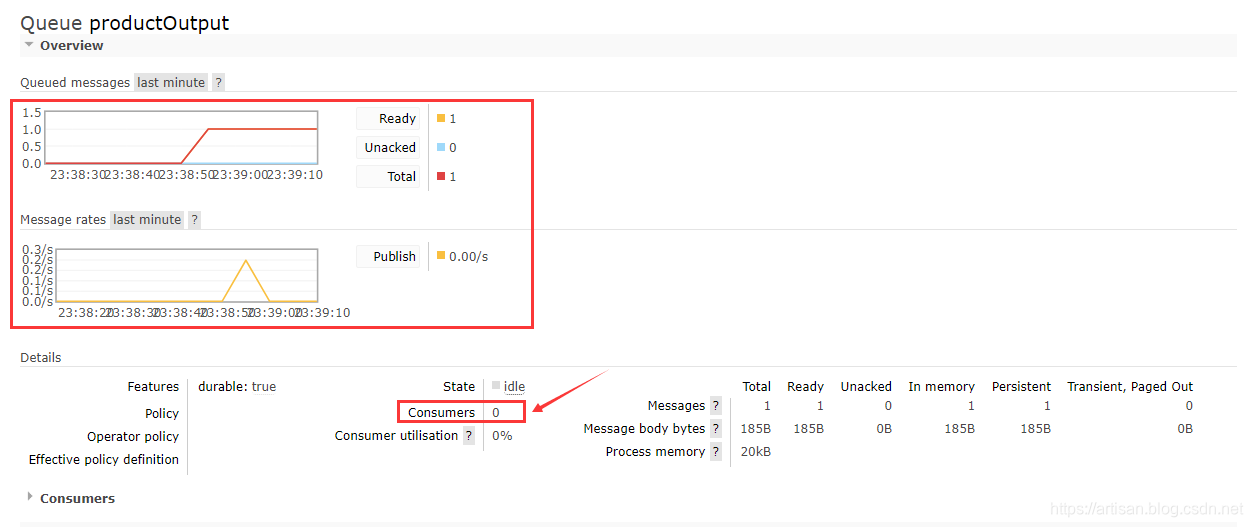
查看挤压的消息:
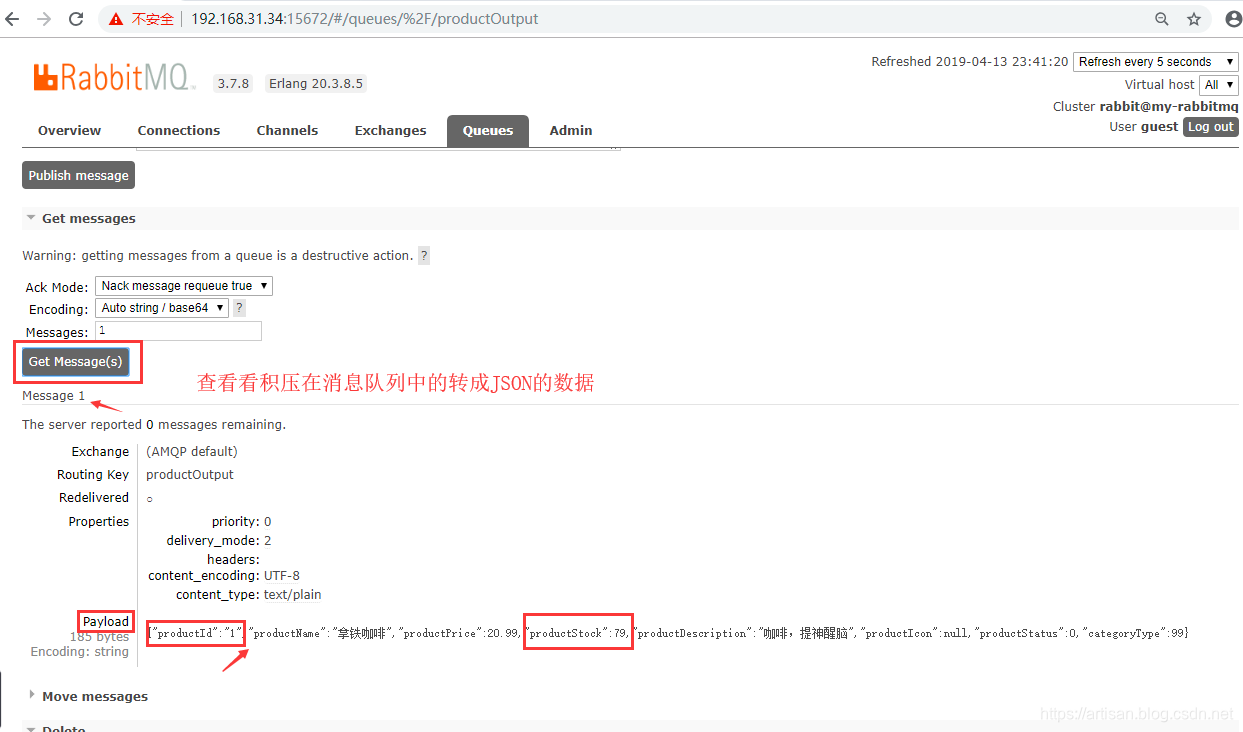
到目前为止,起码消息发送到了消息队列,数据扣减正常。 下一步就是该在订单服务中去写消息接收方的业务逻辑了。
订单模块接收消息队列中的消息
Step1 开发消息接收类
package com.artisan.order.message;

import com.artisan.order.utils.JsonUtil;
import com.artisan.product.common.ProductOutput;
import lombok.extern.slf4j.Slf4j;
import org.springframework.amqp.rabbit.annotation.Queue;
import org.springframework.amqp.rabbit.annotation.RabbitListener;
import org.springframework.stereotype.Component;

@Component
@Slf4j
public class ProductOutputReceive {

    // 自动创建productOutput队列
    @RabbitListener(queuesToDeclare = @Queue("productOutput"))
    public void process(String message) {
        // message --> ProductOutput
        ProductOutput productOutput = JsonUtil.JsonToBean(message, ProductOutput.class);
        log.info("接收到的消息为:{}",productOutput);
    }

}
Step2 验证
我们在上面的消息接收方中使用了@RabbitListener(queuesToDeclare = @Queue("productOutput"))会自动创建消息队列,因此我们测试之前,把之前手工新建的productOutput删掉吧,验证下消息队列通过代码自动创建
启动后,在postman中发送消息,观察RabbitMQ和日志
RabbitMQ:
日志
2019-04-14 00:01:35.621 INFO 15660 --- [cTaskExecutor-1] c.a.order.message.ProductOutputReceive : 接收到的消息为:ProductOutput(productId=1, productName=拿铁咖啡, productPrice=20.99, productStock=73, productDescription=咖啡,提神醒脑, productIcon=null, productStatus=0, categoryType=99)
纠正错误
上述虽然实现了发送消息到消息队列,并接收消息处理业务。但业务上有个比较大的逻辑错误,那就是前台传递的是个List啊,Product中扣减库存方法中 有异常的判断,如果前台买了3个商品, 但库存只有2个,数据如何保持一致?
建议: 将商品扣减的DB操作的部分作为一个整体,如果都成功了,将List发送到消息队列。 同样的Order微服务也要做下相应的调整
Product
@Override
    public void decreaseProduct(List<DecreaseStockInput> decreaseStockInputList) {

        List<Product> productList = operateProducts(decreaseStockInputList);


        List<ProductOutput> productOutputList = productList.stream().map(e -> {
            ProductOutput productOutput = new ProductOutput();
            BeanUtils.copyProperties(e, productOutput);
            return productOutput;
        }).collect(Collectors.toList());

        // 发送消息队列
        amqpTemplate.convertAndSend("productOutput", JsonUtil.toJson(productOutputList));
        log.info("发送消息到MQ,内容为:{}", JsonUtil.toJson(productOutputList));
    }

    // 因为是对List操作,所以加个事务控制
    @Transactional
    public List<Product> operateProducts(List<DecreaseStockInput> decreaseStockInputList) {

        List<Product> productList = new ArrayList<>();

        // 遍历DecreaseStockInput
        for (DecreaseStockInput decreaseStockInput : decreaseStockInputList) {
            // 根据productId查询Product
            Optional<Product> productOptional = productRepository.findById(decreaseStockInput.getProductId());

            // 商品是否存在
            if (!productOptional.isPresent()) {
                throw new ProductException(ResultEnum.PRODUCT_NOT_EXIST);
            }
            // 是否库存充足

            Product product = productOptional.get();
            int leftStock = product.getProductStock() - decreaseStockInput.getProductQuantity();

            if (leftStock < 0) {
                throw new ProductException(ResultEnum.PRODUCT_STOCK_ERROR);
            }
            // 将剩余库存设置到product,并更新数据库
            product.setProductStock(leftStock);
            productRepository.save(product);

            productList.add(product);

        }
        return productList;
    }
Order
package com.artisan.order.message;

import com.artisan.order.utils.JsonUtil;
import com.artisan.product.common.ProductOutput;
import com.fasterxml.jackson.core.type.TypeReference;
import lombok.extern.slf4j.Slf4j;
import org.springframework.amqp.rabbit.annotation.Queue;
import org.springframework.amqp.rabbit.annotation.RabbitListener;
import org.springframework.stereotype.Component;

import java.util.List;

@Component
@Slf4j
public class ProductOutputReceive {

    // 自动创建productOutput队列
    @RabbitListener(queuesToDeclare = @Queue("productOutput"))
    public void process(String message) {
        // message --> ProductOutput
//        ProductOutput productOutput = JsonUtil.JsonToBean(message, ProductOutput.class);
//        log.info("接收到的消息为:{}",productOutput);

        // message -> List<ProductOutput>

        List<ProductOutput> productOutputList = JsonUtil.JsonToList(message,new TypeReference<List<ProductOutput>>(){});
        log.info("接收到的消息为:{}",productOutputList);
    }

}
测试一把
[
    {
        "productId": "1",
        "productQuantity": 2
    },
    {
        "productId": "2",
        "productQuantity": 5
    }
]
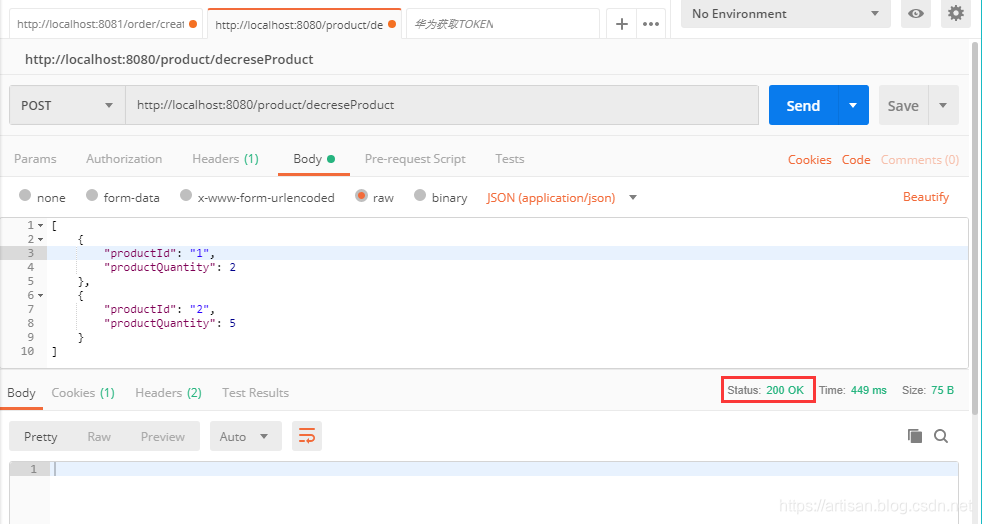
product的日志
2019-04-14 01:28:24.058 INFO 22272 --- [nio-8080-exec-1] c.a.p.service.impl.ProductServiceImpl : 发送消息到MQ,内容为:[{"productId":"1","productName":"拿铁咖啡","productPrice":20.99,"productStock":71,"productDescription":"咖啡,提神醒脑","productIcon":null,"productStatus":0,"categoryType":99},{"productId":"2","productName":"青岛纯生","productPrice":7.50,"productStock":180,"productDescription":"啤酒","productIcon":null,"productStatus":0,"categoryType":98}]
order的日志:
2019-04-14 01:28:24.086 INFO 18036 --- [cTaskExecutor-1] c.a.order.message.ProductOutputReceive : 接收到的消息为:[ProductOutput(productId=1, productName=拿铁咖啡, productPrice=20.99, productStock=71, productDescription=咖啡,提神醒脑, productIcon=null, productStatus=0, categoryType=99), ProductOutput(productId=2, productName=青岛纯生, productPrice=7.50, productStock=180, productDescription=啤酒, productIcon=null, productStatus=0, categoryType=98)]
消息接收方接收到消息后,比如可以把 List<ProductOutput>信息放到redis里,查询商品服务的话,就可以从redis中查询了。
JackSon 的操作
这里我们选择了JackSon 来操作JavaBean和Json之间的互转,当然了你也可以选择其他的API,比如我们上次用的Gson。。
https://blog.csdn.net/qq_37936542/article/details/79268402
package com.artisan.order.utils;

import com.fasterxml.jackson.core.JsonParseException;
import com.fasterxml.jackson.core.JsonProcessingException;
import com.fasterxml.jackson.core.type.TypeReference;
import com.fasterxml.jackson.databind.JsonMappingException;
import com.fasterxml.jackson.databind.ObjectMapper;

import java.io.IOException;

public class JsonUtil {

    private static ObjectMapper objectMapper = new ObjectMapper();

    /**
     * 对象转换为json字符串
     *
     * @param object
     * @return
     */
    public static String toJson(Object object) {
        try {
            return objectMapper.writeValueAsString(object);
        } catch (JsonProcessingException e) {
            e.printStackTrace();
        }
        return null;
    }

    /**
     * json 转 javabean
     * @param jsonStr
     * @param objClass
     * @param <T>
     * @return
     */
    public static <T> T JsonToBean(String jsonStr, Class<T> objClass) {
        try {
            return objectMapper.readValue(jsonStr, objClass);
        } catch (IOException e) {
            e.printStackTrace();
        }
        return null;
    }

    /**
     *  json 转 List
     * @param jsonStr
     * @param typeReference
     * @param <T>
     * @return
     */
    public static <T> T JsonToList(String jsonStr, TypeReference typeReference) {
        try {
            return objectMapper.readValue(jsonStr, typeReference);
        } catch (IOException e) {
            e.printStackTrace();
        }
        return null;
    }
}
代码
https://github.com/yangshangwei/springcloud-o2o/tree/master/artisan_order
https://github.com/yangshangwei/springcloud-o2o/tree/master/artisan-product