1、Config Server
1.1、maven配置

1.2、启动类:

1.3、配置类
坑一:
必须去掉formLogin(),否则spring security无法认证,报401。

源码:
org.springframework.security.config.annotation.web.configuration.WebSecurityConfigurerAdapter.class:164

1.4、基本配置

1.5、config server配置(需要安装Rabbit MQ)
ERLang下载:http://www.erlang.org/downloads
RabbitMQ下载:http://www.rabbitmq.com/#support (需要先安装erlang(语言))
管理界面安装:http://www.rabbitmq.com/management.html
rabbitmq-plugins enable rabbitmq_management

管理界面地址:http://localhost:15672/
帐号密码:guest guest

坑二:
必须手动开启refresh、bus-refresh端点,通过management.dendpints.web.exposure.incluede(此处是开启所有)

1.6、banner配置(自己喜欢就好)

1.7、logback-spring配置(自己喜欢就好)


2、Config Client
2.1、maven配置

2.2、启动类配置

2.3、Controller配置(加上注解@RefreshScope)

2.4、config client配置
坑三:
使用service-id来配置config client时,将base config放入application.yml中无法获取配置,需要放入bootstrap.yml中。
使用uri配置是OK的。。。

使用uri来配置:

2.5、Mybatis配置

3、Git
https://gitee.com/mycode2018/darren-micro-config(暂时未开放)


Mybatis配置:

基本配置(本来这些配置是放在application.yml中的,后面使用service-id无法获取,详情见坑三):

4、测试
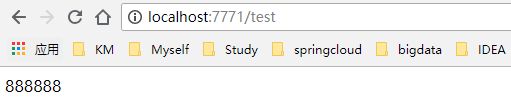
4.1、访问http://localhost:7771/test查看test的值

4.2、修改Git配置文件

4.3、通过postmen刷新配置(坑一:返回码是401)
http://localhost:8764/actuator/bus-refresh:此链接是刷新所有client配置

4.4、查看刷新结果
5、配置webhooks
作用:git提交时,请求http://localhost:8764/actuator/bus-refresh刷新配置(地址必须是域名哦。。。)


