MySQL HA工作原理
1 从宕机崩溃的master保存二进制日志事件(binlog events)
2 识别含有最新更新的slave
3 应用差异的中继日志(relay log)到其他的slave
4 应用从master保存的二进制日志事件(binlog events)
5 提升一个slave为新的master
6 使其他的slave连接新的master进行复制
环境
| 主机 | IP地址 | 类型 |
|---|---|---|
| CentOS7.6 | 192.168.36.7 | Manager |
| CentOS7.6 | 192.168.36.17 | Master |
| CentOS7.6 | 192.168.36.27 | Slave-1 |
| CentOS6.10 | 192.168.36.37 | Slave-2 |
四台机器安装数据库服务
[root@Manager ~]#yum install -y mariadb-server
[root@Master ~]#yum install -y mariadb-server
[root@Slave-1 ~]#yum install -y mariadb-server
[root@Slave-2 ~]#yum install -y mysql-server
将Manager 设置成时间主服务器
[root@Manager ~]#vim /etc/chrony.conf
server 172.22.0.1 iburst
...
allow 192.168.0.0/16
...
local stratum 10

[root@Manager ~]#systemctl restart chronyd
其余节点向Manager 进行时间同步
[root@Master ~]#ntpdate 192.168.36.7
 9 May 19:40:23 ntpdate[7326]: step time server 192.168.36.7 offset -28798.440970 sec
....

 注:如果没有ntpdate这个命令还需要安装ntpdate软件包
 [root@Master ~]#yum install -y ntpdate
主从复制搭建
Master、Slave修改配置文件并重启服务
[root@Master ~]#cat /etc/my.cnf
[mysqld]
server_id=2
skip_name_resolve
log-bin=/data/bin/mysql-bin

[root@Slave-1 ~]#cat /etc/my.cnf
[mysqld]
server_id=3
read_only
log-bin=/data/bin/mysql-bin
relay_log_purge=0
skip_name_resolve

[root@Slave-2 ~]#cat /etc/my.cnf
[mysqld]
server_id=4
read_only
log-bin=/data/bin/mysql-bin
relay_log_purge=0
skip_name_resolve

[root@Master ~]#systemctl restart mariadb
[root@Slave-1 ~]#systemctl restart mariadb
[root@Slave-2 ~]# service mysqld restart
所有节点添加管理的用户账号
添加参与复制的账号
MariaDB [(none)]> grant replication slave on *.* to repluser@'192.168.36.%' identified by 'centos';
Query OK, 0 rows affected (0.00 sec)
添加能远程连接的管理员账号
MariaDB [(none)]> grant all on *.* to mhauser@'192.168.36.%' identified by 'centos';
Query OK, 0 rows affected (0.00 sec)
两个从节点进行同步配置
MariaDB [(none)]> CHANGE MASTER TO
    -> MASTER_HOST='192.168.36.17',
    -> MASTER_USER='repluser',
    -> MASTER_PASSWORD='centos',
    -> MASTER_PORT=3306,
    -> MASTER_LOG_FILE='mysql-bin.000001',
    -> MASTER_LOG_POS=245;
Query OK, 0 rows affected (0.01 sec)

MariaDB [(none)]> start slave;
Query OK, 0 rows affected (0.00 sec)
检查同步情况
MariaDB [(none)]> show slave status\G;
*************************** 1. row ***************************
               Slave_IO_State: Waiting for master to send event
                  Master_Host: 192.168.36.17
                  Master_User: repluser
                  Master_Port: 3306
                Connect_Retry: 60
              Master_Log_File: mysql-bin.000001
          Read_Master_Log_Pos: 245
               Relay_Log_File: mariadb-relay-bin.000002
                Relay_Log_Pos: 529
        Relay_Master_Log_File: mysql-bin.000001
             Slave_IO_Running: Yes
            Slave_SQL_Running: Yes
....
          Exec_Master_Log_Pos: 245
....
                Last_IO_Errno: 0
....
               Last_SQL_Errno: 0
....
             Master_Server_Id: 2
1 row in set (0.00 sec)
四台机器设置key验证
生成私钥文件
[root@Manager ~]#ssh-keygen
Generating public/private rsa key pair.
Enter file in which to save the key (/root/.ssh/id_rsa):
Created directory '/root/.ssh'.
Enter passphrase (empty for no passphrase):
Enter same passphrase again:
Your identification has been saved in /root/.ssh/id_rsa.
Your public key has been saved in /root/.ssh/id_rsa.pub.
The key fingerprint is:
SHA256:jxpqYJdn4u7++CD8CLdUtv6oxLZ/0w0KawCWmiwrpE4 root@Manager
The key's randomart image is:
+---[RSA 2048]----+
|                 |
|                 |
|  .              |
|.o               |
|+o  o.  S        |
|+=+o=.o .o       |
|=EO=o*.o.o.      |
|=* B==+o. .      |
|o.=O@==.         |
+----[SHA256]-----+

生成公钥文件
[root@Manager ~]#ssh-copy-id 192.168.36.7
/usr/bin/ssh-copy-id: INFO: Source of key(s) to be installed: "/root/.ssh/id_rsa.pub"
The authenticity of host '192.168.36.7 (192.168.36.7)' can't be established.
ECDSA key fingerprint is SHA256:PpNjNgoCvgIqG8A1Cl2apgSHQWiY3auqlPdpuJuhE4Y.
ECDSA key fingerprint is MD5:35:97:a4:a0:3d:9a:67:52:bd:61:56:f1:b7:b5:01:59.
Are you sure you want to continue connecting (yes/no)? yes
/usr/bin/ssh-copy-id: INFO: 1 key(s) remain to be installed -- if you are prompted now it is to install the new keys
[email protected]'s password:

Number of key(s) added: 1

Now try logging into the machine, with:   "ssh '192.168.36.7'"
and check to make sure that only the key(s) you wanted were added.
将秘钥传送至远程主机
[root@Manager ~]#scp -rp .ssh 192.168.36.17:/root/
[root@Manager ~]#scp -rp .ssh 192.168.36.27:/root/
[root@Manager ~]#scp -rp .ssh 192.168.36.37:/root/
Manager安装MHA软件
将事先准备好的软件拷贝到主机中
[root@Manager ~]#ll m*
-rw-r--r-- 1 root root 87119 Nov 10  2017 mha4mysql-manager-0.56-0.el6.noarch.rpm
-rw-r--r-- 1 root root 36326 Nov 10  2017 mha4mysql-node-0.56-0.el6.noarch.rpm
使用yum软件安装,由于存在EPEL源的依赖包,所以安装之前需先启用EPEL源
[root@Manager ~]#yum repolist
Loaded plugins: fastestmirror, langpacks
Loading mirror speeds from cached hostfile
epel                                                                            | 4.7 kB  00:00:00
(1/3): epel/group_gz                                                            |  88 kB  00:00:00
(2/3): epel/updateinfo                                                          | 994 kB  00:00:00
(3/3): epel/primary_db                                                          | 6.7 MB  00:00:01
repo id                                          repo name                                       status
CentOS                                           CentOS                                          10,019
epel                                             epel                                            13,139
repolist: 23,158

[root@Manager ~]#yum install *.rpm -y
所有主从节点安装node包
[root@Master ~]#rpm -ivh mha4mysql-node-0.56-0.el6.noarch.rpm
准备中...                          ################################# [100%]
正在升级/安装...
   1:mha4mysql-node-0.56-0.el6        ################################# [100%]

[root@Slave-1 ~]#rpm -ivh mha4mysql-node-0.56-0.el6.noarch.rpm
准备中...                          ################################# [100%]
正在升级/安装...
   1:mha4mysql-node-0.56-0.el6        ################################# [100%]

[root@Slave-2 ~]# rpm -ivh mha4mysql-node-0.56-0.el6.noarch.rpm
Preparing...                ########################################### [100%]
   1:mha4mysql-node         ########################################### [100%]
##Manager修改配置文件
[root@Manager ~]#mkdir /etc/mha
[root@Manager ~]#vim /etc/mha/app1.conf
[server default]
user=mhauser
password=magedu
manager_workdir=/data/mastermha/app1/
manager_log=/data/mastermha/app1/manager.log
remote_workdir=/data/mastermha/app1/
ssh_user=root
repl_user=repluser
repl_password=magedu
ping_interval=1
[server1]
hostname=192.168.36.17
candidate_master=1
[server2]
hostname=192.168.36.27
candidate_master=1
[server3]
hostname=192.168.36.37
candidate_master=1
检查ssh协议是否配置成功
[root@Manager ~]#masterha_check_ssh --conf=/etc/mha/app1.conf
Thu May  9 21:03:34 2019 - [warning] Global configuration file /etc/masterha_default.cnf not found. Skipping.
Thu May  9 21:03:34 2019 - [info] Reading application default configuration from /etc/mha/app1.conf..
....
Warning: Permanently added '192.168.36.27' (RSA) to the list of known hosts.
Thu May  9 21:03:36 2019 - [debug]   ok.
Thu May  9 21:03:37 2019 - [info] All SSH connection tests passed successfully.
检查主从复制有没有问题
[root@Manager ~]#masterha_check_repl --conf=/etc/mha/app1.conf
Thu May  9 21:04:15 2019 - [warning] Global configuration file /etc/masterha_default.cnf not found. Skipping.
Thu May  9 21:04:15 2019 - [info] Reading application default configuration from /etc/mha/app1.conf..
....
MySQL Replication Health is NOT OK!
启动执行manager
[root@Manager ~]#masterha_manager --conf=/etc/mha/app1.conf
Thu May  9 21:05:28 2019 - [warning] Global configuration file /etc/masterha_default.cnf not found. Skipping.
Thu May  9 21:05:28 2019 - [info] Reading application default configuration from /etc/mha/app1.conf..
Thu May  9 21:05:28 2019 - [info] Reading server configuration from /etc/mha/app1.conf..
宕机测试
1、导入SQL函数语句,使数据处于增加状态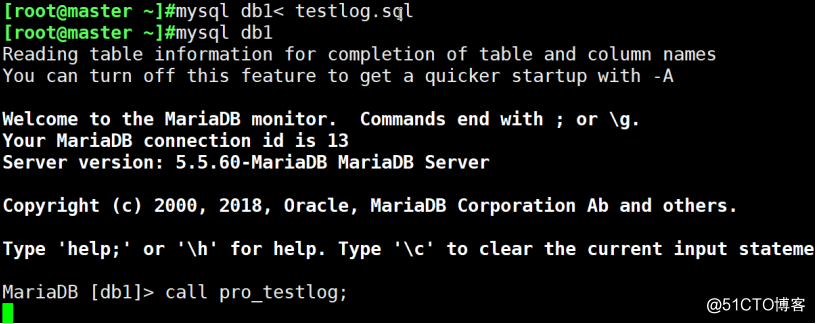
2、kill -9 杀死Master中mysqld父进程,同时子进程也消失不见,实现master宕机,此时发现Master迁移至从节点
3、此时master服务器为Slave-1节点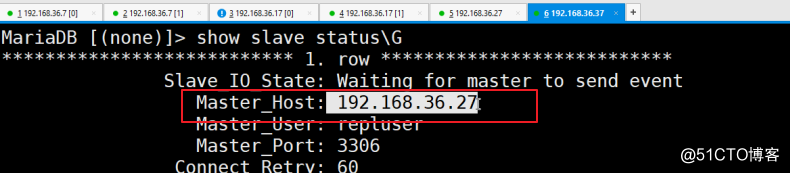
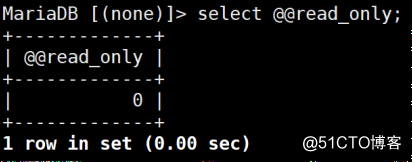
4、管理员自动将read_only修改为0