一、文章简介
本文简要介绍了spring security的基本原理和实现,并基于springboot整合了spring security实现了基于数据库管理的用户的登录和登出,登录过程实现了验证码的校验功能。
完整代码地址:https://github.com/Dreamshf/spring-security.git
二、spring security框架简介
Spring Security是一个能够为基于Spring的企业应用系统提供声明式的安全访问控制解决方案的安全框架。主要包括:用户认证(Authentication)和用户授权(Authorization)两个部分。用户认证指的是验证某个用户能否访问该系统。用户认证过程一般要求用户提供用户名和密码。系统通过校验用户名和密码来完成认证过程。用户授权指的是验证某个用户是否有权限执行某个操作或访问某个页面。通常在一个企业级的系统中不同的用户所具有的权限也是不同的,简单的来说比如普通用户和管理员的区别,管理员显然具有更高的权限。一般来说,系统会为不同的用户分配不同的角色,而每个角色则对应一系列的权限。spring security的主要核心功能为认证和授权,所有的架构也是基于这两个核心功能去实现的。
三、spring security原理
Spring security提供了一组可以在Spring应用上下文中配置的Bean,充分利用了Spring IoC,DI,和AOP功能,为应用系统提供声明式的安全访问控制功能,减少了为企业系统安全控制编写大量重复代码的工作。Spring Security对Web安全性的支持大量地依赖于Servlet过滤器。这些过滤器拦截进入请求,并且在应用程序处理该请求之前进行某些安全处理。 Spring Security提供有若干个过滤器,它们能够拦截Servlet请求,并将这些请求转给认证和访问决策管理器处理,从而增强安全性。
四、spring boot整合spring security
4.1 准备工作
4.1.1数据库


 1 DROP TABLE IF EXISTS `t_user`;
 2 CREATE TABLE `t_user`  (
 3   `id` int(10) NOT NULL AUTO_INCREMENT COMMENT '主键',
 4   `code` varchar(64) CHARACTER SET utf8 COLLATE utf8_general_ci DEFAULT NULL COMMENT '用户编码',
 5   `create_time` timestamp(0) NOT NULL DEFAULT '2019-01-01 00:00:00' COMMENT '注册时间',
 6   `update_time` timestamp(0) NOT NULL DEFAULT CURRENT_TIMESTAMP ON UPDATE CURRENT_TIMESTAMP(0) COMMENT '更新时间',
 7   `is_delete` int(1) NOT NULL DEFAULT 0 COMMENT '是否删除 0:未删除 1:删除',
 8   `username` varchar(16) CHARACTER SET utf8 COLLATE utf8_general_ci NOT NULL COMMENT '用户名',
 9   `password` varchar(64) CHARACTER SET utf8 COLLATE utf8_general_ci NOT NULL COMMENT '密码',
10   `role` varchar(64) CHARACTER SET utf8 COLLATE utf8_general_ci NOT NULL COMMENT '用户角色',
11   `phone` varchar(11) CHARACTER SET utf8 COLLATE utf8_general_ci DEFAULT NULL COMMENT '手机号',
12   `email` varchar(64) CHARACTER SET utf8 COLLATE utf8_general_ci DEFAULT NULL COMMENT '邮箱',
13   PRIMARY KEY (`id`) USING BTREE,
14   UNIQUE INDEX `username`(`username`) USING BTREE
15 ) ENGINE = InnoDB AUTO_INCREMENT = 14 CHARACTER SET = utf8 COLLATE = utf8_general_ci COMMENT = '用户表' ROW_FORMAT = Compact;
16 INSERT INTO `t_user` VALUES (1, 'ef269d06e6b1497fbb209becca248251', '2019-04-22 14:24:10', '2019-04-29 06:55:39', 0, '学友', 'admin1', '1', '18888888888', '[email protected]');
17 INSERT INTO `t_user` VALUES (2, '074aca14664b49ce9165bc597d928078', '2019-01-01 00:00:00', '2019-05-01 18:10:54', 0, '德华', 'admin', '1', '18839339393', '[email protected]');
18 INSERT INTO `t_user` VALUES (3, '0bad7a4fea5f4c129c454cdf658744ec', '2019-01-01 00:00:00', '2019-05-01 18:11:13', 0, '富城', 'admin', '1', '18839339393', '[email protected]');
4.1.2 pom.xml依赖
 1 <?xml version="1.0" encoding="UTF-8"?>
 2 <project xmlns="http://maven.apache.org/POM/4.0.0" xmlns:xsi="http://www.w3.org/2001/XMLSchema-instance"
 3          xsi:schemaLocation="http://maven.apache.org/POM/4.0.0 http://maven.apache.org/xsd/maven-4.0.0.xsd">
 4     <modelVersion>4.0.0</modelVersion>
 5     <parent>
 6         <groupId>org.springframework.boot</groupId>
 7         <artifactId>spring-boot-starter-parent</artifactId>
 8         <version>1.5.10.RELEASE</version>
 9         <relativePath/> <!-- lookup parent from repository -->
10     </parent>
11     <groupId>com.shf</groupId>
12     <artifactId>sping-boot-security</artifactId>
13     <version>0.0.1-SNAPSHOT</version>
14     <name>sping-boot-security</name>
15     <description>Demo project for Spring Boot</description>
16
17     <properties>
18         <java.version>1.8</java.version>
19     </properties>
20
21     <dependencies>
22         <dependency>
23             <groupId>org.projectlombok</groupId>
24             <artifactId>lombok</artifactId>
25         </dependency>
26
27         <dependency>
28             <groupId>org.springframework.boot</groupId>
29             <artifactId>spring-boot-starter-security</artifactId>
30             <version>1.5.10.RELEASE</version>
31         </dependency>
32
33         <dependency>
34             <groupId>mysql</groupId>
35             <artifactId>mysql-connector-java</artifactId>
36         </dependency>
37
38         <dependency>
39             <groupId>org.springframework.boot</groupId>
40             <artifactId>spring-boot-starter-web</artifactId>
41         </dependency>
42
43         <dependency>
44             <groupId>org.springframework.boot</groupId>
45             <artifactId>spring-boot-starter-data-jpa</artifactId>
46         </dependency>
47     </dependencies>
48
49     <build>
50         <plugins>
51             <plugin>
52                 <groupId>org.springframework.boot</groupId>
53                 <artifactId>spring-boot-maven-plugin</artifactId>
54             </plugin>
55         </plugins>
56     </build>
57
58 </project>
4.1.3 application.properties
1 spring.datasource.url=jdbc:mysql://localhost:3306/test?characterEncoding=utf8&useSSL=false&serverTimezone=GMT
2 spring.datasource.driver-class-name=com.mysql.jdbc.Driver
3 spring.datasource.username=root
4 spring.datasource.password=
4.2 代码实现
4.2.1 t_user表的实体类TUser的基本操作
实体类的基本增删改查可依据项目需要自行选择合适的ORM框架,此处我采用的是jpa实现的基本用户查询操作。此模块不在过多赘述,直接上代码
TUser.java实体类
 1 package com.shf.security.user.entity;
 2
 3 import lombok.Data;
 4
 5 import javax.persistence.Entity;
 6 import javax.persistence.Id;
 7 import javax.persistence.Table;
 8 import java.util.Date;
 9
10 /**
11  * 描述:用户表实体
12  * @author: shf
13  * @date: 2019-04-19 16:24:04
14  * @version: V1.0
15  */
16 @Data
17 @Entity
18 @Table(name = "t_user")
19 public class TUser {
20     /**
21      * 主键
22      */
23     @Id
24     private Integer id;
25     /**
26      * 用户编码
27      */
28
29     private String code;
30     /**
31      * 注册时间
32      */
33     private Date createTime;
34     /**
35      * 更新时间
36      */
37     private Date updateTime;
38     /**
39      * 是否删除 0:删除 1:未删除
40      */
41     private Integer isDelete;
42     /**
43      * 用户名
44      */
45     private String username;
46     /**
47      * 密码
48      */
49     private String password;
50     /**
51      * 用户角色
52      */
53     private String role;
54     /**
55      * 手机号
56      */
57     private String phone;
58     /**
59      * 邮箱
60      */
61     private String email;
62 }
TUserDao.java类
 1 package com.shf.security.user.dao;
 2
 3 import com.shf.security.user.entity.TUser;
 4 import org.springframework.data.jpa.repository.JpaSpecificationExecutor;
 5 import org.springframework.data.jpa.repository.Query;
 6 import org.springframework.data.repository.CrudRepository;
 7
 8 public interface TUserDao extends CrudRepository<TUser, Long>, JpaSpecificationExecutor<TUser> {
 9
10     @Query("select t from TUser t where t.username=?1")
11     public TUser findByName(String username);
12 }
TUserService.java接口
 1 package com.shf.security.user.service;
 2
 3 import com.shf.security.user.entity.TUser;
 4
 5 /**
 6  * 描述:用户表服务类
 7  * @author: shf
 8  * @date: 2019-04-19 16:24:04
 9  * @version: V1.0
10  */
11 public interface TUserService{
12     /**
13      * @param username
14      * @return
15      */
16     public TUser findByName(String username);
17 }
TUserServiceImpl.java
 1 package com.shf.security.user.service.impl;
 2
 3 import com.shf.security.user.dao.TUserDao;
 4 import com.shf.security.user.entity.TUser;
 5 import com.shf.security.user.service.TUserService;
 6 import org.springframework.beans.factory.annotation.Autowired;
 7 import org.springframework.stereotype.Service;
 8
 9
10 /**
11  * 描述:
12  * @author: shf
13  * @date: 2017/11/16 0016 13:12
14  * @version: V1.0
15  */
16 @Service
17 public class TUserServiceImpl implements TUserService {
18     @Autowired
19     private TUserDao userDao;
20
21     @Override
22     public TUser findByName(String username) {
23         return userDao.findByName(username);
24     }
25 }
4.2.2 生成验证码的工具
验证码生产工具VerifyCodeFactory.java
  1 package com.shf.security.security.utils;
  2
  3 import javax.imageio.ImageIO;
  4 import javax.servlet.ServletException;
  5 import javax.servlet.ServletOutputStream;
  6 import javax.servlet.http.HttpServlet;
  7 import javax.servlet.http.HttpServletRequest;
  8 import javax.servlet.http.HttpServletResponse;
  9 import javax.servlet.http.HttpSession;
 10 import java.awt.*;
 11 import java.awt.image.BufferedImage;
 12 import java.io.IOException;
 13 import java.util.Random;
 14
 15 /**
 16  * 描述:验证码生成器
 17  *
 18  * @Author shf
 19  * @Date 2019/4/21 18:01
 20  * @Version V1.0
 21  **/
 22 public class VerifyCodeFactory extends HttpServlet {
 23     private static final long serialVersionUID = -5051097528828603895L;
 24     public final static String SESSION_KEY = "verifyCode";
 25     private final static int SESSION_TIME_OUT = 3600;
 26
 27
 28     /**
 29      * 验证码图片的宽度。
 30      */
 31     private int width = 100;
 32
 33     /**
 34      *  验证码图片的高度。
 35      */
 36     private int height = 30;
 37
 38     /**
 39      * 验证码字符个数
 40      */
 41     private int codeCount = 4;
 42
 43     /**
 44      * 字体高度
 45      */
 46     private int fontHeight;
 47
 48     /**
 49      * 干扰线数量
 50      */
 51     private int interLine = 12;
 52
 53     /**
 54      * 第一个字符的x轴值,因为后面的字符坐标依次递增,所以它们的x轴值是codeX的倍数
 55      */
 56     private int codeX;
 57
 58     /**
 59      * codeY ,验证字符的y轴值,因为并行所以值一样
 60      */
 61     private int codeY;
 62
 63     /**
 64      * codeSequence 表示字符允许出现的序列值
 65      */
 66     char[] codeSequence = { 'A', 'B', 'C', 'D', 'E', 'F', 'G', 'H', 'I', 'J',
 67             'K', 'L', 'M', 'N', 'O', 'P', 'Q', 'R', 'S', 'T', 'U', 'V', 'W',
 68             'X', 'Y', 'Z', '0', '1', '2', '3', '4', '5', '6', '7', '8', '9' };
 69
 70     /**
 71      * 初始化验证图片属性
 72      */
 73     @Override
 74     public void init() throws ServletException {
 75         // 从web.xml中获取初始信息
 76         // 宽度
 77         String strWidth = this.getInitParameter("width");
 78         // 高度
 79         String strHeight = this.getInitParameter("height");
 80         // 字符个数
 81         String strCodeCount = this.getInitParameter("codeCount");
 82         // 将配置的信息转换成数值
 83         try {
 84             if (strWidth != null && strWidth.length() != 0) {
 85                 width = Integer.parseInt(strWidth);
 86             }
 87             if (strHeight != null && strHeight.length() != 0) {
 88                 height = Integer.parseInt(strHeight);
 89             }
 90             if (strCodeCount != null && strCodeCount.length() != 0) {
 91                 codeCount = Integer.parseInt(strCodeCount);
 92             }
 93         } catch (NumberFormatException e) {
 94             e.printStackTrace();
 95         }
 96         //width-4 除去左右多余的位置,使验证码更加集中显示,减得越多越集中。
 97         //codeCount+1     //等比分配显示的宽度,包括左右两边的空格
 98         codeX = (width-4) / (codeCount+1);
 99         //height - 10 集中显示验证码
100         fontHeight = height - 10;
101         codeY = height - 7;
102     }
103
104     /**
105      * @param request
106      * @param response
107      * @throws ServletException
108      * @throws IOException
109      */
110     @Override
111     protected void service(HttpServletRequest request, HttpServletResponse response) throws ServletException, IOException {
112         // 定义图像buffer
113         BufferedImage buffImg = new BufferedImage(width, height, BufferedImage.TYPE_INT_RGB);
114         Graphics2D gd = buffImg.createGraphics();
115         // 创建一个随机数生成器类
116         Random random = new Random();
117         // 将图像填充为白色
118         gd.setColor(Color.LIGHT_GRAY);
119         gd.fillRect(0, 0, width, height);
120         // 创建字体,字体的大小应该根据图片的高度来定。
121         Font font = new Font("Times New Roman", Font.PLAIN, fontHeight);
122         // 设置字体。
123         gd.setFont(font);
124         // 画边框。
125         gd.setColor(Color.BLACK);
126         gd.drawRect(0, 0, width - 1, height - 1);
127         // 随机产生16条干扰线,使图象中的认证码不易被其它程序探测到。
128         gd.setColor(Color.gray);
129         for (int i = 0; i < interLine; i++) {
130             int x = random.nextInt(width);
131             int y = random.nextInt(height);
132             int xl = random.nextInt(12);
133             int yl = random.nextInt(12);
134             gd.drawLine(x, y, x + xl, y + yl);
135         }
136         // randomCode用于保存随机产生的验证码,以便用户登录后进行验证。
137         StringBuffer randomCode = new StringBuffer();
138         int red = 0, green = 0, blue = 0;
139         // 随机产生codeCount数字的验证码。
140         for (int i = 0; i < codeCount; i++) {
141             // 得到随机产生的验证码数字。
142             String strRand = String.valueOf(codeSequence[random.nextInt(36)]);
143             // 产生随机的颜色分量来构造颜色值,这样输出的每位数字的颜色值都将不同。
144             red = random.nextInt(255);
145             green = random.nextInt(255);
146             blue = random.nextInt(255);
147             // 用随机产生的颜色将验证码绘制到图像中。
148             gd.setColor(new Color(red,green,blue));
149             gd.drawString(strRand, (i + 1) * codeX, codeY);
150             // 将产生的四个随机数组合在一起。
151             randomCode.append(strRand);
152         }
153         // 将四位数字的验证码保存到Session中。
154         HttpSession session = request.getSession();
155         session.setAttribute(SESSION_KEY, randomCode.toString());
156         session.setMaxInactiveInterval(SESSION_TIME_OUT);
157         // 禁止图像缓存。
158         response.setHeader("Pragma", "no-cache");
159         response.setHeader("Cache-Control", "no-cache");
160         response.setDateHeader("Expires", 0);
161
162         response.setContentType("image/jpeg");
163         // 将图像输出到Servlet输出流中。
164         ServletOutputStream sos = response.getOutputStream();
165         ImageIO.write(buffImg, "jpeg", sos);
166         sos.close();
167     }
168 }
将验证码以接口的方式对外暴露
 1 package com.shf.security.security.config;
 2
 3 import com.shf.security.security.utils.VerifyCodeFactory;
 4 import org.springframework.boot.web.servlet.ServletRegistrationBean;
 5 import org.springframework.context.annotation.Bean;
 6 import org.springframework.context.annotation.Configuration;
 7
 8 /**
 9  * 描述:验证码servlet配置项
10  *
11  * @Author shf
12  * @Date 2019/4/21 18:05
13  * @Version V1.0
14  **/
15 @Configuration
16 public class VerifyCodeServletConfig {
17     @Bean
18     public ServletRegistrationBean indexServletRegistration() {
19         ServletRegistrationBean registration = new ServletRegistrationBean(new VerifyCodeFactory());
20         registration.addUrlMappings("/getVerifyCode");
21         return registration;
22     }
23 }
4.2.3 自定义用户信息类CustomUserDetails 集成实体类TUser并实现security提供的UserDetails 接口
UserDetails是真正用于构建SpringSecurity登录的安全用户(UserDetails),也就是说,在springsecurity进行用户认证的过程中,是通过UserDetails的实现类去获取用户信息,然后进行授权验证的。不明白?没关系,继续往下看
 1 package com.shf.security.security.config;
 2
 3 import com.shf.security.user.entity.TUser;
 4 import org.springframework.security.core.GrantedAuthority;
 5 import org.springframework.security.core.userdetails.UserDetails;
 6
 7 import java.util.Collection;
 8
 9 /**
10  * 描述:自定义UserDetails,使UserDetails具有TUser的实体结构
11  *
12  * @Author shf
13  * @Date 2019/4/19 10:30
14  * @Version V1.0
15  **/
16 public class CustomUserDetails extends TUser implements UserDetails {
17     public CustomUserDetails(TUser tUser){
18         if(null != tUser){
19             this.setId(tUser.getId());
20             this.setCode(tUser.getCode());
21             this.setCreateTime(tUser.getCreateTime());
22             this.setUpdateTime(tUser.getUpdateTime());
23             this.setUsername(tUser.getUsername());
24             this.setPassword(tUser.getPassword());
25             this.setIsDelete(tUser.getIsDelete());
26             this.setEmail(tUser.getEmail());
27             this.setPhone(tUser.getPhone());
28             this.setRole(tUser.getRole());
29         }
30     }
31     @Override
32     public Collection<? extends GrantedAuthority> getAuthorities() {
33         return null;
34     }
35
36     @Override
37     public boolean isAccountNonExpired() {
38         return true;
39     }
40
41     @Override
42     public boolean isAccountNonLocked() {
43         return true;
44     }
45
46     @Override
47     public boolean isCredentialsNonExpired() {
48         return true;
49     }
50
51     @Override
52     public boolean isEnabled() {
53         return true;
54     }
55 }
4.2.4 创建CustomUserDetailsService 类实现UserDetailsService接口
在下文将要提到的CustomAuthenticationProvider 类,也就是security核心的验证类中,会调用CustomUserDetailsService 中重写的loadUserByUsername方法
 1 package com.shf.security.security.config;
 2
 3 import com.shf.security.user.entity.TUser;
 4 import com.shf.security.user.service.TUserService;
 5 import org.springframework.beans.factory.annotation.Autowired;
 6 import org.springframework.security.core.userdetails.UserDetails;
 7 import org.springframework.security.core.userdetails.UserDetailsService;
 8 import org.springframework.security.core.userdetails.UsernameNotFoundException;
 9 import org.springframework.stereotype.Component;
10
11 /**
12  * 描述:自定义UserDetailsService,从数据库读取用户信息,实现登录验证
13  *
14  * @Author shf
15  * @Date 2019/4/21 17:21
16  * @Version V1.0
17  **/
18 @Component
19 public class CustomUserDetailsService implements UserDetailsService {
20     @Autowired
21     private TUserService userService;
22
23     /**
24      * 认证过程中 - 根据登录信息获取用户详细信息
25      *
26      * @param username 登录用户输入的用户名
27      * @return
28      * @throws UsernameNotFoundException
29      */
30     @Override
31     public UserDetails loadUserByUsername(String username) throws UsernameNotFoundException {
32         //根据用户输入的用户信息,查询数据库中已注册用户信息
33         TUser user = userService.findByName(username);
34         //如果用户不存在直接抛出UsernameNotFoundException异常
35         if (user == null) throw new UsernameNotFoundException("用户名为" + username + "的用户不存在");
36         return new CustomUserDetails(user);
37     }
38 }
4.2.5 新建类CustomWebAuthenticationDetails继承WebAuthenticationDetails类
类似于UserDetails类给我们提供了用户详细信息一样,WebAuthenticationDetails则为我们提供了登录请求的用户的信息(也就是申请登录的用户的username和password信息),springsecurity默认只验证用户的username和password信息,所以我们如果想实现验证码登录,需要重写WebAuthenticationDetails类,使其能通过HttpServletRequest获取到用户输入的验证码的信息。
 1 package com.shf.security.security.config;
 2
 3 import org.springframework.security.web.authentication.WebAuthenticationDetails;
 4
 5 import javax.servlet.http.HttpServletRequest;
 6
 7 /**
 8  * 描述:自定义WebAuthenticationDetails,将验证码和用户名、密码一同带入AuthenticationProvider中
 9  *
10  * @Author shf
11  * @Date 2019/4/21 16:58
12  * @Version V1.0
13  **/
14 public class CustomWebAuthenticationDetails extends WebAuthenticationDetails {
15     private static final long serialVersionUID = 6975601077710753878L;
16     private final String verifyCode;
17     public CustomWebAuthenticationDetails(HttpServletRequest request) {
18         super(request);
19         verifyCode = request.getParameter("verifyCode");
20     }
21
22     public String getVerifyCode() {
23         return verifyCode;
24     }
25
26     @Override
27     public String toString() {
28         StringBuilder sb = new StringBuilder();
29         sb.append(super.toString()).append("; verifyCode: ").append(this.getVerifyCode());
30         return sb.toString();
31     }
32 }
4.2.6 创建CustomAuthenticationDetailsSource类继承AuthenticationDetailsSource类
上面提到CustomWebAuthenticationDetails 需要通过HttpServletRequest获取到用户输入的验证码的信息。AuthenticationDetailsSource类就是初始化CustomWebAuthenticationDetails类的地方,在这里面我们需要将HttpServletRequest传递到CustomAuthenticationDetailsSource中。
 1 package com.shf.security.security.config;
 2
 3 import org.springframework.security.authentication.AuthenticationDetailsSource;
 4 import org.springframework.security.web.authentication.WebAuthenticationDetails;
 5 import org.springframework.stereotype.Component;
 6
 7 import javax.servlet.http.HttpServletRequest;
 8
 9 /**
10  * 描述:自定义AuthenticationDetailsSource,将HttpServletRequest注入到CustomWebAuthenticationDetails,使其能获取到请求中的验证码等其他信息
11  *
12  * @Author shf
13  * @Date 2019/4/21 17:03
14  * @Version V1.0
15  **/
16 @Component
17 public class CustomAuthenticationDetailsSource implements AuthenticationDetailsSource<HttpServletRequest, WebAuthenticationDetails> {
18     @Override
19     public WebAuthenticationDetails buildDetails(HttpServletRequest request) {
20         return new CustomWebAuthenticationDetails(request);
21     }
22 }
4.2.7 实现自定义认证器(重点),创建CustomAuthenticationProvider继承AbstractUserDetailsAuthenticationProvider类
AbstractUserDetailsAuthenticationProvider类实现的是AuthenticationProvider接口
  1 package com.shf.security.security.config;
  2
  3 import com.shf.security.security.utils.VerifyCodeFactory;
  4 import lombok.extern.slf4j.Slf4j;
  5 import org.springframework.beans.factory.annotation.Autowired;
  6 import org.springframework.security.authentication.BadCredentialsException;
  7 import org.springframework.security.authentication.DisabledException;
  8 import org.springframework.security.authentication.UsernamePasswordAuthenticationToken;
  9 import org.springframework.security.authentication.dao.AbstractUserDetailsAuthenticationProvider;
 10 import org.springframework.security.core.Authentication;
 11 import org.springframework.security.core.AuthenticationException;
 12 import org.springframework.security.core.userdetails.UserDetails;
 13 import org.springframework.stereotype.Component;
 14 import org.springframework.web.context.request.RequestContextHolder;
 15 import org.springframework.web.context.request.ServletRequestAttributes;
 16
 17 import javax.servlet.http.HttpServletRequest;
 18 import javax.servlet.http.HttpSession;
 19
 20 /**
 21  * 描述:自定义SpringSecurity的认证器
 22  *
 23  * @Author shf
 24  * @Date 2019/4/21 17:30
 25  * @Version V1.0
 26  **/
 27 @Component
 28 @Slf4j
 29 public class CustomAuthenticationProvider extends AbstractUserDetailsAuthenticationProvider {//implements AuthenticationProvider {
 30     @Autowired
 31     private CustomUserDetailsService userDetailsService;
 32
 33     @Override
 34     protected void additionalAuthenticationChecks(UserDetails userDetails, UsernamePasswordAuthenticationToken usernamePasswordAuthenticationToken) throws AuthenticationException {
 35
 36     }
 37
 38     @Override
 39     public Authentication authenticate(Authentication authentication) throws AuthenticationException {
 40         //用户输入的用户名
 41         String username = authentication.getName();
 42         //用户输入的密码
 43         String password = authentication.getCredentials().toString();
 44         //通过CustomWebAuthenticationDetails获取用户输入的验证码信息
 45         CustomWebAuthenticationDetails details = (CustomWebAuthenticationDetails) authentication.getDetails();
 46         String verifyCode = details.getVerifyCode();
 47         if(null == verifyCode || verifyCode.isEmpty()){
 48             log.warn("未输入验证码");
 49             throw new NullPointerException("请输入验证码");
 50         }
 51         //校验验证码
 52         if(!validateVerifyCode(verifyCode)){
 53             log.warn("验证码输入错误");
 54             throw new DisabledException("验证码输入错误");
 55         }
 56         //通过自定义的CustomUserDetailsService,以用户输入的用户名查询用户信息
 57         CustomUserDetails userDetails = (CustomUserDetails) userDetailsService.loadUserByUsername(username);
 58         //校验用户密码
 59         if(!userDetails.getPassword().equals(password)){
 60             log.warn("密码错误");
 61             throw new BadCredentialsException("密码错误");
 62         }
 63         Object principalToReturn = userDetails;
 64         //将用户信息塞到SecurityContext中,方便获取当前用户信息
 65         return this.createSuccessAuthentication(principalToReturn, authentication, userDetails);
 66     }
 67
 68     @Override
 69     protected UserDetails retrieveUser(String s, UsernamePasswordAuthenticationToken usernamePasswordAuthenticationToken) throws AuthenticationException {
 70         return null;
 71     }
 72
 73     /**
 74      * 验证用户输入的验证码
 75      * @param inputVerifyCode
 76      * @return
 77      */
 78     public boolean validateVerifyCode(String inputVerifyCode){
 79         //获取当前线程绑定的request对象
 80         HttpServletRequest request = ((ServletRequestAttributes) RequestContextHolder.getRequestAttributes()).getRequest();
 81         // 这个VerifyCodeFactory.SESSION_KEY是在servlet中存入session的名字
 82         HttpSession session = request.getSession();
 83         String verifyCode = (String)session.getAttribute(VerifyCodeFactory.SESSION_KEY);
 84         if(null == verifyCode || verifyCode.isEmpty()){
 85             log.warn("验证码过期请重新验证");
 86             throw new DisabledException("验证码过期,请重新验证");
 87         }
 88         // 不分区大小写
 89         verifyCode = verifyCode.toLowerCase();
 90         inputVerifyCode = inputVerifyCode.toLowerCase();
 91
 92         log.info("验证码:{}, 用户输入:{}", verifyCode, inputVerifyCode);
 93
 94         return verifyCode.equals(inputVerifyCode);
 95     }
 96
 97     @Override
 98     public boolean supports(Class<?> authentication) {
 99         return authentication.equals(UsernamePasswordAuthenticationToken.class);
100     }
101 }


如上图所示,AuthenticationProvider接口为我们提供了security核心的认证方法authenticate方法,该方法就是实现用户认证的方法。我们自定义实现authenticate方法,大致思路如下,通过CustomWebAuthenticationDetails获取到用户输入的username,password,verifyCode信息。通过CustomUserDetails 中获取用户信息(数据库中注册的用户的信息),然后对用户信息进行比对认证。最终实现认证过程。
当然,也可以直接实现AuthenticationProvider 接口,然后实现authenticate方法。这都是可以的但是有现成的AbstractUserDetailsAuthenticationProvider可用,为啥还要再写一遍呢?尤其是AbstractUserDetailsAuthenticationProvider类提供的createSuccessAuthentication方法,封装了一个完美的Authentication(后续会继续提到)。AuthenticationProvider 的supports方法呢是直接决定哪一个AuthenticationProvider 的实现类是我们需要的认证器。
4.2.8 创建WebSecurityConfig 继承WebSecurityConfigurerAdapter配置类。(spring security的配置类)
具体看代码注释吧,很详细的。
值得一提的是第81行的配置,是我们实现restful风格登录的关键。
  1 package com.shf.security.security.config;
  2
  3 import lombok.extern.slf4j.Slf4j;
  4 import org.springframework.beans.factory.annotation.Autowired;
  5 import org.springframework.context.annotation.Bean;
  6 import org.springframework.context.annotation.Configuration;
  7 import org.springframework.security.authentication.AuthenticationDetailsSource;
  8 import org.springframework.security.config.annotation.authentication.builders.AuthenticationManagerBuilder;
  9 import org.springframework.security.config.annotation.web.builders.HttpSecurity;
 10 import org.springframework.security.config.annotation.web.builders.WebSecurity;
 11 import org.springframework.security.config.annotation.web.configuration.EnableWebSecurity;
 12 import org.springframework.security.config.annotation.web.configuration.WebSecurityConfigurerAdapter;
 13 import org.springframework.security.core.Authentication;
 14 import org.springframework.security.core.AuthenticationException;
 15 import org.springframework.security.crypto.bcrypt.BCryptPasswordEncoder;
 16 import org.springframework.security.crypto.password.PasswordEncoder;
 17 import org.springframework.security.web.authentication.AuthenticationFailureHandler;
 18 import org.springframework.security.web.authentication.AuthenticationSuccessHandler;
 19 import org.springframework.security.web.authentication.WebAuthenticationDetails;
 20 import org.springframework.security.web.authentication.logout.LogoutSuccessHandler;
 21
 22 import javax.servlet.ServletException;
 23 import javax.servlet.http.HttpServletRequest;
 24 import javax.servlet.http.HttpServletResponse;
 25 import java.io.IOException;
 26 import java.io.PrintWriter;
 27
 28 /**
 29  * 描述:
 30  *
 31  * @Author shf
 32  * @Date 2019/4/19 10:54
 33  * @Version V1.0
 34  **/
 35 @Configuration
 36 @EnableWebSecurity
 37 @Slf4j
 38 public class WebSecurityConfig extends WebSecurityConfigurerAdapter {
 39     @Autowired
 40     private CustomAuthenticationProvider customAuthenticationProvider;
 41
 42     @Autowired
 43     private CustomUserDetailsService customUserDetailsService;
 44
 45     @Autowired
 46     private AuthenticationDetailsSource<HttpServletRequest, WebAuthenticationDetails> authenticationDetailsSource;
 47
 48     @Override
 49     protected void configure(AuthenticationManagerBuilder auth) throws Exception {
 50         //将自定义的CustomAuthenticationProvider装配到AuthenticationManagerBuilder
 51         auth.authenticationProvider(customAuthenticationProvider);
 52         //将自定的CustomUserDetailsService装配到AuthenticationManagerBuilder
 53         auth.userDetailsService(customUserDetailsService).passwordEncoder(new PasswordEncoder() {
 54             @Override
 55             public String encode(CharSequence charSequence) {
 56                 return charSequence.toString();
 57             }
 58
 59             @Override
 60             public boolean matches(CharSequence charSequence, String s) {
 61                 return s.equals(charSequence.toString());
 62             }
 63         });
 64     }
 65     @Override
 66     public void configure(HttpSecurity http) throws Exception {
 67         http
 68                 .cors()
 69                 .and().csrf().disable();//开启跨域
 70         http    /*匿名请求:不需要进行登录拦截的url*/
 71                 .authorizeRequests()
 72                     .antMatchers("/getVerifyCode").permitAll()
 73                     .anyRequest().authenticated()//其他的路径都是登录后才可访问
 74                     .and()
 75                 /*登录配置*/
 76                 .formLogin()
 77                     .loginPage("/login_page")//登录页,当未登录时会重定向到该页面
 78                     .successHandler(authenticationSuccessHandler())//登录成功处理
 79                     .failureHandler(authenticationFailureHandler())//登录失败处理
 80                     .authenticationDetailsSource(authenticationDetailsSource)//自定义验证逻辑,增加验证码信息
 81                     .loginProcessingUrl("/login")//restful登录请求地址
 82                     .usernameParameter("username")//默认的用户名参数
 83                     .passwordParameter("password")//默认的密码参数
 84                     .permitAll()
 85                     .and()
 86                 /*登出配置*/
 87                 .logout()
 88                     .permitAll()
 89                     .logoutSuccessHandler(logoutSuccessHandler());
 90     }
 91
 92     /**
 93      * security检验忽略的请求,比如静态资源不需要登录的可在本处配置
 94      * @param web
 95      */
 96     @Override
 97     public void configure(WebSecurity web){
 98 //        platform.ignoring().antMatchers("/");
 99     }
100
101     @Autowired
102     public void configureGlobal(AuthenticationManagerBuilder auth) throws Exception {
103         auth.userDetailsService(userDetailsService()).passwordEncoder(passwordEncoder());
104         auth.eraseCredentials(false);
105     }
106     //密码加密配置
107     @Bean
108     public BCryptPasswordEncoder passwordEncoder() {
109         return new BCryptPasswordEncoder(4);
110     }
111     //登入成功
112     @Bean
113     public AuthenticationSuccessHandler authenticationSuccessHandler() {
114         return new AuthenticationSuccessHandler() {
115             /**
116              * 处理登入成功的请求
117              *
118              * @param httpServletRequest
119              * @param httpServletResponse
120              * @param authentication
121              * @throws IOException
122              * @throws ServletException
123              */
124             @Override
125             public void onAuthenticationSuccess(HttpServletRequest httpServletRequest, HttpServletResponse httpServletResponse, Authentication authentication) throws IOException, ServletException {
126                 httpServletResponse.setContentType("application/json;charset=utf-8");
127                 PrintWriter out = httpServletResponse.getWriter();
128                 out.write("{\"status\":\"success\",\"msg\":\"登录成功\"}");
129                 out.flush();
130                 out.close();
131             }
132         };
133     }
134     //登录失败
135     @Bean
136     public AuthenticationFailureHandler authenticationFailureHandler(){
137         return new AuthenticationFailureHandler() {
138             /**
139              * 处理登录失败的请求
140              * @param httpServletRequest
141              * @param httpServletResponse
142              * @param e
143              * @throws IOException
144              * @throws ServletException
145              */
146             @Override
147             public void onAuthenticationFailure(HttpServletRequest httpServletRequest, HttpServletResponse httpServletResponse, AuthenticationException e) throws IOException, ServletException {
148                 httpServletResponse.setContentType("application/json;charset=utf-8");
149                 PrintWriter out = httpServletResponse.getWriter();
150                 out.write("{\"status\":\"error\",\"msg\":\"登录失败\"}");
151                 out.flush();
152                 out.close();
153             }
154         };
155     }
156     //登出处理
157     @Bean
158     public LogoutSuccessHandler logoutSuccessHandler() {
159         return new LogoutSuccessHandler() {
160             /**
161              * 处理登出成功的请求
162              *
163              * @param httpServletRequest
164              * @param httpServletResponse
165              * @param authentication
166              * @throws IOException
167              * @throws ServletException
168              */
169             @Override
170             public void onLogoutSuccess(HttpServletRequest httpServletRequest, HttpServletResponse httpServletResponse, Authentication authentication) throws IOException, ServletException {
171                 httpServletResponse.setContentType("application/json;charset=utf-8");
172                 PrintWriter out = httpServletResponse.getWriter();
173                 out.write("{\"status\":\"success\",\"msg\":\"登出成功\"}");
174                 out.flush();
175                 out.close();
176             }
177         };
178     }
179 }
4.2.9 LoginController
 1 package com.shf.security.login;
 2
 3 import com.shf.security.utils.Response;
 4 import org.springframework.web.bind.annotation.RequestMapping;
 5 import org.springframework.web.bind.annotation.RestController;
 6
 7 /**
 8  * 描述:
 9  *
10  * @Author shf
11  * @Date 2019/4/19 14:58
12  * @Version V1.0
13  **/
14 @RestController
15 public class LoginController {
16     @RequestMapping("/login_error")
17     public Response loginError(){
18         Response response = new Response();
19         response.buildSuccessResponse("登录失败");
20         return response;
21     }
22     @RequestMapping("/login_success")
23     public Response loginSuccess(){
24         Response response = new Response();
25         response.buildSuccessResponse("登录成功");
26         return response;
27     }
28
29     @RequestMapping("/login_page")
30     public Response root(){
31         Response response = new Response();
32         response.buildSuccessResponse("尚未登录,请登录");
33         return response;
34     }
35 }
4.2.10 UserHolder 工具类
在日常的业务中,在很多业务代码中,我们都需要获取当前用户的信息。这个类就是一个静态工具类。
 1 package com.shf.security.utils;
 2
 3 import com.shf.security.user.entity.TUser;
 4 import org.springframework.security.core.Authentication;
 5 import org.springframework.security.core.context.SecurityContext;
 6 import org.springframework.security.core.context.SecurityContextHolder;
 7
 8 /**
 9  * 描述:
10  *
11  * @Author shf
12  * @Description TODO
13  * @Date 2019/4/21 15:24
14  * @Version V1.0
15  **/
16 public class UserHolder {
17     public static TUser getUserDetail(){
18         SecurityContext ctx = SecurityContextHolder.getContext();
19         Authentication auth = ctx.getAuthentication();
20         TUser user = (TUser) auth.getPrincipal();
21         return user;
22     }
23     public static String getUserCode(){
24         SecurityContext ctx = SecurityContextHolder.getContext();
25         Authentication auth = ctx.getAuthentication();
26         TUser user = (TUser) auth.getPrincipal();
27         return user.getCode();
28     }
29     public static int getUserId(){
30         SecurityContext ctx = SecurityContextHolder.getContext();
31         Authentication auth = ctx.getAuthentication();
32         TUser user = (TUser) auth.getPrincipal();
33         return user.getId();
34     }
35 }
4.2.10 其他工具类Response.java
 1 package com.shf.security.utils;
 2
 3 import lombok.Data;
 4
 5 /**
 6  * 描述:
 7  *
 8  * @Author shf
 9  * @Description TODO
10  * @Date 2019/4/16 15:03
11  * @Version V1.0
12  **/
13 @Data
14 public class Response {
15     private String code;
16     private String msg;
17     private Object data;
18     public Response() {
19         this.code = "-200";
20         this.msg = "SUCCESS";
21     }
22     public Response(String code, String msg){
23         this.code = code;
24         this.msg = msg;
25     }
26     public Response buildSuccessResponse(){
27         this.code = "-200";
28         this.msg = "SUCCESS";
29         return this;
30     }
31     public Response buildFailedResponse(){
32         this.code = "-400";
33         this.msg = "FAILED";
34         return this;
35     }
36     public Response buildSuccessResponse(String msg){
37         this.code = "-200";
38         this.msg = msg;
39         return this;
40     }
41     public Response buildFailedResponse(String msg){
42         this.code = "-400";
43         this.msg = msg;
44         return this;
45     }
46     public Response buildFailedResponse(String code, String msg){
47         this.code = code;
48         this.msg = msg;
49         return this;
50     }
51     public Response buildSuccessResponse(String code, String msg){
52         this.code = code;
53         this.msg =  msg;
54         return this;
55     }
56 }
五、问题总结
5.1 验证码问题
其实呢通过第二部分对security原理的分析,我们不难看出,spring security就是建立在一连串的过滤器filter上的,spring security通过这些过滤器逐层对请求进行过滤,然后进行各种登录认证和授权过程。说道这里估计大家也就能想到另外的实现验证码验证登录的方式。也就是在认证用户输入的用户名和密码之前验证验证码信息。UsernamePasswordAuthenticationFilter过滤器顾名思义就是用户名和密码的过滤器。所以我们只需要在4.2.8 章节中的WebSecurityConfig中addFilterBefore()配置在UsernamePasswordAuthenticationFilter过滤器之前执行VerifyCodeFilter过滤器。然后在VerifyCodeFilter过滤器中执行验证码的验证逻辑即可。
1 .and()
2 .addFilterBefore(new VerifyCodeFilter(),UsernamePasswordAuthenticationFilter.class)
但是这种方式呢有一种天然的缺点,也就是没法办将除username和password的信息带到认证器中进行统一认证。而且如果我们除了验证码意外还需要验证更多的信息的话。岂不是要写n多个filter。
5.2 貌似忘了进行测试登录
浏览器请求:http://localhost:8080/user/test
结果:

正是我们想要的结果。
登录验证还是使用postman吧,因为spring security默认只处理post方式的登录请求。浏览器提交restful请求默认是get的。所以。。。
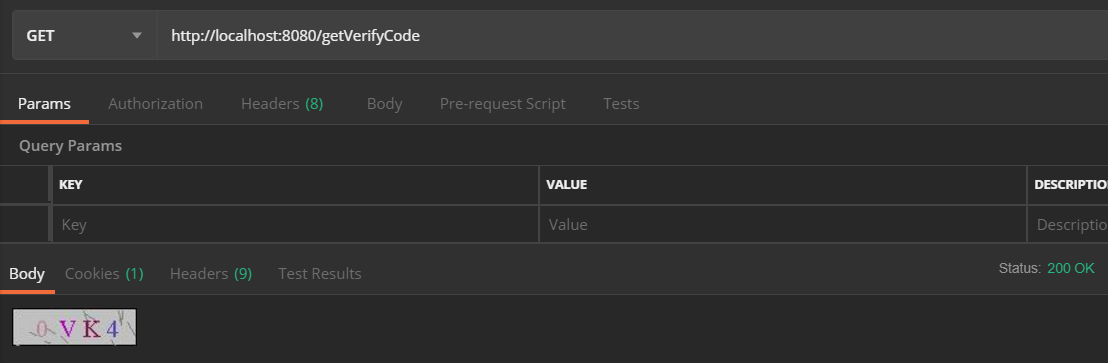
postman请求验证码
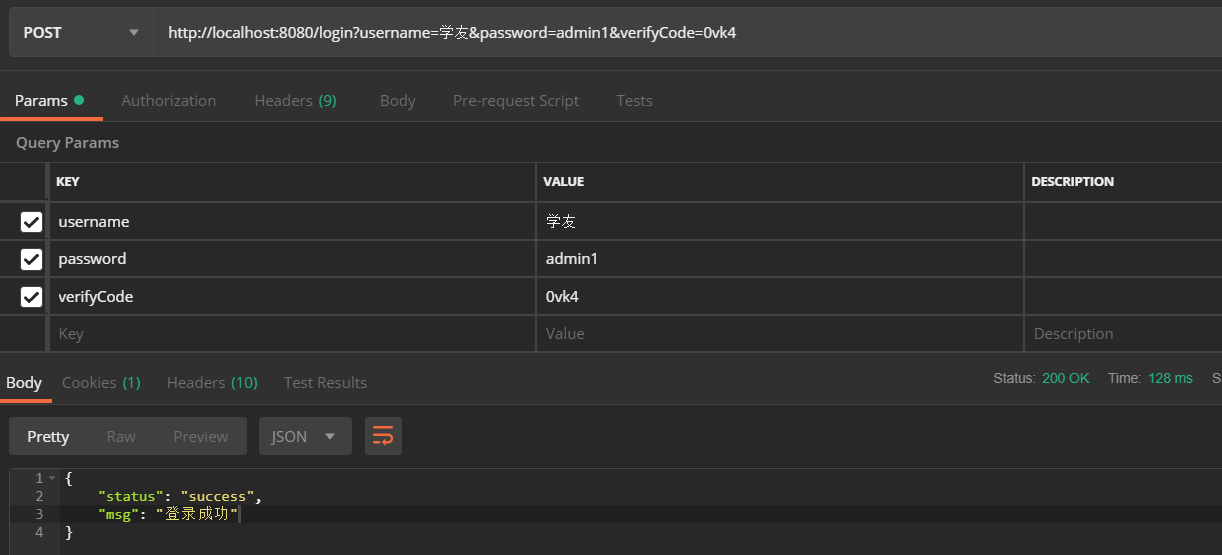
postman登录
看到这里如果还有问题,请移步https://github.com/Dreamshf/spring-security.git开箱即用。
如有问题或者错误的地方,还请留言指出。