版权声明:本文为博主原创文章,未经博主允许不得转载。 https://blog.csdn.net/yhflyl/article/details/89739147
SpringCloud之Eureka高可用
Eureka是Netfilx开元的服务发现组件,本身是一个基于REST的服务。它包含EurekaServer(以下简称ES)和EurekaClient(以下简称EC)两部分,SpringCloud将它集成在子项目SpringCloudNetfilx中,实现了微服务的注册与发现。
一、如何实现高可用
简单来说就是集群,这样就可以在一出现问题的时候保证服务不会挂掉,在谈到集群的时候就会遇到多个Eureka相互注册的问题,接下来简单介绍下:
在上一篇博客中写到了 SpringCloud之Eureka注册 接着上次项目我们接着配就可以了。
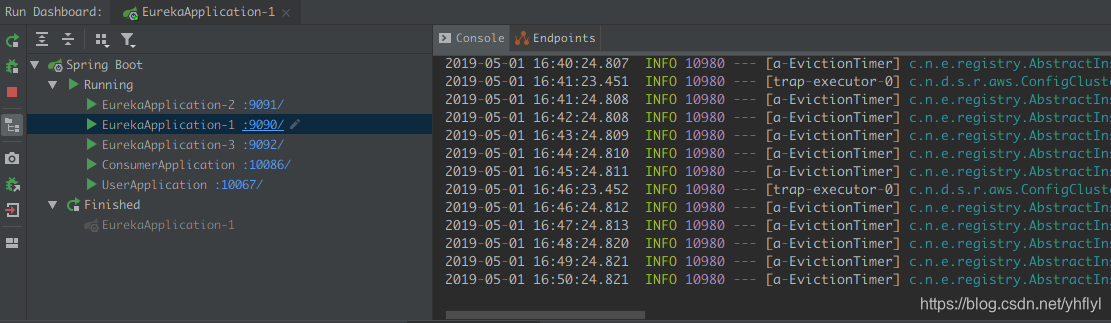
这个是我在项目中的运行实例。
二、修改配置文件
将cloud-erueka-service中的配置文件修改为可以使用与多个实例之间使用的配置。
总配置文件 application.yml
spring:
  application:
    name: Eureka-Service
  profiles:
    active: service1
第一个实例的配置文件 application-service1.yml
server:
  port: 9090
eureka:
  instance:
#    hostname: service1
#    prefer-ip-address: true
#    ip-address: 127.0.0.1
  client:
    service-url:
      # 相互注册: 将 9090端口的Eureka服务注册到9090和9091端口的Eureka服务注册中心中去
      defaultZone: http://127.0.0.1:9091/eureka/,http://127.0.0.1:9092/eureka/
#    register-with-eureka: false
#    fetch-registry: true
第二个实例的配置文件 `application-service2.yml
server:
  port: 9091
eureka:
  instance:
#    prefer-ip-address: true
#    ip-address: 127.0.0.1
#    hostname: service2
  client:
    service-url:
      # 相互注册: 将 9091端口的Eureka服务注册到9090和9092端口的Eureka服务注册中心中去
      defaultZone: http://127.0.0.1:9090/eureka/,http://127.0.0.1:9092/eureka/
#    register-with-eureka: false
#    fetch-registry: true
第三个实例的配置文件 application-service3.yml
server:
  port: 9092
eureka:
  instance:
#    prefer-ip-address: true
#    ip-address: 127.0.0.1
#    hostname: service3
  client:
    service-url:
      # 相互注册: 将 9092端口的Eureka服务注册到9090和9091端口的Eureka服务注册中心中去
      defaultZone: http://127.0.0.1:9090/eureka/,http://127.0.0.1:9090/eureka/
#    register-with-eureka: false
#    fetch-registry: true
这样就OK了。
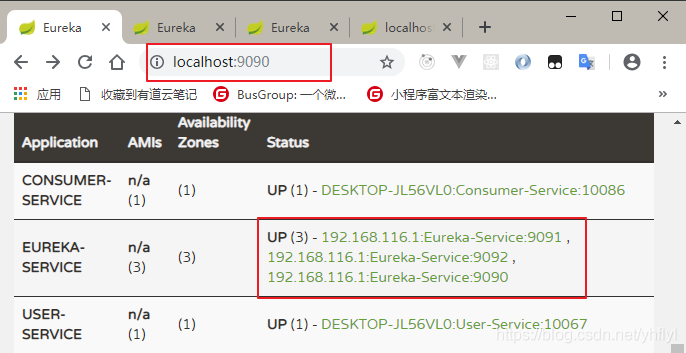
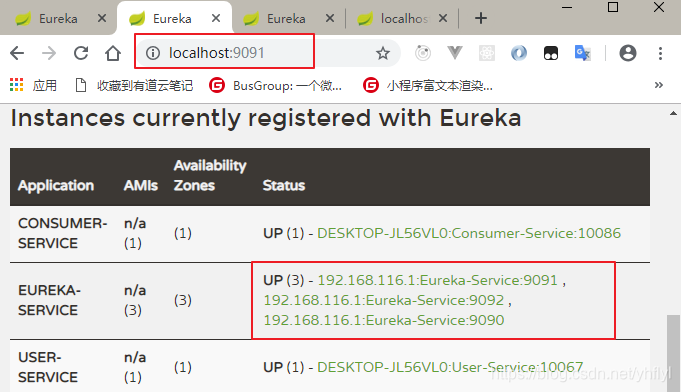
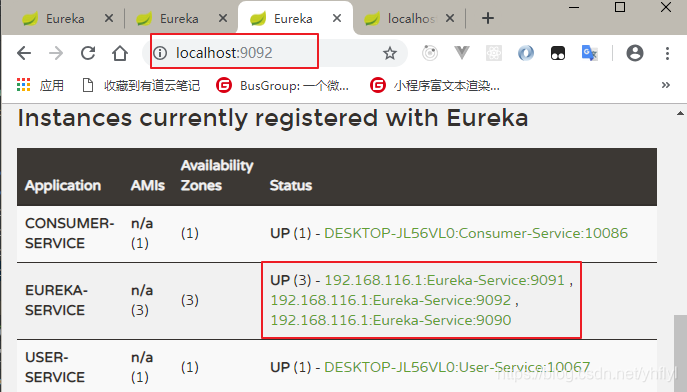
三、效果图
端口为:9090
端口为:9091
端口为: 9092
四、打包
在cloud-erueka-service的pom文件 中添加打包插件, 打包在远程服务器上部署。
 <build>
     <plugins>
         <plugin><!-- 项目的打包发布 -->
             <groupId>org.springframework.boot</groupId>
             <artifactId>spring-boot-maven-plugin</artifactId>
             <configuration>
                 <!-- 主启动类 -->
                 <mainClass>com.cloud.eureka.EurekaApplication</mainClass>
             </configuration>
             <executions>
                 <execution>
                     <goals>
                         <goal>repackage</goal>
                     </goals>
                 </execution>
             </executions>
         </plugin>
     </plugins>
</build>
四、最后解释下配置文件中一些配置信息
eureka:
  instance:
#    prefer-ip-address: true
#    ip-address: 127.0.0.1
#    eureka服务端的实例名称
#    hostname: service3
  client:
    service-url:
      defaultZone: http://127.0.0.1:9090/eureka/,http://127.0.0.1:9090/eureka/
#    表示是否可以向注册中心注册自己    false : 表示不向注册中心注册自己。
#    register-with-eureka: false
#    false :表示自己端就是注册中心,我的职责就是维护服务实例,并不需要去检索服务
#    fetch-registry: true