1. 什么是Vue.js
- 目前最火的两大框架之一,另一个框架为React,不同的是React可以开发App,Vue.就是需要借助于Weex。
- 是前端三大主流框架之一,还有一个框架为Angular.js。
- Vue.js是一套用于构建用户界面的框架,只关注视图层
- 能够让用户不再操作DOM元素,解放用户双手,有恒多的事件去关注业务逻辑。
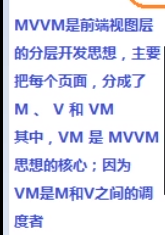
2. MVC和MVVM的区别
MVC:
 MVVM:
MVVM:

3. Vue的学习
1. 第一个hello world
<!DOCTYPE html>
<html>
<head>
	<title>Vue的基本代码</title>
	<script src="./vue.js"></script>
</head>
<body>
	<!-- Vue实例所控制的这个元素区域,就是我们的V -->
	<div id="app">
		<p>{{msg}}</p>
	</div>

	<script>
	//创建一个Vue的实例
	//new出来的这个vm对象,就是我们MVVM中的VM调度者
		new  Vue({
			el:'#app',
		//这里的data就是MVVM中的M ,专门用来保存每个页面的数据
			data:{
				msg:'欢迎学习Vue'
			}
		})
	</script>

</body>
</html>
2. vue基本属性方法
<!DOCTYPE html>
<html>
<head>
	<title>v-clock的学习</title>
	<script src="./vue.js"></script>
	<style>
		[v-cloak]{
			display:none;
		}
	</style>
</head>
<body>

	<div id="app">
		<!-- v-cloak 能够解决插值表达式闪烁的问题 -->
		<p v-cloak>{{msg}}</p>
		<!-- 默认v-text是没有闪烁问题的 -->
		<!-- v-text会覆盖元素中原本的内容,但是  插值表达式  只会替换自己的这个占位符,不会将内容清空 -->
		<h5 v-text="msg"></h5>
		<div v-html="msg2">90789098</div>
		<!-- v-bind中可以写合法的js表达式 缩写 : -->
		<!-- v-on:事件绑定机制    缩写  @ -->
		<input type="button" value="这是一个按钮" :title="mytitle + '132132'"
		@click="show"/>
	</div>


	<script>
		new Vue({
			el:'#app',
			data:{
				msg:'123',
				msg2:'<h1>我是一个H1标题</h1>',
				mytitle:'这是一个title'
			},
			//这个methods属性中定义了当前Vue实例所有可用的方法
			methods:{
				show:function(){
					alert("hello")
				}
			}
		})
	</script>
</body>
</html>
3. 一个简单的跑马灯实例
<!DOCTYPE html>
<html>
	<head>
		<meta charset="utf-8">
		<title></title>
		<script src="./vue.js"></script>
	</head>
	<body>
		<!-- 1.绑定一个点击事件
		2.在按钮的事件处理函数中,写相关的逻辑代码:
		拿到msg字符串,然后使用substring来进行字符串的截取操作,将第一个字符串截取出来放到最后一个位置
		3.为了实现点击按钮自动截取,要把2步骤中的代码放到一个定时器中去 -->
		<div id="app">
			<button @click="lang">开始滚动</button>
			<button @click="stop">低调</button>
			<h4>{{msg}}</h4>

		</div>
		<script>
			new Vue({
				el:"#app",
				data:{
					msg:'猥琐发育,别浪。。。',
					intervalId:null
				},
				methods:{
					lang(){

						if(this.intervalId!=null){
							return;
						}
// 						如果想要获取data上的数据或者是想要调用methods中的方法,
// 						必须使用this.数据属性名  或   this.方法名来进行访问
						//开启一个定时器,每0.4秒执行一次操作
						//=>用来解决this的指向问题,这样函数内部和外部使用的this保持一致
						this.intervalId = setInterval(() => {
							var start=this.msg.substring(0,1)
							var end=this.msg.substring(1)
							//vm实例会监听自己身上data数据的改变,只要数据已发生变化,就会自动把最新的数据从data上同步到页面中去
							//程序员只需要关心数据,不需要渲染页面
							this.msg=end+start
						},400)
					},
					//停止定时器
					stop(){
						clearInterval(this.intervalId)
						//每当清除了定时期之后需要重新赋值为null
						this.intervalId=null
					}
				}
			})
		</script>
	</body>
</html>
4. v-on的事件修饰符

<!DOCTYPE html>
<html>
	<head>
		<meta charset="utf-8">
		<title></title>
		<script src="./vue.js"></script>
		<style>
			.inner{
				height:150px;
				background-color: aqua;
			}
			.outer{
				padding: 40px;
				background-color: crimson;
			}
		</style>
	</head>
	<body>
		<!-- Vue实例所控制的这个元素区域,就是我们的V -->
		<div id="app" >
			<!-- <div class="inner" @click="div1Handler">
				//使用.stop阻止冒泡
				<button @click.stop="btnHandler">戳他</button>
			</div> -->

			<!-- 使用.prevent阻止默认行为 -->
			<!-- <a href="http://www.baidu.com" @click.prevent="linkclick">百度一下</a> -->

			<!-- 使用.capture实现捕获触发事件的机制 -->
			<!-- <div class="inner" @click.capture="div1Handler">
				<button @click="btnHandler">戳他</button>
			</div> -->

			<!-- 使用.self实现只有点击当前元素的时候才会触发事件机制 -->
			<!-- <div class="inner" @click.self="div1Handler">
				<button @click="btnHandler">戳他</button>
			</div> -->

			<!-- 使用.once指触发一次事件 -->
			<!-- <a href="http://www.baidu.com" @click.prevent.once="linkclick">百度一下</a> -->

			<!-- 演示   .stop  和  .self  的区别 -->
			<!-- <div class="outer" @click="div2Handler">
			<div class="inner" @click="div1Handler">
				<button @click.stop="btnHandler">戳他</button>
			</div>
			</div> -->
			<!-- .self 只会阻止自己身上的冒泡,并不会阻止其他的冒泡行为 -->
			<div class="outer" @click="div2Handler">
			<div class="inner" @click.self="div1Handler">
				<button @click="btnHandler">戳他</button>
			</div>
			</div>
		</div>


		<script>
		//创建一个Vue的实例
		//new出来的这个vm对象,就是我们MVVM中的VM调度者
			new  Vue({
				el:'#app',
			//这里的data就是MVVM中的M ,专门用来保存每个页面的数据
				data:{
					msg:'欢迎学习Vue'
				},
				methods:{
					div1Handler(){
						console.log('这是出发了inner div的点击事件')
					},
					btnHandler(){
						console.log('这是触发了按钮的点击事件')
					},
					linkclick(){
						console.log('这是触发了跳转的点击事件');
					},
					div2Handler(){
						console.log('c触发outer的点击事件')
					}
				}
			})
		</script>
	</body>
</html>
5. v-model双向绑定
我们这里使用v-model双向绑定来写一个计算器类:
<!DOCTYPE html>
<html>
	<head>
		<meta charset="utf-8">
		<title></title>
		<script src="./vue.js"></script>
	</head>
	<body>
		<div id="app">
			<input type="text" v-model="n1" />

			<select v-model="opt">
				<option value="+">+</option>
				<option value="-">-</option>
				<option value="*">*</option>
				<option value="/">/</option>
			</select>

			<input type="text" v-model="n2"/>
			<input type="button" value="=" @click="calc"/>
			<input type="text" v-model="result" />
		</div>

		<script>
			new Vue({
				el:'#app',
				data:{
					n1:0,
					n2:0,
					result:0,
					opt:'*'
				},
				methods:{
					calc(){  //计算器算数的方法
// 						switch (this.opt){
// 							case '+':
// 								this.result=parseInt(this.n1)+parseInt(this.n2)
// 								break;
// 							case '-':
// 								this.result=parseInt(this.n1)-parseInt(this.n2)
// 								break;
// 							case '*':
// 								this.result=parseInt(this.n1)*parseInt(this.n2)
// 								break;
// 							case '/':
// 								if(this.n2!=0){
// 									this.result=parseInt(this.n1)/parseInt(this.n2)
// 									break;
// 								}else{
// 									console.log("除数不能够为0")
// 								}
// 						}
						//注意:这个方式很投机取巧,正式开发中少用
						var codeStr='parseInt(this.n1)'+this.opt+'parseInt(this.n2)'
						this.result=eval(codeStr)
					}
				}
			})

		</script>
	</body>
</html>
6. 使用class样式

<!DOCTYPE html>
<html>
<head>
	<script src="./vue.js"></script>
	<style>
		.red{
			color: red;
		}
		.thin{
			font_weight:200;
		}
		.italic{
			font-style: italic;
		}
		.active{
			letter-spacing: 0.5em;
		}
	</style>
</head>
<body>
	<div id="root">
		<!-- 使用数组来添加样式 -->
		<!-- 数组中还有三元表达式 -->
		<!-- <h1 :class="['red','italic',flag ? 'active':'']">干巴得啊小伙伴们</h1> -->
		<!-- 使用对象来代替三元表达式,提高可读性 -->
		<!-- <h1 :class="['red','italic',{'active':flag}]">干巴得啊小伙伴们</h1> -->
		<!-- 直接使用对象-->
		<h1 :class=classObj>干巴得啊小伙伴们</h1>
	</div>

	<script>
		new Vue({
			el:"#root",
			data:{
				flag:false,
				classObj:{red:true,thin:true,italic:true,active:false}
			},
			methods:{
			}
		})
	</script>
</body>
</html>
7.使用内联样式

<!DOCTYPE html>
<html>
<head>
	<title>Vue入门</title>
	<script src="./vue.js"></script>
</head>
<body>
	<div id="root">
		<!-- 对象就是无序键值对的集合 -->
		<h1 :style="[styleObj,styleObj2]">喵喵喵</h1>
	</div>

	<script>
		new Vue({
			el:"#root",
			data:{
				styleObj:{color:'red','font-weight':200},
				styleObj2:{'font-style':'italic'}
			},
			methods:{
			}
		})
	</script>
</body>
</html>
8. v-for循环四种元素
<!DOCTYPE html>
<html>
<head>
	<script src="./vue.js"></script>
</head>
<body>
	<div id="root">
		<!-- <p v-for="(item,index) in list" key="index">索引值:{{index}}----数组的值:{{item}}</p> -->
		<!-- 循环对象数组 -->
		<!-- <p v-for="(user,index) in list">{{user.id}} --- 名字:{{user.name}}</p> -->
		<!-- 循环对象 -->
		<!-- <p v-for="(val,key,i) in user">值是:{{val}}---键是:{{key}}---索引:{{i}}</p> -->
		<!-- 迭代数字,item从1开始 -->
		<p v-for="item in 10">这是第{{item}}次循环</p>
	</div>

	<script>
		new Vue({
			el:"#root",
			data:{
// 				list:[
// 					{id:1,name:'kaishui'},
// 					{id:3,name:'hong'},
// 					{id:0,name:'yoyo'},
// 					{id:8,name:'qing'}
// 				]
// 				user:{
// 					id:1,
// 					name:'lalala',
// 					gender:'nan'
// 				}

			},
			methods:{
			}
		})
	</script>
</body>
</html>
9. v-key的使用
<!DOCTYPE html>
<html>
<head>
	<title>Vue入门</title>
	<script src="./vue.js"></script>
</head>
<body>
	<div id="root">
		<div>
			<label>Id:
				<input type="text" v-model="id"/>
			</label>
			<label>Name:
				<input type="text" v-model="name" />
			</label>
			<button @click="add">添加</button>
		</div>
		<!-- 注意:v-for循环的时候,key属性只能够使用number或string-->
		<!-- key在使用的时候必须使用v-bind属性绑定形式,指定key的值 -->
		<!-- 在组件中使用v-for循环的时候,或者在一些特殊情况中如果v-for有问题,必须在使用v-for的同时指定唯一的字符串、数字类型key值 -->
		<p v-for="item in list" :key="item.id">
			<input type="checkbox" />
			{{item.id}}----{{item.name}}</p>
	</div>

	<script>
		new Vue({
			el:"#root",
			data:{
				list:[
					{id:1,name:'李斯'},
					{id:2,name:'嬴政'},
					{id:3,name:'赵高'},
					{id:4,name:'韩非'},
					{id:5,name:'荀子'}
				]
			},
			methods:{
				add(){  //添加方法
					this.list.unshift({id:this.id,name:this.name})
				}
			}
		})
	</script>
</body>
</html>
10.v-if 和 v-show 的区别
<!DOCTYPE html>
<html>
<head>
	<script src="./vue.js"></script>
</head>
<body>
	<div id="root">
		<button @click="flag=!flag" >toggle</button>
		<!-- v-if 每次都会重新删除或者创建元素 -->
		<!-- 有较高的切换性能消耗 -->
		<h3 v-if=flag>这是用v-if控制的元素</h3>
		<!-- v-show  每次不会进行DOM的删除和创建操作,只是切换了元素的display:none样式 -->
		<!-- 有较高的初始渲染消耗 -->
		<h3 v-show=flag>这是用v-show控制的元素</h3>
		<!-- 如果元素涉及到频繁的切换,最好不用使用v-if -->
		<!-- 如果元素可能永远也不会被显示出来被用户看到,则推荐使用v-if -->
	</div>

	<script>
		new Vue({
			el:"#root",
			data:{
				flag:true
			},
			methods:{
// 				toggle(){
// 					this.flag=!this.flag
// 				}
			}
		})
	</script>
</body>
</html>