项目之前开发完接口后,我们还需要写接口说明文档,现在有了swagger方便了很多,可以网页版直接测试,当然了也减少了我们的工作量。
使用swagger生成接口说明文档,大致需要2个步骤
1、从“管理 NuGet 程序包”对话框中:
-
- 右键单击“解决方案资源管理器” > “管理 NuGet 包”中的项目
- 将“包源”设置为“nuget.org”
- 在搜索框中输入“Swashbuckle.AspNetCore”
- 从“浏览”选项卡中选择“Swashbuckle.AspNetCore”包,然后单击“安装”
2、添加并配置 Swagger 中间件
public void ConfigureServices(IServiceCollection services)
        {
            services.AddMvc().SetCompatibilityVersion(CompatibilityVersion.Version_2_1);
            services.AddSwaggerGen(c =>
            {
                c.SwaggerDoc("v1", new Info { Title = "My API", Version = "v1" });

            });
        }
public void Configure(IApplicationBuilder app, IHostingEnvironment env)
        {
            if (env.IsDevelopment())
            {
                app.UseDeveloperExceptionPage();
            }
            else
            {
                app.UseHsts();
            }

            //启用静态文件中间件
            app.UseStaticFiles();
            // Enable middleware to serve generated Swagger as a JSON endpoint.
            app.UseSwagger();

            // Enable middleware to serve swagger-ui (HTML, JS, CSS, etc.),
            // specifying the Swagger JSON endpoint.
            app.UseSwaggerUI(c =>
            {
                c.SwaggerEndpoint("/swagger/v1/swagger.json", "My API V1");

            });

            app.UseHttpsRedirection();
            app.UseMvc();
        }
经过上面的2步,我们的接口说明文档就生成好啦,运行项目,输入https://localhost:**/swagger/index.html地址,效果如下: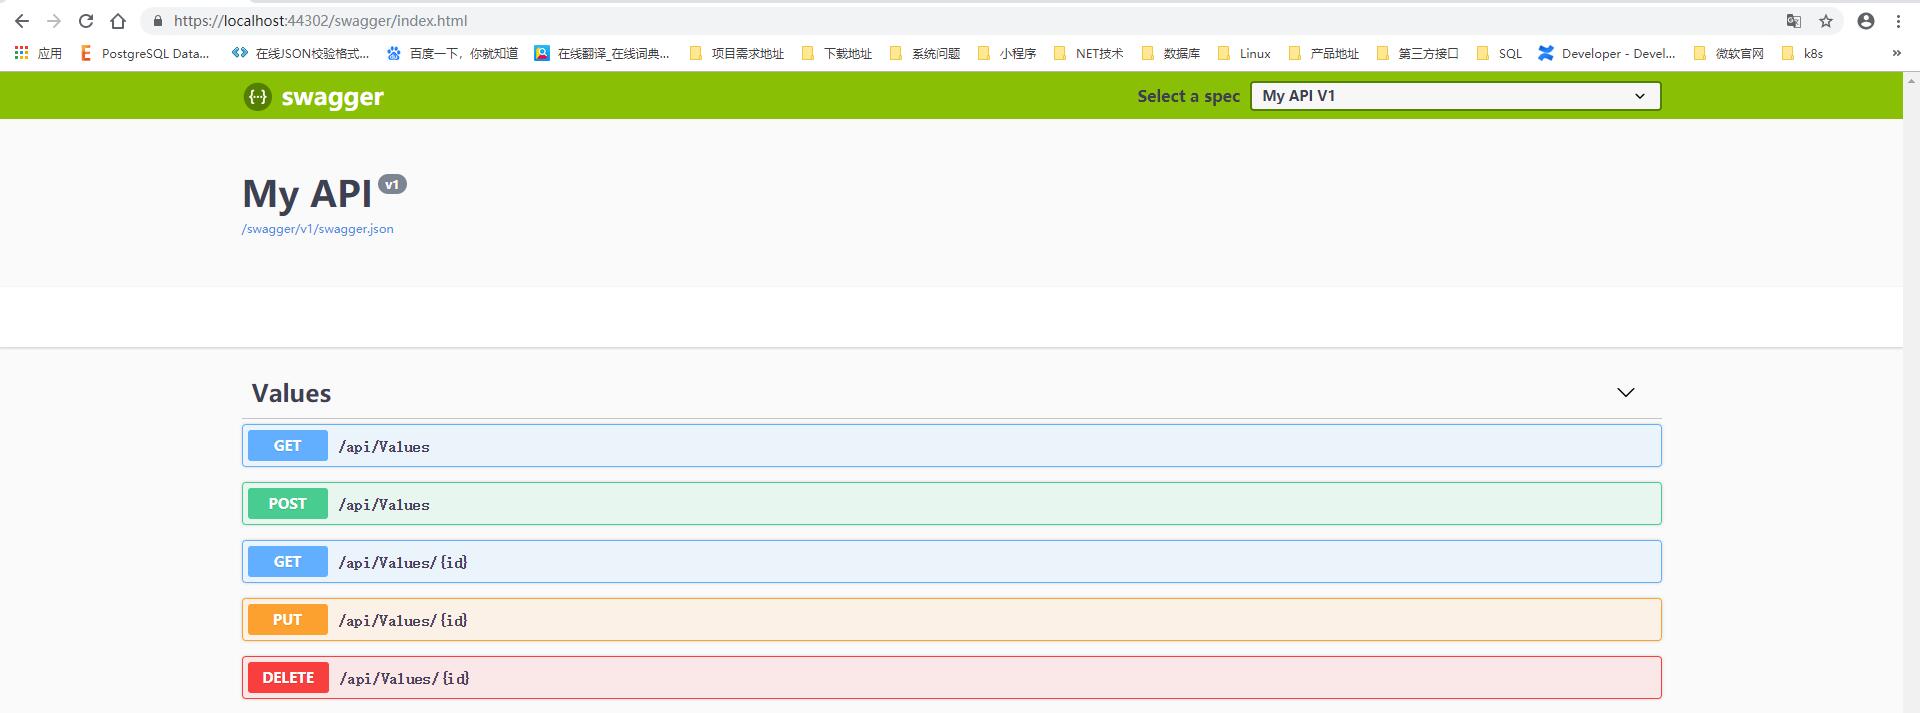 细心的童鞋可能发现,没有接口说明注释,我们稍做修改就可以显示注释,步骤如下:
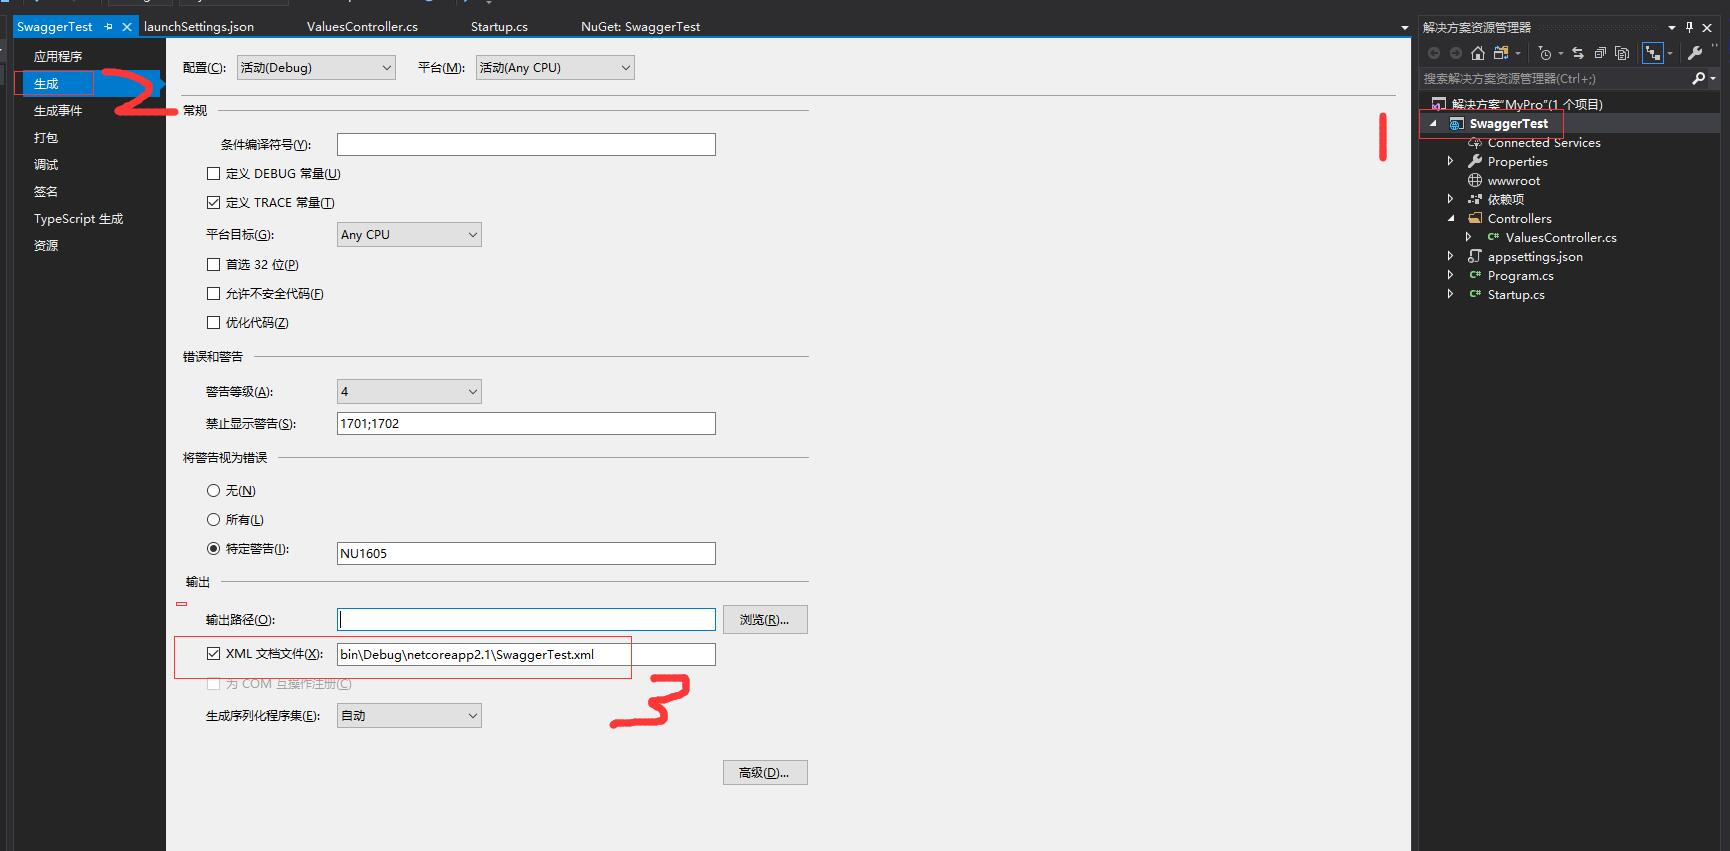
            services.AddSwaggerGen(c =>
            {
                c.SwaggerDoc("v1", new Info { Title = "My API", Version = "v1" });
                var xmlPath = Path.Combine(AppContext.BaseDirectory, "OfficalProject.xml");
                c.IncludeXmlComments(xmlPath);
            });

            //启用静态文件中间件
            app.UseStaticFiles();
            // Enable middleware to serve generated Swagger as a JSON endpoint.
            app.UseSwagger(c => { c.RouteTemplate = "swagger/{documentName}/swagger.json"; });
            // Enable middleware to serve swagger-ui (HTML, JS, CSS, etc.),
            // specifying the Swagger JSON endpoint.
            app.UseSwaggerUI(c =>
            {
                // c.SwaggerEndpoint("/swagger/v1/swagger.json", "My API V1");
                c.SwaggerEndpoint("v1/swagger.json", "SwaggerTest");
                //c.SwaggerEndpoint("/swagger/v2/swagger.json", "My API V2");
            });
上面红色字体的就是修改的部分,下面我们的文档就有注释啦
