ubuntu16.04+opencv3.1安装
安装依赖项:
sudo apt-get install build-essential cmake git libgtk2.0-dev pkg-config libavcodec-dev libavformat-dev libswscale-devsudo apt-get install checkinstall yasm libtiff5-dev libjpeg-dev libjasper-dev libdc1394-22-dev libxine2-dev libgstreamer0.10-dev libgstreamer-plugins-base0.10-dev libv4l-dev python-dev python-numpy libtbb-dev libqt4-dev libgtk2.0-dev libfaac-dev libmp3lame-dev libopencore-amrnb-dev libopencore-amrwb-dev libtheora-dev libvorbis-dev libxvidcore-dev x264 v4l-utils libeigen3-dev1.进入opencv官网,选择opencv3.1版本:https://opencv.org/releases.html

2.将下载的压缩包移至指定位置解压,比如home下,终端执行:
cd opencv-3.1.0

mkdir build

cd build
cmake -D CMAKE_BUILD_TYPE=Release -D CMAKE_INSTALL_PREFIX=/usr/local ..
make -j8
sudo make install其中,opencv可能的报错
报错1:
CMake Error: The following variables are used in this project, but they are set to NOTFOUND.Please set them or make sure they are set and tested correctly in the CMake files:
解决方法参考:https://blog.csdn.net/u014613745/article/details/78310916
报错2:
nvcc fatal : Unsupported gpu architecture 'compute_11'
解决方法:
终端输入:
cmake -D CMAKE_BUILD_TYPE=Release -D CMAKE_INSTALL_PREFIX=/usr/local -D BUILD_TIFF=ON -D BUILD_EXAMPLES=ON -D CUDA_GENERATION=Auto -D BUILD_NEW_PYTHON_SUPPORT=ON ..报错3:

解决方法:
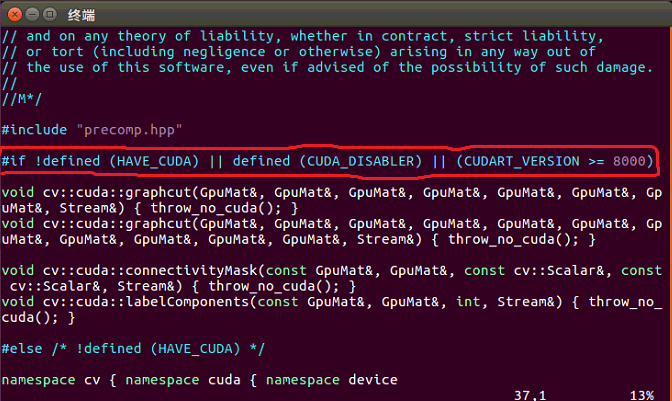
打开opencv-3.1.0/modules/cudalegacy/src/graphcuts.cpp文件,并修改:
#include "precomp.hpp"
#if !defined (HAVE_CUDA) || defined (CUDA_DISABLER)
为:
#include "precomp.hpp"

#if !defined (HAVE_CUDA) || defined (CUDA_DISABLER) || (CUDART_VERSION >= 8000)
如图为改后的
验证:
验证如下,则安装完成:

参考:
https://blog.csdn.net/jhszh418762259/article/details/52957495
https://blog.csdn.net/sysuwuhongpeng/article/details/45485719