版权声明:本文为博主原创文章,未经博主允许不得转载。 https://blog.csdn.net/u011283226/article/details/88135991
【写在前面】
要想在qml中进行绘图,有很多方法,
1、在我之前的博客中,就讲过如何在qml中使用opengl,这是一种方法,但它要求opengl的基础。
2、一种方法是使用QPainter,它的好处是提供很多易用和实用的绘图API,而且在很多在widgets的使用的代码可以直接移到qml中来使用。
3、当然还有一种方法就是使用场景图API,这种我了解的不多,以后再说。
【正文开始】
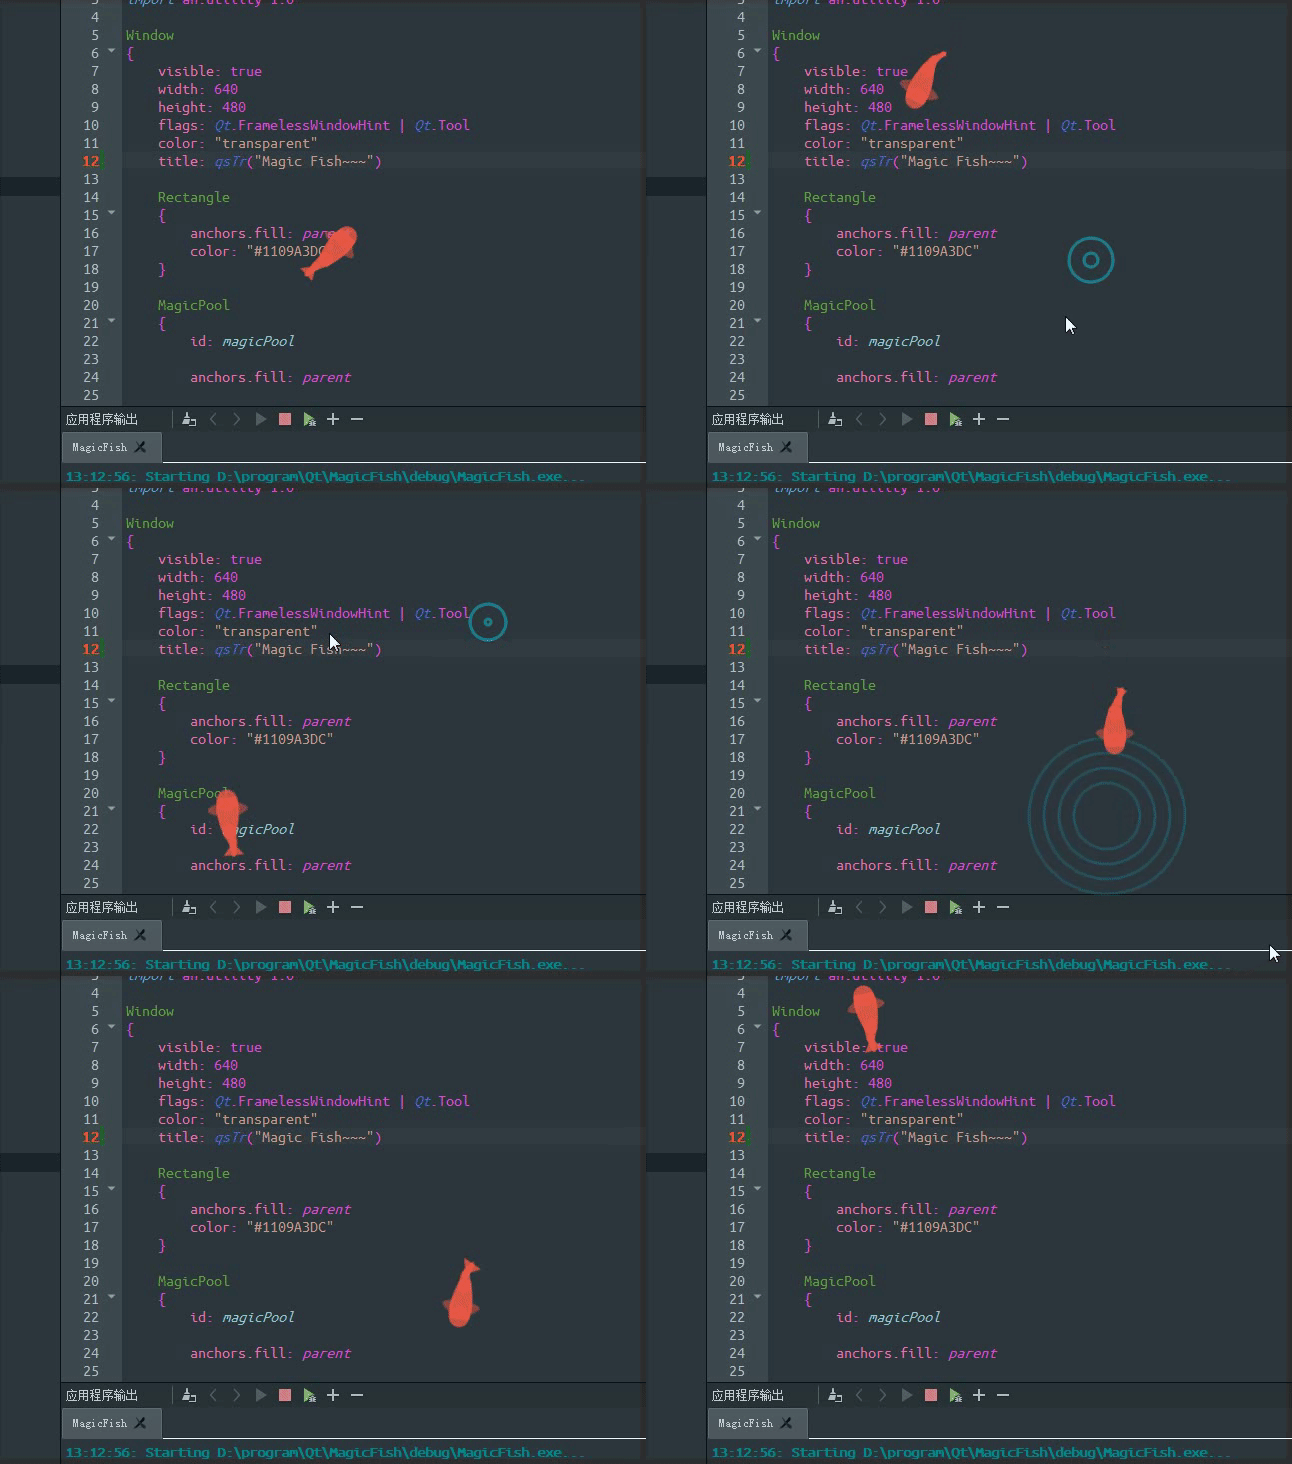
先上效果图(因为很漂亮):

可以看到,效果很不错,接下来我开始讲解如何在qml中使用QPainter的步骤:
1、继承自QQuickPaintedItem。
2、QQuickPaintedItem有一个纯虚函数paint(QPainter *painter),重写它,而参数为我们提供了一个QPainter,使用它来进行自己的绘图。
#ifndef MAGICPOOL_H
#define MAGICPOOL_H
#include "magicfish.h"
#include <QPainterPath>
#include <QQuickPaintedItem>
class MagicPool : public QQuickPaintedItem
{
Q_OBJECT
Q_PROPERTY(bool moving READ moving CONSTANT)
public:
MagicPool(QQuickPaintedItem *parent = nullptr);
bool moving() const { return m_moving; }
public slots:
void updateValue();
void updateMove();
void moveFish(qreal x, qreal y, bool hasCircle);
protected:
void paint(QPainter *painter);
private:
qreal calcIncludedAngle(const QPointF ¢er, const QPointF &head, const QPointF &touch);
QPointF calcPoint(const QPointF &pos, qreal length, qreal angle);
qreal getLength(const QPointF &pos1, const QPointF &pos2);
private:
bool m_moving;
bool m_startCircle;
QTimer *m_circleTimer;
QTimer *m_moveTimer;
QTimer *m_swimTimer;
int m_circleRadius;
int m_circleAlpha;
QPointF m_pos;
MagicFish *m_fish;
QPainterPath m_path;
qreal m_moveStep;
};
#endif // MAGICPOOL_H
3、使用qmlRegisterType注册到qml中使用。
#include "magicpool.h"
#include <QGuiApplication>
#include <QQmlApplicationEngine>

int main(int argc, char *argv[])
{
    QCoreApplication::setAttribute(Qt::AA_EnableHighDpiScaling);

    QGuiApplication app(argc, argv);

    qmlRegisterType<MagicPool>("an.utility", 1, 0, "MagicPool");
    QQmlApplicationEngine engine;
    engine.load(QUrl(QStringLiteral("qrc:/main.qml")));
    if (engine.rootObjects().isEmpty())
        return -1;

    return app.exec();
}
4、在qml中导入使用。
import QtQuick 2.9
import QtQuick.Window 2.2
import an.utility 1.0

Window
{
    visible: true
    width: 640
    height: 480
    flags: Qt.FramelessWindowHint | Qt.Tool
    color: "transparent"
    title: qsTr("Magic Fish~~~")

    Rectangle
    {
        anchors.fill: parent
        color: "#1109A3DC"
    }

    MagicPool
    {
        id: magicPool

        anchors.fill: parent

        function randomMove()
        {
            var r_x = Math.random() * width;
            var r_y = Math.random() * height;
            magicPool.moveFish(r_x, r_y, false);
        }

        Timer
        {
            interval: 1500
            repeat: true
            running: true
            onTriggered:
            {
                if (Math.random() > 0.6 && !magicPool.moving) magicPool.randomMove();
            }
        }

        Component.onCompleted: randomMove();

        MouseArea
        {
            anchors.fill: parent
            onClicked: magicPool.moveFish(mouse.x, mouse.y, true);
        }
    }
}
因为这里只讲如何在QML使用QPainter,而具体的绘制过程有点复杂,具体可见代码。
【结语】
好了,这篇其实很简单,而且QPainter用起来也简单方便,当然,在qml中确实也有更好的方法(也更复杂)来绘图,但是具体喜欢哪种还是取决于个人。
然后,附上代码地址,我就放在了QmlControls中了:https://github.com/mengps/QmlControls