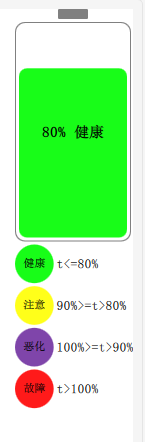
1、效果
2、QML
在资源里新建Mybattery.qml:
import QtQuick 2.0
import QtQuick 2.12
Item {
    id: root
    property color color1: "#18FD18"//绿色,健康
    property color color2: "#FFFF1A"//黄色,注意
    property color color3: "#7F45AA"//紫色,恶化
    property color color4: "#FF1A1A"//红色,故障
    property color colorBase: color1
    property bool colorChangeFlag: true
    property int bat_value: 80
    signal setBat(double batValue)//对外接口,batValue是已经使用了多少电量,比如已经使用了80%则=80
    onSetBat: {
        console.log("in bat")
        if(batValue<0)//不能小于0
        {
            text_bat_text.text="err param";
            return;
        }
        else if(batValue>100)
        {
            bat_value=0;
            rect_bat_body.border.color=color4;
        }
        else
        {
            bat_value=100-batValue;
            rect_bat_body.border.color="gray"
        }
        if(batValue<=80)
        {
            text_bat_text.text="已使用"+batValue+"%"
            colorBase = color1;
        }
        else if((batValue>80)&&(batValue<=90))
        {
            text_bat_text.text="已使用"+batValue+"%"
            colorBase = color2;
        }
        else if((batValue>90)&&(batValue<=100))
        {
            text_bat_text.text="已使用"+batValue+"%"
            colorBase = color3;
        }
        else
        {
            text_bat_text.text="已使用"+batValue+"%"
            colorBase = color4;
        }
    }
    Rectangle {
        color: "#ffffff"
        width: parent.width
        height: parent.height
        Rectangle {
            id: rect_bat_head
            width: 30
            height: 10
            radius: 1
            color: "gray"
            anchors.horizontalCenter: parent.horizontalCenter
            anchors.topMargin: 3
        }

        Rectangle {
            id: rect_bat_body
            anchors.horizontalCenter: parent.horizontalCenter
            anchors.top: rect_bat_head.bottom
            anchors.topMargin: 3
            width: parent.width-4
            height: parent.height/2
            color: "#ffffff"
            radius: 10
            border.width: 1
            border.color: "gray"
            Rectangle {
                id: rect_bat_value
                width: parent.width-8
                height: (parent.height-8)*(bat_value/100.0)
                anchors.bottom: parent.bottom
                anchors.bottomMargin: 4
                anchors.horizontalCenter: parent.horizontalCenter
                radius: 8
                color: colorBase
            }
            Text {
                id: text_bat_text
                anchors.centerIn: parent
                font.pixelSize: 15
                font.bold: true
                color: "black"
                text: bat_value+"% 健康"
            }
        }
        Grid {
            rows: 4
            columns: 2
            width: parent.width-4
            height: parent.height/2
            anchors.top: rect_bat_body.bottom
            anchors.topMargin: 3
            anchors.horizontalCenter: parent.horizontalCenter
            horizontalItemAlignment:Grid.AlignLeft
            verticalItemAlignment: Grid.AlignVCenter
            spacing: 3
            Rectangle {
                color: color1
                width: parent.width/3
                height: parent.width/3
                radius: width/2
                Text {
                    anchors.centerIn: parent
                    font.pixelSize: 11
                    text: qsTr("健康")
                }
            }

            Text {
                font.pixelSize: 13
                text: qsTr("t<=80%")
            }
            Rectangle {
                color: color2
                width: parent.width/3
                height: parent.width/3
                radius: width/2
                Text {
                    anchors.centerIn: parent
                    font.pixelSize: 11
                    text: qsTr("注意")
                }
            }

            Text {
                font.pixelSize: 13
                text: qsTr("90%>=t>80%")
            }
            Rectangle {
                color: color3
                width: parent.width/3
                height: parent.width/3
                radius: width/2
                Text {
                    anchors.centerIn: parent
                    font.pixelSize: 11
                    text: qsTr("恶化")
                }
            }
            Text {
                font.pixelSize: 13
                text: qsTr("100%>=t>90%")
            }
            Rectangle {
                color: color4
                width: parent.width/3
                height: parent.width/3
                radius: width/2
                Text {
                    anchors.centerIn: parent
                    font.pixelSize: 11
                    text: qsTr("故障")
                }
            }
            Text {
                font.pixelSize: 13
                text: qsTr("t>100%")
            }
        }
    }
}
解读:C++访问QML有多种方式,如调用函数啥的,我都试过了,widget和qml结合的方式下,目前就c++信号触发qml信号能成功。
所有定义一个信号,并且在其回调里改变界面。
3、在ui中拖动一个quickWidget
在cpp中将其绑定成qml界面:
QUrl source("qrc:/qml/Mybattery.qml");
ui->quickWidget->setResizeMode(QQuickWidget::SizeRootObjectToView );
ui->quickWidget->setSource(source);
ui->quickWidget->setClearColor(QColor(Qt::transparent));
4、在C++中通过信号连接QML的信号
没错,你没听错,就是信号连接信号!!!
mainwindow.h中定义信号
signals:
    void set(double value);
mainwindow.cpp中
QObject *root = ui->quickWidget->rootObject(); QObject::connect(this,SIGNAL(set(double)),root,SIGNAL(setBat(double)));//信号连接信号
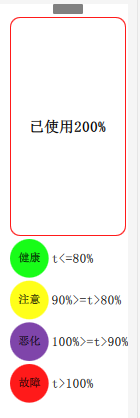
emit set(80);//效果上面1图 emit set(200);//效果上面2图