平时不论是在Spring配置文件中引入其他中间件(比如dubbo),还是使用切面时,都会用到自定义标签。那么配置文件中的自定义标签是如何发挥作用的,或者说程序是如何通过你添加的自定义标签实现相应的功能的呢?且看下文。
通过对本文的阅读,你会在阅读涉及到自定义标签的源码功能时事半功倍,而且还可以自己动手做出一个自己的自定义标签。
先呈上我自己在本地实现自定义标签的代码及对应讲解:
1、先无脑输出一个测试要用到的Bean类


 1 public class User {
 2
 3     private String userName;
 4     private String emailAddress;
 5
 6     public String getUserName() {
 7         return userName;
 8     }
 9
10     public void setUserName(String userName) {
11         this.userName = userName;
12     }
13
14     public String getEmailAddress() {
15         return emailAddress;
16     }
17
18     public void setEmailAddress(String emailAddress) {
19         this.emailAddress = emailAddress;
20     }
21 }
2、spring的xml配置文件,以及在配置文件中引入自定义标签跟它的命名空间
 1 <?xml version="1.0" encoding="UTF-8"?>
 2 <beans xmlns="http://www.springframework.org/schema/beans"
 3        xmlns:xsi="http://www.w3.org/2001/XMLSchema-instance"
 4        xmlns:context="http://www.springframework.org/schema/context"
 5        xmlns:aop="http://www.springframework.org/schema/aop"
 6        xmlns:mvc="http://www.springframework.org/schema/mvc"
 7        xmlns:myname="http://www.zzq.com/schema/user"
 8        xsi:schemaLocation="http://www.springframework.org/schema/beans
 9       http://www.springframework.org/schema/beans/spring-beans-4.0.xsd
10       http://www.springframework.org/schema/context
11       http://www.springframework.org/schema/context/spring-context-4.0.xsd
12       http://www.springframework.org/schema/aop http://www.springframework.org/schema/aop/spring-aop.xsd
13       http://www.springframework.org/schema/mvc http://www.springframework.org/schema/mvc/spring-mvc.xsd
14       http://www.zzq.com/schema/user http://www.zzq.com/schema/user.xsd">
15
16     <aop:aspectj-autoproxy proxy-target-class="true"/>
17     <mvc:annotation-driven/>
18     <context:component-scan base-package="myDemoHome"/>
19     <context:property-placeholder location="classpath:properties/config.properties" ignore-unresolvable="true"/>
20
21     <myname:myPw id="testUserBean" userName="zzq" emailAddress="[email protected]"/>
22
23 </beans>
3、从2中可以看到,命名空间中我添加了自定义的xmlns:myname="http://www.zzq.com/schema/user",以及http://www.zzq.com/schema/user跟http://www.zzq.com/schema/user.xsd。
其中紧跟xmlns冒号后面的部分,就是我们自定义标签引号前的部分,比如此处定义了myname,那么自定义标签中我就可以<myname:XXX/>这样引用了,其中的XXX则是在命名空间中定义的myPw。
中间http://www.zzq.com/schema/user对应此自定义标签的handler,放在Spring.handlers中。
最后的http://www.zzq.com/schema/user.xsd则定义了此自定义标签的XXX,即自定义标签冒号后面有什么,由此xsd定义,放在Spring.schemas中。
Spring.handlers跟Spring.schemas文件都放在META-INF目录下,因为spring会默认去此目录下读。
Spring.handlers如下所示:
http\://www.zzq.com/schema/user=myDemoHome.springElement.bdParser.UserNamespaceHandler
Spring.schemas如下所示:
http\://www.zzq.com/schema/user.xsd=META-INF/spring-test.xsd
3.1 自定义标签的解析类UserNamespaceHandler构建
 1 package myDemoHome.springElement.bdParser;
 2
 3 import myDemoHome.springElement.User;
 4 import org.springframework.beans.factory.support.BeanDefinitionBuilder;
 5 import org.springframework.beans.factory.xml.AbstractSingleBeanDefinitionParser;
 6 import org.springframework.util.StringUtils;
 7 import org.w3c.dom.Element;
 8
 9 public class UserBeanDefinitionParser extends AbstractSingleBeanDefinitionParser {
10
11     @Override
12     protected Class getBeanClass(Element element) {
13         return User.class;
14     }
15
16     @Override
17     protected void doParse(Element element, BeanDefinitionBuilder builder) {
18         String name = element.getAttribute("userName");
19         String address = element.getAttribute("emailAddress");
20
21         if (StringUtils.hasText(name)) {
22             builder.addPropertyValue("userName", name);
23         }
24         if (StringUtils.hasText(address)) {
25             builder.addPropertyValue("emailAddress", address);
26         }
27     }
28
29 }
就是对element中的标签进行解析处理,完成从xml中的标签属性向对象值的转化
3.2 自定义标签解析类的注册 UserNamespaceHandler
 1 package myDemoHome.springElement.bdParser;
 2
 3 import org.springframework.beans.factory.xml.NamespaceHandlerSupport;
 4
 5 public class UserNamespaceHandler extends NamespaceHandlerSupport {
 6     @Override
 7     public void init() {
 8         registerBeanDefinitionParser("myPw", new UserBeanDefinitionParser());
 9     }
10 }
此处的意思就是当遇到myPw这个标签的时候,往spring容器中注入这个标签的解析类,以完成后续对标签属性的解析。看到此处,各位道友有没有想起AOP的自定义注解aspectj-autoproxy 的解析呢?其实套路都是一样的。
3.3 xsd文件spring-test.xsd的定义
<?xml version="1.0" encoding="UTF-8" ?>
<schema xmlns="http://www.w3.org/2001/XMLSchema"
        targetNamespace="http://www.zzq.com/schema/user"
        elementFormDefault="qualified">

    <element name="myPw">
        <complexType>
            <attribute name="id" type="string"/>
            <attribute name="userName" type="string"/>
            <attribute name="emailAddress" type="string"/>
        </complexType>
    </element>
</schema>
此文件规定了自定义注解的标签,以及对应的属性
4、测试类ElementTest
 1 package myDemoHome.springElement;
 2
 3 import org.springframework.context.ApplicationContext;
 4 import org.springframework.context.support.ClassPathXmlApplicationContext;
 5
 6 public class ElementTest {
 7     public static void main(String[] args) {
 8         ApplicationContext applicationContext = new ClassPathXmlApplicationContext("classpath*:spring/spring-config.xml");
 9         User user = (User)applicationContext.getBean("testUserBean");
10         System.out.println(user.getEmailAddress());
11     }
12 }
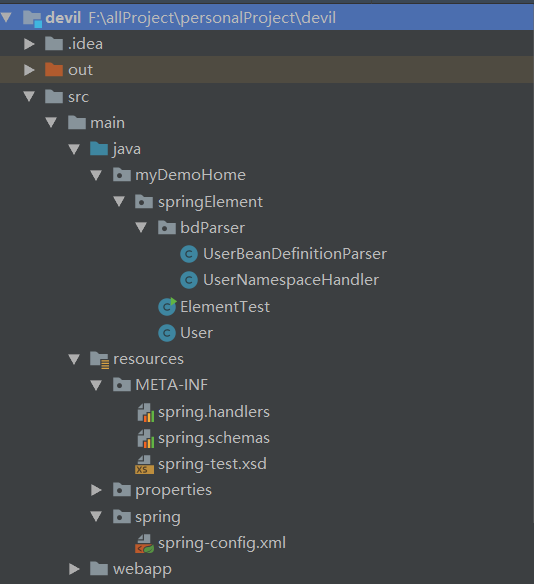
再附上一张所用类的位置关系图
至此大功告成,最后运行一下测试类:
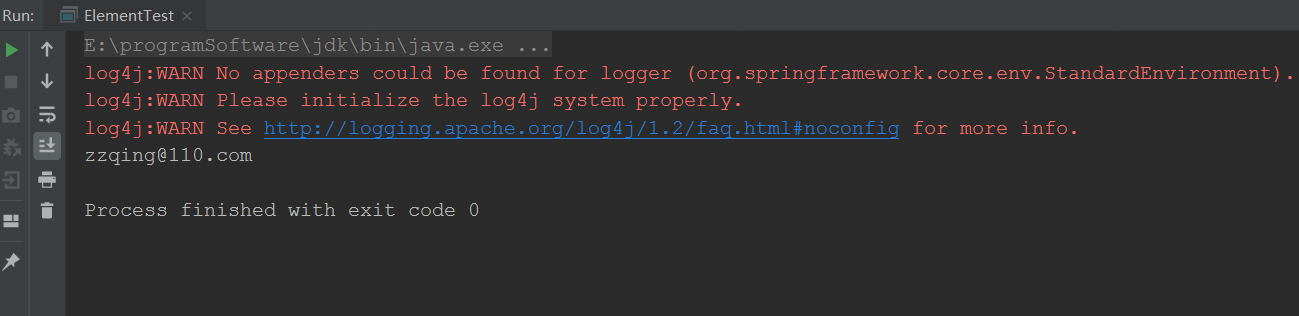
功德圆满!
总结:
构建一个自定义标签的流程便是如此,相信如果后面再遇到自定义标签,按照此构建思路反向解析一下便也能顺藤摸瓜知晓它的来龙去脉。其实看一下之前我们用过的中间件,像dubbo,也是一样的套路,只是功能更繁杂。
dubbo的jar包如图所示:

也是用了这三个实现的标签引用。
写在最后:至此,19年金三银四找工作之途的总结(包括技术跟个人感悟,感兴趣的道友可以移步我的另几篇博文一探究竟)便告一段落。今年自从去年下半年的资本收缩后,行情确实相较以往差了一些(虽然贫道也才17年入行),但我个人的感觉
是行业整体回归理性,之前是经过三四个月培训班下来就月薪十几K而且都抢着招人,太不正常。话说回来,不管外界行情怎样,只要你喜欢做这一行,都要静下心来多学习多探究,才能在不断的积累中让自己更上一层。今年年初两次阿里的面试
经历也让自己对于自身能力有了更客观真实的认识,不管是从项目经历还是个人技术积累上,都差很多。目前贫道新公司所处的部门,对技术比较注重,且技术大佬不少,工作都很认真,正是"发粪涂墙"之际,内心充满激情。后面的博文目前打算
更多偏向微服务(因为目前公司的项目用的就是微服务架构)、并发编程(因为前段时间买了本并发编程实战)。技术积累不是一朝一夕,与各位道友共勉!