自己设计一个的轻量级的RPC框架--客户端Spring 自定义标签和自定义注入bean
前言
尝试后端调用服务要和普通controller一样,所以普通的注入service接口以及不适用于当前场景。因为调用接口方法变成了调用一个代理对象,所以需要我们自己来注入代理对象bean
Spring 自定义标签
<beans xmlns="http://www.springframework.org/schema/beans"
	xmlns:xsi="http://www.w3.org/2001/XMLSchema-instance"
	xmlns:p="http://www.springframework.org/schema/p"
	xmlns:rpcClient="http://www.springframework.org/schema/rpcClient"
	xsi:schemaLocation="http://www.springframework.org/schema/beans
			http://www.springframework.org/schema/beans/spring-beans-4.1.xsd
			http://www.springframework.org/schema/rpcClient
			http://www.springframework.org/schema/rpcClient/spring-rpcClient.xsd">
    <!-- 调用接口注册bean -->
	<rpcClient:rpcClient package="main.java.work.service"></rpcClient:rpcClient>
</beans>
注意rpcClient 这个标签就是自己定义的一个标签
解释一下
http://www.springframework.org/schema/rpcClient 这个相当于一个命名(可以随便取)
http://www.springframework.org/schema/rpcClient/spring-rpcClient.xsd"(相当于url地址 不过我们一般会把这个文件在本地放一个 通过映射地址)
spring-rpcClient.xsd
定义了标签里面里面的属性 其实就是一个命名规范
<?xml version="1.0" encoding="UTF-8" standalone="no" ?>
<xsd:schema
	xmlns="http://www.springframework.org/schema/rpcClient"
    xmlns:xsd="http://www.w3.org/2001/XMLSchema"
    xmlns:beans="http://www.springframework.org/schema/beans"
    targetNamespace="http://www.springframework.org/schema/rpcClient"
    elementFormDefault="qualified"
    attributeFormDefault="unqualified">
	<xsd:import
		namespace="http://www.springframework.org/schema/beans"
		schemaLocation="http://www.springframework.org/schema/beans/spring-beans-4.1.xsd"
	/>

    <xsd:element name="rpcClient">
        <xsd:complexType>
            <xsd:complexContent>
                <xsd:extension base="beans:identifiedType">
                    <xsd:attribute name="package" type="xsd:string">
                    </xsd:attribute>
                </xsd:extension>
            </xsd:complexContent>
        </xsd:complexType>
    </xsd:element>
</xsd:schema>
spring.schemas
这个就是所说的映射地址
http\://www.springframework.org/schema/rpcClient/spring-rpcClient.xsd=META-INF/spring-rpcClient.xsd
spring.handlers
相当于处理类 处理rpcClient 下的标签属性
http\://www.springframework.org/schema/rpcClient=main.java.SpringDefine.RPCClientNameHandler
RPCClientNameHandler
处理类 和名称
public class RPCClientNameHandler extends NamespaceHandlerSupport{

	@Override
	public void init() {
		registerBeanDefinitionParser("rpcClient", new ClientBeanLoad());
	}

}
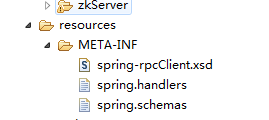
主要这个3个文件需要放在META-INF文件夹中 打包需要打在改文件夹中
自定义注入bean
这里代码比较长 不过我基本都写了注释 耐心看都看得懂
public class ClientBeanLoad implements BeanDefinitionParser{
	//
	public static Map<String, String> map = new HashMap<String, String>();

	@Override
	public BeanDefinition parse(Element element, ParserContext parserContext) {
		String packageName = element.getAttribute("package");
		Enumeration<URL> urls;
		try {
			//获取实际调用项目路径
			urls = Thread.currentThread().getContextClassLoader().getResources(packageName.replace(".", "/"));
			while (urls.hasMoreElements()){
				URL url =  urls.nextElement();
				if(null != url){
					String  protocol = url.getProtocol();
					if(protocol.equals("file")){
						String packagePath = url.getPath().replaceAll("%20"," ");//去空格
						File file = new File(packagePath);
						//遍历目录获取RPCClient注解的class
						func(file,packageName);
					}
				}
			}
			//加载bean
			Iterator<Map.Entry<String, String>> it = map.entrySet().iterator();
	        while (it.hasNext()) {
	             Map.Entry<String, String> entry = it.next();
	             try {
					BeanDefinitionBuilder builder = BeanDefinitionBuilder.genericBeanDefinition();
					GenericBeanDefinition definition = (GenericBeanDefinition) builder.getRawBeanDefinition();
					//设置属性 即所对应的消费接口
			        definition.getPropertyValues().add("interfaceClass", Class.forName(entry.getValue()));
			        //设置Calss 即代理工厂
			        definition.setBeanClass(MethodProxyFactory.class);
			        //按照查找Bean的Class的类型
			        definition.setAutowireMode(GenericBeanDefinition.AUTOWIRE_BY_TYPE);
			        BeanDefinitionRegistry bean = parserContext.getRegistry();
			        bean.registerBeanDefinition(entry.getKey(), definition);
			        System.out.println(entry.getKey()+": 被加载");
	             } catch (ClassNotFoundException e) {
					// TODO Auto-generated catch block
					e.printStackTrace();
				}
	        }
		} catch (IOException e1) {
			// TODO Auto-generated catch block
			e1.printStackTrace();
		}
		return null;
	}

	private static void func(File file,String packageName){
		File[] fs = file.listFiles();
		if(fs.length != 0){
			for(File f:fs){
				if(f.isDirectory())	//若是目录,则递归打印该目录下的文件
				{
					String packageName2 = packageName + "."+f.getName();
					func(f,packageName2);
				}
				if(f.isFile()){		//若是文件,直接打印
					String str = f.getName().split("\\.")[0];
					String className = packageName +"."+str;
					className = className.substring(0, className.length());
					try {
						Class implClass = Class.forName(className);
						Annotation annotation = implClass.getAnnotation(RPCClient.class);
						if(annotation != null){
							String simpleName = str;
							map.put(simpleName, className);
						}
					} catch (ClassNotFoundException e) {
						e.printStackTrace();
					}
				}
			}
		}
	}
}
解释一下
1.Thread.currentThread().getContextClassLoader().getResources(packageName.replace(".", “/”));
主要是为了获取到当前项目的路径
2.func()方法
主要是为了获取到带有@RPCClient注解的类的信息
例如 clientWorld 和 main.java.work.service.clientWorld
3.GenericBeanDefinition 相当一个可以更为详细设置bean信息的对象
4.这里的注入的不是接口而且一个代理对象
这个部分会在下篇博客中详细讲解