说明:该篇博客是博主一字一码编写的,实属不易,请尊重原创,谢谢大家!
接着上一篇博客继续往下写 :https://blog.csdn.net/qq_41782425/article/details/88921322
目录
一丶天天生鲜详情页
1.显示商品详情页
- step1 在df_goods/views中定义类视图get方法渲染详情页模板
# /goods/商品id
class DetailView(View):
    """详情页"""
    def get(self, request, goods_id):
        """显示商品详情页"""
return render(request, "detail.html")- step2 在df_goos/urls中定义详情页路由
url(r"^goods/(?P<goods_id>\d+)$", DetailView.as_view(), name="detail"), # 详情页- step3 在浏览器直接输入

2.获取商品详情页信息
- step1 根据商品goods_id,获取商品信息,如果查询不到则返回首页
try:
    sku = GoodsSKU.objects.get(id=goods_id)
except GoodsSKU.DoesNotExist:
    # 此goods_id的商品不存在
return redirect(reverse("goods:index"))- step2 获取所有的商品类型
types = GoodsType.objects.all()- step3 从订单模块中根据查询到的sku对象查询出评论不为空的评论信息
sku_orders_comment = OrderGoods.objects.filter(sku=sku).exclude(comment='')
- step4 根据查询到的商品sku对象获取商品信息按照创建时间进行倒序排序并且只显示最前面两个
new_skus = GoodsSKU.objects.filter(type=sku.type).order_by('-create_time')[:2]- step5 获取用户购物车中商品的数目
# 获取用户购物车中商品的数目
user = request.user  # 获取user对象
cart_count = 0  # 默认设置为0
# 获取商品详情页中的购物车数目信息
if user.is_authenticated():  # 如果返回True表示用户已登录
    # 用户已登录
    conn = get_redis_connection('default')  # 获取配置中default默认redis连接对象
    cart_key = 'cart_%d' % user.id  # 设置key
    # 通过hlen方法获取购物车商品数目
cart_count = conn.hlen(cart_key)- step6 定义模板上下文,并返回
# 定义模板上下问
content = {"types":types, "sku":sku,
           "sku_orders_comment":sku_orders_comment,
           "new_skus":new_skus, "cart_count":cart_count}
return render(request, "detail.html", content)- step7 在商品详情页父模板base_detail_list.html中,获取全部分类信息
<ul class="subnav">
    {% for type in types %}
    <li><a href="{% url 'goods:list' type.id 1 %}" class="{{ type.logo }}">{{ type.name }}</a></li>
    {% endfor %}
</ul>- step8 在商品详情页detail.html模板中进行数据填坑
<div class="breadcrumb">
<a href="#">全部分类</a>
<span>></span>
<a href="#">{{ sku.type.name }}</a>
<span>></span>
<a href="#">商品详情</a>
</div>
<div class="goods_detail_con clearfix">
<div class="goods_detail_pic fl"><img src="{{ sku.image.url }}"></div>
<div class="goods_detail_list fr">
<h3>{{ sku.name }}</h3>
<p>{{ sku.desc }}</p>
<div class="prize_bar">
<span class="show_pirze">¥<em>{{ sku.price }}</em></span>
<span class="show_unit">单 位:{{ sku.unite }}</span>
</div>
<div class="goods_num clearfix">
<div class="num_name fl">数 量:</div>
<div class="num_add fl">
<input type="text" class="num_show fl" value="1">
<a href="javascript:;" class="add fr">+</a>
<a href="javascript:;" class="minus fr">-</a>
</div>
</div>
<div class="total">总价:<em>16.80元</em></div>
<div class="operate_btn">
<a href="javascript:;" class="buy_btn">立即购买</a>
<a href="javascript:;" class="add_cart" id="add_cart">加入购物车</a>
</div>
</div>
</div>
<div class="main_wrap clearfix">
<div class="l_wrap fl clearfix">
<div class="new_goods">
<h3>新品推荐</h3>
<ul>
{% for sku in new_skus %}
<li>
<a href="{% url 'goods:detail' sku.id %}"><img src="{{ sku.image.url }}"></a>
<h4><a href="{% url 'goods:detail' sku.id %} ">{{ sku.name }}</a></h4>
<div class="prize">¥{{ sku.price }}</div>
</li>
{% endfor %}
</ul>
</div>
</div>
<div class="r_wrap fr clearfix">
<ul class="detail_tab clearfix">
<li class="active">商品介绍</li>
<li>评论</li>
</ul>
<div class="tab_content">
<dl>
<dt>商品详情:</dt>
<dd>{{ sku.goods.detail |safe }}</dd>
</dl>
</div>
<div class="tab_content">
<dl>
{% for comment in sku_orders_comment %}
<dt>评论时间:{{ comment.update_time }} {{ comment.order.user.username }}</dt>
<dd>评论内容:{{ comment.comment |safe }}</dd>
{% endfor %}
</dl>
</div>
</div>
</div>- step9 在首页index.html中对商品详情链接地址进行数据填坑
<div class="center_con clearfix">
    <ul class="subnav fl">
        {% for type in types %}
        <li><a href="#model0{{ forloop.counter }}" class="{{ type.logo }}">{{ type.name }}</a></li>
        {% endfor %}
    </ul>
    <div class="slide fl">
        <ul class="slide_pics">
            {% for banner in goods_banners %}
                <li><a href="{% url 'goods:detail' banner.sku.id %}" ><img src="{{ banner.image.url }}" alt="幻灯片"></a>/li>
            {% endfor %}
        </ul>
        <div class="prev"></div>
        <div class="next"></div>
        <ul class="points"></ul>
    </div>
    <div class="adv fl">
        {% for banner in promotion_banners %}
        <a href="{{ banner.url }}"><img src="{{ banner.image.url }}"></a>
        {% endfor %}
    </div>
</div>
{% for type in types %}
<div class="list_model">
    <div class="list_title clearfix">
        <h3 class="fl" id="model{{ forloop.counter }}">{{ type.name }}</h3>
        <div class="subtitle fl">
            <span>|</span>
            {% for banner in type.title_banners %}
            <a href="{% url 'goods:detail' banner.sku.id %}">{{ banner.sku.name }}</a>
            {% endfor %}
        </div>
        <a href="#" class="goods_more fr" id="fruit_more">查看更多 ></a>
    </div>

    <div class="goods_con clearfix">
        <div class="goods_banner fl"><img src="{{ type.image.url }}"></div>
        <ul class="goods_list fl">
            {% for banner in type.image_banners %}
            <li>
                <h4><a href="{% url 'goods:detail' banner.sku.id %}">{{ banner.sku.name }}</a></h4>
                <a href="{% url 'goods:detail' banner.sku.id %}"><img src="{{ banner.sku.image.url }}"></a>
                <div class="prize">¥ {{ banner.sku.price }}</div>
            </li>
            {% endfor %}
        </ul>
    </div>
</div>
- step10 测试

3.添加历史浏览记录
- step1 当用户点击某个商品,进入商品商品详情页面时,将该商品id保存到redis数据库中,在用户中心页面个人信息页面进行显示
# 添加用户中心历史浏览记录
history_key = "history_%d"% user.id
# 当用户进入该goods_id的商品详情页时,则将之前redis数据中的的此goods_id的商品移除
conn.lrem(history_key, 0, goods_id)
# 将此goods_id的商品排到浏览记录列表的左侧
conn.lpush(history_key, goods_id)
# 最多只保存5条浏览记录
conn.ltrim(history_key, 0 ,4)- step2 测试用户历史浏览记录
- step3 查看redis数据库以及mysql数据库

4.在商品详情页添加其他规格的商品
- step1 在DetailView类视图get方法中进行获取,获取同一个spu的其他规格的商品,不显示当前的商品
same_spu_skus = GoodsSKU.objects.filter(goods=sku.goods).exclude(id=goods_id)

content = {"types":types, "sku":sku,
           "sku_orders_comment":sku_orders_comment,
           "same_spu_skus":same_spu_skus,
"new_skus":new_skus, "cart_count":cart_count}- step2 在detail.html模板中添加其他规格的标签,并进行数据填坑
<div>
    <p>其他规格:</p>
    <ul>
        {% for sku in same_spu_skus %}
        <li><a href="{% url 'goods:detail' sku.id %}">{{ sku.name }}</a></li>
        {% endfor %}
    </ul>
</div>- step3 测试显示不同规格的商品

5. 添加详情计算商品总价js代码
- step1 获取商品总价
// 获取商品总价
function get_goods_amount() {
    price = $('.show_pirze').children('em').text(); //商品单价
    count = $('.num_show').val();  //商品数量
    // 计算商品总价
    price = parseFloat(price);
    count = parseInt(count);
    amount = price*count;
    // 显示总价价格
    $('.total').children('em').text(amount.toFixed(2)+'元')
}- step2 添加商品数量
// 增加商品数量
$('.add').click(function () {
   // 获取商品原有的数量并加1
   count = $('.num_show').val();
   count = parseInt(count)+1;
   // 重新显示商品数量
   $('.num_show').val(count);
   // 更新商品总价
   get_goods_amount();
});- step3 减少商品数量
$('.minus').click(function () {
   // 获取商品原有的数量并减1
   count = $('.num_show').val();
   count = parseInt(count)-1;
   if(count<=0){
       count=1
   }
   // 重新显示商品数量
   $('.num_show').val(count);
   // 更新商品总价
   get_goods_amount();
});- step4 手动输入商品数量
// 手动输入商品数量
$('.num_show').blur(function () {
   // 获取输入的商品数量
   count = $(this).val();
   // 校验用户输入的商品数量是否合法
   if(isNaN(count) || count.trim().length==0 || parseInt(count) <=0){
       count=1
   }
   // 设置用户输入的商品数目
   $(this).val(parseInt(count));
   // 更新商品总价
   get_goods_amount()
});- step5 效果演示
二丶天天生鲜列表页
1.显示商品列表页
- step1 在df_goods/views中定义类视图get方法,显示列表页
# /list/商品种类id/页码?sort=排序方式
class ListView(View):
    """商品列表页"""
    def get(self, request, type_id, page):
        """显示商品列表页"""
return render(request, "list.html")- step2 在df_goods/urls中定义url路由
url(r"^list/(?P<type_id>\d+)/(?P<page>\d+)$", ListView.as_view(), name="list"), # 列表页2.获取商品列表页内容
- step1 获取商品种类信息
# 获取商品种类信息
try:
    type = GoodsType.objects.get(id=type_id)
except GoodsType.DoesNotExist:
    """商品种类不存在返回主页"""
return redirect(reverse("goods:index"))- step2 获取全部商品分类信息
types = GoodsType.objects.all()- step3 获取排序的方式 sort=default 默认id排序 price 价格排序 hot 商品销量
sort = request.GET.get("sort")
if sort == "price":
    skus = GoodsSKU.objects.filter(type=type).order_by("price")
elif sort == "hot":
    skus = GoodsSKU.objects.filter(type=type).order_by("-sales")
else:
    # 其他的通通按照默认排序
    sort = "default"
skus = GoodsSKU.objects.filter(type=type).order_by("-id")- step4 对数据进行分页
paginator = Paginator(skus, 5)  # Show 25 contacts per page
# 获取页数
try:
    page = int(page)
except Exception as e:
    page = 1
# 判断用户传递过来的页数,是否小于总页数,大于总页数则设置第一页
if page > paginator.num_pages:
    page = 1

skus_page = paginator.page(page)- step5 获取新品推荐信息,根据查询到的商品sku对象获取商品信息按照创建时间进行倒序排序并且只显示最前面两个
new_skus = GoodsSKU.objects.filter(type=type).order_by('-create_time')[:2]- step6 获取用户购物车中商品的数目
user = request.user  # 获取user对象
cart_count = 0  # 默认设置为0
if user.is_authenticated():  # 如果返回True表示用户已登录
    # 用户已登录
    conn = get_redis_connection('default')  # 获取配置中default默认redis连接对象
    cart_key = 'cart_%d' % user.id  # 设置key
    # 通过hlen方法获取购物车商品数目
cart_count = conn.hlen(cart_key)- step7 定义模板上下文,并返回
context = {
    "type":type,"types":types,
    "skus_page":skus_page,"new_skus":new_skus,
    "cart_count":cart_count,"sort":sort
}

return render(request, "list.html", context)- step8 在list.html模板文件中进行数据填坑
<div class="breadcrumb">
    <a href="#">全部分类</a>
    <span>></span>
    <a href="#">{{ type.name }}</a>
</div>
<div class="main_wrap clearfix">
    <div class="l_wrap fl clearfix">
        <div class="new_goods">
            <h3>新品推荐</h3>
            <ul>
                {% for sku in new_skus %}
                <li>
                    <a href="{% url 'goods:detail' sku.id %}"><img src="{{ sku.image.url }}"></a>
                    <h4><a href="{% url 'goods:detail' sku.id %}">{{ sku.name }}</a></h4>
                    <div class="prize">¥{{ sku.price }}</div>
                </li>
                {% endfor %}
            </ul>
        </div>
    </div>
    <div class="r_wrap fr clearfix">
        <div class="sort_bar">
            <a href="{% url 'goods:list' type.id 1 %}" {% if sort == "default" %}class="active"{% endif %}>默认</a>
            <a href="{% url 'goods:list' type.id 1 %}?sort=price" {% if sort == "price" %}class="active"{% endif %}>价格</a>
            <a href="{% url 'goods:list' type.id 1 %}?sort=hot" {% if sort == "hot" %}class="active"{% endif %}>人气</a>
        </div>
        <ul class="goods_type_list clearfix">
            {% for sku in skus_page %}
            <li>
                <a href="{% url 'goods:detail' sku.id %}"><img src="{{ sku.image.url }}"></a>
                <h4><a href="{% url 'goods:detail' sku.id %}">{{ sku.name }}</a></h4>
                <div class="operate">
                    <span class="prize">¥{{ sku.price }}</span>
                    <span class="unit">{{ sku.price }}/{{ sku.unite }}</span>
                    <a href="#" class="add_goods" title="加入购物车"></a>
                </div>
            </li>
            {% endfor %}
        </ul>
        <div class="pagenation">
            {% if skus_page.has_previous %}
            <a href="{% url 'goods:list' type.id skus_page.previous_page_number %}?sort={{ sort }}"><上一页</a>
            {% endif %}
            {% for pindex in skus_page.paginator.page_range %}
                {% if pindex == skus_page.number %}
                    <a href="{% url 'goods:list' type.id pindex %}?sort={{ sort }}" class="active">{{ pindex }}</a>
                {% else %}
                    <a href="{% url 'goods:list' type.id pindex %}?sort={{ sort }}">{{ pindex }}</a>
                {% endif %}
            {% endfor %}
            {% if skus_page.has_next %}
            <a href="{% url 'goods:list' type.id skus_page.next_page_number %}?sort={{ sort }}">下一页></a>
            {% endif %}
        </div>
    </div>
</div>- step9 测试列表页
3.列表页分页页码控制(只显示5个页数)
- step1 当总页数小于5页时,页面上显示所有页码(1~5页都显示),当总页数大于5页时,那么判断当前页如果是前3页,显示1-5页,如果当前页是后3页,显示总页数最后5页;如果当前页不是第3页时,即显示当前页的前2页 当前页 当前页最后2页
num_pages = paginator.num_pages
if num_pages < 5:
    pages = range(1, num_pages + 1)
elif page <= 3:
    pages = range(1, 6)
elif num_pages - page <= 2:
    pages = range(num_pages - 4, num_pages + 1)
else:
    pages = range(page - 2, page + 3)
context = {
    "type":type,"types":types,
    "skus_page":skus_page,"new_skus":new_skus,
    "cart_count":cart_count,"sort":sort,
    "pages":pages
}- step2 替换list.html模板文件中的{% for pindex in skus_page.paginator.page_range %}为pages即可
{% for pindex in pages %}- step3 为了演示分页页码显示效果,博主设置每页显示商品2个,因为博主添加的商品不足够多

- step4 修改主页中的查看更多链接地址 ,跳转到丢应商品种类的列表页,sort不传表示默认排序方式
<a href="{% url 'goods:list' type.id 1 %}" class="goods_more fr" id="fruit_more">查看更多 ></a>- step5 效果显示
三丶天天生鲜商品搜索
1.全文检索框架以及搜索引擎安装配置
全文检索不同于特定字段的模糊查询,使用全文检索的效率更高,并且能够对于中文进行分词处理。
haystack:全文检索的框架,支持whoosh、solr、Xapian、Elasticsearc四种全文检索引擎,点击查看官方网站。
whoosh:纯Python编写的全文搜索引擎,虽然性能比不上sphinx、xapian、Elasticsearc等,但是无二进制包,程序不会莫名其妙的崩溃,对于小型的站点,whoosh已经足够使用,点击查看whoosh文档。
jieba:一款免费的中文分词包,如果觉得不好用可以使用一些收费产品。
- step1 使用haystack全文检索的框架,配合whoosh搜索引擎进行数据搜索,安装django-haystack以及whoosh
pip install django-haystack
pip install whoosh- step2 在settings中添加haystack应用以及配置haystack框架
# 全文检索haystack框架配置
HAYSTACK_CONNECTIONS = {
    'default': {
        # 使用whoosh引擎
        'ENGINE': 'haystack.backends.whoosh_backend.WhooshEngine',
        # 索引文件路径
        'PATH': os.path.join(BASE_DIR, 'whoosh_index'),
    }
}

# 当数据库表 添加、修改、删除数据时,自动生成索引
HAYSTACK_SIGNAL_PROCESSOR = 'haystack.signals.RealtimeSignalProcessor'2.创建引擎及索引
- step1 在网站搜索框中搜索商品是对df_goods_sku表数据的搜索,即在df_goods模块下创建search_indexes.py文件,并在此文件中创建引擎和索引(固定写法和用法)
# coding:utf-8
from haystack import indexes
from df_goods.models import GoodsSKU  # 指定对于某个类的某些数据建立索引


class GoodsSKUIndex(indexes.SearchIndex, indexes.Indexable):
    text = indexes.CharField(document=True, use_template=True)  # 索引字段

    # 获取模型类
    def get_model(self):
        # 返回模型类
        return GoodsSKU

    # 建立索引数据
    def index_queryset(self, using=None):
        # 返回该模型的所有数据
return self.get_model().objects.all()- step2 在templates模板目录下创建search/indexes/df_goods/goodssku_text.txt文件(search/indexes/模块名/模型类_text.txt固定写法),并在goodssku_text.txt文件中,指定哪些表字段用于创建索引

# 指定数据库表中哪些字段来建立索引
{{object.name}}  # 商品名称
{{object.desc}}  # 商品简介
{{object.goods.detail}} # 商品详情3.生成索引文件
- step1 执行命令python2 manage.py rebuild_index,生成指定模型类df_goods_sku索引文件,生成成功显示出商品的个数

- step2 查看数据库中df_goods_sku表有多少个商品

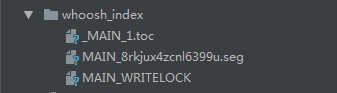
- step3 在settings配置中索引文件的路径为'PATH': os.path.join(BASE_DIR, 'whoosh_index'),也就是项目目录下的whoosh_index目录,此时查看项目目录下已经成功创建该目录,并在该目录下生成了df_goods_sku表的索引文件
4.全文检索的使用
- step1 在base.html模板文件中找到搜索框,进行如下编写,需要注意的是表单提交的方法为get以及text input输入框的name必须为q,这两个为固定的
<form method="get" action="/search">
    <input type="text" class="input_text fl" name="q" placeholder="搜索商品">
    <input type="submit" class="input_btn fr" name="" value="搜索">
</form>- step2 在根基urls文件中,配置全文检索框架
url(r'^search', include('haystack.urls')), # 全文检索框架- step3 启动项目,在主页搜索框中搜索商品信息,点击搜索提交按钮后,结果提示如下错误,在templates/search目录下找不到search.html文件

- step4 在templates/search目录下创建search.html文件,将list.html模板中的内容拷贝到该文件中,进行修改显示出搜索结果列表页,haystack会把搜索出的结果传递给该路径下的search.html模板
query:搜索关键字
page:当前页的page对象 –>遍历page对象,获取到的是SearchResult类的实例对象,对象的属性object才是模型类的对象
paginator:分页paginator对象
{% extends 'base_detail_list.html' %}
{% block title %}天天生鲜-搜索结果列表{% endblock title %}
{% block main_content %}
	<div class="breadcrumb">
		<a href="#">{{ query }}</a>
		<span>></span>
		<a href="#">搜索结果如下:</a>
	</div>

	<div class="main_wrap clearfix">
        <ul class="goods_type_list clearfix">
            {% for item in page %}
            <li>
                <a href="{% url 'goods:detail' item.object.id %}"><img src="{{ item.object.image.url }}"></a>
                <h4><a href="{% url 'goods:detail' item.object.id %}">{{ item.object.name }}</a></h4>
                <div class="operate">
                    <span class="prize">¥{{ item.object.price }}</span>
                    <span class="unit">{{ item.object.price }}/{{ item.object.unite }}</span>
                    <a href="#" class="add_goods" title="加入购物车"></a>
                </div>
            </li>
            {% endfor %}
        </ul>
        <div class="pagenation">
            {% if page.has_previous %}
            <a href="/search?q={{ query }}&page={{ page.previous_page_number }}"><上一页</a>
            {% endif %}
            {% for pindex in paginator.page_range %}
                {% if pindex == page.number %}
                    <a href="/search?q={{ query }}&page={{ pindex }}" class="active">{{ pindex }}</a>
                {% else %}
                    <a href="/search?q={{ query }}&page={{ pindex }}">{{ pindex }}</a>
                {% endif %}
            {% endfor %}
            {% if page.has_next %}
            <a href="/search?q={{ query }}&page={{ page.next_page_number }}">下一页></a>
            {% endif %}
        </div>
	</div>
{% endblock main_content %}- step5 回到主页在搜索框中搜索草莓,显示出搜索的结果
- step6 在数据库进行模糊查询后,得值使用haystack框架加载whoosh检索出来的内容,只能呵呵了

5.使用中文分词包,更爱whoosh默认分词方式
- step1 安装jieba分词包
pip install jieba- step2 在D:\Python27\Lib\site-packages\haystack\backends你的python项目环境安装包中找到此路径,在该路径下创建ChineseAnalyzer.py文件,文件内容如下
import jieba
from whoosh.analysis import Tokenizer, Token

class ChineseTokenizer(Tokenizer):
    def __call__(self, value, positions=False, chars=False,
                 keeporiginal=False, removestops=True,
                 start_pos=0, start_char=0, mode='', **kwargs):
        t = Token(positions, chars, removestops=removestops, mode=mode, **kwargs)
        seglist = jieba.cut(value, cut_all=True)
        for w in seglist:
            t.original = t.text = w
            t.boost = 1.0
            if positions:
                t.pos = start_pos + value.find(w)
            if chars:
                t.startchar = start_char + value.find(w)
                t.endchar = start_char + value.find(w) + len(w)
            yield t

def ChineseAnalyzer():
return ChineseTokenizer()- step3 复制whoosh_backend.py文件,改为whoosh_cn_backend.py,编辑该文件,导入from .ChineseAnalyzer import ChineseAnalyzer类,将代码中的analyzer=StemmingAnalyzer()修改为analyzer=ChineseAnalyzer()
from .ChineseAnalyzer import ChineseAnalyzer
analyzer=ChineseAnalyzer()- step4 修改settings中haystack配置,将.whoosh_backend改为.whoosh_cn_backend
ENGINE': 'haystack.backends.whoosh_cn_backend.WhooshEngine',- step5 重新生成新的索引文件

- step6 测试搜索草莓是否显示出所有草莓相关的商品信息

- step7 测试搜索商品简介以及商品详情介绍关键字
四丶添加商品到购物车
1.分析如何添加购物车数目
1.使用什么方式想后端传递参数
使用ajax post方式向后端传递参数
2.传递哪些参数
商品id和商品的数量2.添加购物车后台逻辑
- step1 在df_cart/views中定义类视图,并在该视图下定义post方法
class CartAddView(View):
    """购物车添加"""
    def post(self, request):
        """添加购物车数目"""
pass- step2 判断用户是否登录,没有登录则无法添加购物车
user = request.user
if not user.is_authenticated():
return JsonResponse({"errno":0, "error_msg":"请先登录"})- step3 获取参数
sku_id = request.POST.get("sku_id")
count = request.POST.get("count")- step4 校验参数完整性
if not all([sku_id, count]):
return JsonResponse({"errno":1, "error_msg":"参数不完整"})- step5 校验商品数量count是否合法
try:
    count = int(count)
except Exception as e:
return JsonResponse({"errno":2, "error_msg":"商品数量不合法"})- step6 校验商品是否存在
try:
    sku = GoodsSKU.objects.get(id=sku_id)
except GoodsSKU.DoesNotExist:
return JsonResponse({"errno":3, "error_msg":"商品不存在"})- step7 如果用户购物车存在将要添加的商品id,则添加商品的数量即可,如果没有,则添加商品id以及数量
conn = get_redis_connection("default")
cart_key = "cart_%d" % user.id
cart_count = conn.hget(cart_key, sku_id)
if cart_count:
    # 在redis中查询到该sku_id键存在,则添加该键的商品数量
count += int(cart_count)- step8 判断该商品库存是否大于用户添加商品的数量
if count > sku.stock:
return JsonResponse({"errno":4, "error_msg":"商品库存不足"})- step9 添加商品数目,没有查到则设置新的sku_id以及商品数量,hset方法有数据则更新,无则新增
conn.hset(cart_key, sku_id, count)
- step10 计算用户购物车商品的总数目,最后返回添加成功响应
total_count = conn.hlen(cart_key)
return JsonResponse({"errno":"ok","total_count":total_count, "error_msg":"添加成功"})3.添加购物车前端js
- step1 获取元素坐标
var $add_x = $('#add_cart').offset().top;
var $add_y = $('#add_cart').offset().left;
var $to_x = $('#show_count').offset().top;
var $to_y = $('#show_count').offset().left;- step2 定义点击购物车事件,获取商品sku_id以及商品数量,通过ajax post请求方式向后端cart接口发送请求并传递sku_id以及商品数量,后台进行逻辑判断向前端返回字典数据,通过后台返回的data数据进行页面购物车显示控制
$('#add_cart').click(function(){
        // 获取商品id和商品数量
        sku_id = $(this).attr('sku_id');
        count = $('.num_show').val();
        csrf = $('input[name="csrfmiddlewaretoken"]').val();
        {#alert(sku_id+':'+count);#}
        // 发起ajax post请求 访问/cart/add ,参数 sku_id和count
        params = {"sku_id":sku_id, "count":count, "csrfmiddlewaretoken":csrf};
        $.post('/cart/add', params, function (data) {
            if(data.errno=="ok"){
                $(".add_jump").css({'left':$add_y+80,'top':$add_x+10,'display':'block'});
                $(".add_jump").stop().animate({
                    'left': $to_y+7,
                    'top': $to_x+7},
                    "fast", function() {
                        $(".add_jump").fadeOut('fast',function(){
                            $('#show_count').html(data.total_count);
                        });
                });
            }else {
                alert(data.error_msg)
            }
        });
})- step3 需要注意的是在上一步中通过ajax post方式向后台发送请求,是需要进行csrf验证的,不然则会报错;在detail.html模板文件中任意一位置加上{% csrf_token %}即可,并且在ajax中发送请求传递参数是获取input[name="csrfmiddlewaretoken"]的值来向后端传递,在页面源代码中对应html文件中的{% csrf_token %}位置会出现如下标签元素

4.测试
说明:为了方便测试,博主先把redis数据库中保存的购物车删除

- step1 对同一个商品进行多次添加,右上方购物车显示数目不变

- step2 对不同的商品进行多次添加,右上方购物车显示数目变化

- step3 查看redis库数据

五丶天天生鲜我的购物车页
1.购物车页面显示
- step1 在df_cart/views中定义类视图继承于封装的login_required方法的类,因为该页面是需要用户登录才能访问的,而在添加购物车数目的时候使用ajax方式发送请求,所以不用继承,在post方法中进行登录验证即可;并在类中定义get方法,显示我的购物车页面
# /cart
class CartInfoView(LoginRequiredMixin, View):
    """我的购物车"""
    def get(self, request):
        """显示我的购物车页面"""
return render(request, "cart.html")- step2 在df_cart/urls中定义路由
url(r"^$", CartInfoView.as_view(), name="cart_show") # 显示我的购物车- step3 在base.html中菜单栏上的我的购物车添加链接地址
<a href="{% url 'cart:cart_show' %}">我的购物车</a>- step4 测试在登录与未登录状态进入我的购物页面
2.获取我的购物车页面数据
- step1 获取登录的用户
user = request.user- step2 获取用户购物车商品信息
conn = get_redis_connection("default")
cart_key = "cart_%d" % user.id
# {商品id:商品数量}
cart_dict = conn.hgetall(cart_key)- step3 获取我的购物车页面每个商品的数量以及小计以及我的购物车中商品总件数以及总价格
skus = []  # 存放查出来的商品信息对象
# 用于保存我的购物车中商品总件数以及总价格
total_count = 0
total_price = 0
# 获取商品id和商品数量
for sku_id, count in cart_dict.items():
    # 根据sku_id获取商品信息
    sku = GoodsSKU.objects.get(id=sku_id)
    # 计算小计
    amount = sku.price*int(count)
    # 动态给sku对象添加属性,保存遍历获取的小计以及商品数量
    sku.amount = amount
    sku.count = count
    # 将查询出来的商品信息对象保存到列表中
    skus.append(sku)
    # 累加计算商品总件数和总价格
    total_count += int(count)
total_price += amount- step4 定义模板上下文,并返回给购物车模板
# 定义模板上下文
context = {
    'skus':skus,'total_count':total_count,
    'total_price':total_price
}
return render(request, "cart.html", context)- step5 在cart.html模板文件中进行数据填坑
<div class="total_count">全部商品<em>{{ total_count }}</em>件</div>
<ul class="cart_list_th clearfix">
    <li class="col01">商品名称</li>
    <li class="col02">商品单位</li>
    <li class="col03">商品价格</li>
    <li class="col04">数量</li>
    <li class="col05">小计</li>
    <li class="col06">操作</li>
</ul>
{% for sku in skus %}
<ul class="cart_list_td clearfix">
    <li class="col01"><input type="checkbox" name="" checked></li>
    <li class="col02"><img src="{{ sku.image.url }}"></li>
    <li class="col03">{{ sku.name }}<br><em>{{ sku.price }}元/{{ sku.unite }}</em></li>
    <li class="col04">{{ sku.unite }}</li>
    <li class="col05">{{ sku.price }}元</li>
    <li class="col06">
        <div class="num_add">
            <a href="javascript:;" class="add fl">+</a>
            <input type="text" class="num_show fl" value="{{ sku.count }}">
            <a href="javascript:;" class="minus fl">-</a>
        </div>
    </li>
    <li class="col07">{{ sku.amount}}元</li>
    <li class="col08"><a href="javascript:;">删除</a></li>
</ul>
{% endfor %}
<ul class="settlements">
    <li class="col01"><input type="checkbox" name="" checked=""></li>
    <li class="col02">全选</li>
    <li class="col03">合计(不含运费):<span>¥</span><em>{{ total_price }}</em><br>共计<b>{{ total_count }}</b>件商品</li>
    <li class="col04"><a href="place_order.html">去结算</a></li>
</ul>
- step6 进入我的购物车页面显示正确商品信息以及购物车数目小计金额以及购物车总件数总金额

3.购物车页面全选与不全选以及选中与不选中js代码
- step1 计算选中的商品的总件数和总价格
function get_cart_info() {
         total_price = 0;
         total_count = 0;
         $('.cart_list_td').find(':checked').parents('ul').each(function () {
                //获取商品的数量和小计
                count = $(this).find('.num_show').val();
                amount = $(this).children('.col07').text();
                count = parseInt(count);
                amount = parseFloat(amount);
                total_count += count;
                total_price += amount;
         });
         // 设置选中商品的总件数和总价格
        $('.settlements').find('em').text(total_price.toFixed(2));
        $('.settlements').find('b').text(total_count);
}- step2 全选和全不选
$('.settlements').find(':checkbox').change(function () {
        // 获取全选的选中状态
        is_check = $(this).prop('checked');
        // 遍历商品对应的checkbox状态,设置其状态与全选的checkbox状态保持一致
        $('.cart_list_td').find(':checkbox').each(function () {
            $(this).prop('checked', is_check)
        });
        // 调用get_cart_info方法,更新购物车页面商品总件数和总价格
        get_cart_info()
    });
- step3 当购物车某个商品的checkbox状态发生改变时,设置全选checkbox状态
$('.cart_list_td').find(':checkbox').change(function () {
        // 获取页面上所有的商品数目(不是商品数量)
        all_len = $('.cart_list_td').length
        // 获取页面上被选中的商品数目
        checked_len = $('.cart_list_td').find(":checked").length;
        if(checked_len<all_len){
            // 说明商品未全部勾选,即取消全选的checkbox状态
            $('.settlements').find(':checkbox').prop('checked', false)
        }
        else{
            $('.settlements').find(':checkbox').prop('checked', true)
        }
        // 调用get_cart_info方法,更新购物车页面商品总件数和总价格
        get_cart_info()
})- step4 效果展示

4.购物车中商品数量点击事件(增加或减少)
- step1 在df_cart/views中定义类视图,通过页面点击+或-来对商品数量进行修改,使用ajax post请求方式向后端发送,所以需要定义post方法,需要传递商品id(sku_id)以及商品更改后的数量(count)
# /cart/update
class CartUpdateView(View):
    """购物车数据更新"""
    def post(self, request):
        """修改购物车商品数据"""
pass- step2 判断用户是否登录--->获取参数--->校验参数完整性--->校验商品数量count是否合法--->校验商品是否存在,跟前面添加商品到购物车(CartAddView视图逻辑一样)
user = request.user
if not user.is_authenticated():
    return JsonResponse({"errno": 0, "error_msg": "请先登录"})
# 1.获取参数
sku_id = request.POST.get("sku_id")
count = request.POST.get("count")

# 2.校验参数完整性
if not all([sku_id, count]):
    return JsonResponse({"errno": 1, "error_msg": "参数不完整"})

# 3.校验商品数量count是否合法
try:
    count = int(count)
except Exception as e:
    return JsonResponse({"errno": 2, "error_msg": "商品数量不合法"})

# 4. 校验商品是否存在
try:
    sku = GoodsSKU.objects.get(id=sku_id)
except GoodsSKU.DoesNotExist:
return JsonResponse({"errno": 3, "error_msg": "商品不存在"})- step3 更新购物车的商品数量,在数据库中设置对应key的value值
conn = get_redis_connection("default")
cart_key = "cart_%d" % user.id
if count > sku.stock:
    return JsonResponse({"errno": 4, "error_msg": "商品库存不足"})
conn.hset(cart_key, sku_id, count)
- step4 获取更新后的购物车中商品的总件数
total_count = 0
vals = conn.hvals(cart_key)
for val in vals:
    total_count += int(val)
return JsonResponse({"errno": "ok", "total_count":total_count, "error_msg": "更新成功"})- step5 在cart.html中编写js增加商品数量
// 计算商品的小计
function update_goods_amount(sku_ul) {
    // 获取商品的价格和数量
    count = sku_ul.find('.num_show').val();
    price = sku_ul.children('.col05').text();
    // 计算商品的小计
    amount = parseInt(count)*parseFloat(price);
    // 设置商品的小计
    sku_ul.children('.col07').text(amount.toFixed(2)+'元')
}
// 购物车增加商品数量
$('.add').click(function () {
    // 获取商品id和当前数量
    sku_id = $(this).next().attr('sku_id');
    count = $(this).next().val();
    count = parseInt(count) +1;
    csrf = $('input[name="csrfmiddlewaretoken"]').val();
    // 组织参数
    params = {'sku_id':sku_id, 'count':count, "csrfmiddlewaretoken":csrf};
    error_update = false;
    total = 0;
    // 设置ajax请求为同步
    $.ajaxSettings.async = false;
    // 向后端发送ajax post请求
    $.post('/cart/update', params, function (data) {
        if(data.errno == "ok"){
            error_update = false;
            total = data.total_count
        }
        else {
            // 更新失败
            error_update = true;
            alert(data.error_msg)
        }
    });
    // 设置ajax请求为异步
    $.ajaxSettings.async = true;
    // 判断是否更新成功
    if(error_update == false){
        // 重新设置页面上商品数量
        $(this).next().val(count);
        // 计算商品小计
        update_goods_amount($(this).parents('ul'));
         // 获取商品对应的checkbox的选中状态,如果被选中,更新页面信息
        is_checked = $(this).parents('ul').find(':checkbox').prop('checked');
        if (is_checked){
            // 更新页面信息
            get_cart_info()
        }
        // 更新页面上购物车商品的总件数
        $('.total_count').children('em').text(total)
        }
})- step6 当商品状态为checked选中状态,点击增加商品数量,则左上角全部商品件数和右下角合计金额商品总件累加,如果该增加的商品不是选中状态,则只增加左上角全部商品件数
- step7 商品数量的减少,跟增加的js代码逻辑一样,只需要修改其中的count-1以及查找元素next修改为prev
$('.minus').click(function () {
    // 获取商品id和当前数量
    sku_id = $(this).prev().attr('sku_id');
    count = $(this).prev().val();
    count = parseInt(count) -1;
    if(count <=0){
        return
    }
    csrf = $('input[name="csrfmiddlewaretoken"]').val();
    // 组织参数
    params = {'sku_id':sku_id, 'count':count, "csrfmiddlewaretoken":csrf};
    error_update = false;
    total = 0;
    // 设置ajax请求为同步
    $.ajaxSettings.async = false;
    // 向后端发送ajax post请求
    $.post('/cart/update', params, function (data) {
        if(data.errno == "ok"){
            error_update = false;
            total = data.total_count
        }
        else {
            // 更新失败
            error_update = true;
            alert(data.error_msg)
        }
    });
    // 设置ajax请求为异步
    $.ajaxSettings.async = true;
    // 判断是否更新成功
    if(error_update == false){
        // 重新设置页面上商品数量
        $(this).prev().val(count);
        // 计算商品小计
        update_goods_amount($(this).parents('ul'));
         // 获取商品对应的checkbox的选中状态,如果被选中,更新页面信息
        is_checked = $(this).parents('ul').find(':checkbox').prop('checked');
        if (is_checked){
            // 更新页面信息
            get_cart_info()
        }
        // 更新页面上购物车商品的总件数
        $('.total_count').children('em').text(total)
        }
})- step8 测试

- step9 将增加商品数量以及减少商品数量复用的代码进行封装到函数中
error_update = false;
total = 0;
function update_remote_cart_info(sku_id, count){
    csrf = $('input[name="csrfmiddlewaretoken"]').val();
    // 组织参数
    params = {'sku_id':sku_id, 'count':count, "csrfmiddlewaretoken":csrf};
     // 设置ajax请求为同步
    $.ajaxSettings.async = false;
    // 向后端发送ajax post请求
    $.post('/cart/update', params, function (data) {
        if(data.errno == "ok"){
            error_update = false;
            total = data.total_count
        }
        else {
            // 更新失败
            error_update = true;
            alert(data.error_msg)
        }
    });
    // 设置ajax请求为异步
    $.ajaxSettings.async = true;
}5.购物车中的商品手动输入数量
- step1 input输入框类属性失去焦点则进行逻辑处理,跟前面的增加减少大同小异
// 记录用户输入商品数量之前的商品数量
pre_count = 0;
$('.num_show ').focus(function () {
   pre_count = $(this).val()
});
$('.num_show ').blur(function () {
    // 获取商品id和当前数量
    sku_id = $(this).attr('sku_id');
    count = $(this).val();
    if(isNaN(count) || count.trim().length==0 || parseInt(count)<=0){
        // 当出现用户输入的数量不是数字或空格或小于等于0时,设置数量的值为输入前商品的数量
        $(this).val(pre_count);
        return
    }
    // 更新购物车数据
    count = parseInt(count);
    update_remote_cart_info(sku_id, count);
    // 判断是否更新成功
    if(error_update == false){
        // 重新设置页面上商品数量
        $(this).val(count);
        // 计算商品小计
        update_goods_amount($(this).parents('ul'));
         // 获取商品对应的checkbox的选中状态,如果被选中,更新页面信息
        is_checked = $(this).parents('ul').find(':checkbox').prop('checked');
        if (is_checked){
            // 更新页面信息
            get_cart_info()
        }
        // 更新页面上购物车商品的总件数
        $('.total_count').children('em').text(total)
    }
    else{
        // 更新失败则设置为原来的手动输入前的值
        $(this).val(pre_count)
    }
})- step2 效果演示,输入不合法的数量,数量显示为输入之前的数量,当输入的商品数量大于实际库存则显示之前的数量
6.在购物车中删除商品记录
- step1 在df_cart/views中定义类视图,使用ajax post请求方式向该视图进行数据传递
# /cart/delete
class CartDelView(View):
    """删除购物车记录"""
    def post(self, request):
pass- step2 获取参数校验参数数据库进行删除返回正确响应数据
# 判断用户是否登录
user = request.user
if not user.is_authenticated():
    return JsonResponse({"errno": 0, "error_msg": "请先登录"})
# 1.获取参数并判断
sku_id = request.POST.get("sku_id")
if not sku_id:
    return JsonResponse({"errno": 1, "error_msg": "参数不完整"})
# 2. 校验商品是否存在
try:
    sku = GoodsSKU.objects.get(id=sku_id)
except GoodsSKU.DoesNotExist:
    return JsonResponse({"errno": 2, "error_msg": "商品不存在"})
#3.删除购物车记录
conn = get_redis_connection("default")
cart_key = "cart_%d" % user.id
conn.hdel(cart_key, sku_id)
#4.获取更新后的购物车中商品的总件数
total_count = 0
vals = conn.hvals(cart_key)
for val in vals:
    total_count += int(val)
return JsonResponse({"errno": "ok", "total_count":total_count, "error_msg": "删除成功"})
- step3 在模板文件中进行删除事件js编写
// 删除购物车记录
$('.cart_list_td').children('.col08').children('a').click(function () {
    // 获取对应商品的id
    sku_id = $(this).parents('ul').find('.num_show').attr("sku_id");
    csrf = $('input[name="csrfmiddlewaretoken"]').val();
    params = {"sku_id":sku_id, "csrfmiddlewaretoken":csrf};
    // 获取商品所在的ul元素
    sku_ul = $(this).parents('ul');
    $.post('/cart/delete', params, function (data) {
        if(data.errno == "ok"){
            // 删除成功 移除页面上商品所在的ul元素
            sku_ul.remove()
            // 获取被删除商品是否为选中状态
            is_checked = sku_ul.find(':checkbox').prop('checked')
            if(is_checked){
                // 更新页面信息
                get_cart_info()
            }
            // 重新设置页面上的总件数
            $('.total_count').children('em').text(data.total_count)
        }
        else {
            alert(data.error_msg)
        }
    })
})- step4 测试
