试验机配置:
cat /etc/centos-release
CentOS Linux release 7.4.1708 (Core)
uname -r
3.10.0-693.el7.x86_64
所有主机需改主机名
1、vim /etc/hostname #永久修改
2、hostname + 主机名 #临时修改
修改hosts文件
vim /etc/hosts
192.168.1.205 node1
192.168.1.206 node2
scp /etc/hosts [email protected]:/etc.hosts #发送到node2机器上
做跳板设置
alias a='for a in {1..2};do'
ssl秘钥互信
客户端:
ssh-keygen -t rsa
ssh-copy-id root@node1 #这里有几台客户端就都把公钥发给服务端
服务端:
ssh-keygen -t rsa
ssh-copy-id root@node2 #这里有几台客户端就发给几台客户端
cat .ssh/id_rsa.pub >>.ssh/authorized_keys
时间同步(target端)
yum -y install ntp
vim /etc/ntp.conf
#server 0.centos.pool.ntp.org iburst
#server 1.centos.pool.ntp.org iburst #把原来的这4项注释掉
#server 2.centos.pool.ntp.org iburst
#server 3.centos.pool.ntp.org iburst
restrict 192.168.1.0 mask 255.255.255.0 nomodify notrap #nomodify:禁止客户端修改时间内容。notrap:禁止抓包
server 127.127.1.0 #指定使用本机主板时间作为"标准时间"
fudge 127.127.1.0 stratum 10 #stratum: 时间服务器的等级(最大是15),当服务器之间时间冲突时较大的优先
service ntpd start
让所有客户端都装上ntp服务:
for a in {2..*};do ssh node$a 'yum -y install ntp';done #2..*是说除target端机器以外的所有主机
for a in {2..*};do node$a 'sed -i 's/^server/#server/' /etc/ntp.conf';done
for a in {2..*};do node$a 'echo server 192.168.1.205>>/etc/ntp.conf';done #指定时间服务器
for a in {2..*};do node$a 'echo restrict 192.168.1.205 nomodify notrp noquery>>/etc/ntp.conf';done
a ssh node$a 'service ntpd start';done #所有节点启动ntp服务
a ssh node$a 'chkconfig ntpd on';done
a ssh node$a 'ntpdate -u 192.168.1.205';done

配置ISCSI:
服务端操作:
a ssh node$a 'iptables -F';done
a ssh node$a 'setenforce 0';done
yum -y install epel-release
yum -y install scsi-target-utils #服务端程序
a ssh node$a 'yum -y install iscsi-initiator-utils';done #所有机器上安装客户端
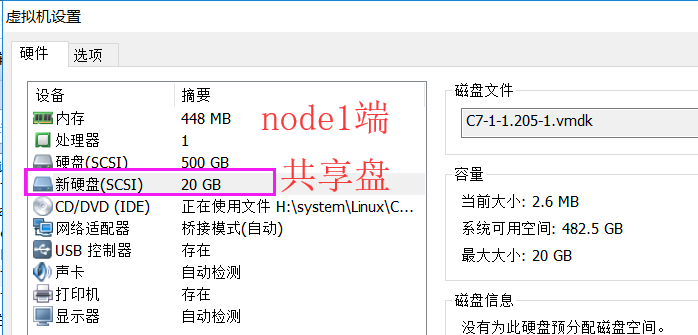
echo "<target iqn.2019-03.com:teststore.sdb1>">>/etc/tgt/targets.conf #存储共享的target标签,每一块硬盘作为一个标签,实验结束后再进行分区
echo -e "\t<backing-store /dev/sdb>">>/etc/tgt/targets.conf #对网络存储的磁盘进行说明
echo -e "\tvendor_id SAMSUNG">>/etc/tgt/targets.conf #id号是磁盘的标签,哪块盘出故障后方便具体找出来
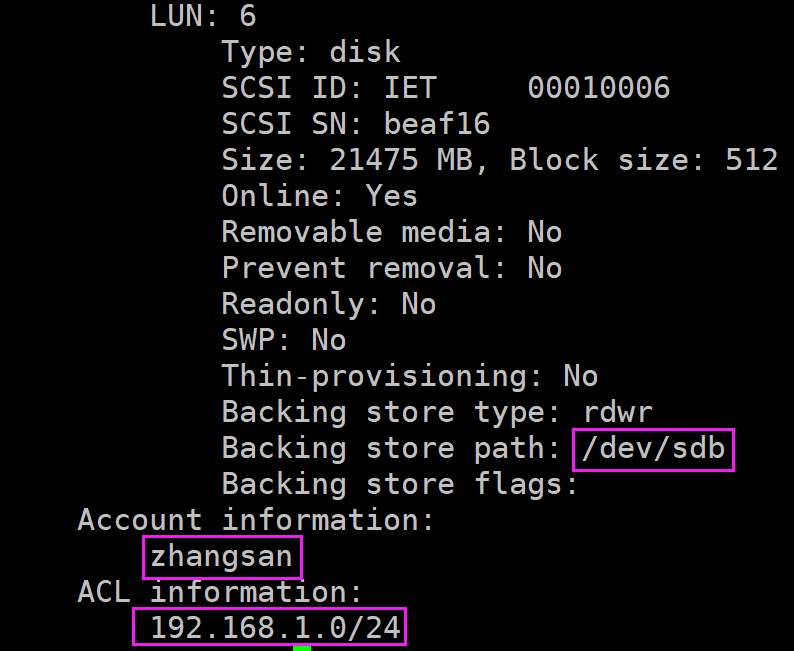
echo -e "\tlun 6">>/etc/tgt/targets.conf #指定逻辑单元号
echo -e "\t</backing-store>">>/etc/tgt/targets.conf
echo -e "\tincominguser zhangsan 123456">>/etc/tgt/targets.conf #客户端使用的密码登录验证,当客户端使用这个磁盘时需提供
echo -e "\tinitiator-address 192.168.1.0/24">>/etc/tgt/targets.conf
echo "</target>">>/etc/tgt/targets.conf
service tgtd start
chkconfig tgtd on
tgtadm -L iscsi -o show -m target #查看逻辑单元配置信息

节点主机的存储设备配置:
vim /etc/iscsi/initiatorname.iscsi #该处客户端服务端都要改
InitiatorName=iqn.2019-03.com:node2 #该处的数字随主机名最后一位而变
vim /etc/iscsi/iscsid.conf
node.session.auth.authmethod = CHAP #去注释
....
node.session.auth.username = zhangsan
node.session.auth.password = 123456
#这里注意:要和target端定义标签时的用户名和密码一样
同样的操作也在另外所有客户端主机上进行配置
a ssh node$a 'service iscsi start';done
a ssh node$a 'chkconfig iscsi on';done

a ssh node$a 'iscsiadm -m discovery -t sendtargets -p 192.168.1.205';done
客户端挂载:
a ssh node$a 'iscsiadm -m node -T iqn.2019-03.com:teststore.sdb --login';done
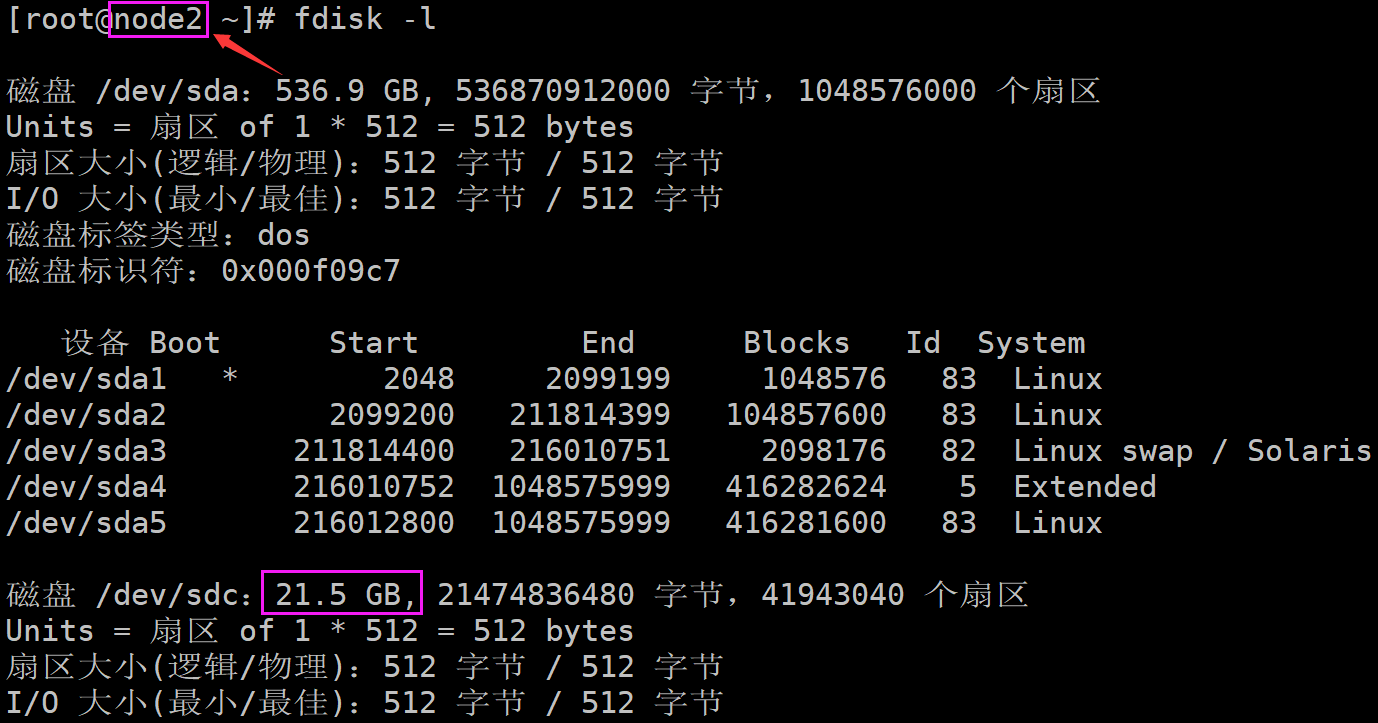
注意:该提示是说已经挂载上去了,去客户端上使用 fdisk -l 即可看到那块20G的磁盘
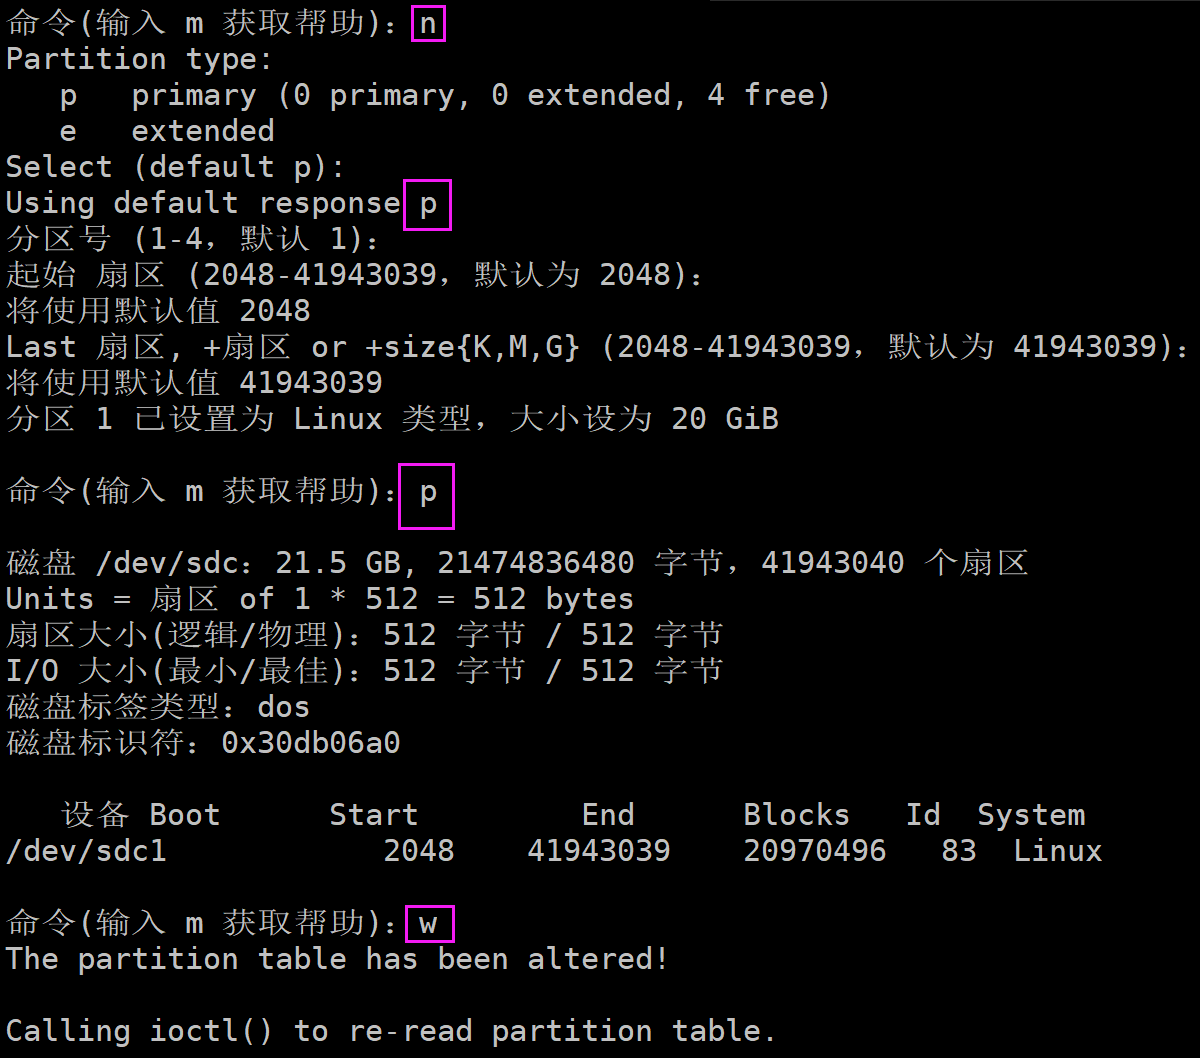
客户端使用 fdisk /dev/sdc 即可对磁盘进行分区
挂载;

